This content originally appeared on Zell Liew and was authored by Zell Liew
Bower is a great dependency manager that’s specially created to help you manage different frontend libraries.
It reduces the time and energy you need to spend hunting around the web for libraries like Susy and jQuery by helping you install, update or delete them with a single command.
To top it off, it can help you download all the libraries you need whenever you scaffold a new project with a single command.
In this article we’ll talk about how to install Bower and how to use it.
Installing Bower
Bower requires you to have 3 things installed on your system:
- NodeJS
- Node Package Manager (npm)
- Git
You can install NodeJS by downloading the installer from its website and double clicking on it.
Npm comes bundled together with the NodeJS installation and so you don’t have to install anything extra for it.
Finally, Windows users will need to download and install git if you haven’t done so already. Mac has Git installed by default.
Once you have these three prerequisites installed, you can install bower by firing up the command line and entering the following command:
$ npm install bower -g
npm is a command made available to your command line after you installed npm. The install command tells npm to install a node package that can be found on npmjs.com.
Bower is one such package and hence we’re installing it with npm.
The final -g flag tells npm to install Bower globally, which allows you to use the bower command anywhere on your computer.
We’re now ready to start managing dependencies with Bower! Let’s start by creating an empty folder called test and navigate into it.
Creating a bower.json file
Bower looks at a file called bower.json to identify the dependencies in your project, so you’ll want to make sure you create this bower.json first.
You can do that by running bower init from your command line.
$ bower init
Upon hitting enter, Bower immediately runs you through a series of questions and creates the bower.json file for you at the end.
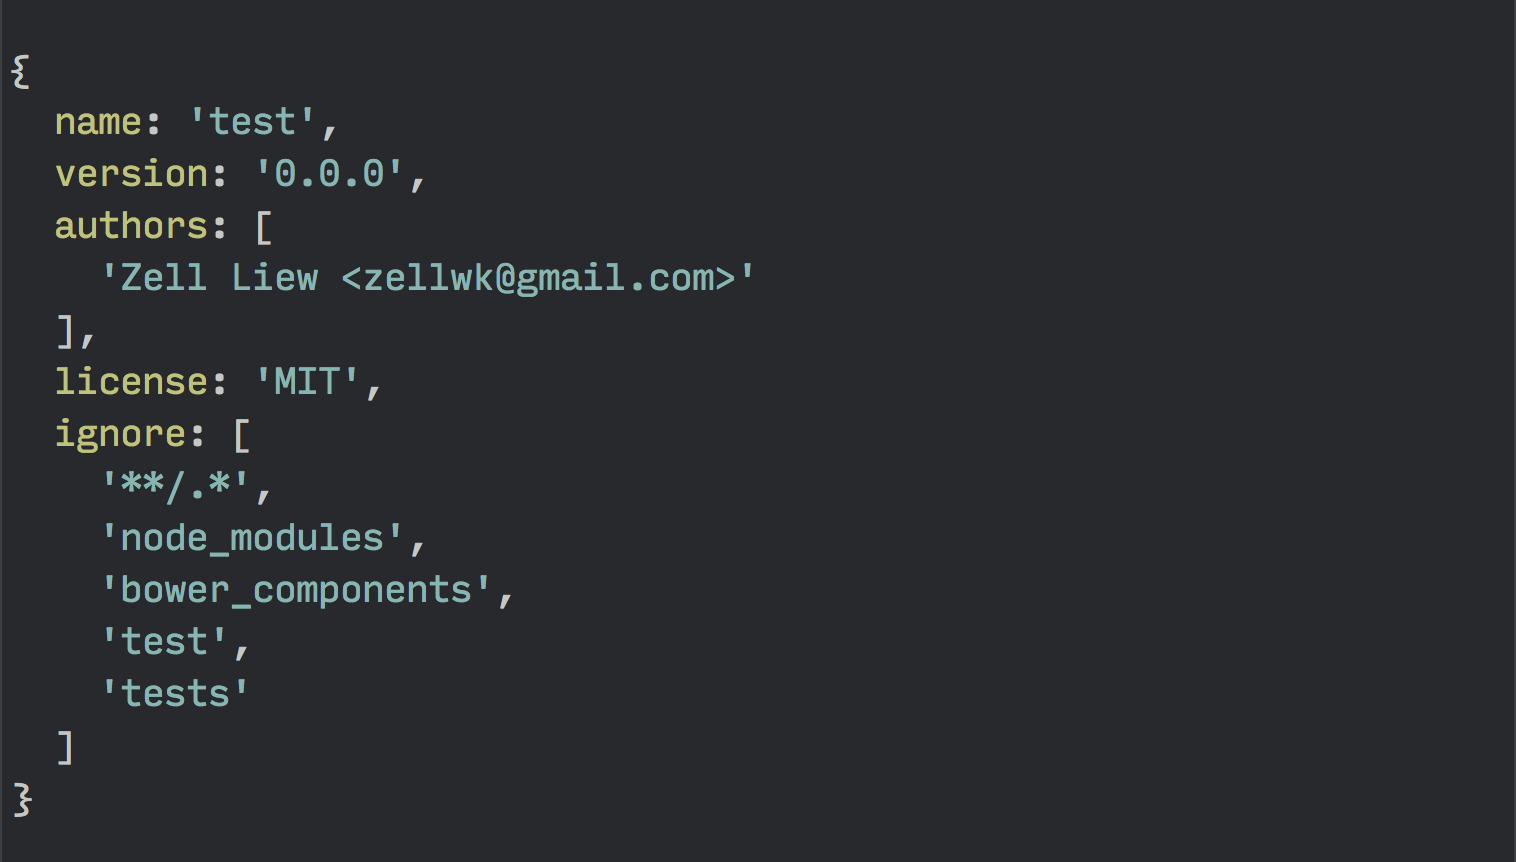
Once the bower.json file is created, you can begin installing libraries into your project.
Installing Bower Packages
By the way, libraries in Bower and npm are also called packages (in case you’re wondering where the “package” word came from).
You can install packages with Bower the same way as you would install packages with npm. The difference is that you’ll have to use the bower command instead.
So fire up your command line and enter this:
$ bower install jquery --save
Bower will install the latest version of jQuery with this command. The additional --save flag tells Bower to add jQuery into your bower.json file as a dependency.
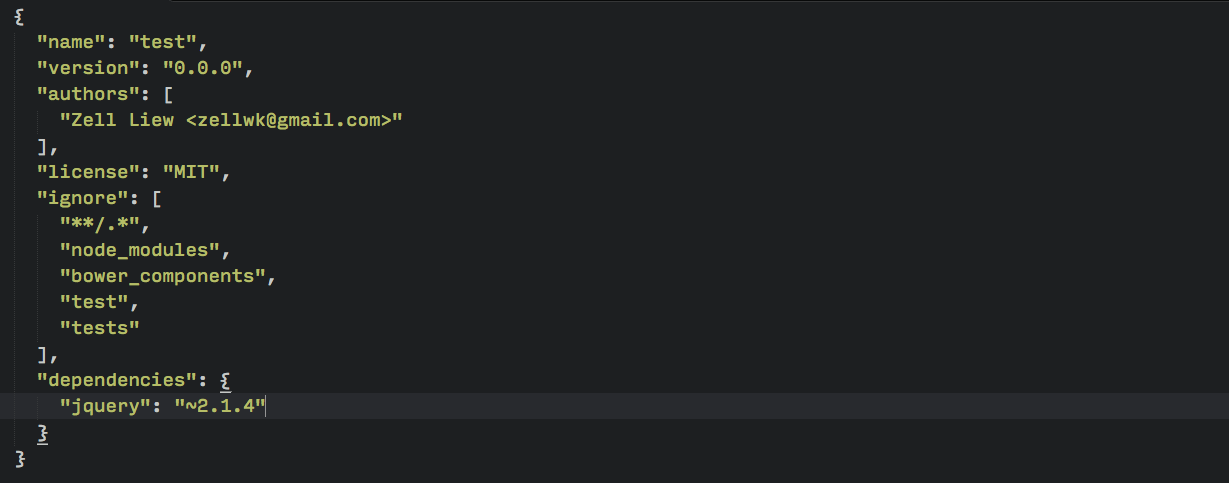
If you take a look at your folders now you’ll see a bower_components directory, followed by a jquery folder within it.

Let’s try to use this jQuery package you’ve just installed.
Using a library installed with Bower
You’ll first have to identify the files you need in the package before you can use it with your project.
Here’s where I got confused when I first started with Bower.
Bower allows developers to freely structure their Bower packages. This means that every Bower package is different and you’ll have to find the correct file for each package.
It can be daunting at first, so let’s run through this together.
First you’ll have to navigate to the jquery folder within bower_components.
You’ll see that there’s a src folder and a dist folder within this package. Both src and dist are short names for folders that developers use. src means source while dist means distribution.

In this case, you’ll want to search under distribution.

In here, you’ll find jquery.js, which is what we’re looking for.
What you need to do to use this file is to reference this script in your html. If you have an index.html file in the test folder, you can use this jQuery library with the following code:
<script src="bower_components/jquery/dist/jquery.js"></script>
This is the process for using Javascript files installed with Bower.
In addition to JavaScript libraries, you can often find Sass libraries as well. Let’s try our hand at installing Susy and using it with Sass.
Using a Sass library with Bower
You can install Susy the same way you installed jQuery – by using the bower install command.
$ bower install susy --save
Check that you now have a susy folder in the bower_components directory and a susy dependency in your bower.json file.
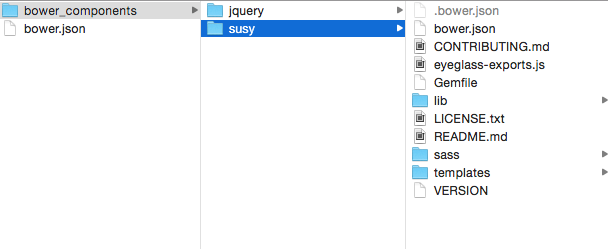

Similar to what we did before with the jQuery package, you’ll need to look into the susy folder to find out what files to add to your Sass project.
In this case, the file you want is susy.scss, which can be found in the sass folder.
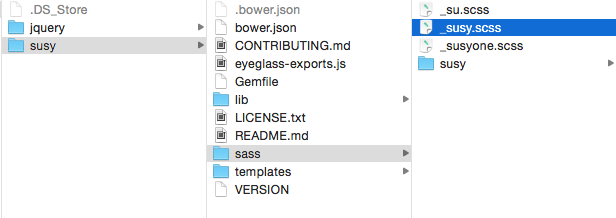
Next, you have to import this file to your Sass partial. The code will be:
@import "../bower_components/susy/sass/susy";
And we’re done with adding a Sass file from a bower package into your project!
So far so good. Let’s take a step back and look at how to search for packages on Bower if you’re not sure of the name of the package you’re trying to install.
Searching for Bower Packages
Let’s say you’re trying to install the breakpoint library by Team Sass (who changed their github repo to at-import), but you’re not too sure whether the bower package is called breakpoint.
In this case, you can search for the breakpoint package with the bower search command.
$ bower search breakpoint
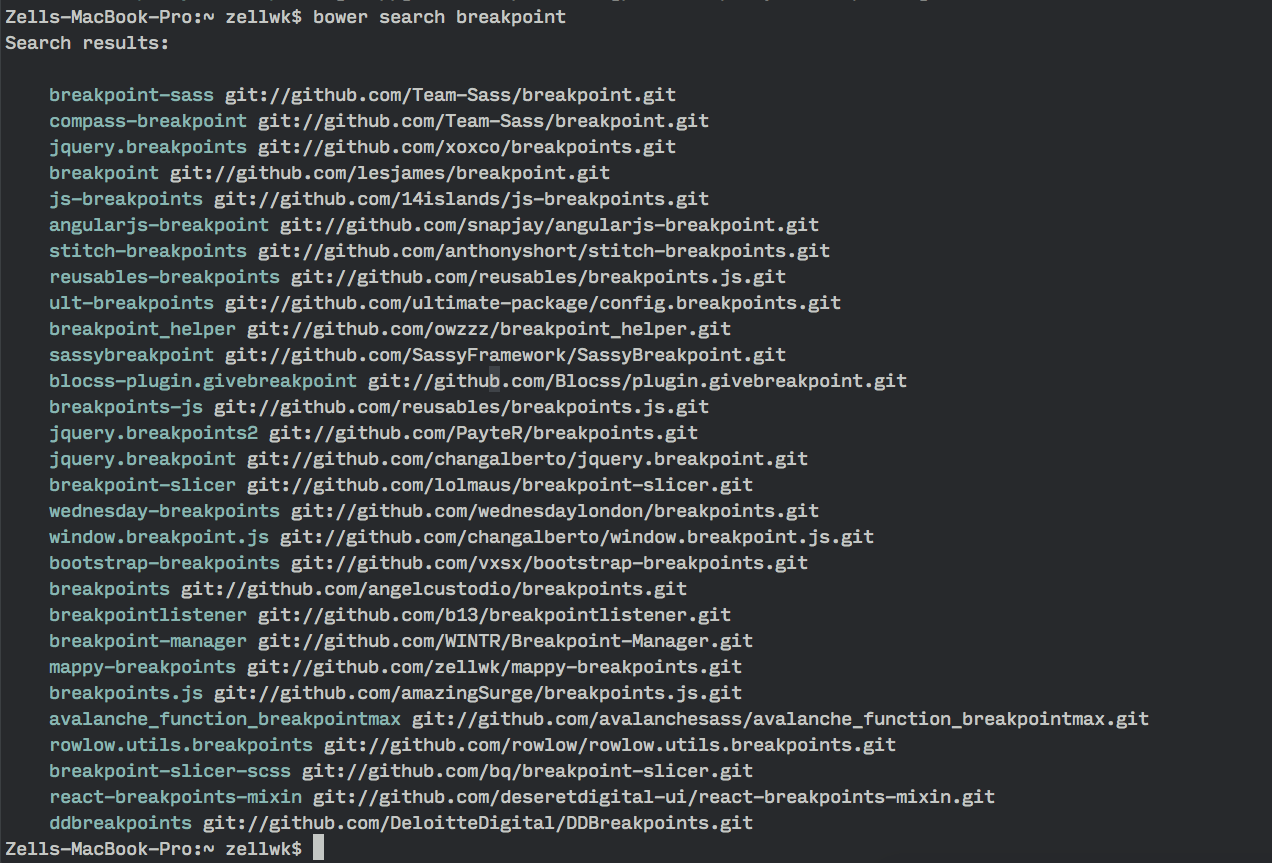
And as you can see, there are multiple results for breakpoint. If you went ahead and typed bower install breakpoints, you would have installed an incorrect bower package.
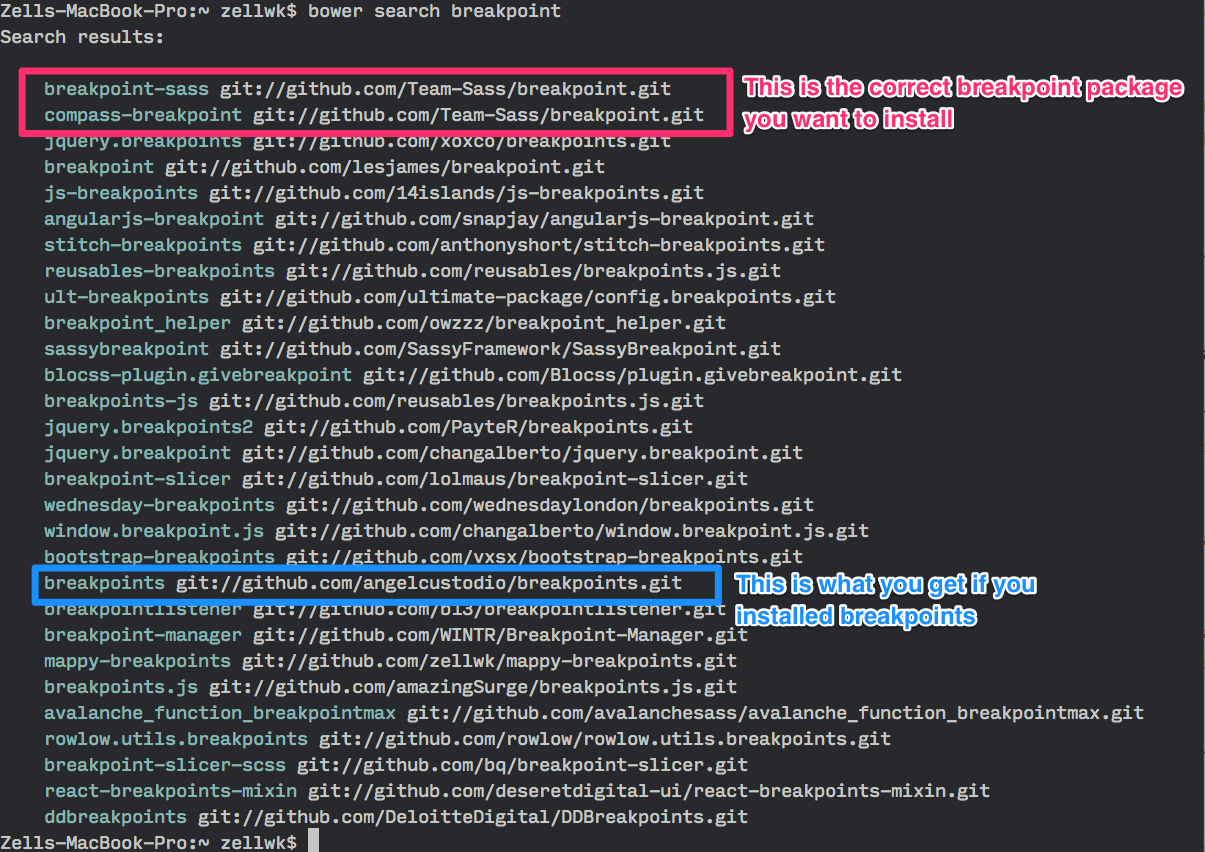
So if you’re unsure, the best thing to do is always to search for the Bower package first, take a look at their git repository before deciding what to install.
The other way is to look through the documentation since most package authors will tell you how to install their package through Bower.
Now let’s see how Bower can help you install all your dependencies with just one command!
Installing dependencies with one command
First, you’ll want to delete the bower_components folder.
Next, run this command:
$ bower install
Bower will then look through your bower.json and download all dependencies for you. After it’s done, you’ll be able to find your dependencies back in the bower_components folder.
This makes it easy for you to automate your scaffolding and allows team members to quickly get their project up to speed with the correct dependencies.
What about uninstalling packages that you don’t need?
Uninstalling Bower Packages
Uninstalling Bower packages is almost the same as installing them. You’ll just have to use the bower uninstall command instead.
$ bower uninstall susy --save
And with this command, Susy will be removed from both your folder and your bower.json file.
That’s the basic Bower stuff. Now, let’s talk about something slightly more advanced (but good to know) stuff. These are the things that tripped me up when I wanted to use Bower with my projects initially.
Advanced Bower Stuff
Alright. What we’re going to cover in this section is:
- How to install a specific version of a library
- What to do if there’s a conflicting version of a library
- How to update all Bower packages to their latest available versions
- How to change the location of
bower_componentsfolder
Installing a specific version of a package
Say you discovered that you have to use jQuery version 1.11.3 instead of 2.1.4 that we have installed. You can install this specific version by appending a # plus the version number you’re trying to install.
Here’s what you’ll do:
$ bower install jquery#1.11.3 --save
This would install jQuery v1.11.3 into your project.
However, since you already have jQuery v2.1.4 in your project, you’ll be greeted with a dependency conflict.
Resolving Dependency Conflicts
Bower knows when you have two versions of the same library installed and asks you to choose between them when this happens.

All you have to do is to select the correct version with 1 or 2 and Bower will resolve the conflict for you automatically.
Since we’re on a older version of jQuery right now, let’s talk about how we can bump it up to the latest version with Bower.
Updating Bower Packages to their latest versions
Once in a while when you’re scaffolding new projects you’ll probably want to bump your dependencies to the latest possible version.
That, unfortunately, is not doable with Bower’s native bower update command.
What I’ve found helpful with this problem is the bower-update npm package written by @sagepin
Let’s install this package via npm first:
$ npm install bower-update -g
This package gives you the ability to use the bower-update command.
$ bower-update
What it does is that it’ll run through all the bower components in your project and check if they are the latest version. Then, it gives you the opportunity to individually update each package to its latest version.
If you run this bower-update command in the test folder, you’ll get a prompt like this:

The only thing I dislike about the bower-update command is that it adds a “resolutions” object in the bower.json file.
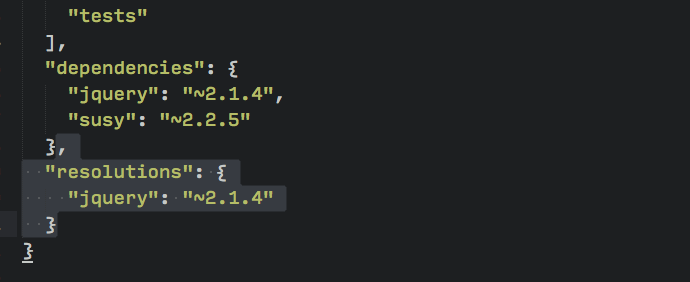
I haven’t found a need for resolutions myself and I often delete it manually.
Finally, let’s see how we can change the directory where Bower installs its files.
Changing bower components directory
Bower now installs your components into the bower_components in the root folder by default.
However, in older versions, Bower installs them in app/bower_components by default.
This inconsistency may cause some problems for you since the location of bower_components is incredibly important.
The good news is you can control this install directory with a .bowerrc file and this should be placed in the folder where you run bower commands.
Once you have the .bowerrc file, all you have to do is to state the directory at which bower should install its components at. I tend to leave mine as this app/bower_components.
{
  "directory" : "app/bower_components"
}
Wrapping Up
That’s everything you need to know about Bower in order to use it in your projects.
You’ve learned how to install, update and use packages that you need. You’ve also learnt to uninstall packages that you no longer need.
What’s more, you’ve learn how to customize the directory where Bower installs packages and that would help you fit Bower into your project, no matter how it looks like.
How do you feel towards Bower after reading this article? Have you managed to integrate it into your projects yet? Let me know in the comments below!
This content originally appeared on Zell Liew and was authored by Zell Liew
Zell Liew | Sciencx (2015-06-07T00:00:00+00:00) Manage your Frontend Dependencies with Bower. Retrieved from https://www.scien.cx/2015/06/07/manage-your-frontend-dependencies-with-bower/
Please log in to upload a file.
There are no updates yet.
Click the Upload button above to add an update.
