This content originally appeared on Level Up Coding - Medium and was authored by Valon Januzaj

You’ve created your FastAPI application and now you want to make it public by deploying it? — No worries got that covered.
In this article, I am going to explain step-by-step from creating a simple application with FastAPI, dockerizing it, and deploying to AWS EC2.
What is FastAPI?
From the official docs:
FastAPI is a modern, fast (high-performance), web framework for building APIs with Python 3.6+ based on standard Python type hints.
Setting up the project:
$ mkdir fastapi-demo
$ cd fastapi-demo
After creating the directory for your project, dive in, and create a virtual environment. You can skip this step but it’s always good to have your dependencies isolated from the outside world. I want to stay simple here so I am using the virtualenv tool to create python virtual environments.
$ virtualenv <name_of_environment>
$ source venv/Scripts/activate
Now install FastAPI and uvicorn:
pip install fastapi uvicorn
Now let’s set the project structure:
$mkdir src && cd $_
$ touch __init__.py main.py
Now in the main.py let’s just create an instance of the FastAPI application, add a route and test it out:
from fastapi import FastAPI

app = FastAPI()


@app.get("/")
def root():
    return {"Hello": "World"}
So now we test if the application is working by running the application with uvicorn. Command has this format:
uvicorn <project_dir>.<project_dir>:<fastapi_instance_name>
uvicorn src.main:app -- reload # for live-reloading
Visit http://localhost:8000/ to see the application in action ?, or http://localhost:8000/docs to see the API documentation, which is generated automatically? — Isn’t it awesome??
I am not going to dive deeper into the project structure, how can we organize things better, etc.. as the goal here is just to get started with FastAPI and learn how to dockerize and deploy it to AWS, and for the other tips and tutorials about FastAPI I highly recommend to refer to the official docs as it has really well-organized documentation, and it dives deep in all the concepts of the frameworks.
We set up a simple application with FastAPI, and now you want to deploy it so you can access it or share it, or whatever is your intention. There are several approaches, like deploying manually by grabbing the source code and running manually as we did locally, but we want to be smarter here, so we’re going to dockerize the application and run it on AWS EC2 instances. Let’s go!
Dockerizing the Application
So we basically created the application and tested it locally, all good. We could skip the steps of creating virtual environments and running the code locally, by defining the requirements and just adding the same logic, but it’s always a good practice to run the application locally and test it before going further.
Note: I am assuming that you already have docker installed in your machine if you don’t get it from here.
Why would we use docker?
- Get rid of the popular saying “it worked on my machine”
- Isolate the dependencies
- Run in an isolated environment which will serve only to run your application and it’s dependencies
- Easier to deploy, etc.
In the root directory of our project create a Dockerfile
$ touch Dockerfile
A Dockerfile is a text document that contains all the commands a user could call on the command line to assemble an image.
Before we write our configuration for the Dockerfile, let’s generate our application requirements:
$ pip freeze > requirements.txt
Open the Dockerfile with your favorite editor, and write the following:
FROM python:3.8.1-slim # Image from dockerhub

ENV PYTHONUNBUFFERED 1
EXPOSE 8000 # Expose the port 8000 in which our application runs
WORKDIR /app # Make /app as a working directory in the container
# Copy requirements from host, to docker container in /app
COPY ./requirements.txt .
# Copy everything from ./src directory to /app in the container
COPY ./src .
RUN pip install -r requirements.txt # Install the dependencies
# Run the application in the port 8000
CMD ["uvicorn", "--host", "0.0.0.0", "--port", "8000", "src.main:app"]
Great, now let’s build our image by running:
$ docker build -t fastapi-demo .
As we are in the same directory we don’t need to specify the path to the Dockerfile as the name of the file is following the conventions. Now, wait for a couple of minutes as you will download the image from the remote repository from dockerhub, and then build your project on top of it.
To make sure that nothing failed run $ docker images and you should see the name of the image in the list of the images in your machine. Great, now let’s run it:
$ docker run -dp <host_port:docker_port> <name_of_image>
# -d - Detached mode, runs in the background
# -p - to map the port on where do you want to access the #application in my case localhost:8000/
We have exposed port 8000 in our Dockerfile so we're good to go.
So putting it all together:
$ docker run -dp 8000:8000 fastapi-demo
To make sure that the image is running ( after the image runs it becomes a container ) check with docker ps and you should see a container with our image running in the port 8000. Great now visit localhost:8000 and you should see the application running just as we did before locally. Done...
Deploying the application to AWS
So we have created our FastAPI application and we have dockerized into an isolated environment that runs everything. That’s great for local, but we want to expose the application to the public, so let’s deploy to AWS which is the most popular cloud provider.
Everything that we’ll be using in this article is supposed to be without any additional charge, so you can use AWS free tier to follow along, but in general, do a clean-up after you have played around with it.
Note: I am assuming that you already have an AWS Account and you can use free-tier services. I am going to explain everything step-by-step so let’s continue.
Create EC2 Instance
For the sake of demonstration, I will do everything from my AWS root account, but it’s not recommended, so make sure that you always create a separate user, and give the necessary permissions to accomplish the tasks.
Navigate to EC2 service, and click Launch Instance
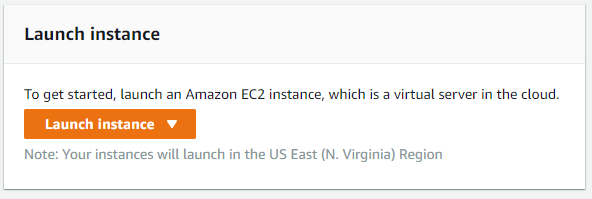
Select the Amazon Linux 2 AMI (HVM) as it’s free tier eligible. Stay with the default settings and just click Review and Launch . After that it will ask you to generate a new key which you will use when you need to ssh into the instance, so create a new one, name whatever you want, and then download and keep them in your machine as you will need them right away. Click Launch instance and your instance will be ready in a bit.
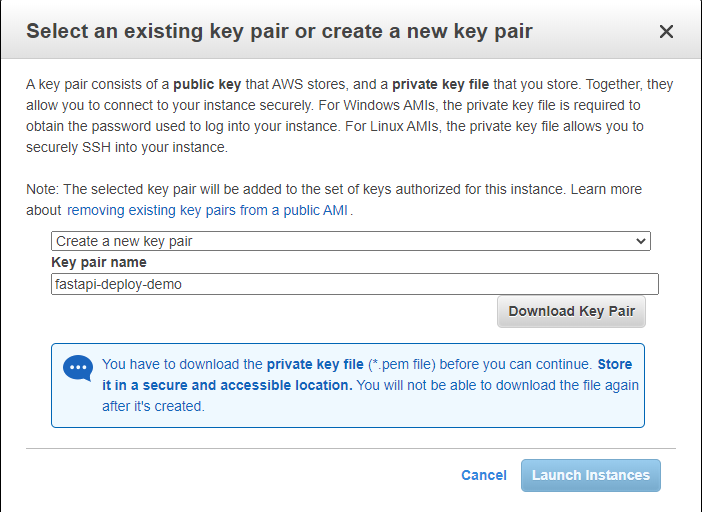
After the instance has been created you might want to ssh into it, and install docker, so let’s do it.
In your EC2 Dashboard, after the instance state has changed to running, right-click over it, and choose Connect . That is enough to give you information on how to ssh into your instance. Leave that open, and open a new bash terminal.
Navigate to the downloaded .pem key, and do the following:
$ chmod 400 fastapi-deploy-demo.pem # Substitute with your key
From your EC2 Dashboard, grab the latest command which tells you how to ssh to the instance and paste that in your terminal, (make sure you’re in the same directory as the .pem file is ):
# Same directory where .pem key is located
ssh -i "fastapi-deploy-demo.pem" ec2-user@<your-details-here>.compute-1.amazonaws.com
And you should be inside your instance now, so let’s install docker. Just follow along with the commands and you should be fine:
# Update the installed packages and package cache on your instance.
sudo yum update -y
# Install the most recent Docker Community Edition package.sudo
amazon-linux-extras install docker
# Start the Docker service.
sudo service docker start
# Add the ec2-user to the docker group so you can execute Docker #commands without using sudo.
sudo usermod -a -G docker ec2-user
Now reboot your EC2 instance, because in most of the cases it won’t take the configured permissions, so do it from the EC2 Dashboard and follow the steps above to connect again.
Now write docker info to see if you can run it without sudo, and if you can you’re good to go.
Create repository, and push the image to it
As we are deploying in AWS I prefer that we keep everything here, so instead of Dockerhub, I am going to use Amazon ECR.
Amazon Elastic Container Registry (ECR) is a fully-managed Docker container registry that makes it easy for developers to store, manage, and deploy Docker container images
Navigate to Amazon Container Services (ECR) and create a new repository. Name it whatever you want (fastapi-deploy-demo).

Now it’s time to push or local image that we have built earlier to this remote repository. You first need to authenticate with your AWS credentials from your AWS CLI (Local), so if you don’t have it go ahead and install it from here:
I am assuming that you’re already authenticated using your credentials
Now go to your ECR, and select your created repository, and click VIEW PUSH COMMANDS . Authenticate your docker client with your registry using the first command:
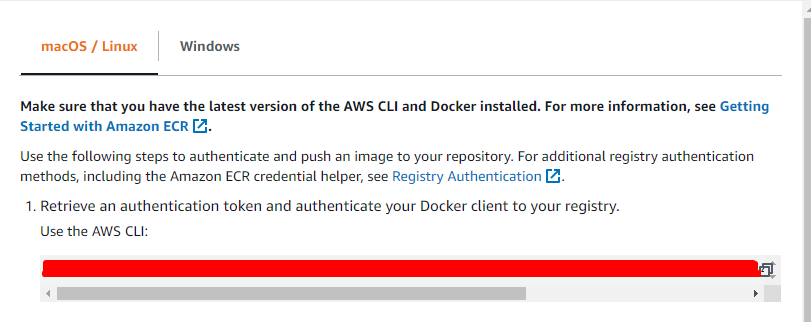
After that build the image again using the repository name, tag and push the image to the repository:
# Navigate to the project directory first and type the following:
docker build -t fastapi-deploy-demo .
# Tag the image
docker tag fastapi-deploy-demo:latest <YOUR ID>.dkr.ecr.us-east-1.amazonaws.com/fastapi-deploy-demo:latest
# PUSH
docker push <YOUR ID>.dkr.ecr.us-east-1.amazonaws.com/fastapi-deploy-demo:latest
Done...
Now you’ve got everything set-up, we need to ssh to the instance and pull the image, then run it with docker.
Just as we did locally, now in our instance we have AWS CLI shipped we just need to authenticate by running
$ aws configure
# This will ask you for:
AWS Access Key ID: []
AWS Secret Access Key: []
Default region name: []
Default output format: []
# Make sure you use the same credentials as you used when you authenticated localy with AWS CLI
And then authenticate with the docker client, see docs here
After you have been authenticated you can pull the image from ECR, so go ahead navigate to the ECR once again, click on the repository and grab the Image URI.
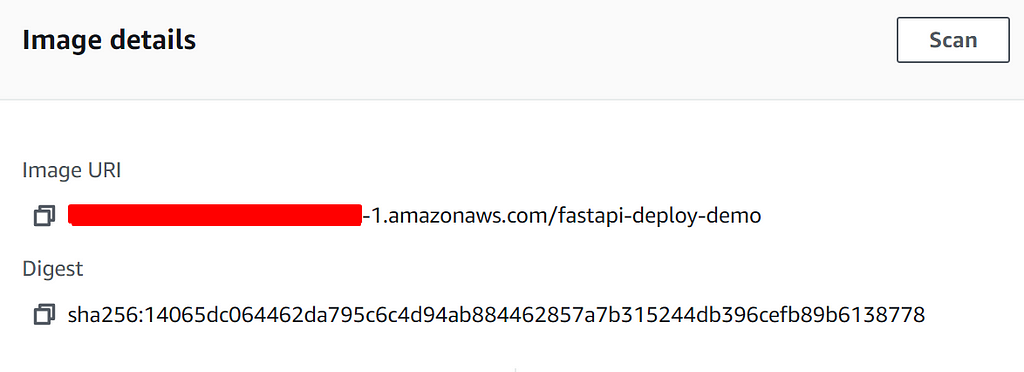
Get back to your EC2 instance and write the type the following command:
docker pull <IMAGE_URI> # that you grab from ecr repository
After you’ve pulled the image, go ahead and run as we did locally.
Grab the name of the image first by running docker images and then write:
docker run -dp 80:8000 <NAME_OF_IMAGE>.. Now we have mapped port 80 in our instance with port 8000 in docker.
Great, verify that the container is running with the command: docker ps
is so, we have one last thing to configure, the traffic into our instance... ?
Go to your instance in the EC2 dashboard, click on it, and then go to the Security tab, and after that click on your security group(mine is sg-0881f2399bc659e6b), and then click Edit inbound rules .
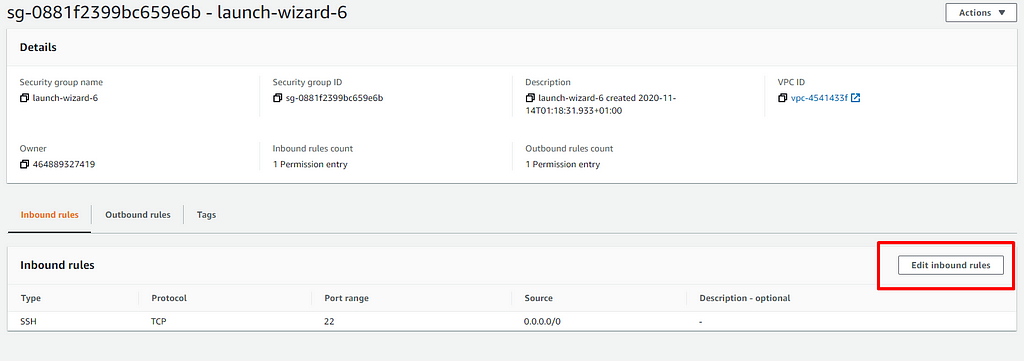
Click add a new rule, and select all traffic, which is not good for security but just for sake of demonstration.

Finally, navigate to your EC2 Instance, grab the public IPV4of the instance and test that in your browser:

We have successfully deployed our FastAPI application in your AWS EC2 Instance using Docker ? ?
Play around with it, and when you’re done with it, remove the instance and the repository as you don’t want to get any additional charge from AWS.
Wrapping up
In this article, I wanted to show you step-by-step on how to deploy your application to dockerize and deploy your application in AWS.
As I did my research out there, this is a nice and straight forward approach to deploy your application, but you can use other services like ECS if you are intentions are to run applications in scale, which is is a fully managed container orchestration service, so you can easily scale applications by only having images of your application as we did.
Special thanks to Sebastián Ramírez for creating this awesome python framework, and to all the community contributing to it?
Feel free to reach out to me if you have any questions.
Connect with me on ? LinkedIn, Github
Deploy a dockerized FastAPI application to AWS was originally published in Level Up Coding on Medium, where people are continuing the conversation by highlighting and responding to this story.
This content originally appeared on Level Up Coding - Medium and was authored by Valon Januzaj
Valon Januzaj | Sciencx (2021-02-10T13:09:24+00:00) Deploy a dockerized FastAPI application to AWS. Retrieved from https://www.scien.cx/2021/02/10/deploy-a-dockerized-fastapi-application-to-aws/
Please log in to upload a file.
There are no updates yet.
Click the Upload button above to add an update.
