
This content originally appeared on DEV Community and was authored by Daniel N. H
As there is a multitude of ways in which you can test your applications, we will just start off with some very basic examples inside
create-react-app as it ships with Jest.
What is Jest?
Jest is a JavaScript testing framework maintained by Facebook, Inc. designed and built by Christoph Nakazawa with a focus on simplicity and support for large web applications.
First, why?
Tests are used to prevent errors and bad logic in your application and to make sure that it runs as it's supposed to.
Often Jest tests will be utilized as part of TDD: Test Driven Design & this have perks such as
- We can commit changes to our repo with confidence in our code's logic
- Push changes with confidence
- Deploy our code to production knowingly that the end-users functionality works - it can prevent loss of sales, data leaks, downtime and enforce your sites' security
Tests are also part of Continuos Deployment/Continuous Integration which is an more automated process set up with a pipeline of different CLI commands as an example. You should just know that this exists and not how to do it; if this is your first time coming across Jest.
Let's try our first test in a new React project
Launch your editor of choice and open a new terminal
Make sure your repository is completely empty and type in your term:
npx create-react-app . and let it do it's thing.
The developers have made it easy for us so our project comes with a prebuilt test.
App.test.js
This will be the standard format all your test will be named in Component.test.js.
Now navigate to App.test.js
Here you will find a code snippet like this:
// @testing-library/react is the integrated Jest test lib what ships with this app
// render - renders the component as part of the specified test
// screen - is an object that part of the DOM test library that contains all queries bound to document.body
import { render, screen } from '@testing-library/react';
import App from './App';

test('renders learn react link', () => {
// We have to render a test as if it would be rendered on our webpage
// render is also the "body" of our test
  render(<App />);

// Here we are telling the test that it needs to look for "learn react"
// the "i" is a regular expression that means "ignore upper/lower-case
// note: when using the screen Jest query it needs to come after the body(render)
  const linkElement = screen.getByText(/learn react/i);

// Test expects LinkElement to be inside our component
  expect(linkElement).toBeInTheDocument();
});
I have added comments to help readability, take your time to go through the logic, proceed to your term and type
npm test or npm test --coverage --coverage shows some additional sci-fi voodoo.
Examples of what Jest looks like after running the default command:

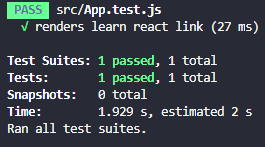
Fortune has it that we passed our first test, good job.
But that was a little too easy, amiright?
Spicing up our own test environment with react-bootstrap
Let's teach ourselves how to add Bootstrap components to our React project while we're at it.
Run in your terminal:
npm install react-bootstrap bootstrap
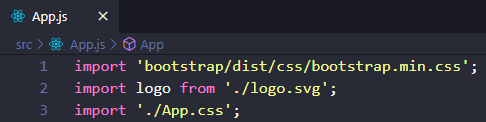
Then add import 'bootstrap/dist/css/bootstrap.min.css'; to the top of src/App.js
And you're set!
For our own test we will build a Form and run the test on it.
Create a folder inside src called components
Create 3 files inside components - Navbar.js, Navbar.css, Navbar.test.js and link the stylesheet
Inside Navbar.js we need to create a component to import into App.js:
import Navbar from 'react-bootstrap/Navbar'
import React from 'react'

export default function Navbar() {
  return (
    <div>

    </div>
  )
}
Then add to the top of Navbar.js
import Navbar from 'react-bootstrap/Navbar'
Our Navbar:
<Navbar bg="light" expand="lg">
        <Navbar.Brand href="#home">React-Bootstrap</Navbar.Brand>
        <Navbar.Toggle aria-controls="basic-navbar-nav" />
        <Navbar.Collapse id="basic-navbar-nav">
          <Nav className="mr-auto">
            <Nav.Link href="#home">Home</Nav.Link>
            <Nav.Link href="#link">Link</Nav.Link>
            <NavDropdown title="Dropdown" id="basic-nav-dropdown">
              <NavDropdown.Item href="#action/3.1">Action</NavDropdown.Item>
              <NavDropdown.Item href="#action/3.2">Another action</NavDropdown.Item>
              <NavDropdown.Item href="#action/3.3">Something</NavDropdown.Item>
              <NavDropdown.Divider />
              <NavDropdown.Item href="#action/3.4">Separated link</NavDropdown.Item>
            </NavDropdown>
          </Nav>
          <Form inline>
            <FormControl type="text" placeholder="Search" className="mr-sm-2" />
            <Button variant="outline-success">Search</Button>
          </Form>
        </Navbar.Collapse>
 </Navbar>
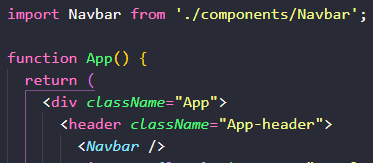
In App.js we import Navbar
In our own test we will be introduced to Mount.
// What is Mount in jest?
// mount method renders the full DOM including the child components of the parent component that we are running the tests on.
// @testing-library/react is the integrated Jest test lib what ships with this app
import { render, mount } from '@testing-library/react';
import Navbar from './Navbar';

test('mounts the Navbar including children and check to see if Search appears in the Form Field', () => {
  /* render(<Navbar />); */
  let wrapped = mount(<Navbar />);

  // Here we are telling the test that it needs to look for "Search" inside the form field
  expect(wrapped.find("input").get(0).props.value).toEqual("Search");
});
Run npm test and post a comment about your result below.
Formatting & pre-commit hooks in React
Before we get into the hot sauce there's a few packages we have to install.
Husky this is what's used to create/manage pre-commit hooks
npx husky install
then run
npx husky add .husky/pre-commit "npm test"
This is done to make sure Husky runs alongside Jest. In case of errors manually add npm test to the pre commit file in the .husky folder and remove npm test from package.json.
With the power of Husky we can now install Prettier which is a code formatting convention which gives us the power to change how our code looks before a commit.
Run npm i -D prettier eslint-config-prettier
Create 2 files in the src folder: .prettierignore .prettierrc.json
Add the following to .prettierignore
node_modules
build
coverage
.vscode
These folders are now excluded just as with .gitignore.
The file .prettierrc.json is where the magic happens. Here we can change the settings for our code formatting.
Add the following basic configuration
{
  "trailingComma": "es5",
  "useTabs": true,
  "tabWidth": 4,
  "semi": true,
  "singleQuote": false
}
Since we already installed Husky all there is left to do is go back to the terminal and run
npx mrm lint-staged
This will add the necessary functionality to Husky to use Prettier.
The test will now be Prettified but we need our pre-commit hook to get so as well.
To do this run npm i --save-dev cross-env
and make a small change to our test script in package.json
"test": "cross-env CI=true react-scripts test"
There you go :)
The end.
Cu next time.
This content originally appeared on DEV Community and was authored by Daniel N. H
Daniel N. H | Sciencx (2021-02-19T11:32:52+00:00) Testing and pre-commit hooks in Jest + React. Retrieved from https://www.scien.cx/2021/02/19/testing-and-pre-commit-hooks-in-jest-react/
Please log in to upload a file.
There are no updates yet.
Click the Upload button above to add an update.