This content originally appeared on Level Up Coding - Medium and was authored by Robert Shilcof
Integrating google maps into React forms with geolocation

As a follow up to my previous article on implementing infinite scrolling, in this post I will cover how to integrate the Google Maps API into a React project, and how it can be used as a form element.
My motivation behind this feature was to add a responsive location field in the form of a map, which would be centred on the users current position.
Set Up
To begin, you will need to install the Google Maps node by running the following in the root directory of your application:
npm i google-maps-react --s
With the package installed, you will then need to visit https://developers.google.com/maps/documentation/, sign up, and get an API token to use.
Google requires bank card credentials to grant an API token, but no fee is incurred while using the free trial.
Components
To set up your first embedded map, you must import the map component from the package in the component of your choice. In my case, this was the listing form.
import { Map, GoogleApiWrapper, Marker } from 'google-maps-react'The map component requires google props, which are generated by the GoogleApiWrapper. This functionality is best implemented with the export statement as follows:
export default GoogleApiWrapper({apiKey: process.env.REACT_APP_GOOGLE_MAP
})(ListingForm)
Where here process.env.REACT_APP_GOOGLE_MAP represents the API token that google provided me with. I have utilised the dotenv node to store my token as it is something that should not be pushed to GitHub.
The GoogleApiWrapper has now provided the required props to insert a map component. First create a div element to house the map, and style it as desired.
Within this, place your map component, with the prop google set equal to props.google that has been passed by the wrapper (in my example I have used functional components but the same result can be achieved with class components).
<div className="map-container" >
    <Map
        google={props.google}
        zoom={14}
        initialCenter={{ lat: 51.501364, lng: -0.141890 }}
    ></Map>
</div>
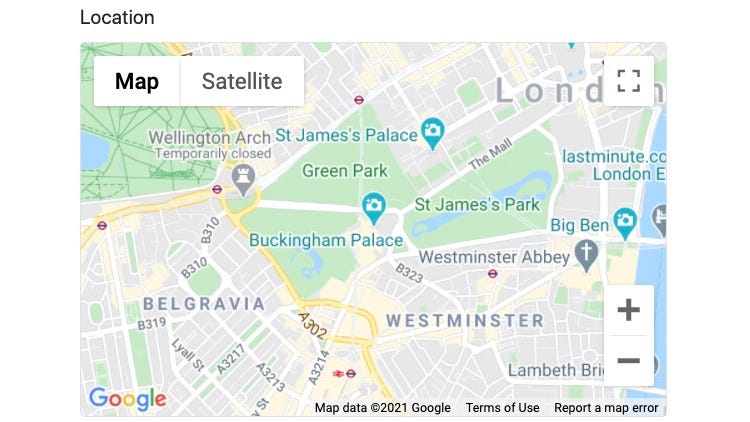
With the props configured as above, you should have a map centred on Buckingham Palace like so:

Put a Pin in it
This looks a little plane — and is not going to serve very well as a form field.
To render a marker that will remain on the centre of the map that will represent a location to submit we must add the following to our map component:
<div className="map-container" >
    <Map
        google={props.google}
        zoom={14}
        initialCenter={listing.latLng}
        ref={refMap}
        onBoundsChanged={
            useCallback(handleBoundsChanged,[handleBoundsChanged])
        }
    >
        <Marker
            position={listing.latLng}
        />
    </Map>
</div>
The additions here are:
- A ref is being used to represent the map in order to retrieve information from it.
- The centre of the map is now being set by a listing object that is stored in state.
const [listing, setListing] = useState({
    latLng: { lat: 51.501364, lng: -0.141890 }
})- An onBoundsChange event listener has been added that will be called whenever the map is panned.
The handleBoundsChanged callback function looks as follows:
const handleBoundsChanged = () => {
    if (refMap.current) {
        const mapCenter = {
            lat: refMap.current.map.center.lat(),
            lng: refMap.current.map.center.lng()
        }
        setListing({...listing, latLng: mapCenter})
    }
};
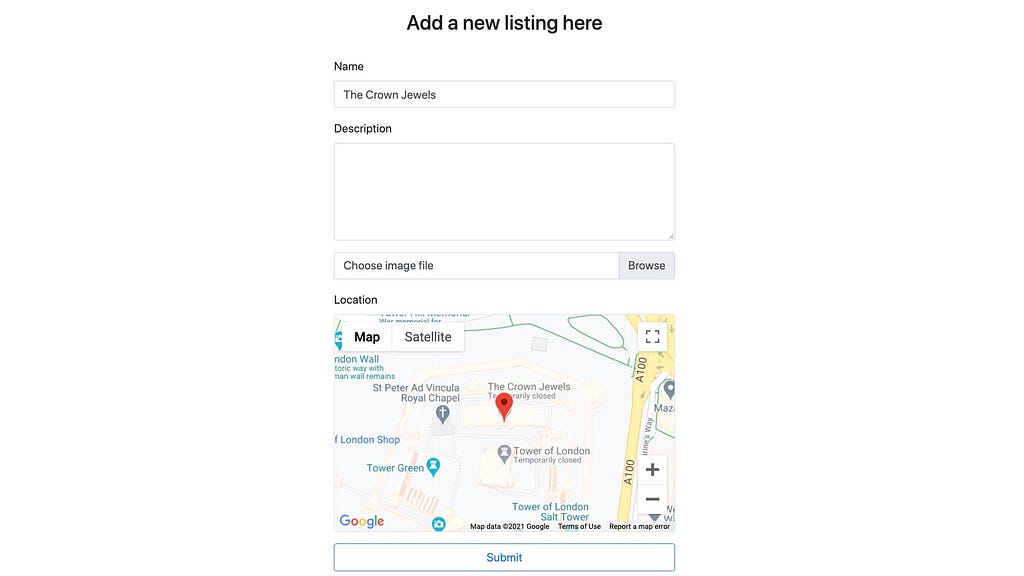
Now, on render there will be a marker that remains in the centre of the map. Additionally, there will be coordinates stored in the state under the key of listing. This can be combined with any other attributes that can be part of a controlled form and submitted to your database.
Geolocation
Now it may not be the case that every user of your application wants to submit their listings from Buckingham palace. In order for them to find their address, they will have to zoom out and pan until they find their location on the map.
This is of course unless they enable sharing location.
If they do, you will be able to access their longitude and latitude through their geolocation.
NB if you are developing using google chrome and you are accessing your site on local host, by default google will assess this as a non secure connection and block the sending of your geolocation.
To enable local host you can enter chrome://flags/#allow-insecure-localhost into your url bar and enable insecure localhost.
To best utilise geolocation, I recommend wrapping the form component in a parent component that will be responsible for passing the location as props if location sharing is active, or your default location if not.
To do this you can add the following component:
import { useEffect, useState } from "react"
import ListingForm from '../listings/ListingForm'
const GeoLocator = props => { const [location, setLocation] = useState({
lat: 51.501364,
lng: -0.141890
}) const success = position => {
const coordinates = {
lat: position.coords.latitude,
lng: position.coords.longitude
}
setLocation(coordinates)
} useEffect(()=>{
if (navigator.geolocation) {
navigator.permissions
.query({ name: "geolocation" })
.then(function (result) {
if (result.state === "granted") {
navigator.geolocation.getCurrentPosition(success)
}
});
}
},[])return (
<div>
<div className="container" style={{maxWidth: "500px"}}>
<ListingForm location={location} />
</div>
</div>
)
}
export default GeoLocator
Then in your form component, you can define the useState to now reference the passed down props.
To avoid bugs when a new location is passed as props I needed to pan the map. I used the following function to handle this:
useEffect(()=>{refMap.current.map.panTo(props.location)
},[props.location])
Once again making use of the map’s ref.

Wrap up
With these functionalities in place, you should now have a form that centres on a users location; with a marker that remains in the centre serving as a placeholder for coordinates that can be submitted as data with a form.
Now all to do is write the code necessary for your backend to handle the processing of coordinates…
Have fun setting up your map components, and if you came across any neat tricks along the way please share with me.
All the source code for this project can be found here if you want to clone it and see the application in action for yourself.
Location, location, location was originally published in Level Up Coding on Medium, where people are continuing the conversation by highlighting and responding to this story.
This content originally appeared on Level Up Coding - Medium and was authored by Robert Shilcof
Robert Shilcof | Sciencx (2021-03-30T17:51:14+00:00) Location, location, location. Retrieved from https://www.scien.cx/2021/03/30/location-location-location/
Please log in to upload a file.
There are no updates yet.
Click the Upload button above to add an update.
