This content originally appeared on Level Up Coding - Medium and was authored by Frank Warman
Our Player cube can now shoot their Lasers. The lasers get destroyed off-screen, but what is the Player shooting at?! It’s time to create the perfect target — an Enemy cube!
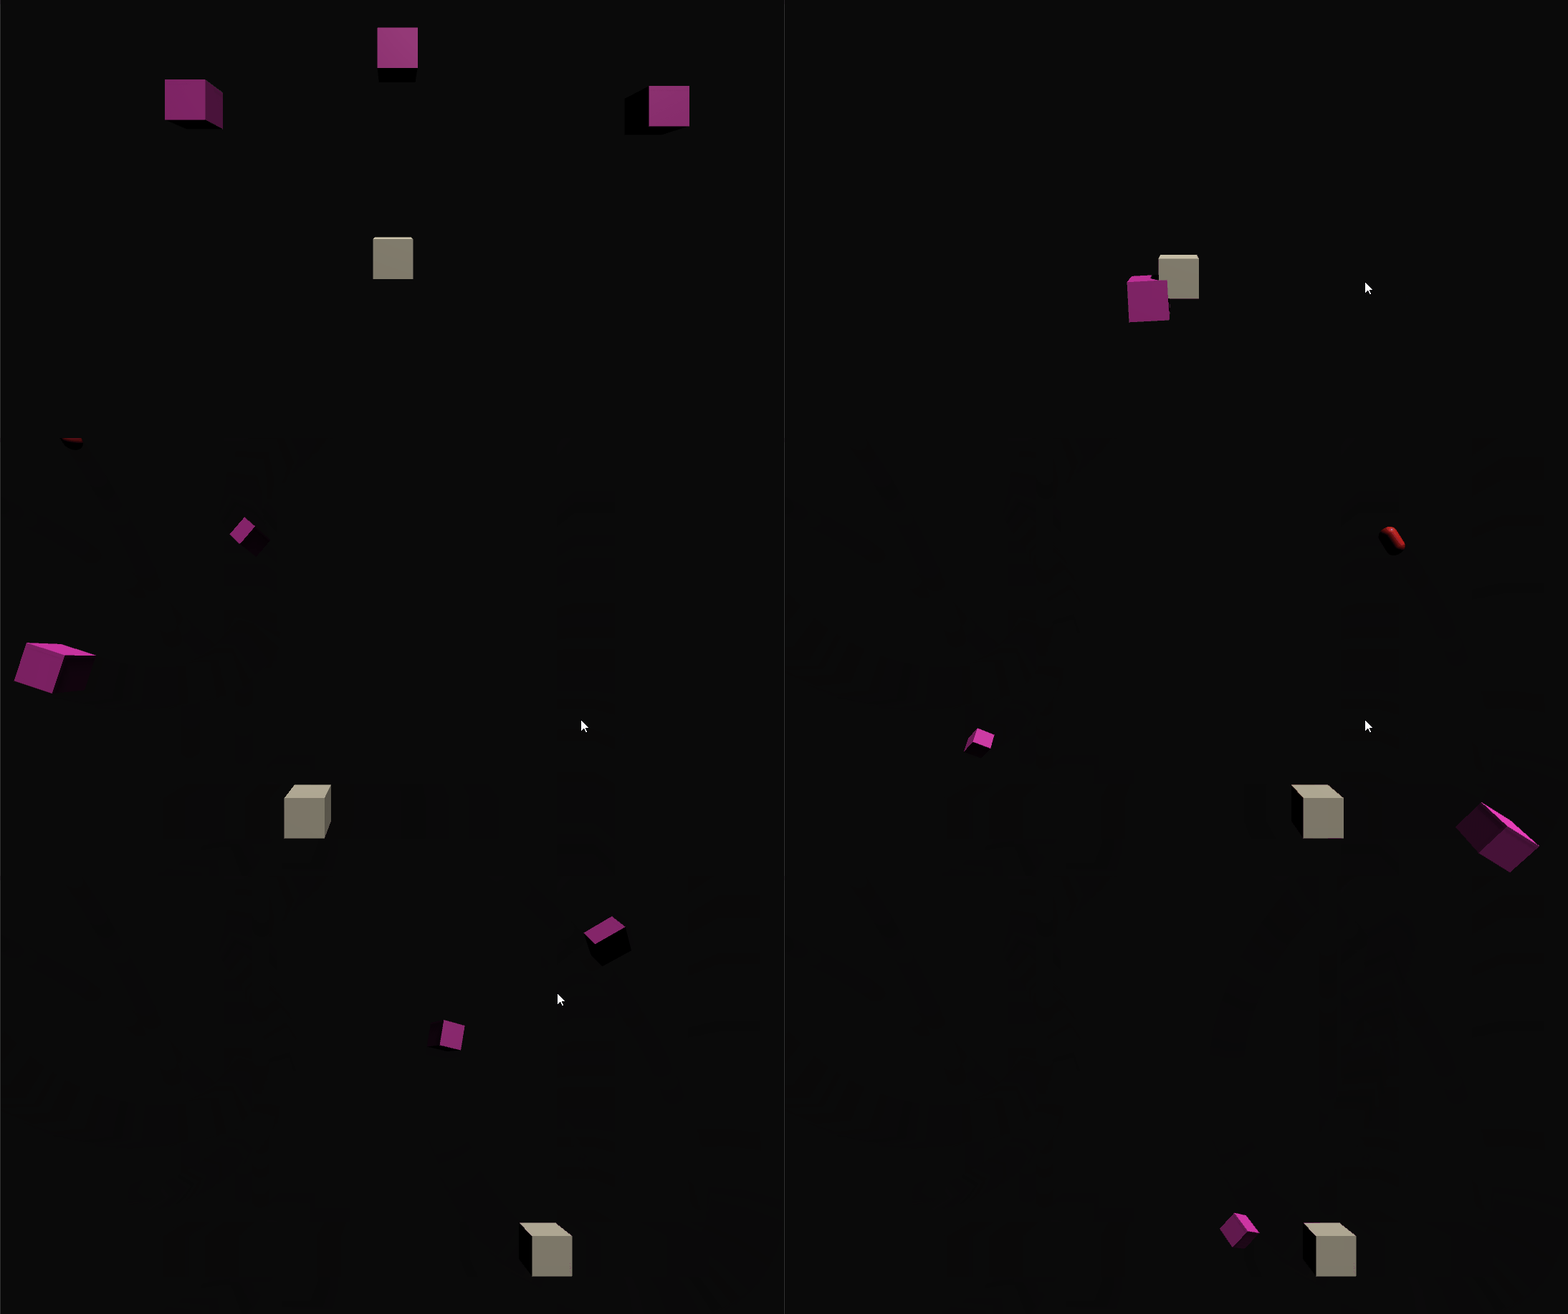
Creating The Enemy Cube
We’ll start by creating another Cube and naming it Enemy. Then create an Enemy material that stands out against the background and Player, and attach it to our new GameObject!
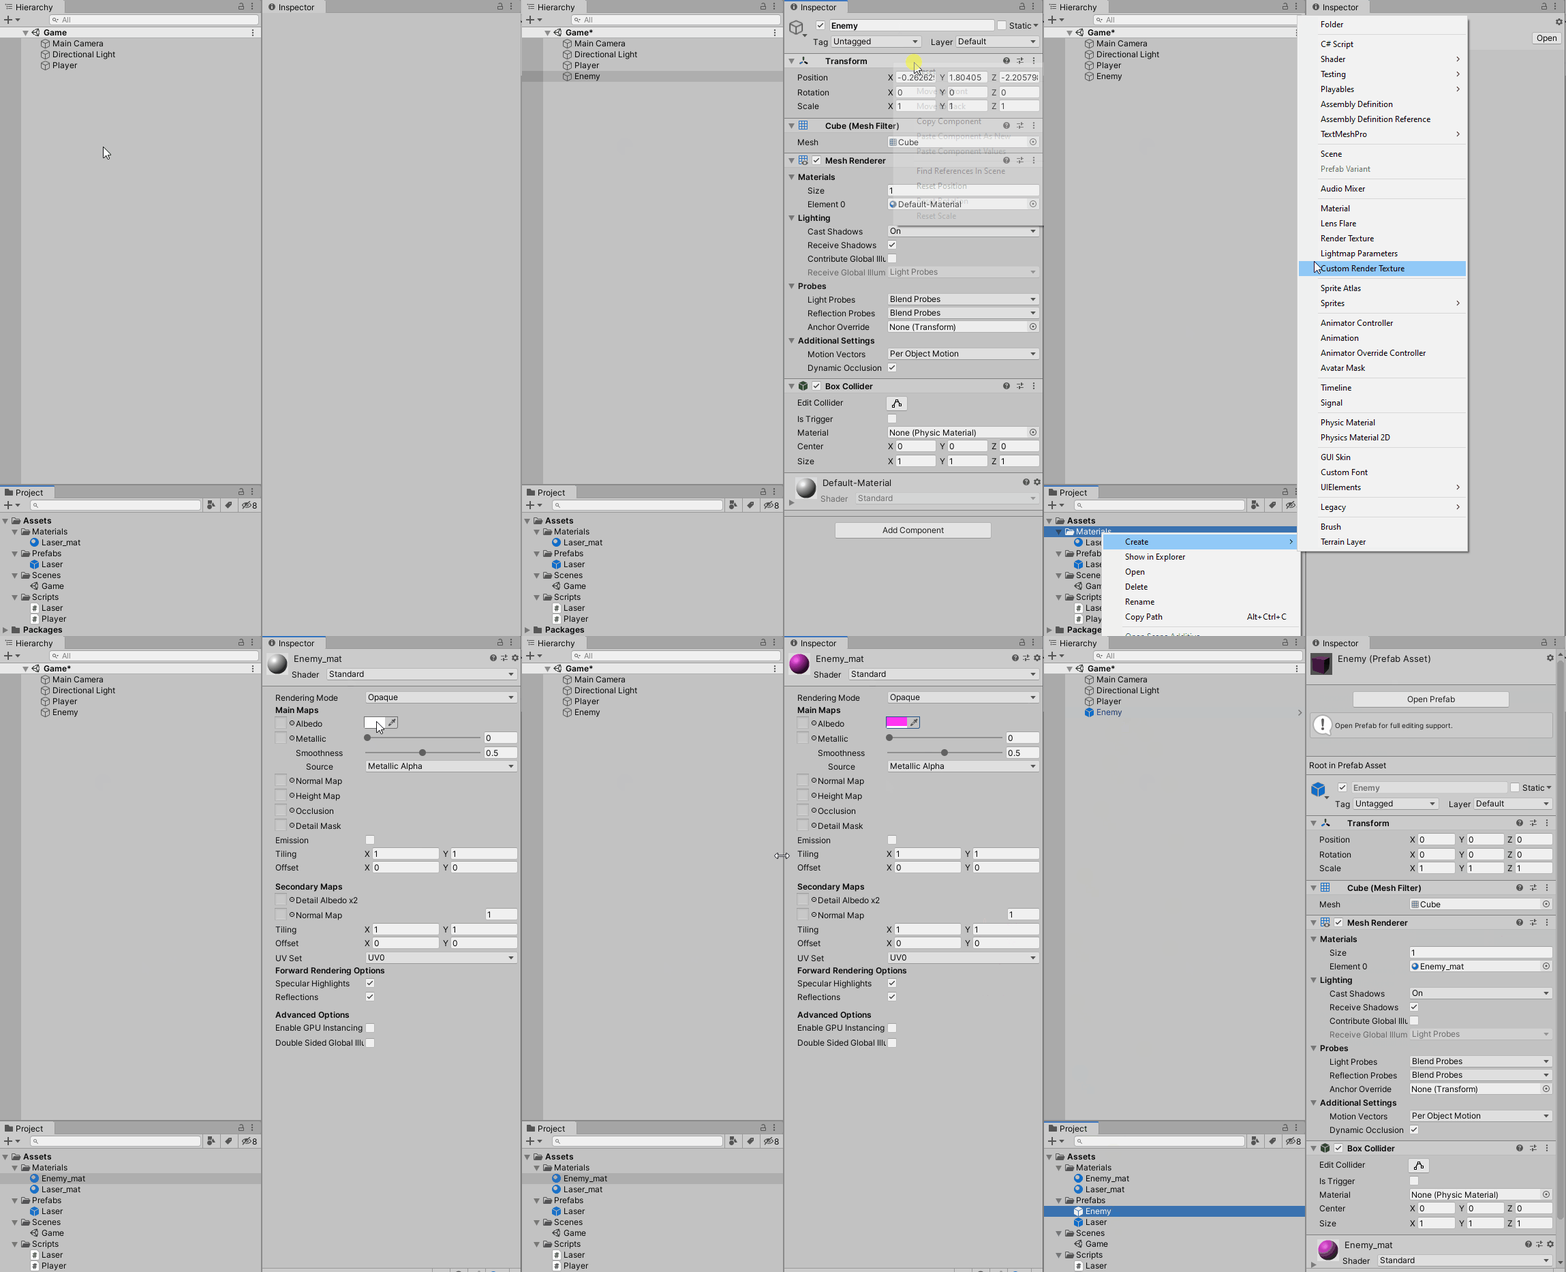
Then we’ll drag our Enemy GameObject from the Hierarchy into our Prefabs folder, making it a Prefab.
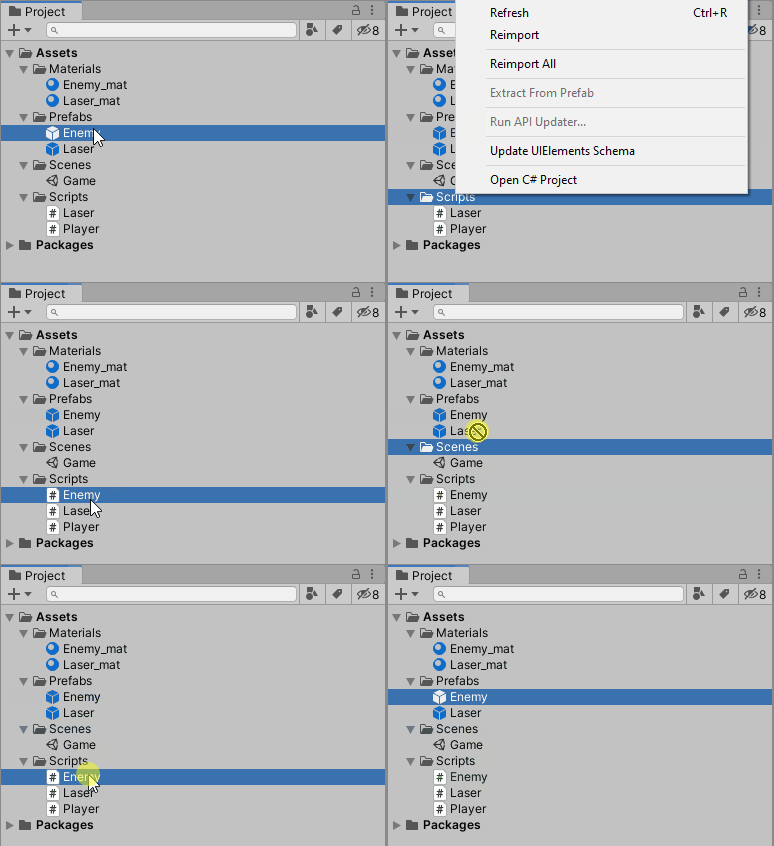
Next we’ll create an Enemy Script so that we can add our Enemy Behaviour:
Now to create the Enemy logic. We want the Enemy to continue downwards once it’s created, but once it is off-screen, we’ll respawn it at a random X position at the top of the screen.
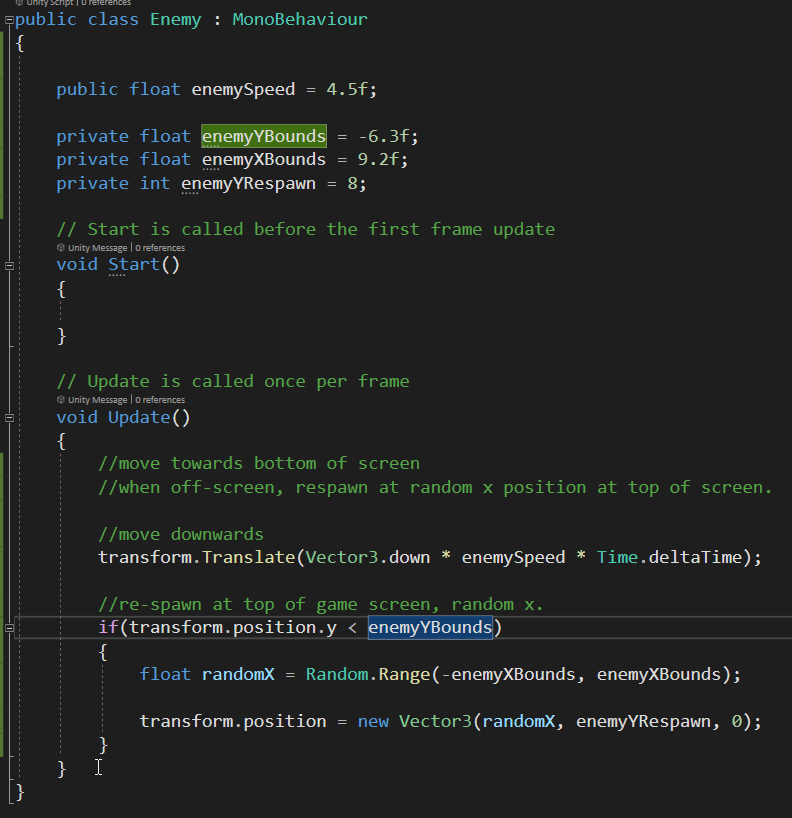
To explain our variables:
- enemySpeed is the speed at which our Enemy moves downwards.
- enemyYBounds is our off-screen bounds on the Y-Axis.
- enemyXBounds are the X-Axis positions in which we want our Enemy to respawn within once reaching the bottom of our screen. These bounds are inside the screen (left to right), and are Input to our randomX variable that is using Random.Range.
- enemyYRespawn is off-screen at the top and is where out Enemy will respawn after reaching the enemyYBounds off-screen at the bottom.
Here is the code in action:

This will go on indefinitely until the Enemy is destroyed. Which brings us to our next segment — creating logic to destroy the Enemy.
Destruction Logic — Triggers, Colliders, AND Rigidbodies?!
Those are a few words/components we haven’t covered yet, but thankfully they’re not too hard to understand. But they are essential to understand to get proper destruction logic going for, well, everything really.
First we’ll cover the Rigidbody.
Rigidbodies handle the physics inside Unity.
A Rigidbody is also need to properly use our Colliders in the way we want. At least one of our interacting objects needs a Rigidbody to enable Collision detections.
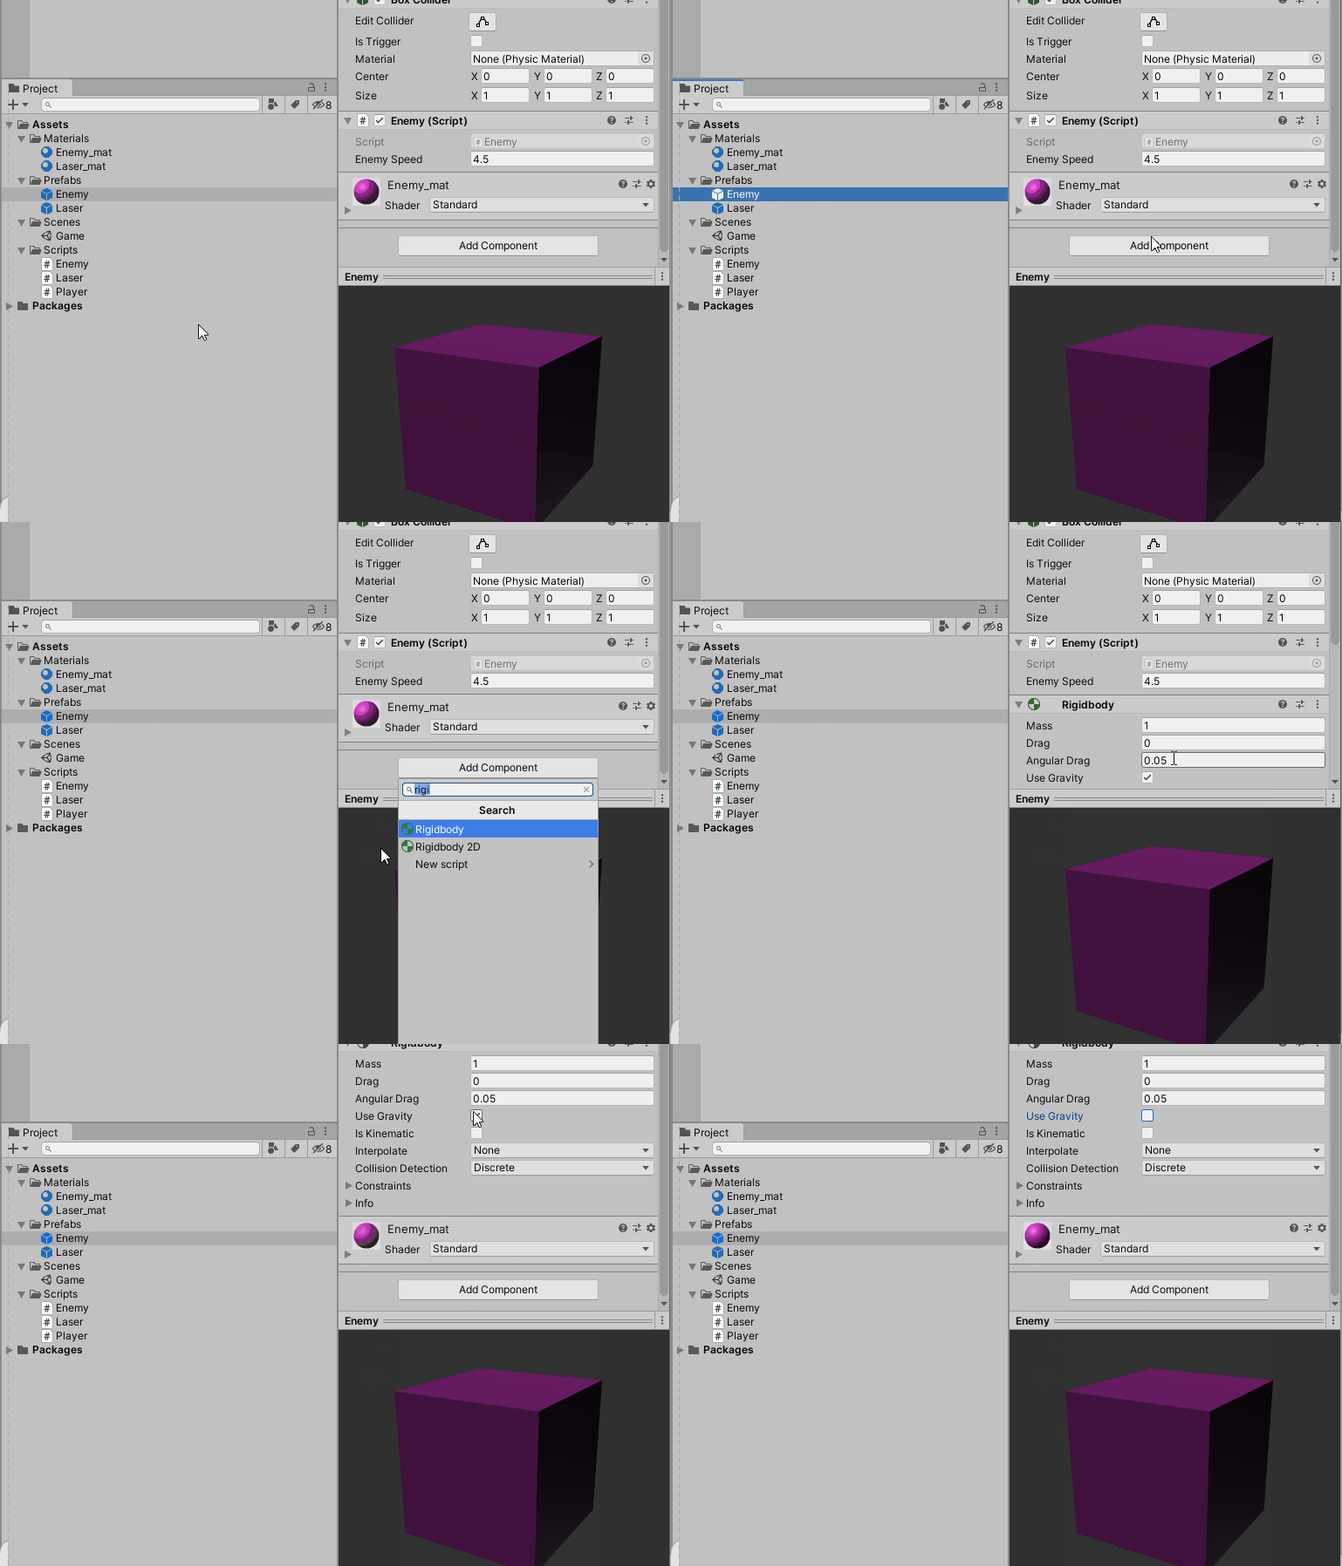
Above, we give our Enemy Cube a Rigidbody, but also deactivate the Use Gravity box, because we don’t want Gravity to be acting on our Enemy — we’ve already handled the downward motion in our code.
Next we have to mess with our Colliders.
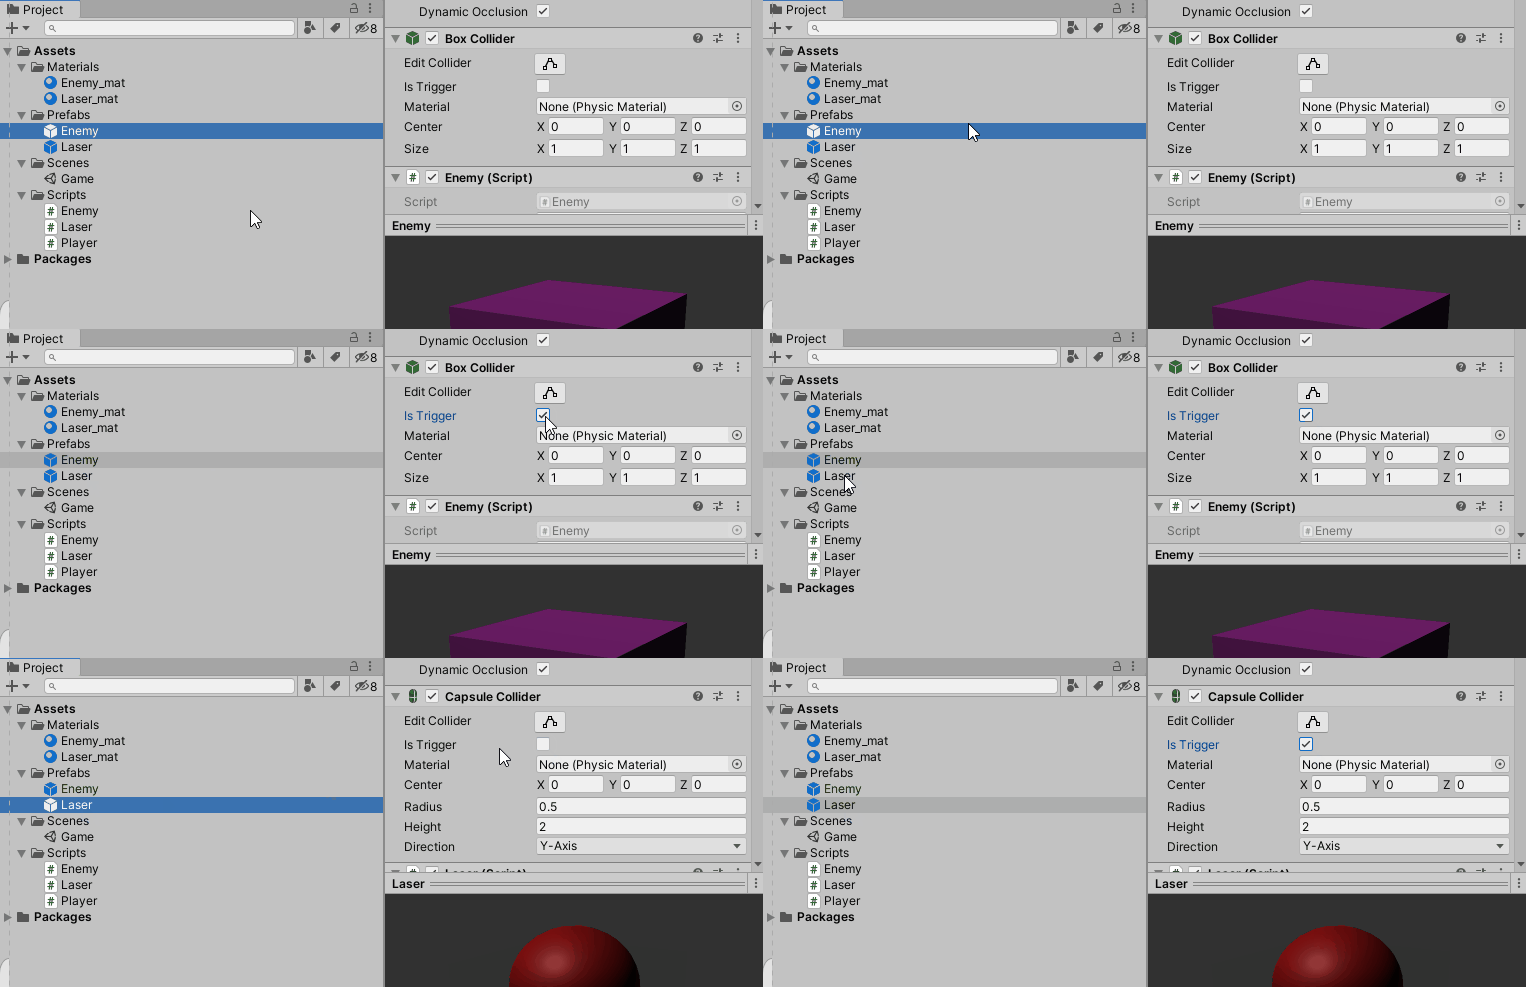
In our Enemy and Laser Prefabs, we’ll tick the Is Trigger box, turning our Colliders into Triggers.
This allows other objects to pass through the object, and trigger an event in our script. Whereas if they were not Triggers, and simply Colliders, when they come in contact with other objects they would perform some physics calculations and ‘bump’ into each other.
We’ll put this code in our Enemy script to test if the triggers are working properly:

From our test code, we can see that our Triggers are working properly — when the enemy hits the Player, it is shown, and likewise for the Laser.
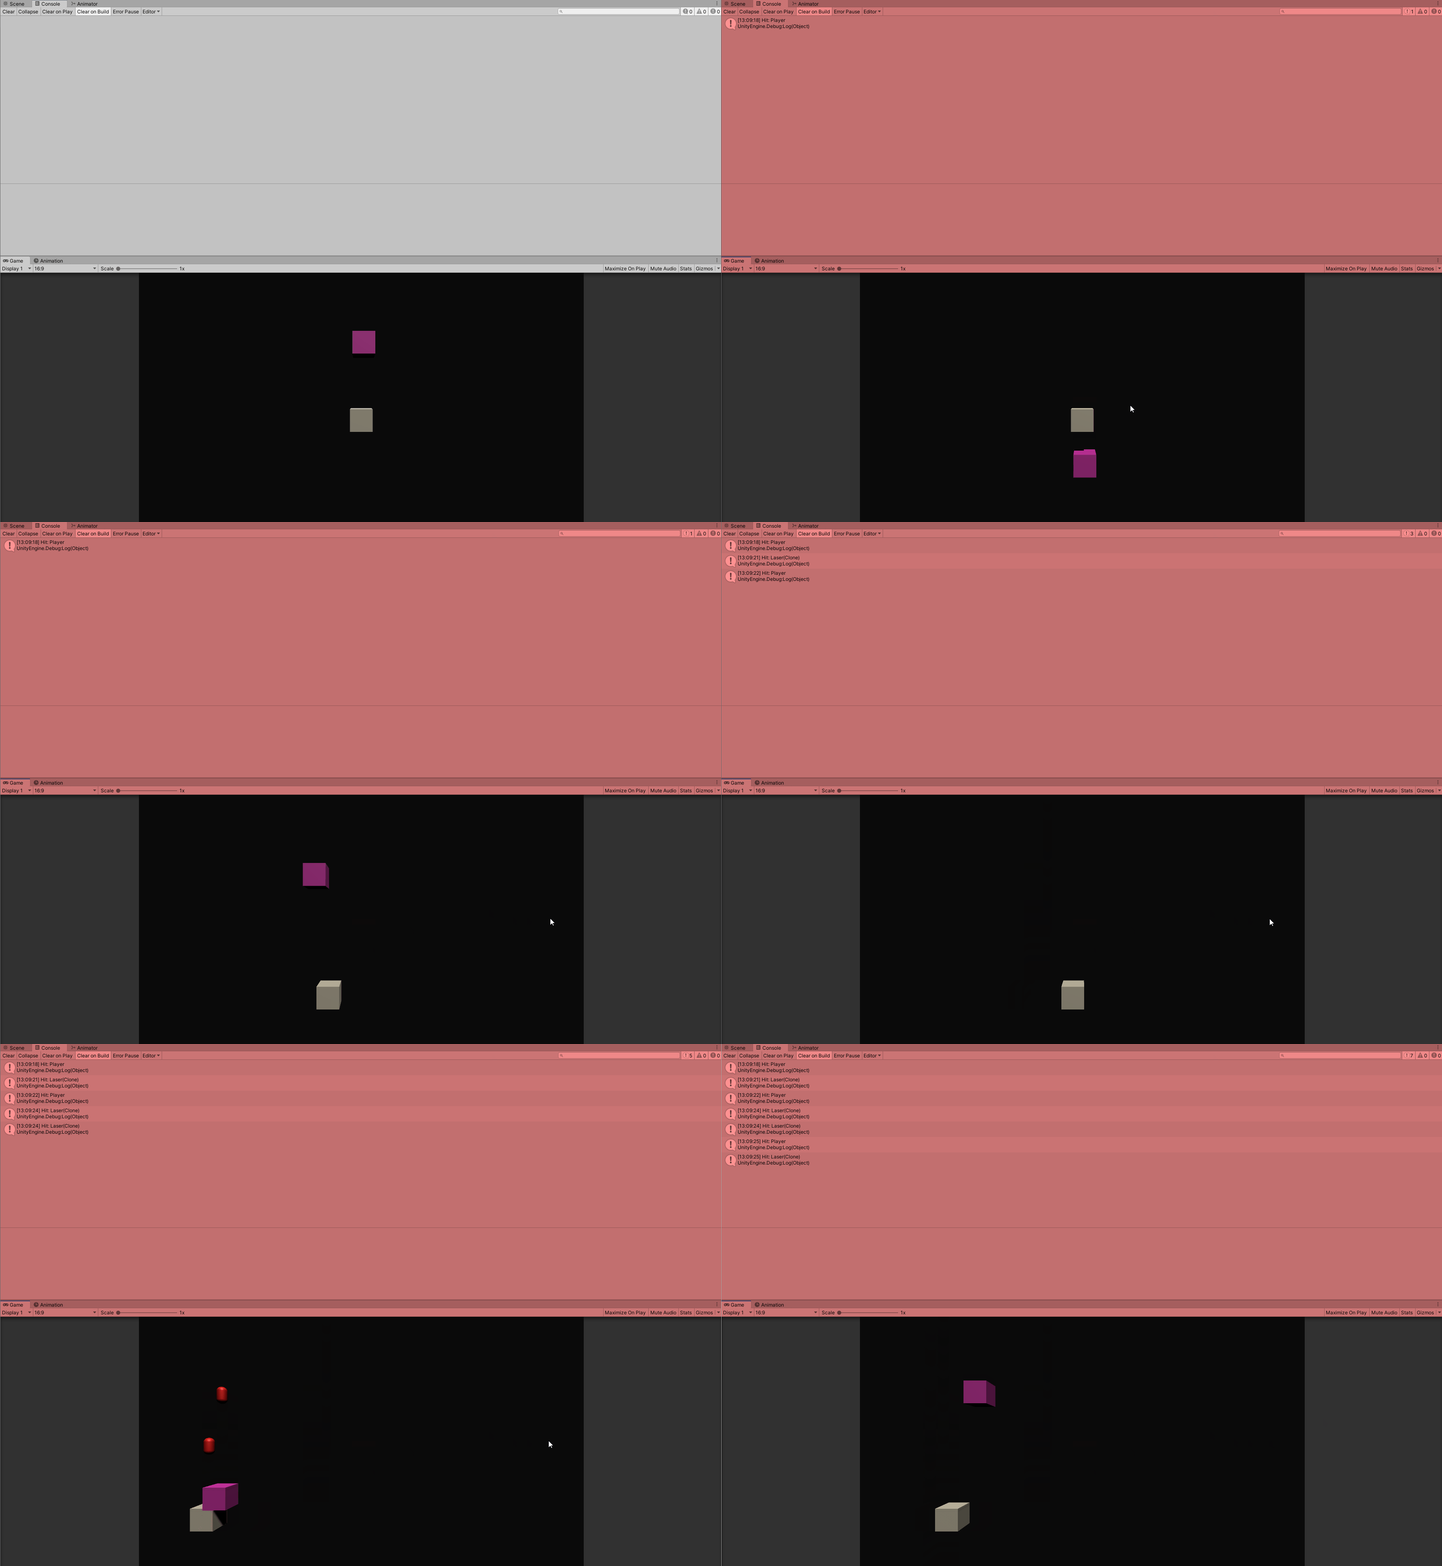
Here is an example of what happens when Is Trigger is off, and our objects have hard-surface Colliders on them. Physics takes over and can ruin the game (or make it more interesting!):


Triggers, Colliders, and Rigidbodies are the first step in understanding Object interaction during run-time. In the next article, we’ll cover a slightly more sophisticated system, making it easier to use code for each interaction! Tag, you’re it!
Enemy Creation and an Introduction to Triggers and Colliders in Unity was originally published in Level Up Coding on Medium, where people are continuing the conversation by highlighting and responding to this story.
This content originally appeared on Level Up Coding - Medium and was authored by Frank Warman
Frank Warman | Sciencx (2021-04-05T02:35:36+00:00) Enemy Creation and an Introduction to Triggers and Colliders in Unity. Retrieved from https://www.scien.cx/2021/04/05/enemy-creation-and-an-introduction-to-triggers-and-colliders-in-unity/
Please log in to upload a file.
There are no updates yet.
Click the Upload button above to add an update.
