This content originally appeared on DEV Community and was authored by Mariam Adedeji
I had an opportunity to work on this recently, and I had to I had an opportunity to work on this recently, and I had to combine different tutorials and articles before I was able to set this up successfully.
So, I’m writing this article in hopes that it will make someone’s work easier and make things clearer for beginners who wish to learn this.
What is Infrastructure as Code?
Infrastructure as Code (IaC) is the process of setting up and managing cloud infrastructure through machine-readable files as opposed to manually setting up the required infrastructure.
After the files have been written, you run them using IaC tools to build and configure the cloud infrastructure. Needless to say, this is a much more palatable and easier process than manual setup.
IaC tools include; Terraform, Ansible, Chef, AWS cloud formation, Puppet, Vagrant, and many others.
Benefits of Infrastructure as Code
- With IaC, infrastructure configuration and setup is much faster: all you do is run a script.
- Scripts can be easily reused at any time.
- It is also easier to make small modifications between different but similar setups.
- It increases site reliability.
- It reduces the possibility of errors in infrastructure set up.
In this tutorial, you will learn how to provision a server(AWS EC2) for a React app using Terraform and then configure them with necessary packages using Ansible.
Let’s start by highlighting all the steps needed and then explaining them in detail below:
- Configure AWS CLI and AWS vault
- Create a Key-pair for the server
- Dockerize a React app
- Provision the server using terraform
- Create a security group for the server
- Configure the server using Ansible
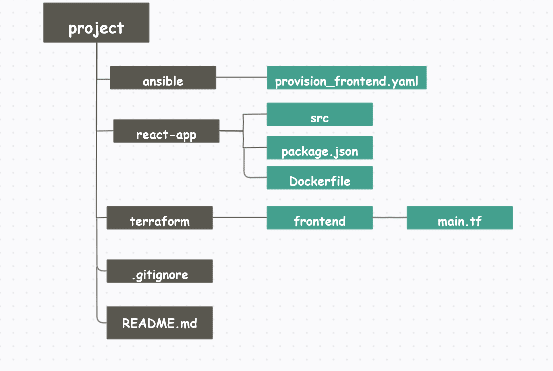
My folder structure
Prerequisites
If you’d like to follow this tutorial, please make sure the following requirements are met before doing so.
- AWS account. You can create one here if you haven't already, and follow this tutorial in setting it up.
- AWS CLI and AWS vault.
- Docker and Dockerhub account.
- Terraform
- Ansible
- A demo React app. You can create one with this tutorial.
Now, let’s get to it!
Step 1 — Configure AWS CLI and AWS vault
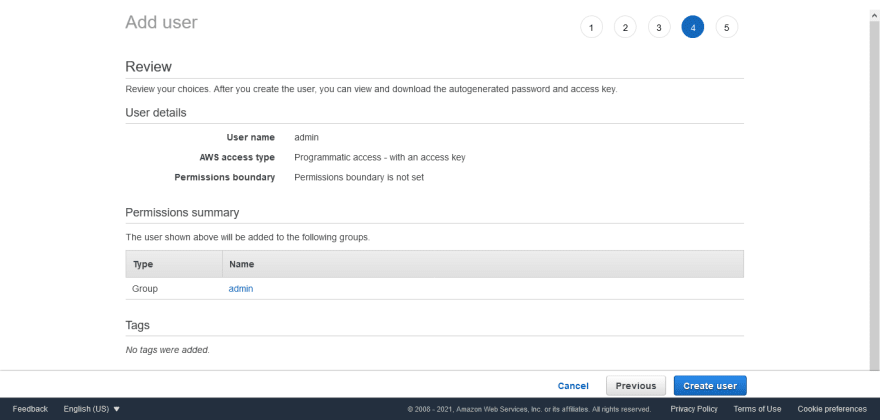
We’ll need to create a user on our AWS account to be able to configure the AWS CLI.
To do this, login to your AWS account, go to Services, then click on IAM. Click on User, then Add a user. Type in a Username, then select Programmatic access for AWS access type.
Next, we’ll need to create a group for our user. Click on Create group and give it Administrator access. You can add Tags (optional), click Next to review the user details and then click on Create user.
After this, a new screen would be displayed to download the user security credentials. Click on Download.csv.
Now, go back to the terminal and run the following command:
aws-configure
Add the user Access key ID and Secret Access Key as prompted. Then enter your preferred AWS region and Output.
Run the following command and make sure to replace username with the user created previously from the AWS console.
aws-vault add <username>
Add the user Access key ID and Secret Access Key as prompted. This is done to store your AWS credentials in your machine local keystore.
Then run the following command to authenticate yourself for a session.
aws-vault exec <username>
Step 2 — Create a Key-pair for the server
We need a key pair to run our instance.
To create one, go to your AWS console, select EC2 from Services drop-down, click on Key pairs, then click on Create key pair button.
Enter a Name for your key, select pem for openSSH or ppk for Putty and then click on Create key pair.
Download the key and move it to your machine’s .ssh folder. For Ubuntu and MacOS, this will most likely be ~/.ssh
Step 3 — Dockerize the app
In the root directory of the react-app folder, create a Dockerfile and add the following lines:
FROM node:12.18.3

LABEL version="1.0"

LABEL description="This is the base docker image for my React app"

LABEL maintainer="abc@mail.com"

WORKDIR /usr/src/app

COPY ["package.json", "yarn.lock", "./"]

RUN yarn

COPY . .

EXPOSE 3000

CMD ["yarn", "start"]
Here is an overview of the commands:
FROM defines the image we’re using for our container. In this context, we’re using node:12.18.3
LABEL indicates the version, description and maintainer of the Dockerfile.
WORKDIR sets the working directory for the app, and create it if the directory did not exists.
COPY is used to copy file(s) from one destination to another. The last path is always the destination to copy the file(s) to.
RUN defines the command to be run by Docker. I used yarn here because I installed my React app with yarn, you can change yours to npm if it’s more applicable.
EXPOSE tells docker which port it should listen to when running the container.
CMD defines the command to start the container. I used yarn start as specified from my React app’s start script, you should make sure yours also correlates to your app’s start script.
Now, you need to build a docker image from the Dockerfile. To achieve this, run the following command in the root directory of the react-app folder:
docker build -t <image-name> .
Make sure you replace image-name with the app’s image name.
Now, run the following command to spin up a container from the image.
docker run -it -p 3000:3000 <image-name>
Go to http://localhost:3000 in your browser to view the app.
Go back to your terminal and add a tag to the image using:
docker tag <image-name> <docker_hub_username>/<repo-name>:<tag-name>
Be sure to replace all variables with appropriate values.
Next, login to your DockerHub account from your terminal using:
Docker login
Add the username and password as prompted.
Then run the following command to push the image to Dockerhub.
docker push <docker_hub_username>/<repo-name>:<tag-name>
Once that is complete, you should see your docker image in the repo created.
Step 4 — Provision the server using terraform
In the root directory of the project folder, create a folder called terraform. Inside the terraform folder, create a new folder and call it frontend. We’ll be adding all the config files for our frontend in here. Next, create a file called main.tf inside the frontend folder.
Put the following code inside the main.tf file.
provider "aws" {
    region = "us-east-1"
}

variable "name" {
    description = "Name the instance on deploy"
}

resource "aws_instance" "admin_frontend" {
    ami = "ami-042e8287309f5df03"
    instance_type = "t2.micro"
    key_name = "admin"

    tags = {
            Name = var.name
    }
}
Here, we’re creating an AWS ec2 instance using ubuntu server image (ami-042e8287309f5df03), t2.micro as our instance type and admin as the name of the key-pair we created earlier. Make sure you replace region, ami, instance_type, and key.name with values from your setup.
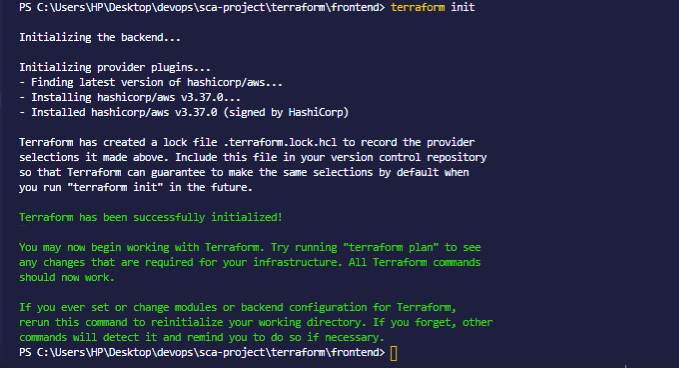
In your terminal, cd into the frontend folder and run the following command to initialize a working directory containing terraform configuration files.
terraform init
After that, run the following command to verify that we've set it up correctly.
terraform plan
It will later prompt for a value, enter the instance name, frontend.
Next, run the following command to spin up your ec2 instance.
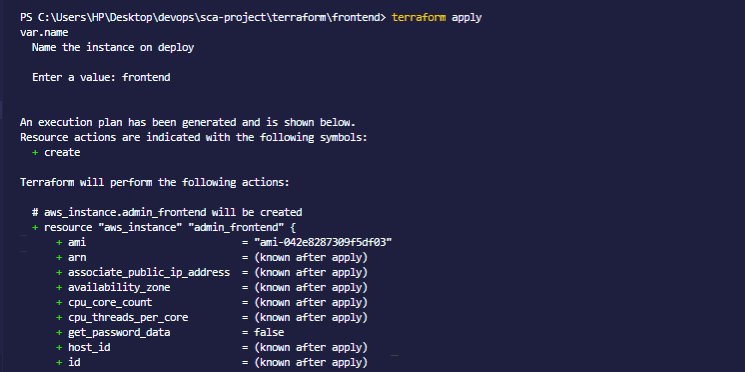
terraform apply
This should also prompt for a value, enter the instance name as frontend again and at the next prompt, enter yes to confirm.
Now, if you check your running instances on AWS console, it should be there.
Step 5 — Create a security group for the server
Now we need to create a security group for our frontend instance.
Go to AWS console, select EC2 from Services dropdown, then click on Security groups. Click on Create security group, then add Security group name and Description.
Scroll down to the Inbound rules, and click Add rule. Select HTTP for Type and Anywhere for Source. Once that’s done, create yet another inbound rule with Type as All TCP and Anywhere for Source. Create a last inbound rule with SSH as Type and My IP for Source. This makes a total of three inbound rules
Leave the Outbound rule as All traffic for Type and 0.0.0.0/0 for Destination. Then click on Create security group. You can read this article if you’re interested in learning more about security groups.
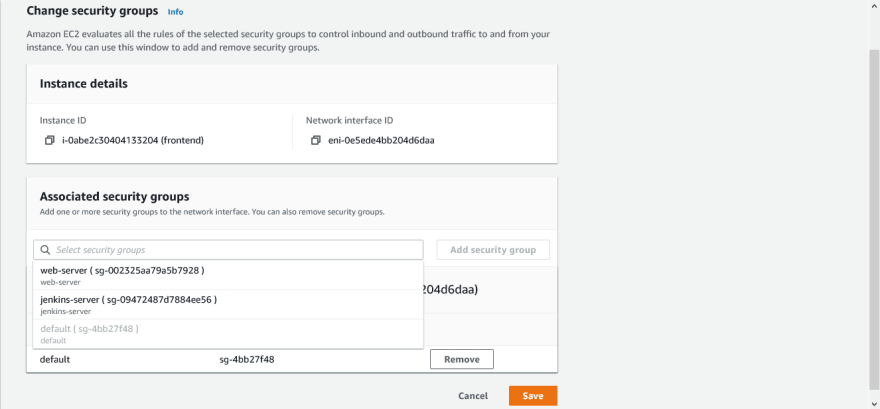
Now, go back to the frontend instance and attach the security group created to it. To do this, select the frontend instance, then Actions > Security > Change security groups > click on the search field and choose the security group, remove the default security group, then Save.
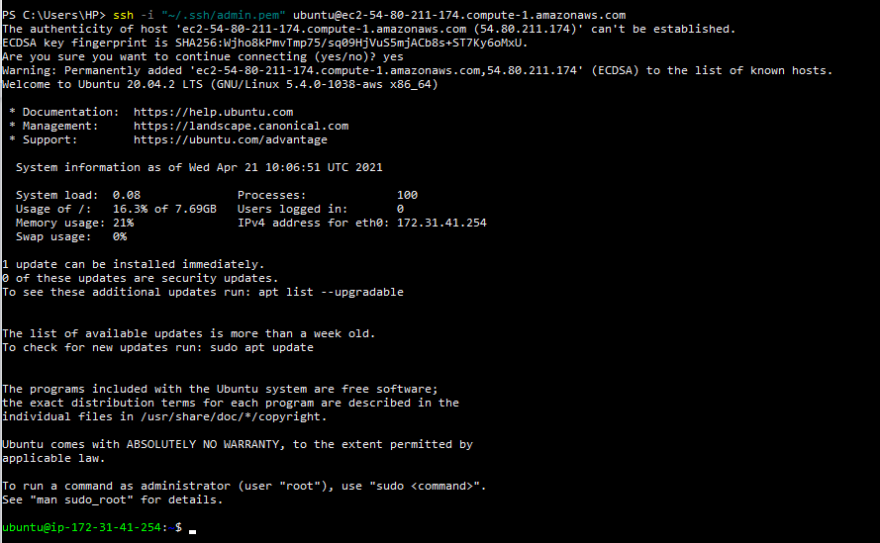
Now, you can try and ssh into your server using the following command:
ssh -i "~/.ssh/<your_KeyPair>.pem" <ec2-user>@<public_IPv4_DNS>
Make sure to replace ec2-user with AMI username, public_IPv4_DNS with the instance public domain name, and your_KeyPair with your key file name.
Step 6 — Configure the server using Ansible
Now that we have our instance running, we need to install the necessary packages using Ansible. Before we do that, let’s add some settings to our ansible config file.
Go to your terminal and run the following command to open up the config file. I use vim but feel free to use any editor of your choice.
sudo vim /home/<username>/.ansible.cfg
Be sure to replace username with your own username.
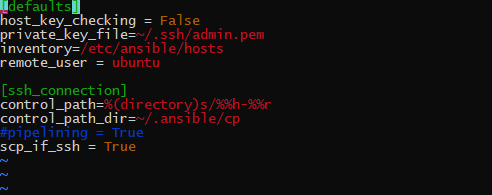
Then insert the following, making sure to replace your_KeyPair with your key name.
[defaults]
host_key_checking = False
private_key_file=~/.ssh/<your_KeyPair>.pem
inventory=/etc/ansible/hosts
remote_user = ubuntu

[ssh_connection]
control_path=%(directory)s/%%h-%%r
control_path_dir=~/.ansible/cp
#pipelining = True
scp_if_ssh = True
Now save and exit.
We also need to add our host into the ansible host file. To achieve that, open the ansible hosts file by running the following command:
sudo vim /etc/ansible/hosts
Then add these lines to the file. Make sure to replace ec2-user with AMI username, public_IPv4_DNS with the instance public domain name, and your_KeyPair with your key name.
[frontend] ec2-user@public_IPv4_DNS ansible_ssh_private_key_file=~/.ssh/your_KeyPair.pem
Save and exit.
Now, make sure your managed node can be reached by pinging it using the following command:
sudo ansible all -m ping
If it cannot be reached, then you may have connectivity issues that need some debugging. If you get a green blob of json however, then you’re good to go.
Now, go to the root of your project folder, create a folder and call it ansible. Inside this ansible folder, create a file and call it provision_frontend.yaml
Add the following lines into the provision_frontend.yaml file
---
- hosts: frontend
  become: yes
  become_method: sudo

  tasks:

  - name: Install pip
    apt:
      update_cache: yes
      name: python3-pip

  - name: Install aptitude using apt
    apt: name=aptitude state=latest update_cache=yes force_apt_get=yes

  - name: Install required system packages
    apt: name={{ item }} state=latest update_cache=yes
    loop: [ 'apt-transport-https', 'ca-certificates', 'curl', 'software-properties-common', 'python3-pip', 'virtualenv', 'python3-setuptools']

  - name: Add Docker GPG apt Key
    apt_key:
      url: https://download.docker.com/linux/ubuntu/gpg
      state: present

  - name: Add Docker Repository
    apt_repository:
      repo: deb https://download.docker.com/linux/ubuntu bionic stable
      state: present

  - name: Update apt and install docker-ce
    apt: update_cache=yes name=docker-ce state=latest

  - name: install docker-py
    pip: name=docker-py

  - name: enable Docker services
    service:
      name: "docker"
      state: started
      enabled: yes

  - name: Check if container is running
    shell: docker ps

  - name: run docker image
    shell: docker run -dit --name <repo-name> -p 3000:3000 <docker_hub_username>/<repo-name>:<tag-name>

  - name: show running images
    shell: docker images
Make sure to edit the shell command for running the docker image, to match your setup.
Then save.
hosts defines host upon which commands in a playbook operate.
become_method sets to root user.
package is for installing packages.
service is for controlling services on remote hosts.
shell is for running commands.
In the terminal, navigate to the ansible folder and run the playbook using the following command:
ansible-playbook provision_frontend.yaml
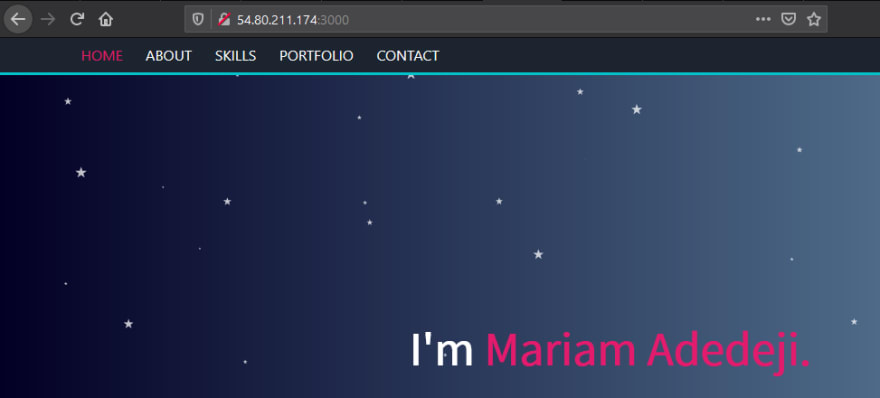
Now, open your browser and enter the public address of the instance with 3000 at the end.
Yay! That’s it! This might have been a lot, but I hope it was able to help you along in your journey.
If you would like to set up CI/CD for your app using Jenkins, you can check out one of my other articles here.
If you’ve found this article helpful, please leave a heart or a comment. If you have any questions or constructive feedback, please let me know in the comment section.
Also, don’t forget to follow me for more articles. Thank you!
This content originally appeared on DEV Community and was authored by Mariam Adedeji
Mariam Adedeji | Sciencx (2021-04-21T22:46:55+00:00) How to deploy an application to AWS EC2 Instance using Terraform and Ansible.. Retrieved from https://www.scien.cx/2021/04/21/how-to-deploy-an-application-to-aws-ec2-instance-using-terraform-and-ansible/
Please log in to upload a file.
There are no updates yet.
Click the Upload button above to add an update.

