This content originally appeared on DEV Community and was authored by Michael Okoh
Introduction
Recently, I had to migrate my queue driver on a project from Redis to SQS and for some weird reason the information provided on the official Laravel Queues documentation didn't do justice to this and I couldn't find an article online that could help, that's why I'm writing this, with the hope that you don't spend two hours of your Saturday morning figuring stuff that should have been documented. I'd try to keep this article as brief as possible, I'd attach links to other articles that explain some steps so I can focus on the important parts.
Prerequisites
- An existing Laravel application
- An AWS account
- An understanding of Laravel queues
- Some AWS knowledge
Step One - Install the AWS SDK
Run the following command to install the SDK:
composer require aws/aws-sdk-php
Step Two - Get your AWS keys
Click on this link to watch the guide.
When you get to the point where you need to set permissions, search for AmazonSQSFullAccess and select it.
If you already have existing credentials, modify its policies and do the same.
Step Three - Create a queue
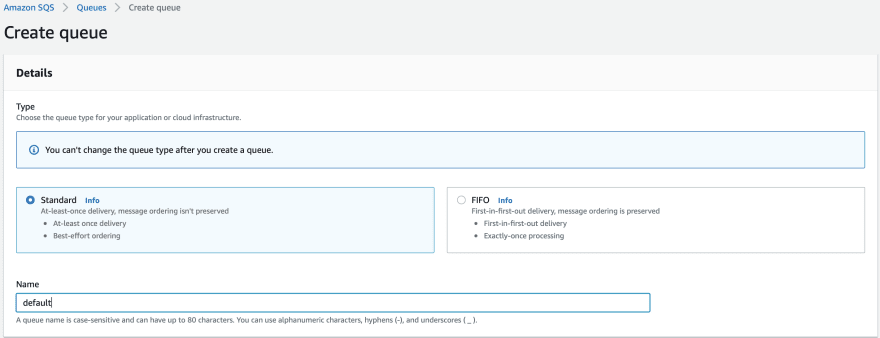
Head over to your SQS console, click on create queue.
Out of the box, Laravel dispatches jobs to the default queue, therefore, your first queue should be named default on SQS.
If you would be dispatching to a queue other than
default, the queue name should be the same as the queue you're dispatching to.
Leave everything else at its default, scroll to the bottom and click on the create queue button.
Step Four - Set .env variables
Open your .env with your preferred text editor. Add your AWS keys in the following format:
AWS_ACCESS_KEY_ID=YOUR_AWS_ACCESS_KEY_ID
AWS_SECRET_ACCESS_KEY=YOUR_SECRET_ACCESS_KEY
AWS_DEFAULT_REGION=YOUR_SQS_REGION
Ensure you replace YOUR_* with the right credentials. Next, set your SQS Prefix:
SQS_PREFIX=https://sqs.<your-region>.amazonaws.com/<your-account-id>
| I don't think I need to explain what <your-region> means
You can get <your-account-id> on your AWS console, click on your account name on the top right of your dashboard.
you'd find your account ID just beside My Account as shown above. Finally, change the queue driver to SES.
QUEUE_CONNECTION=sqs
Step Five - Start queue worker
Run the following command to start your queue worker:
php artisan queue:work sqs
Dispatch your job on the default queue and it should be processed.
Modification for Laravel horizon
If you use Laravel Horizon to manage your queues, you'd be making some modifications to your horizon.php file. For each worker defined, change the queue connection from redis which is the default to env('QUEUE_CONNECTION').
From this:
<?php
...
'defaults' => [
    'queue_name' => [
        ...
        'connection' => 'redis',
    ];
...
]
...
To this:
<?php
...
'defaults' => [
    'queue_name' => [
        ...
        'connection' => env('QUEUE_CONNECTION'),
    ];
...
]
...
After these modifications have been made, restart horizon and all should be good.
Conclusion
I have nothing else to add, have fun, keep building.
This content originally appeared on DEV Community and was authored by Michael Okoh
Michael Okoh | Sciencx (2021-05-15T09:36:32+00:00) Configuring Laravel Queues with AWS SQS. Retrieved from https://www.scien.cx/2021/05/15/configuring-laravel-queues-with-aws-sqs/
Please log in to upload a file.
There are no updates yet.
Click the Upload button above to add an update.


