This content originally appeared on Level Up Coding - Medium and was authored by Dennisse Pagán Dávila

The Unity Engine comes complete with Build Settings that allow the user to build and test their applications before their final phase of deployment.
In this article, you will learn how to use the Build Settings to create a test version of your application that can actually be executed from your computer!
Using the Build Settings
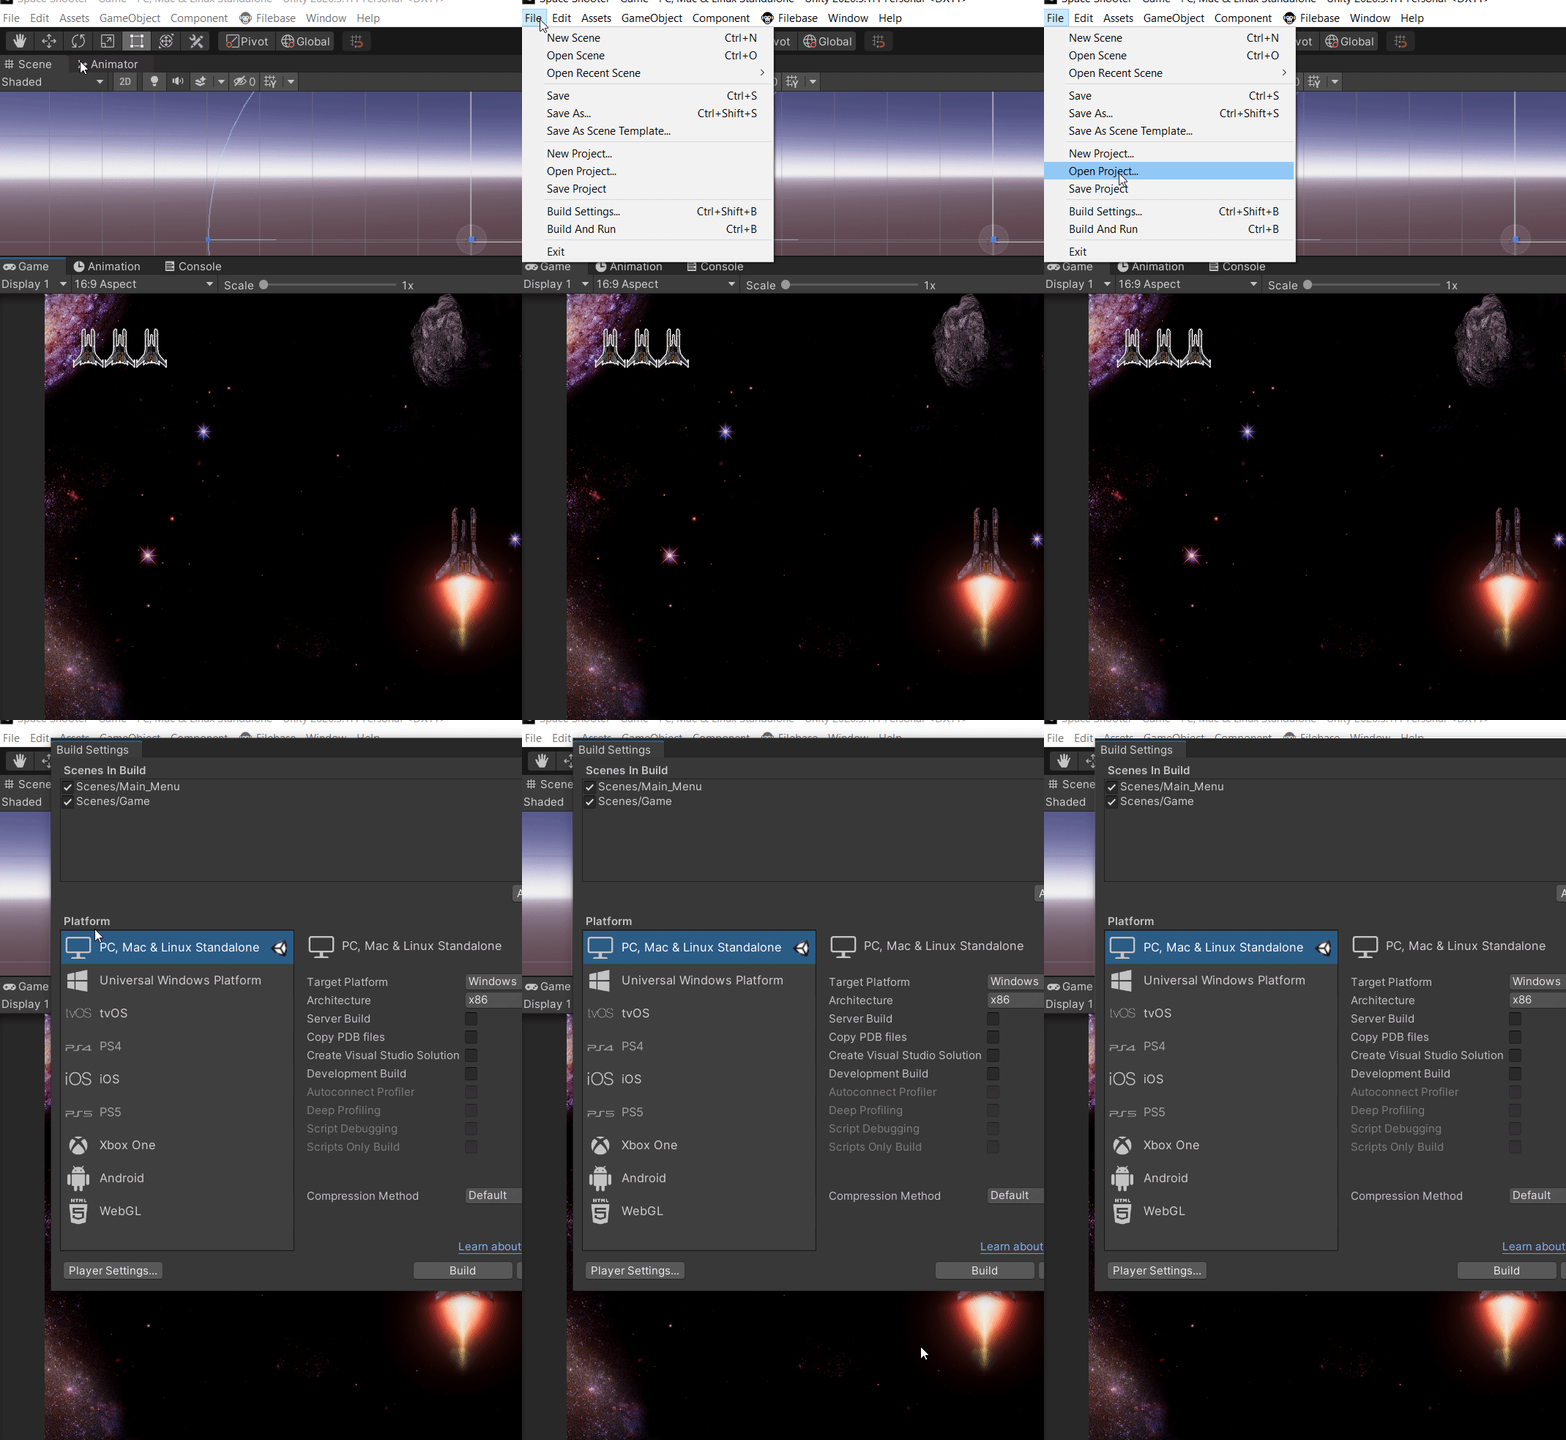
- To access the Build Settings Go to File → Build Settings

Note: Once you open the Build Settings you will see all your currently added scenes, which should appear in the right order. Should you be missing any scenes, you can open your missing scene, then go back to your Build Settings, and select Add Open Scenes.

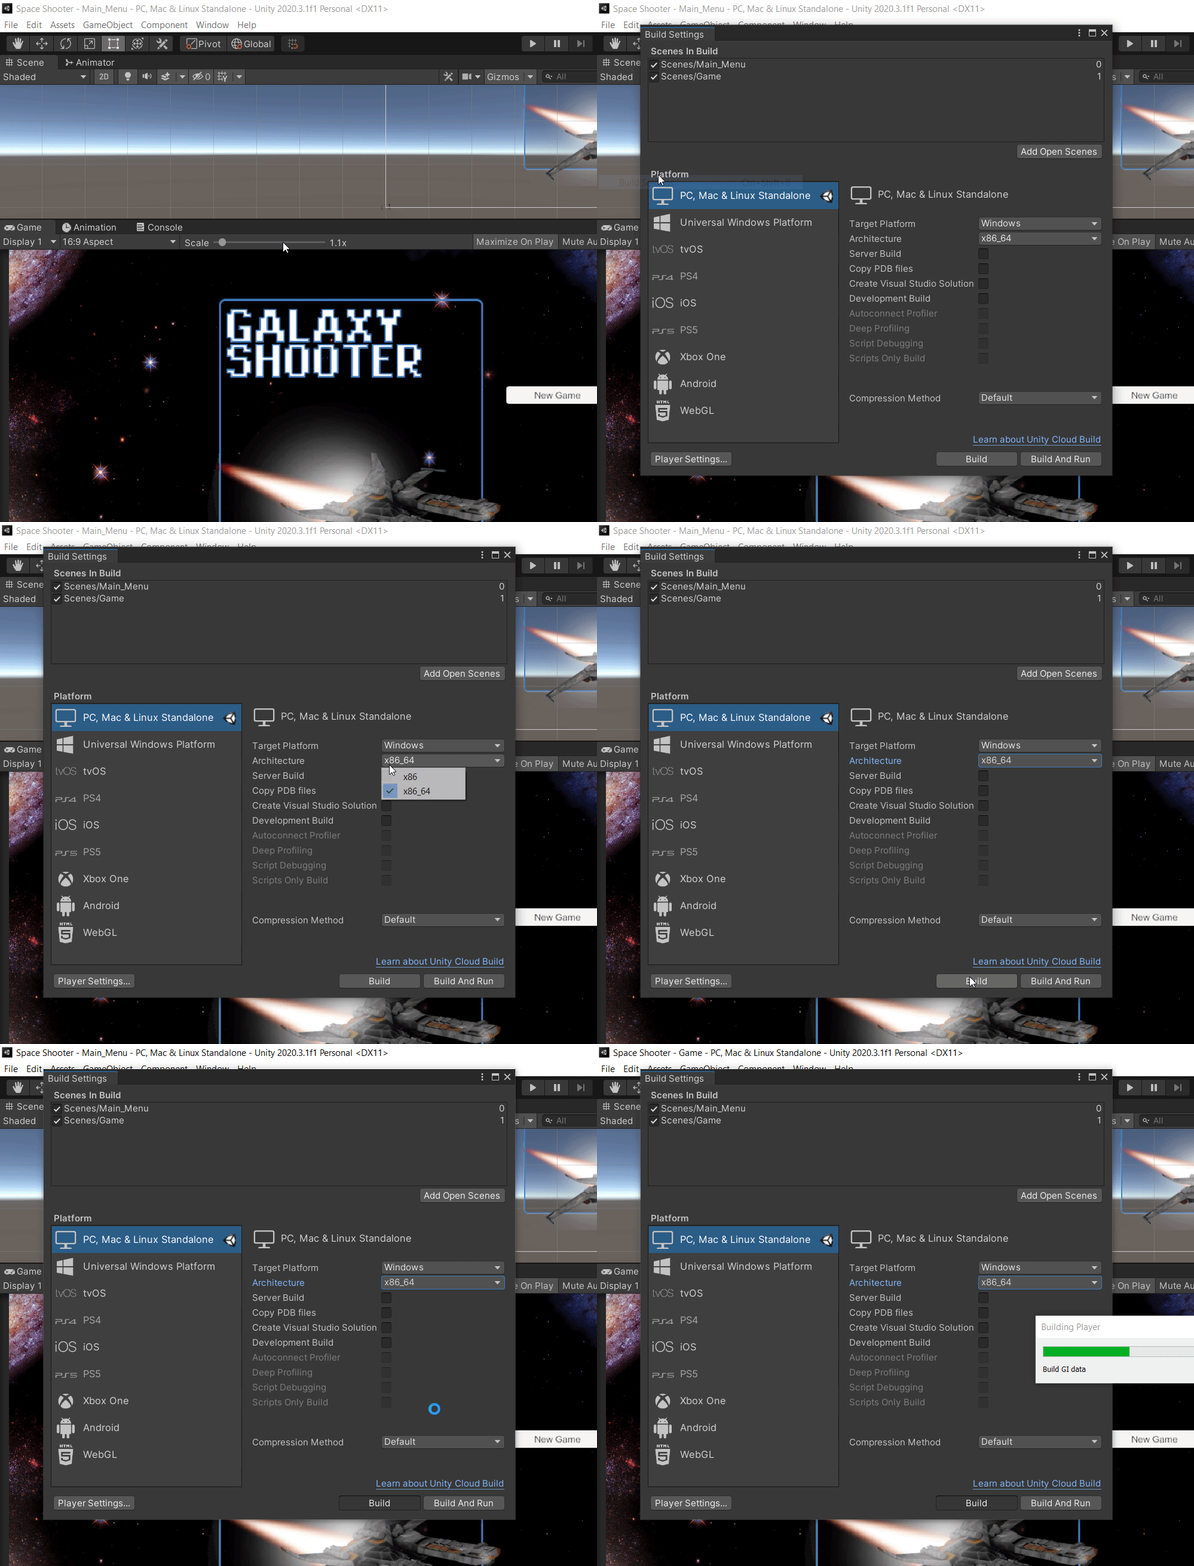
2. Select the desired Platform, some platforms have specific settings that you can learn more about here. When you are making early test builds, it’s good to test the product on your computer if possible. Once you have selected the platform, click on Build and follow along. If you select PC, make sure to select the right type of Architecture for your computer.
Note: Typically, testing on Consoles requires a developer’s agreement, and clearance to use a professionally distributed devkit. Take Microsoft, for example.

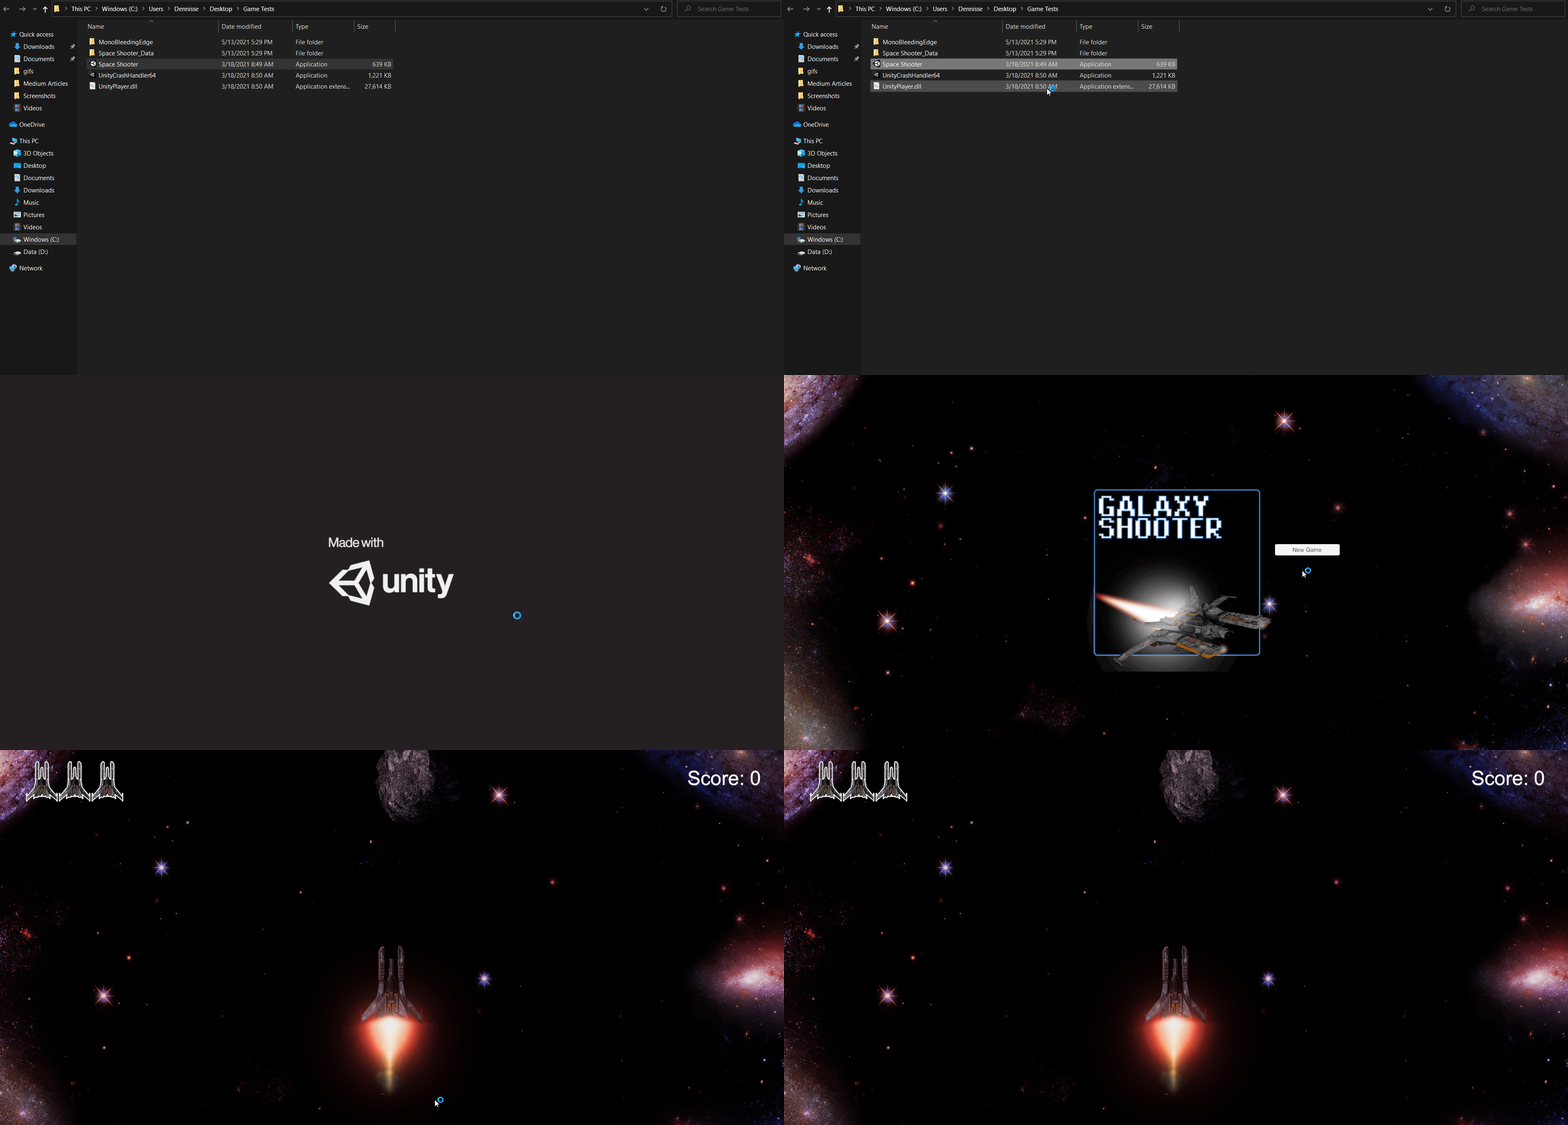
3. The folder where you chose to store the build should open automatically once the process is finished. From there, you can execute your fully playable/runnable test!

In the next article, I will go over how to make a shareable version of your game or application!
How to Build and Test your Unity Game was originally published in Level Up Coding on Medium, where people are continuing the conversation by highlighting and responding to this story.
This content originally appeared on Level Up Coding - Medium and was authored by Dennisse Pagán Dávila
Dennisse Pagán Dávila | Sciencx (2021-05-16T18:32:37+00:00) How to Build and Test your Unity Game. Retrieved from https://www.scien.cx/2021/05/16/how-to-build-and-test-your-unity-game/
Please log in to upload a file.
There are no updates yet.
Click the Upload button above to add an update.
