This content originally appeared on DEV Community and was authored by Software Development Academy
Video tutorial of this article
This article will teach the basics of the useEffect() hook to make fetch calls to a server.
We will use the fantastic and free API mockup resource called JsonPlaceholder to practice some network calls.
Pre-requisites
Promises: Explains a way to run code only after other code that we don't know when is going to be ready.
Note: If you want to use Async & Await, there is a special hook called useCallback, more info in the section: Additional reading.
Intended result

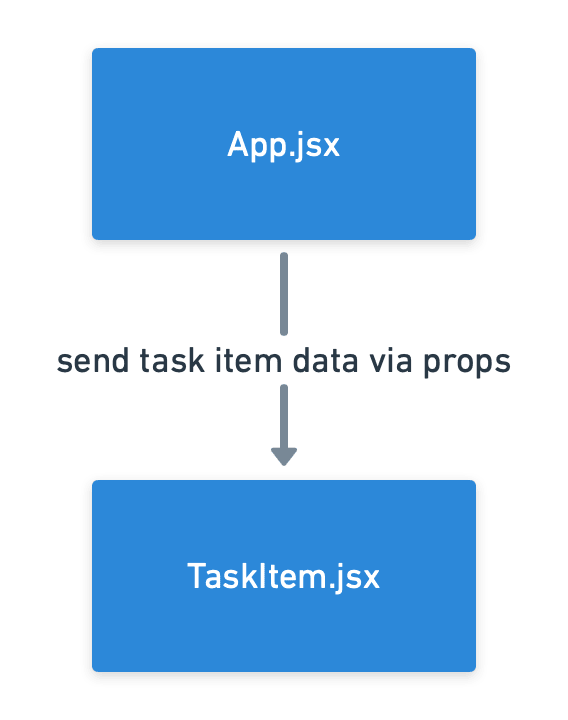
Figure 2: App hierarchy chart.
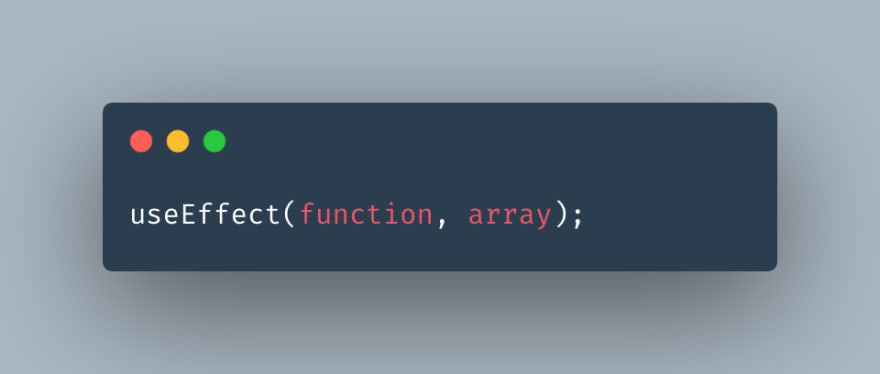
Anatomy of the useEffect hook

Figure 3: The parameters of the useEffect hook.
The first parameter is a function usually written as an arrow function. Inside the function, you do your network call using fetch().
The second parameter is an array of state variables. It is used to tell React to re-render the page only when these state variable changes.
If you omit the second parameter, React will enter an infinite loop, crashing the application. Why? Because as we mentioned during the Introduction to State management, React refreshes the page each time the state changes. But if we refresh the page, the fetch data will be called again, changing the state, and the page will be refreshed and so on a so forth.
Think about the second parameter as a brake to tell React to refresh the page once instead of entering an infinite loop.
Getting started
To tackle the complexity we will focus on 3 areas:
- General app setup
- useEffect first argument (function)
- useEffect second argument (array)
import { useEffect, useState } from "react";
import TaskItem from "./components/Item";

export default function App() {
  console.log("1 App.jsx created");

  // State
  const [taskData, setTaskData] = useState([]);

  // Method
  useEffect(() => {
    console.log("2 App.jsx useEffect()");

    fetch("https://jsonplaceholder.typicode.com/todos/")
      .then((response) => response.json())
      .then((json) => setTaskData(json));
  }, [setTaskData]);

  // Component
  const TaskList = taskData.map((item) => {
    return <TaskItem key={item.id} prop={item} />;
  });

  return (
    <div className="App">
      <ol>{TaskList}</ol>
    </div>
  );
}
Note: This is the first exercise we have a console.log() inside the code. This is on purpose, so you can open the console and see the exact moment the App.jsx component is destroyed and recreated once we have the server's data.
Lets break down the code line by line:
General App:
- We import the new hook
useEffectin addition to theuseStatehook. - We create a state variable called
taskItemDataas an empty array to hold the todo items fetched from the server. - We use the
useEffect()hook directly without assigning a const or a function. - Finally, TaskList is a list of
<TaskItems/>by using thetaskDatastate getter, and we pass to each copy its corresponding item.
useEffect first argument:
Inside useEffect, we pass the arrow function. This will be called each time the contents of the App component change. In this case, we want to refresh the page when new data arrives from the server.
Inside the arrow function, a fetch() function calls the server. Note that we need to append 2 then() statements to:
- To convert our raw data into legible JSON.
- To assign this JSON to our
taskDatastate using thesetTaskData()setter.
useEffect second argument:
We put setTaskData in the array inside the second argument of the useEffect hook. Because we are only calling the setter and not the getter, we don't need to add taskData.
If you omit the [] entirely, React will enter an infinite loop because each time you set setTaskData, the state will change, refresh the page, and when you set the data again, it will refresh over and over.
If you put the [] but leave it empty, React will refresh the page 1 time only. This will work for this small example, but on bigger projects, this will stop calling other network calls because you aren't allowing the page to refresh when other pieces of state change. So get used to putting the necessary state getters and setters.
Conclusion
This example taught you the basics of fetching data using the useEffect hook.
You can take a break before moving to the articles intended for the next day, or click here to continue your studies.
My recommendation is to practice creating individual projects for each API endpoint that JSONPlaceholder has. The goal is to get comfortable setting up the useEffect hook and write its 2 arguments without copying and pasting the code.
If you want to see the finished code, open this link and open the branch server-state.
Additional reading
- React hooks documentation: For a detailed explanation of the difference between all the available hooks.
- useCallback hook: A short video tutorial to help you organize your useEffect code into smaller separated async functions.
Credits
- Cover: Photo by Alexey Savchenko on Unsplash
- Video tutorial: Learn useEffect In 13 Minutes - React Hooks Explained by Web Dev Simplified.
This content originally appeared on DEV Community and was authored by Software Development Academy
Software Development Academy | Sciencx (2021-06-04T12:18:49+00:00) Manage server state with useEffect hook. Retrieved from https://www.scien.cx/2021/06/04/manage-server-state-with-useeffect-hook/
Please log in to upload a file.
There are no updates yet.
Click the Upload button above to add an update.


