This content originally appeared on DEV Community and was authored by Teja Bhutada
Choosing the right software is one of those critical decisions that impacts your business. Now getting the software to interact and automating workflows can increase that impact and ensure your organization is headed the right way.
Today, I’ll discuss integrating Jira and Zendesk, showing you how tickets and issues can be shared between your teams seamlessly, letting information propagate from team to team and helping everyone work effectively.
Why Integrate Jira and Zendesk
It’s common for teams to store data on different systems. There’s often a large amount of overlap between the data, so syncing it benefits the teams and their collaboration.
Sharing data manually is slow and error prone. An automated system will do it regularly and quickly. It can also log what it does and record any errors.
A common use case for a Jira Zendesk sync is where a company uses Jira for development and Zendesk for customer service. Many of the issues raised by users will end up as tickets for developers.
Such integration lets these Zendesk tickets move to Jira automatically. With the right software integration solution, you can decide how you want to send them while allowing users to flag some of them or to set specific conditions for transfer.
How to Set up a Jira Zendesk Integration in 6 Steps
I am going to use a software integration solution called Exalate. Here’s how to set the integration up in a few simple steps.
First, you’ll install Exalate on both sides and then connect them. After that, there are a couple of optional steps to get things working exactly how you want. Then you’re ready to go!
Step 1 - Install Exalate on Jira
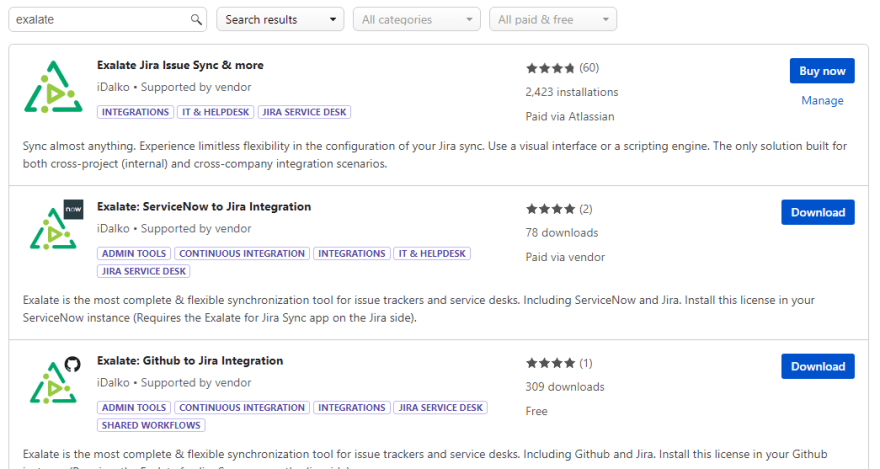
In Jira, click the top right user icon and select ‘Atlassian Marketplace’. Enter ‘Exalate’ in the search field and press return. ‘Exalate Jira Issue Sync & More’ will appear as the top entry.
Click the blue button to choose a plan and install Exalate.
Step 2 - Install Exalate on Zendesk
Now you’ll install Exalate on Zendesk. You can read more about it in the documentation.
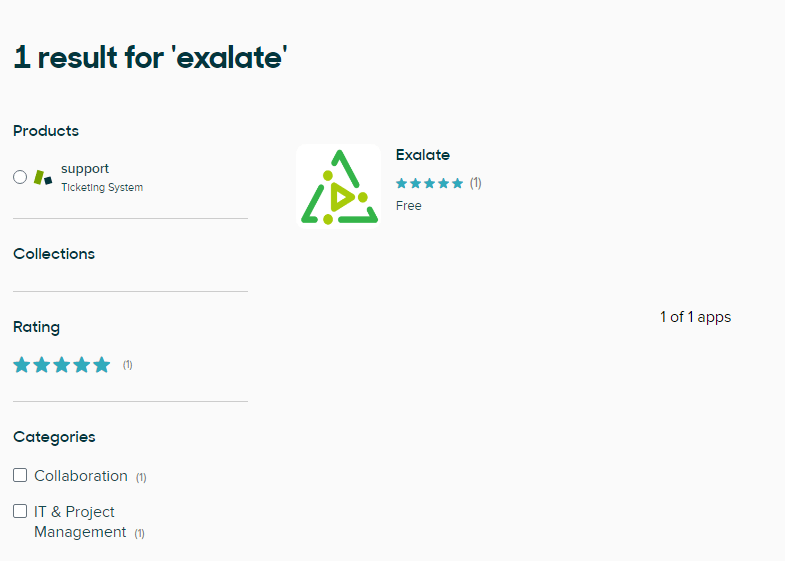
In Zendesk, click the cog in the left hand menu, then click ‘Marketplace’ in the ‘Apps’ section. Type ‘Exalate’ in the search field, then click ‘Exalate’ when its icon appears.
Click the install button, then select your account on the popup. Click ‘install’ again. A config screen will appear. You can change the details if you like, before clicking ‘Install’ again.
Exalate will appear in Zendesk’s left-hand menu. Click it, then click ‘Allow’ to give it access to your data.
Step 3 - Create a Connection Between Your Instances
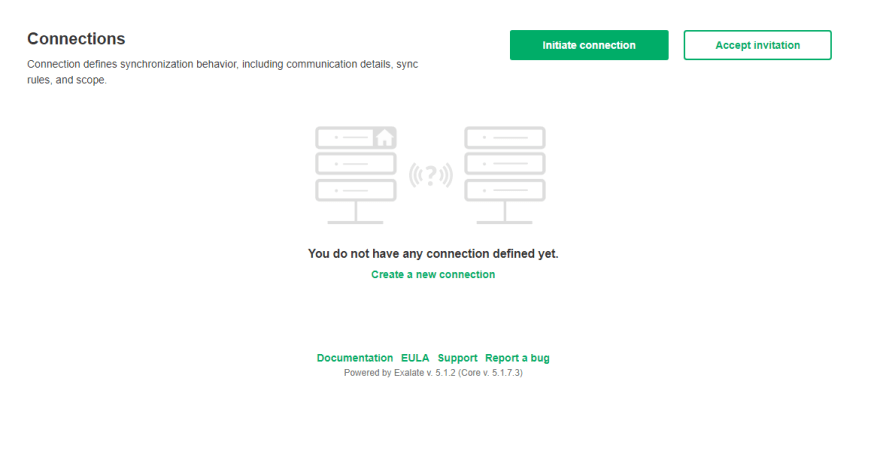
You can do the next steps from either side. I’ll use Zendesk here. Click the Exalate icon in the left side menu, then click ‘Connections’.
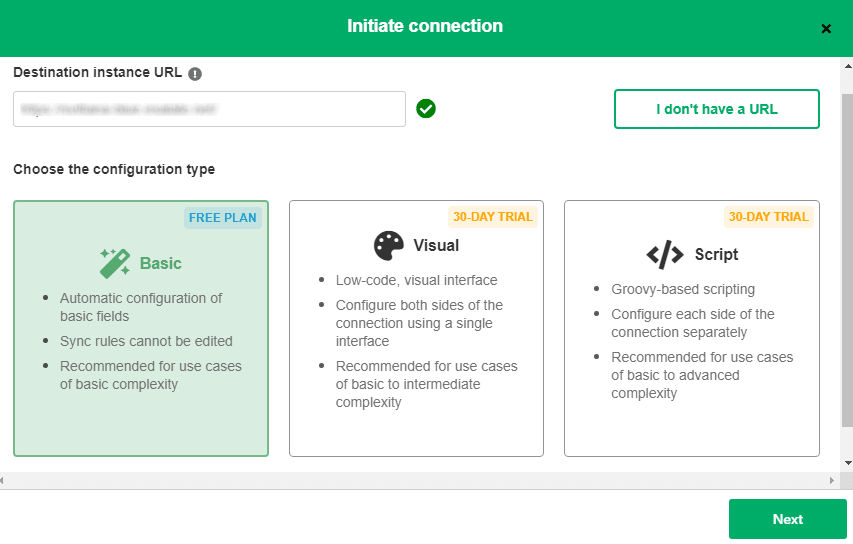
On the connections screen, click the ‘Initiate Connection’ button. Paste the address of your Jira instance into the ‘Destination instance URL’ field. Exalate will now check your Jira instance to make sure it is installed there too.
Then it will present you with several options.
The basic more (Free Plan) lets you create connections with everything configured automatically. That’s a great way to test Exalate out. The more advanced plans offer a visual and a scripting mode. These let you choose what is shared, and the conditions under which sharing takes place.
In visual mode, you can do this using an intuitive, easy-to-use interface. And in scripting mode, you use code. Visual mode is easier, but scripting mode lets you add more advanced rules.
I’ll use the basic mode for now, but will discuss the others briefly in the next steps.
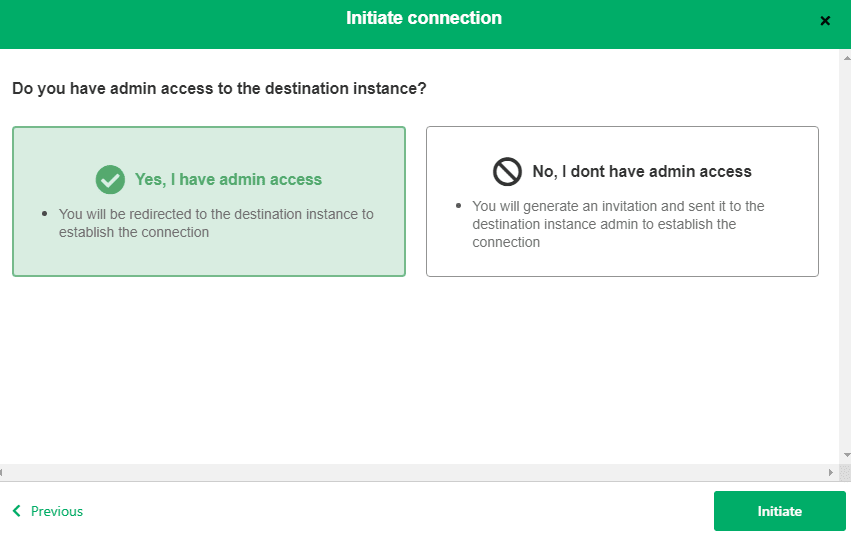
If you choose ‘basic’ and click next, Exalate will ask if you have admin access to the other side of the connection. If so, you’ll be sent there to activate it. You need to pick a project for the connection to work with. Exalate will use that project’s data.
If not, you’ll generate a code, which you can paste into Jira manually. You do that by going to the connection screen in Jira, clicking ‘Accept Invitation’ and following the steps that appear on-screen.
You can also optionally enter an issue to sync to test the connection is working.
Step 4 - Configure Your Connection to Share the Right Data
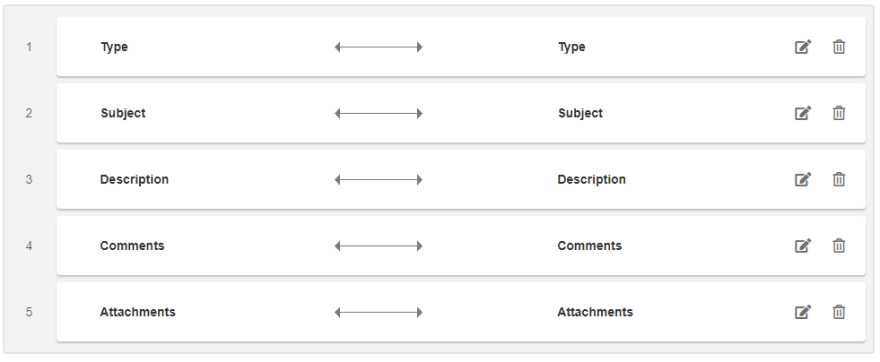
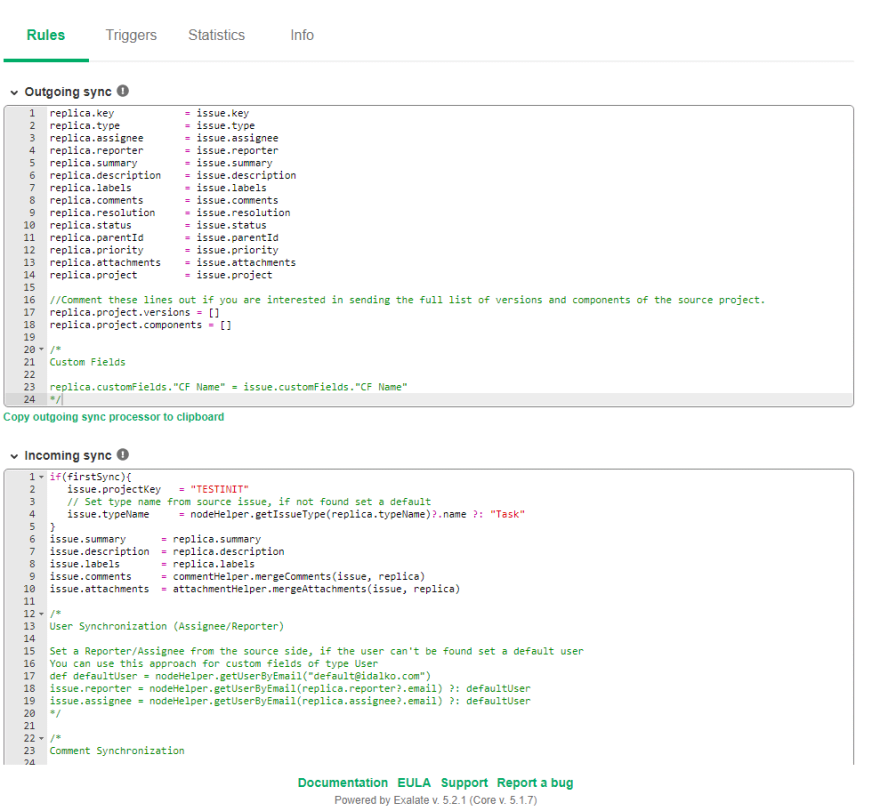
If you click the ‘edit connection’ button in the connections list, then the rules tab on the next screen, you can see how fields are synced. In visual mode, you can change these mappings, remove what you don’t want and add any others.
In script mode, you can create more complex rules. Programmers will appreciate the additional power this provides.
If you look at the existing rules, you’ll get an idea of how it works. Lines of code assign attributes from one side of the connection to the other.
If you don’t want an attribute synced, you can comment that line out. You can also match different attributes. Perhaps you want to add the priority to the notes, and set it yourself on the other side.
The outgoing rules essentially provide the other side of the connection with equivalent attributes. The incoming sync picks out a few attributes to use when creating new issues, based on the information it receives.
You can add items here, and, again, change anything you like. You could set the assignee to a specific person by adding this line:
Issue.assignee = “Peter”
You could also combine items, or use more advanced code to make decisions based on other attributes. The assignee could depend on the priority for example.
With script rules, you can get very specific and get the connection to do exactly what you want. So don’t be afraid to experiment!
Step 5 - Create Automated Synchronization Triggers
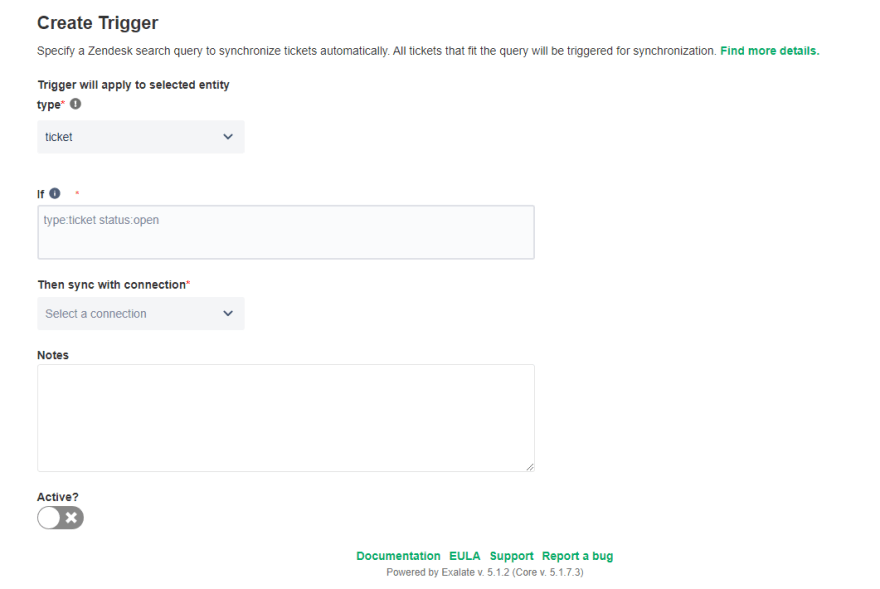
Click the ‘Create Trigger’ button on the ‘Triggers’ page and you can set a rule for syncing items. You can select the type of entity and the connection the trigger applies to. In the ‘if’ section you enter rules in Zendesk search syntax to pick out the tickets you want to share.
Set the ‘Active’ switch, then click ‘Create’ and your trigger will be ready. You can also add notes to help you keep track of things.
Step 6 - Start Syncing Issues and Tickets
Now that your instances are connected and sharing data, feel free to revisit the previous steps to refine your connection’s behaviour. You can add further connections, rules, and triggers and get Exalate doing more and more work for you.
Conclusion
Integrating platforms can multiply the benefits you get from them, and level up your business. And as you’ve learned today, it is very easy to do. A little work setting things up can save you a lot of time.
Exalate lets you share data reliably, while maintaining your teams’ autonomy. It is flexible enough to make changes and share the data you want, when you want.
As well as Jira and Zendesk, it works with several other platforms such as Azure DevOps, Github, and ServiceNow. Take a look and see how it will work for you.
This content originally appeared on DEV Community and was authored by Teja Bhutada
Teja Bhutada | Sciencx (2021-07-12T07:20:46+00:00) Jira Zendesk Integration: Sync Jira Issues and Zendesk Tickets. Retrieved from https://www.scien.cx/2021/07/12/jira-zendesk-integration-sync-jira-issues-and-zendesk-tickets/
Please log in to upload a file.
There are no updates yet.
Click the Upload button above to add an update.

