This content originally appeared on DEV Community and was authored by NikhilBelide
According to me every website should have a DARK MODE toggle.
As most of the time we as developers, spend hours and hours working in front of our screens, having a dark theme option to a website will reduce the amount of eye strain during long sessions especially during the night.
So, lets take a look at how to add dark-theme toggle to a website using HTML, CSS and Vanilla JavaScript.
Here, we'll also be using browser's local Storage to save the preferred state of the developer. This means that no matter how many times the page is reloaded or even closed, the browser will automatically switch the theme to dev's previous preferred state.
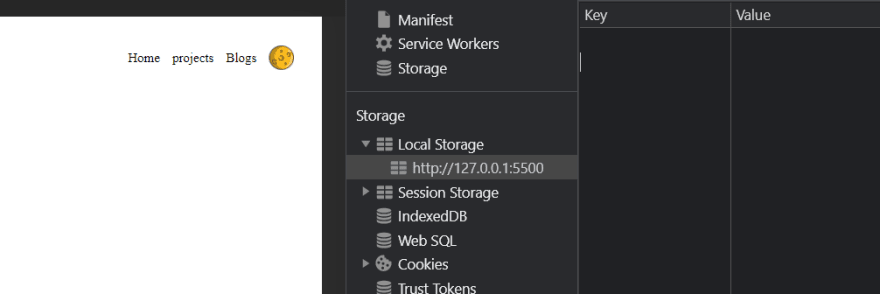
Below, is how the browsers' local storage looks like.
Before we get started lets discuss a few things about local storage. This basically stores data as key and value pairs and the value can be only be a string. So, even if you want to store an object, that needs to be converted to a string as well.
Here is an example another example where you will be able to see the key-value pairs.
For now we'll have only one value as string so we don't need to worry a lot about the conversions.
The site that we are going to make is going to be very light on HTML and CSS.
Here are the site previews at different theme states.
The HTML body tag is going to be as follows.
<div class="container">
        <!-- header -->
        <header>
            <h1>Logo</h1>
            <div id="right_data">
                <ul>
                    <li>Home</li>
                    <li>projects</li>
                    <li>Blogs</li>
                </ul>
                <img src="./moon.png" id="switcher">
            </div>
        </header>

        <!-- section data -->
        <section>
            <h1>Dark Theme Swicther.</h1>
            <p>Lorem ipsum dolor sit amet consectetur adipisicing. Neque,psam mollitia! Porro magnam earum corporis amet vero maiores in perspiciatis consectetur d</p>
        </section>

        <!-- footer -->
        <footer>
            <p>Lets Connect</p>
            <ul id="social">
                <li>Twitter</li>
                <li>LinkedIn</li>
                <li>Github</li>
            </ul>
        </footer>
    </div>
In the above HTML, all we did was create a static page with a Header, Footer and a section with some data.
The img tag with the id="switcher" and a source is the one that does our theme switching using JavaScript.
Now, lets look the CSS.
*{
box-sizing: border-box;
margin: 0;
padding: 0;
}
:root{
--primary-color:#fff;
--secondary-color:#000;
}
.dark_mode{
--primary-color:#000;
--secondary-color:#fff;
}
body{
background: var(--primary-color);
color: var(--secondary-color);
text-align: center;
}
.container{
margin: auto;
max-width: 700px;
display: flex;
justify-content: space-between;
flex-direction: column;
align-items: center;
height: 100vh;
padding: 20px;
}
h1,h2,p{
padding: 10px 20px;
}
li{
cursor: pointer;
list-style: none;
margin-right: 15px;
}
img,svg{
width: 30px;
cursor: pointer;
}
header{
height: 60px;
width: 100%;
display: flex;
justify-content:space-between;
align-items: center;
text-align: center;
}
header ul{
display: flex;
}
#right_data{
display: flex;
justify-content: space-between;
align-items: center;
margin-left: 10px;
}
footer{
width: 100%;
display: flex;
flex-direction: column;
justify-content:space-between;
align-items: center;
}
footer ul{
display: flex;
}
There are two things to look out for. One of them is :root which is CSS pseudo-class and it matches to the root element of the document which in our case is .
Inside the :root we declared the colors that we want to use on our website and the advantage of doing this is that changing the color value in :root will affect the whole body which means we don't need to go to each and every line and change color if we decide change our website color.
Here is an example where all I did was following in CSS.
:root{
    --primary-color:orange;
    --secondary-color:rgb(20, 20, 20);
}
The other is .dark_theme in CSS which we will be adding to our HTML body using JavaScript to change the colors only by a click.
Now, moving on to the important part, JavaScript.
First step is to select the image with id id="switcher" and pass it on a variable and then we need to add an event listener to it.
let the variable be theme_switcher.
Event Listener, as the name suggests will basically listen to an event like click, change, submit, mouse-over etc.
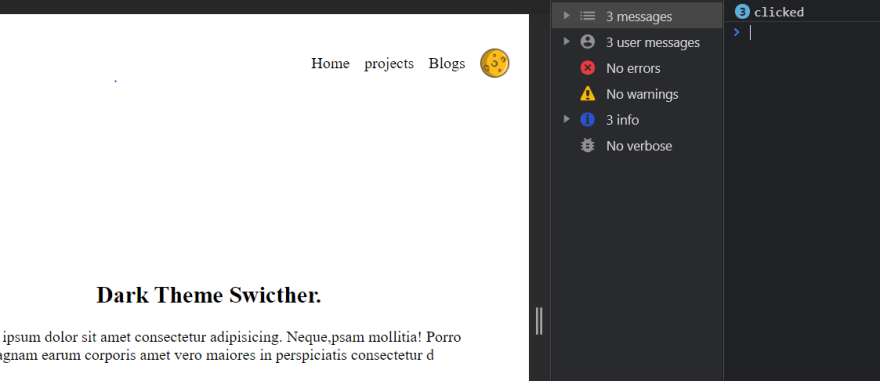
What we need is a click handler and when clicked we need to do something. For now lets console log "clicked".
//selecting *img* of *id="switcher"* from DOM.
let theme_switcher=document.querySelector("#switcher")
//adding event listener to it
theme_switcher.addEventListener("click",()=>{
        console.log("clicked");
})
As you see above, now the console shows clicked.
But what we want is to change the theme right and at the same time wee need to change the way the switcher (i.e the moon icon to sun icon) looks as well.
So, dark theme will have SUN icon and light theme will have MOON icon.
So, when click event is fired, we need to add .dark_theme class to the body tag so that the --primary- and --secondary color varibles value change.
To add a class to body, below is the code.
document.body.classList.add("dark_mode").
We can also use document.body.classList.toggle("dark_mode").
which toggles the class on body tag but for now lets stick with .add.
Now if we add, we need to remove it as well right? for that we use the below line of code.
document.body.classList.remove("dark_mode").
This is how the body tag looks on light theme
And this is how the body tag looks on dark theme.
See the difference in icon as well.
But how do we do that?
Remember the variable theme_switcher that we declared above? On DOM that is basically an image tag with an id switcher right? Correct.
We will change that img tags' source.How do we do it? Here is the code.
theme_switcher.setAttribute("src","./moon.png")
Notice the path or src inside it. It says moon.png while the HTML has sun.png. This is basically called changing the source.
setAttribute basically sets or to be precise, changes the src attribute of img tag to another image path when we click on the toggler.
Now lets look at the JavaScript code.
let theme_switcher=document.querySelector("#switcher")

theme_switcher.addEventListener("click",()=>{
    if(document.body.classList.contains("dark_mode")){

        document.body.classList.remove("dark_mode")
        theme_switcher.setAttribute("src","./moon.png")
    }else{

        document.body.classList.add("dark_mode")
        theme_switcher.setAttribute("src","./sun.png")
    }
})
So, what we are doing here is telling JavaScript that, whenever a click event is triggered then go and check if the classlist of body tag has dark_mode. If it has that class, It means that the dark theme is enabled. So, we will just remove the dark_mode class from the classlist of body and change the image tag source to sun icon.
If the classlist does not have any class called dark_mode which means that the theme is a light theme and since click event happened we switch to dark theme using *classList.add and then replace the img tag source to sun icon.
Lets clean the code a lttle bit using functions.
theme_switcher.addEventListener("click",()=>{
    if(document.body.classList.contains("dark_mode")){
        lightMode()
    }else{
        darkMode()
    }
})

function darkMode(){
    document.body.classList.add("dark_mode")
    theme_switcher.setAttribute("src","./sun.png")
}

function lightMode(){
    document.body.classList.remove("dark_mode")
    theme_switcher.setAttribute("src","./moon.png")
}
This is it. Now our toggle icons will do the theme switching whenever we do the click event.
Bu there are two drawbacks here. First is that if the page is refreshed the theme goes back to light and the other is that if you have multiple pages on your website then it's body tags will not have the class of dark mode.
By solving the first problem we can resolve the second issue as well. And we do that using local storage.
As I said before storage deals with key-value pairs. Let out key be theme_state and value be disabled_state which means that the website is at system default.
Now to save a key-value pair to the storage we use,
localStorage.setItem("theme_state", "disabled_state")
Here we are basically telling the browser that, take this key value pair and save them in storage.
The key is theme_state and the value is disabled_state
Now, there is no point in saving to local storage if we can't access it. So we access/ get the data using getItem(key) which will return us the value and we need to store this in a varible to know what the value is.
let storageValue=localStorage.getItem("theme_state")
This is the most important part.
Once we get the data from storage we need to change the value that key when click happens. But what if there our getItem command checks and finds out that the local storage is empty, which it will anyway for ever dev who runs this on his browser for the first time.
Then we need to set the local storage to default.
So, lets make some change to the code.
let theme_switcher=document.querySelector("#switcher")

let storageValue=localStorage.getItem("theme_state")
if(storageValue===null){
    localStorage.setItem("theme_state","disabled_state")
}else if(storageValue==="enabled_state"){
    darkMode()
}


theme_switcher.addEventListener("click",()=>{
    storageValue=localStorage.getItem("theme_state")
    if(storageValue==="disabled_state"){
        darkMode()
    }else{
        lightMode()
    }
})

function darkMode(){
    localStorage.setItem("theme_state","enabled_state")
    document.body.classList.add("dark_mode")
    theme_switcher.setAttribute("src","./sun.png")
}

function lightMode(){
    document.body.classList.remove("dark_mode")
    localStorage.setItem("theme_state","disabled_state")
    theme_switcher.setAttribute("src","./moon.png")
}
Oops! That's a lot of code. I know. Lets break it down.
So, before you even run this code, this is what the storage looked like.
Once you run the code, what it is doing in the start itself is that it is going and fetching the value of the key theme_state, but it wont find any since the storage is actually empty. So, it'll return null. If it returns null then we'll set the theme as default which in our case is light mode.
This is what the storage looks like now.
Ok, so now we have set the storage on default but we need to change the value when click event happens right? Correct.
theme_switcher.addEventListener("click",()=>{
    storageValue=localStorage.getItem("theme_state")
    if(storageValue==="disabled_state"){
        darkMode()
    }else{
        lightMode()
    }
})
That is the reason we wrote this code where we are telling the system that when a click happens go and get keys' value and then we compare it with a string "disabled_state". If the fetched value is equal to "disabled_state" we need to switch the theme to dark mode and we are doing that by calling the dark_mode() function and the function code is as follows.
function darkMode(){
    localStorage.setItem("theme_state","enabled_state")
    document.body.classList.add("dark_mode")
    theme_switcher.setAttribute("src","./sun.png")
}
Simple right. This is what the storage and the icon now look like.
Now in a similar fashion we need to change storage value to disabled_state when click event is fired once again and we are doing that by calling the light_mode() function and the function code is as follows.
function lightMode(){
    document.body.classList.remove("dark_mode")
    localStorage.setItem("theme_state","disabled_state")
    theme_switcher.setAttribute("src","./moon.png")
}
That is it.
Voila! Now you know how to create website with dark mode.
Few suggestions I'll make is that use .SVG format images/icons as they do look good even when compressed and are light in size. This will also result in faster website loading times.
Let me now your thoughts on dark mode and on this article as well.
Happy coding. ?
This content originally appeared on DEV Community and was authored by NikhilBelide
NikhilBelide | Sciencx (2021-07-27T21:23:55+00:00) How to add Dark Mode to a website.. Retrieved from https://www.scien.cx/2021/07/27/how-to-add-dark-mode-to-a-website/
Please log in to upload a file.
There are no updates yet.
Click the Upload button above to add an update.


