
This content originally appeared on DEV Community and was authored by Francisco Mendes
This was one of my current curiosities, however the purpose of this article is not to say that I think it is necessary to create your own router. If you have the same interest as I had this article is for you, but if you find it interesting you can read on.
According to the research I did, most of the articles I read had solutions that used a lot of hooks, some use a lot of regular expressions, and some use a mixture of both.
However in today's example I'm just going to use the hooks we are all familiar with (useEffect() and useState()). And another little thing that in a few seconds I'll explain.
So we're going to create two super popular components, Route and Link. The Route will be in charge of registering our route and rendering its component. The Link will be used to navigate between the different components.
Let's code
Let's assume we have four pages (Home.jsx, About.jsx, Contacts.jsx) similar to this one:
// @src/pages/Home.jsx

import React from "react";

const Home = () => {
  return <h1>Home Page</h1>;
};

export default Home;
We can start working on our Route component:
// @src/components/Route.jsx

const Router = () => {
  // ...
};

export default Router;
We'll want to get two properties, the route path and the component we want to associate with the route:
// @src/components/Route.jsx

const Router = ({ path, component }) => {
  // ...
};

export default Router;
Then we'll import the useState() hook, which we'll create the current state state and its initial value will be the current website path. Like this:
// @src/components/Route.jsx

import { useState } from "react";

const Router = ({ path, component }) => {
  const [currentPath, setCurrentPath] = useState(window.location.pathname);
  // ...
};

export default Router;
Then we'll import the useEffect() hook without any independence to run only after rendering the component.
// @src/components/Route.jsx

import { useEffect, useState } from "react";

const Router = ({ path, component }) => {
  const [currentPath, setCurrentPath] = useState(window.location.pathname);
  useEffect(() => {
    // ...
  }, []);
  // ...
};

export default Router;
Within our useEffect() we will create a function that will be executed whenever the website navigation event (that we still have to create) is triggered. Which will make a mutation in the state of our current path with the current location.
// @src/components/Route.jsx

import { useEffect, useState } from "react";

const Router = ({ path, component }) => {
  const [currentPath, setCurrentPath] = useState(window.location.pathname);
  useEffect(() => {
    const onLocationChange = () => {
      setCurrentPath(window.location.pathname);
    };
    // ...
  }, []);
  // ...
};

export default Router;
Now whenever the navigation event occurs, which we'll call "navigate", we'll execute our function.
// @src/components/Route.jsx

import { useEffect, useState } from "react";

const Router = ({ path, component }) => {
  const [currentPath, setCurrentPath] = useState(window.location.pathname);
  useEffect(() => {
    const onLocationChange = () => {
      setCurrentPath(window.location.pathname);
    };
    window.addEventListener("navigate", onLocationChange);
    // ...
  }, []);
  // ...
};

export default Router;
In our useEffect(), now we just need to clean it up, removing the event listener that was attached.
// @src/components/Route.jsx

import { useEffect, useState } from "react";

const Router = ({ path, component }) => {
  const [currentPath, setCurrentPath] = useState(window.location.pathname);
  useEffect(() => {
    const onLocationChange = () => {
      setCurrentPath(window.location.pathname);
    };
    window.addEventListener("navigate", onLocationChange);
    return () => window.removeEventListener("navigate", onLocationChange);
  }, []);
  // ...
};

export default Router;
Finally, just do conditional rendering on the component, if the current path is equal to the component's path, we will render the component.
// @src/components/Route.jsx

import { useEffect, useState } from "react";

const Router = ({ path, component }) => {
  const [currentPath, setCurrentPath] = useState(window.location.pathname);
  useEffect(() => {
    const onLocationChange = () => {
      setCurrentPath(window.location.pathname);
    };
    window.addEventListener("navigate", onLocationChange);
    return () => window.removeEventListener("navigate", onLocationChange);
  }, []);
  return currentPath === path ? component() : null;
};

export default Router;
With the Route component finished, we can start working on our Link. One of the props we need out of the box is children, because we're going to want to pass text to Link.
// @src/components/Link.jsx

import React from "react";

const Link = ({ children }) => {
  return (
    <a>
      {children}
    </a>
  );
};

export default Link;
However, another prop we will need is the to that will be assigned to the href.
// @src/components/Link.jsx

import React from "react";

const Link = ({ to, children }) => {
  return (
    <a href={to}>
      {children}
    </a>
  );
};

export default Link;
Then we will need to create a function to avoid rendering the page entirely. Which will then be added to React's onClick event.
// @src/components/Link.jsx

import React from "react";

const Link = ({ to, children }) => {
  const preventReload = (event) => {
    event.preventDefault();
    // ...
  };
  return (
    <a href={to} onClick={preventReload}>
      {children}
    </a>
  );
};

export default Link;
Although we have solved the problem of the complete reloading of the page, we now have another problem, now it is not possible to navigate this way.
However, this issue can be resolved using the PopState event, which is an event that fires whenever the window's history changes. And let's call this event "navigate". Like this:
// @src/components/Link.jsx

import React from "react";

const Link = ({ to, children }) => {
  const preventReload = (event) => {
    event.preventDefault();
    window.history.pushState({}, "", to);
    const navigationEvent = new PopStateEvent("navigate");
    window.dispatchEvent(navigationEvent);
  };
  return (
    <a href={to} onClick={preventReload}>
      {children}
    </a>
  );
};

export default Link;
Now with both components finished, we can create a Navbar using only the Link component:
// @src/components/Navbar.jsx

import React from "react";

import Link from "./Link";

const Navbar = () => {
  return (
    <nav>
      <ul>
        <li>
          <Link to="/">Home</Link>
        </li>
        <li>
          <Link to="/about">About</Link>
        </li>
        <li>
          <Link to="/contacts">Contacts</Link>
        </li>
      </ul>
    </nav>
  );
};

export default Navbar;
Now we can go to our App.jsx and register our routes using the Route component, in the same way we can import our Navbar to be available globally in our app.
// @src/App.jsx

import React from "react";

import Route from "./components/Route";
import Home from "./pages/Home";
import About from "./pages/About";
import Contacts from "./pages/Contacts";
import Navbar from "./components/Navbar";

const App = () => {
  return (
    <>
      <Navbar />
      <Route path="/" component={Home} />
      <Route path="/about" component={About} />
      <Route path="/contacts" component={Contacts} />
    </>
  );
};

export default App;
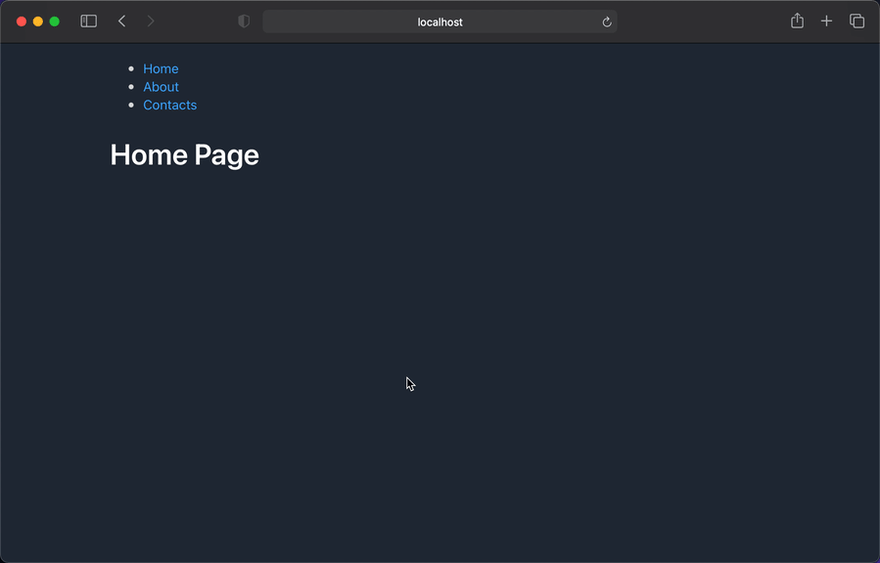
This way you should have a similar application with the following:
Conclusion
As always, I hope you found it interesting. If you noticed any errors in this article, please mention them in the comments. ✏️
Hope you have a great day! ? ?
This content originally appeared on DEV Community and was authored by Francisco Mendes
Francisco Mendes | Sciencx (2021-08-05T20:55:32+00:00) How to Create Your Own React Router. Retrieved from https://www.scien.cx/2021/08/05/how-to-create-your-own-react-router/
Please log in to upload a file.
There are no updates yet.
Click the Upload button above to add an update.