This content originally appeared on DEV Community and was authored by DEV Community
Goal: Create a simple way for contextual guides to be shown to users while using Wagtail.
Why: Wagtail's UI is quite intuitive, however, when using anything for the first time it is great to have a bit of help.
How: We want to provide a way for these guides to be maintained by the admin users (avoiding hard-coded content), they should be simple to create and be shown on specific pages when available.
Implementation Overview
- Each
guidewill be able to be mapped to a page within the admin. - Each
guidewill be able to have one or more steps with basic text content and the option to align a step with a UI element. - If a guide is available for the current page it will be highlighted in the menu. If no guide is available for the current page the menu will simply load a listing of all guides.
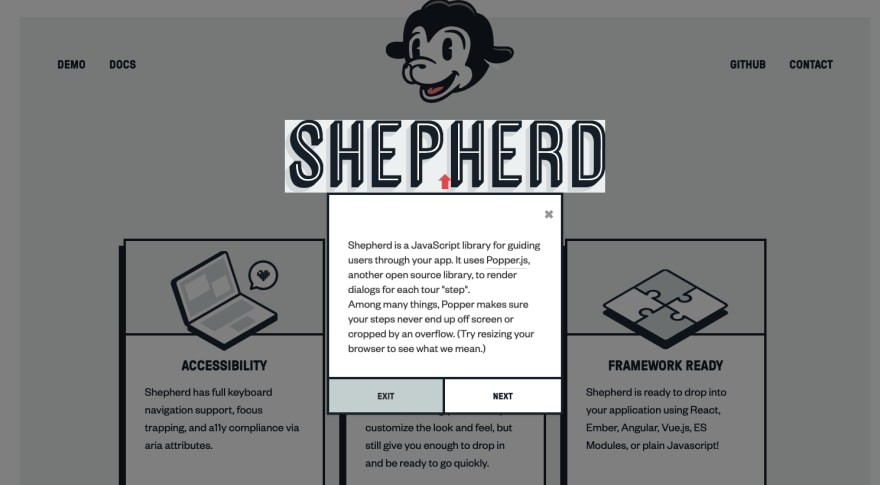
- Shepherd.js will be used to present the UI steps in an interactive way, this is a great JS library that allows a series of 'steps' to be declared that takes the user through a tour as a series of popovers, some steps can be aligned to an element in the UI and that element will be highlighted.
- Wagtail
modelAdminandhookswill be used to add the customisation. - We can leverage content from the Editor's guide to Wagtail for some of the initial guides.
Versions
- Django 3.2
- Wagtail 2.14
- Shepherd.js 8.3.1
Tutorial
0. Before you start
- It is assumed that you will have a Wagtail application running, if not you can use the Wagtail Bakery Demo as your starting point.
- It is assumed you will have a basic knowledge of Django and Wagtail and are comfortable with creating Django Models and Python Classes.
- It is assumed you have a basic knowledge of Javascript and CSS, you can copy & paste the code but it is good to understand what is happening.
1. Create the guide app
- Use the Django
startappcommand to create a new app'guide'which will contain all the new models and code for this feature. - Run
django-admin startapp guide - Update the settings
INSTALLED_APPSwith the newguideapp created - Run the initial migration
./manage.py makemigrations guide
INSTALLED_APPS = [
  # ...
  'guide',
  # ... wagtail & django items
]
Cross-check (before you continue)
- You should have a new app folder
guidewith models, views, etc. - You should be able to run the app without errors.
2. Create the model
- We will create two new models;
GuideandGuideStep. - Where
Guidecontains a title (for searching), a URL path (to determine what admin UI page it should be shown on) and links to one or more steps. We want to provide the user with a way to order the steps, even re-order them later. - In the
Guidewe are using theedit_handlerto build up a tabbed UI so that some fields will be separate. - Where
GuideStepcontains a title, text and an optional element selector. The data needed is based on the options that can be passed to the Shepherd.jssteps. - This code is based on the Inline Panels and Model Clusters instructions in the Wagtail docs.
- After creating the models, remember to run migrations & migrate
/manage.py makemigrations&/manage.py migrate.
# guide/models.py
from django.db import models

from modelcluster.fields import ParentalKey
from modelcluster.models import ClusterableModel

from wagtail.admin.edit_handlers import (
    FieldPanel,
    InlinePanel,
    ObjectList,
    TabbedInterface,
)
from wagtail.core.models import Orderable


class GuideStep(models.Model):
    """
    Each step is a model to represent the step used by
    https://shepherdjs.dev/docs/Step.html
    This is an abstract model as `GuideRelatedStep` will be used for the actual model with a relation
    """

    title = models.CharField(max_length=255)
    text = models.CharField(max_length=255)
    element = models.CharField(max_length=255, blank=True)

    panels = [
        FieldPanel("title"),
        FieldPanel("text"),
        FieldPanel("element"),
    ]

    class Meta:
        abstract = True


class GuideRelatedStep(Orderable, GuideStep):
    """
    Creates an orderable (user can re-order in the admin) and related 'step'
    Will be a many to one relation against `Guide`
    """

    guide = ParentalKey("guide.Guide", on_delete=models.CASCADE, related_name="steps")


class Guide(ClusterableModel):
    """
    `ClusterableModel` used to ensure that this model can have orderable relations
    using the modelcluster library (similar to ForeignKey).
    edit_handler
    """

    title = models.CharField(max_length=255)
    # steps - see GuideRelatedStep
    url_path = models.CharField(max_length=255, blank=True)

    content_panels = [
        FieldPanel("title"),
        InlinePanel("steps", label="Steps", min_num=1),
    ]

    settings_panels = [
        FieldPanel("url_path"),
    ]

    edit_handler = TabbedInterface(
        [
            ObjectList(content_panels, heading="Content"),
            ObjectList(settings_panels, heading="Settings"),
        ]
    )
Cross-check (before you continue)
- You should have a new file
guide/migrations/001_initial.pywith your migration. - You should be able to run the app without errors.
3. Add the hooks for the modelAdmin
- Using the
modelAdminsystem we will create a basic admin module for ourGuidemodel, this code is based on the modelAdmin example in the docs. - Using
modelAdminwill set up a new menu item in the sidebar by adding the code below to a new filewagtail_hooks.py. - Note that we have turned ON
inspect_view_enabled, this is so that a read-only view of each guide is available and it also ensures that non-editors of this model can be given access to this data, these permissions are checked for showing the menu item also. - Remember to give all users permission to 'inspect' Guides (otherwise the menu will not show).
- It would be good to now add at least one Guide with the following values.
- Title: Dashboard
- URL Path: /admin/ **(on the settings tab*)*
- Step 1:
  - Title: Dashboard
  - Text: Clicking the logo returns you to your Dashboard
  - Element: a.logo
- Step 2:
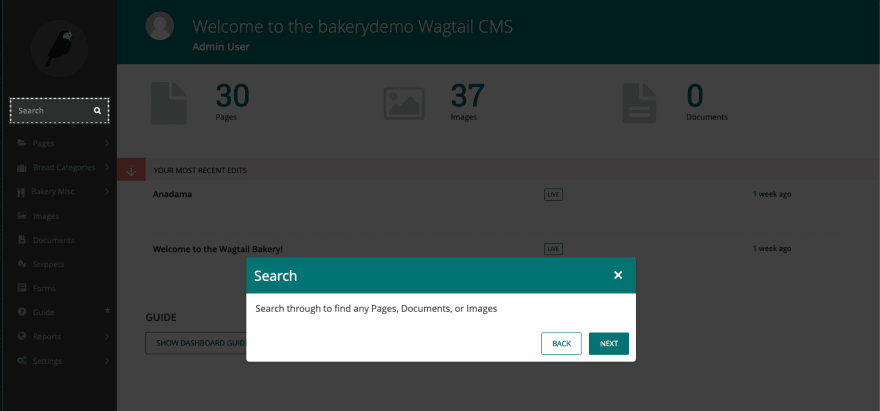
  - Title: Search
  - Text: Search through to find any Pages, Documents, or Images
  - Element: .nav-search > div
- Step 3:
  - Title: Explorer Menu (Pages)
  - Text: Click the Pages button in the sidebar to open the explorer. This allows you to navigate through the sections of the site.
  - Element: .menu-item[data-explorer-menu-item]
- Step 4:
  - Title: Done
  - Text: That's it for now, keep an eye out for the Help menu item on other pages.
  - Element: (leave blank)
# guide/wagtail_hooks.py
from wagtail.contrib.modeladmin.options import ModelAdmin, modeladmin_register

from .models import Guide


class GuideAdmin(ModelAdmin):
    menu_label = "Guide"
    model = Guide
    menu_icon = "help"
    menu_order = 8000
    list_display = ("title", "url_path")
    search_fields = ("title", "url_path")
    inspect_view_enabled = True


modeladmin_register(GuideAdmin)
Cross-check (before you continue)
- You should now see a menu item 'Guide' in the left sidebar within Wagtail admin.
- You should be able to log in as a non-admin user and still see this sidebar menu item.
4. Customise the Guide menu item
- Our goal now is to create a custom
MenuItem, this is a Wagtail class that is used to generate the content for each sidebar menu item. - Instead of extending the class
from wagtail.admin.menu import MenuItemwe will be using the classfrom wagtail.contrib.modeladmin.menus import ModelAdminMenuItem. This is because theModelAdminMenuItemcontains some specificModelAdminlogic we want to keep. - Each
MenuItemhas a methodget_contextwhich provides the template context to themenu_item.htmltemplate. - This template accepts
attr_stringandclassnameswhich can be leveraged to inject content.
4a. Add a method to the Guide model
- This method
get_data_for_requestwill allow us to find the firstGuideinstance where the URL path of the request aligns with theurl_pathin the guide. - For example - if a Guide is created with the URL path '/admin/images/' then we want to return data about that when we are on that page in the admin. If a Guide is created with the path '/admin/images/#/' then we want the guide to be found whenever is editing any image (note the use of the hash).
-
path_to_match = re.sub('[\d]+', '#', request.path)will take the current request path (e.g./admin/images/53/) and convert it to one where any numbers are replaced with a hash (e.g./admin/images/#/), this is a simple way to allow fuzzy URL matching. - The data structure returned is intentionally creating a JSON string so it is easier to pass into our model as a data-attribute.
# guide/models.py

class Guide(ClusterableModel):
    #...

    @classmethod
    def get_data_for_request(cls, request):
        """
        Returns a dict with data to be sent to the client (for the shepherd.js library)
        """

        path_to_match = re.sub("[\d]+", "#", request.path)

        guide = cls.objects.filter(url_path=path_to_match).first()

        if guide:
            steps = [
                {
                    "title": step.title,
                    "text": step.text,
                    "element": step.element,
                }
                for step in guide.steps.all()
            ]

            data = {"steps": steps, "title": guide.title}

            value_json = json.dumps(
                data,
                separators=(",", ":"),
            )

            data["value_json"] = value_json

            return data

        return None
4b. Create a menu.py file
- This will contain our new menu class, we could put this code in the
wagtail_hooks.pyfile but it is nice to isolate this logic if possible. - Here we override the
get_contextmethod for theMenuItemand first call the super'sget_contextmethod and then add two items. - Firstly, we add
attr_stringand build adata-helpattribute which will contain the JSON output of our guide (if found). Note: There are many ways to pass data to the client, this is the simplest but it is not perfect. - Secondly, we extend the
classnamesitem with ahelp-availableclass if we know we have found a matching Guide for the current admin page. - Remember to
return context, otherwise you will just get a blank menu item.
# guide/menu.py

from django.utils.html import format_html

from wagtail.contrib.modeladmin.menus import ModelAdminMenuItem

from .models import Guide


class GuideAdminMenuItem(ModelAdminMenuItem):
    def get_context(self, request):
        context = super().get_context(request)

        data = Guide.get_data_for_request(request)

        if data:

            context["attr_string"] = format_html('data-help="{}"', data["value_json"])
            context["classnames"] = context["classnames"] + " help-available"

        return context
4c. Update the Guide admin to use the custom menu item
- By overriding the
get_menu_itemwe can leverage our customGuideAdminMenuIteminstead of the default one.
# guide/wagtail_hooks.py
from wagtail.contrib.modeladmin.options import ModelAdmin, modeladmin_register

from .menu import GuideAdminMenuItem # added
from .models import Guide

class GuideAdmin(ModelAdmin):
    # ...
    def get_menu_item(self, order=None):
        """
        Utilised by Wagtail's 'register_menu_item' hook to create a menu item
        to access the listing view, or can be called by ModelAdminGroup
        to create a SubMenu
        """
        return GuideAdminMenuItem(self, order or self.get_menu_order())
Cross-check (before you continue)
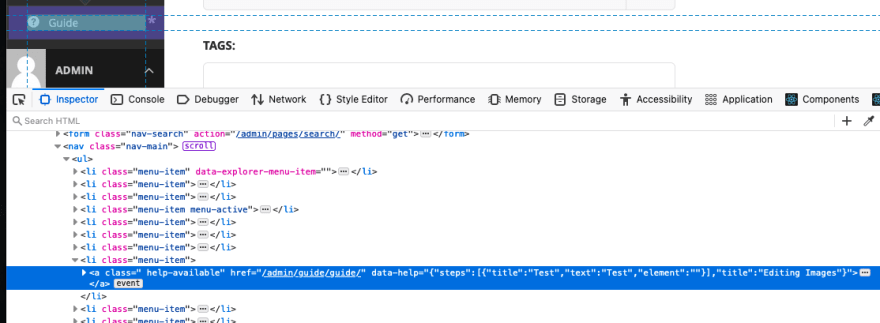
- When you load the Dashboard page in the Wagtail admin, you should be able to inspect (browser developer tools) the 'Guide' menu item and see the classes & custom data-help attribute.
5. Adding JS & CSS
- There is a fair bit to unpack in this step, but the goal is to provide the right
optionsto the Shepherd.js library and when the user clicks the menu item button, instead of going to the Guide listing it should trigger the tour.
5a. Importing the shepherd.js library
- In our
wagtail_hooks.pyfile we will leverage theinsert_global_admin_jshook to add two files, the first of which is a CDN version of the npm package. - Using a hosted CDN version of the NPM package via https://www.jsdelivr.com/package/npm/shepherd.js saves time but it may not be suitable for your project.
- In the code snippet below we will also use Wagtail's static system to add a js file, however, the code for that file is in step 5c.
-
Cross-check (before you continue) Remember to restart your dev server, once done you should be able to open up the browser console and type
Shepherdto see a value. This means the CDN has worked, you can also look at the network tab to check it gets loaded.
#guide/wagtail_hooks.py

from django.templatetags.static import static # added
from django.utils.html import format_html # added

from wagtail.contrib.modeladmin.options import ModelAdmin, modeladmin_register
from wagtail.core import hooks # added

# .. other imports & GuideAdmin

@hooks.register("insert_global_admin_js")
def global_admin_js():
    """
    Sourced from https://www.jsdelivr.com/package/npm/shepherd.js
    """
    return format_html(
        '<script src="{}"></script><script src="{}"></script>',
        "https://cdn.jsdelivr.net/npm/shepherd.js@8/dist/js/shepherd.min.js",
        static("js/shepherd.js"),
    )
5b. Adding the custom static CSS file
- The CSS code below contains all the base styles supplied with the Shepherd.js library with some tweaks to look a bit more like 'Wagtail', you can just use the CDN version via
https://cdn.jsdelivr.net/npm/shepherd.js@8/dist/css/shepherd.cssto save time. - It is important to note the styling
.menu-item .help-available::after- this is to add a small visual indicator of a*(star) when a known help item is available. - Cross-check (before you continue) Remember to restart your dev server when changing static files, once done you should be able to see that this CSS file was loaded in the network tab.
#guide/wagtail_hooks.py

# .. other imports & GuideAdmin + insert_global_admin_js

@hooks.register("insert_global_admin_css")
def global_admin_css():
    """
    Pulled from https://github.com/shipshapecode/shepherd/releases (assets)
    .button styles removed (so we can use Wagtail styles instead)
    """
    return format_html('<link rel="stylesheet" href="{}">', static("css/shepherd.css"))
/* guide/static/css/shepherd.css */
.shepherd-footer {
  border-bottom-left-radius: 5px;
  border-bottom-right-radius: 5px;
  display: flex;
  justify-content: flex-end;
  padding: 0 0.75rem 0.75rem;
}

.shepherd-footer .shepherd-button:last-child {
  margin-right: 0;
}

.shepherd-cancel-icon {
  background: transparent;
  border-radius: 0.25rem;
  border: none;
  color: inherit;
  font-size: 2em;
  cursor: pointer;
  font-weight: 400;
  margin: 0;
  padding: 0;
  transition: background-color 0.5s ease;
  width: 2.2rem;
  height: 2.2rem;
}

.shepherd-cancel-icon:hover {
  background-color: var(--color-primary-darker);
}

.shepherd-title {
  display: flex;
  font-size: 1.5rem;
  font-weight: 400;
  flex: 1 0 auto;
  margin: 0;
  padding: 0;
}

.shepherd-header {
  align-items: center;
  border-top-left-radius: 5px;
  border-top-right-radius: 5px;
  display: flex;
  justify-content: flex-end;
  line-height: 2em;
  padding: 0.75rem 0.75rem 0;
  margin-bottom: 0.25rem;
}

.shepherd-has-title .shepherd-content .shepherd-header {
  padding: 1em;
}

.shepherd-text {
  color: rgba(0, 0, 0, 0.75);
  font-size: 1rem;
  line-height: 1.3em;
  min-height: 4em;
  padding: 0.75em 1em;
}

.shepherd-text p {
  margin-top: 0;
}

.shepherd-text p:last-child {
  margin-bottom: 0;
}

.shepherd-content {
  border-radius: 5px;
  outline: none;
  padding: 0;
}

.shepherd-element {
  background: #fff;
  border-radius: 5px;
  box-shadow: 0 1px 4px rgba(0, 0, 0, 0.2);
  max-width: 50em;
  opacity: 0;
  outline: none;
  transition: opacity 0.3s, visibility 0.3s;
  visibility: hidden;
  width: 100%;
  z-index: 9999;
}

.shepherd-enabled.shepherd-element {
  opacity: 1;
  visibility: visible;
}

.shepherd-element[data-popper-reference-hidden]:not(.shepherd-centered) {
  opacity: 0;
  pointer-events: none;
  visibility: hidden;
}

.shepherd-element,
.shepherd-element *,
.shepherd-element :after,
.shepherd-element :before {
  box-sizing: border-box;
}

.shepherd-arrow,
.shepherd-arrow:before {
  position: absolute;
  width: 16px;
  height: 16px;
  z-index: -1;
}

.shepherd-arrow:before {
  content: "";
  transform: rotate(45deg);
  background: #fff;
}

.shepherd-element[data-popper-placement^="top"] > .shepherd-arrow {
  bottom: -8px;
}

.shepherd-element[data-popper-placement^="bottom"] > .shepherd-arrow {
  top: -8px;
}

.shepherd-element[data-popper-placement^="left"] > .shepherd-arrow {
  right: -8px;
}

.shepherd-element[data-popper-placement^="right"] > .shepherd-arrow {
  left: -8px;
}

.shepherd-element.shepherd-centered > .shepherd-arrow {
  opacity: 0;
}

.shepherd-element.shepherd-has-title[data-popper-placement^="bottom"]
  > .shepherd-arrow:before {
  background-color: #e6e6e6;
}

.shepherd-target-click-disabled.shepherd-enabled.shepherd-target,
.shepherd-target-click-disabled.shepherd-enabled.shepherd-target * {
  pointer-events: none;
}

.shepherd-target {
  outline: 4px dotted var(--color-input-focus);
  outline-offset: -2px;
}

.shepherd-modal-overlay-container {
  height: 0;
  left: 0;
  opacity: 0;
  overflow: hidden;
  pointer-events: none;
  position: fixed;
  top: 0;
  transition: all 0.3s ease-out, height 0ms 0.3s, opacity 0.3s 0ms;
  width: 100vw;
  z-index: 9997;
}

.shepherd-modal-overlay-container.shepherd-modal-is-visible {
  height: 100vh;
  opacity: 0.75;
  transition: all 0.3s ease-out, height 0s 0s, opacity 0.3s 0s;
}

.shepherd-modal-overlay-container.shepherd-modal-is-visible path {
  pointer-events: all;
}

.menu-item .help-available::after {
  content: "*";
}
5c. Adding the custom static JS file
- The full JS is below, the goal of this JS is to set up a Shepherd.js tour for every element found with the
data-helpattribute. - This data attribute will be parsed as JSON and if
stepsare found, the tour will be set up and the element will have a click listener attached to it to trigger the tour. - We have also set up some logic to ensure that the right buttons show for each possible state of a step (for example, the first step should only have a 'next' button).
- The Shepherd.js documentation contains information about each of the options passed in and these can be customised based on requirements.
- Cross-check (before you continue) Remember to restart your dev server when adding static files, once done you should be able to see that this JS file was loaded in the network tab.
// guide/static/js/shepherd.js
(() => {
  /* 1. set up buttons for each possible state (first, last, only) of a step */

  const nextButton = {
    action() {
      return this.next();
    },
    classes: "button",
    text: "Next",
  };

  const backButton = {
    action() {
      return this.back();
    },
    classes: "button button-secondary",
    secondary: true,
    text: "Back",
  };

  const doneButton = {
    action() {
      return this.next();
    },
    classes: "button",
    text: "Done",
  };

  /* 2. create a function that will maybe return an object with the buttons */

  const getButtons = ({ index, length }) => {
    if (length <= 1) return { buttons: [doneButton] }; // only a single step, no back needed
    if (index === 0) return { buttons: [nextButton] }; // first
    if (index === length - 1) return { buttons: [backButton, doneButton] }; // last
    return {};
  };

  /* 3. prepare the default step options */

  const defaultButtons = [backButton, nextButton];

  const defaultStepOptions = {
    arrow: false,
    buttons: defaultButtons,
    cancelIcon: { enabled: true },
    canClickTarget: false,
    scrollTo: { behavior: "smooth", block: "center" },
  };

  /* 4. once the DOM is loaded, find all the elements with the data-help attribute
     - for each of these elements attempt to parse the JSON into steps and title
     - if we find steps then initiate a `Shepherd` tour with those steps
     - finally, attach a click listener to the link so that the link will trigger the tour
   */

  window.addEventListener("DOMContentLoaded", () => {
    const links = document.querySelectorAll(".help-available[data-help]");

    // if no links found with data-help - return
    if (!links || links.length === 0) return;

    links.forEach((link) => {
      const data = link.dataset.help;

      // if data on data-help attribute is empty or missing, do not attempt to parse
      if (!data) return;

      const { steps = [], title } = JSON.parse(data);

      const tour = new Shepherd.Tour({
        defaultStepOptions,
        steps: steps.map(({ element, ...step }, index) => ({
          ...step,
          ...(element ? { attachTo: { element } } : {}),
          ...getButtons({ index, length: steps.length }),
        })),
        tourName: title,
        useModalOverlay: true,
      });

      link &&
        link.addEventListener("click", (event) => {
          event.preventDefault();
          tour.start();
        });
    });
  });
})();
Final Implementation
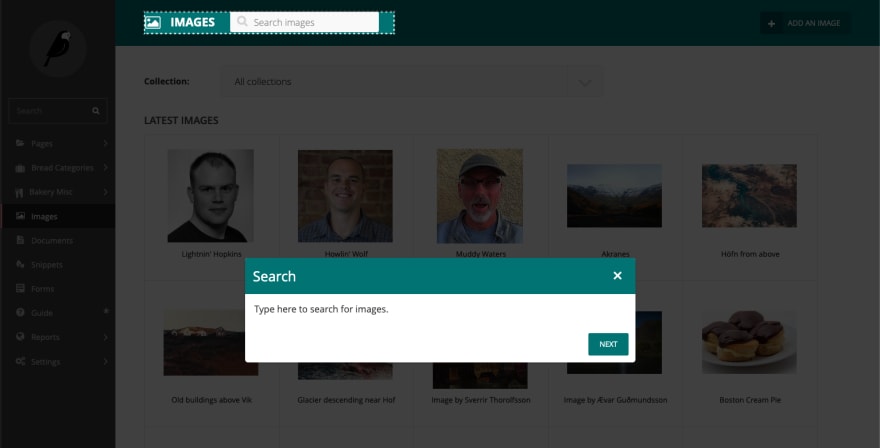
- There should now be a fully functional Tour trigger that is available on the Admin home (dashboard) page, the 'Guide' menu item should have a '*' to indicate help is available.
- When clicking this, it should trigger the tour based on the data added in step 3 above.
- You can see all the final code on github https://github.com/lb-/bakerydemo/tree/tutorial/guide-app/guide
Future Enhancement Ideas
- Having the same Menu Item trigger the guide AND show the guide listing is not ideal, as this could be confusing for users, plus it might be confusing to admins when they actually want to edit and cannot easily get to the guide listing (if there are lots of guides added).
- Make a dashboard panel available to new users if there is a matching guide available for that page, this has been implemented as a bonus step 6 below.
- Make the inspect view for Guide items show the full steps in a nice UI, as this will be a helpful resource, even without the interactive tour aspect.
- Have a way to track what users click on what guides, especially helpful for new users, maybe even provide feedback.
6. Add a Dashboard panel with a Guide trigger Bonus
- This is a rough implementation but it leverages the same logic in the custom
MenuItemto potentially render a homepage panel. - This code is based on the
construct_homepage_panelsWagtail docs. - Using
Guide.get_data_for_request(self.request)we can pull in a potential data object and if found, pass it to the generated HTML. - Note: We need to override the
__init__method to ensure this Panel class can be initialised with therequest.
# wagtail_hooks.py

# imports and other hooks...

class GuidePanel:
    order = 500

    def __init__(self, request):
        self.request = request

    def render(self):
        data = Guide.get_data_for_request(self.request)

        if data:
            return format_html(
                """
            <section class="panel summary nice-padding">
                <h2>Guide</h2>
                <div>
                    <button class="button button-secondary help-available" data-help="{}">Show {} Guide</button>
                </div>
            </section>
            """,
                data["value_json"],
                data["title"],
            )

        return ""


@hooks.register("construct_homepage_panels")
def add_guide_panel(request, panels):
    panels.append(GuidePanel(request))
This content originally appeared on DEV Community and was authored by DEV Community
DEV Community | Sciencx (2021-08-19T11:55:12+00:00) How to build an interactive guide for users in the Wagtail CMS admin. Retrieved from https://www.scien.cx/2021/08/19/how-to-build-an-interactive-guide-for-users-in-the-wagtail-cms-admin/
Please log in to upload a file.
There are no updates yet.
Click the Upload button above to add an update.


