This content originally appeared on Level Up Coding - Medium and was authored by Ishan Choudhary
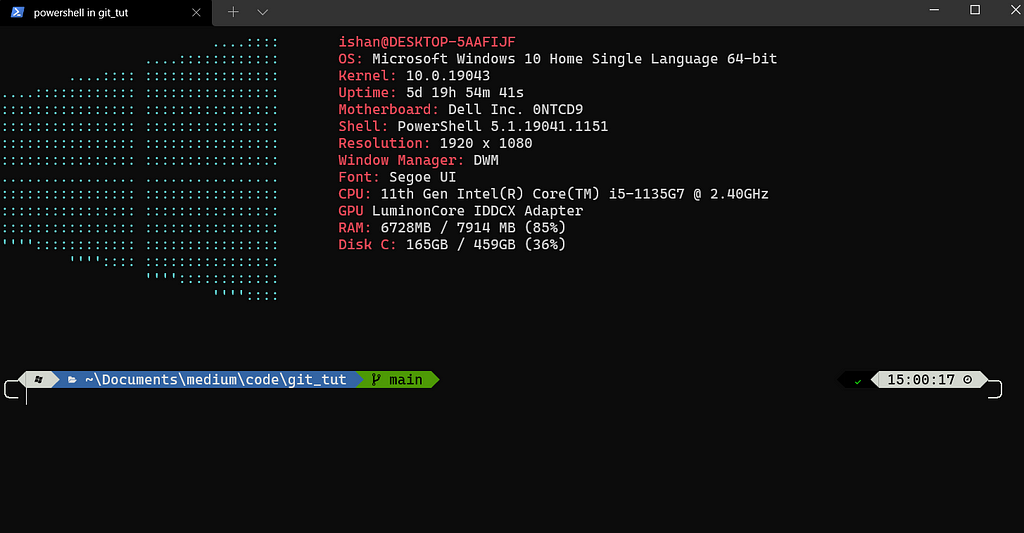
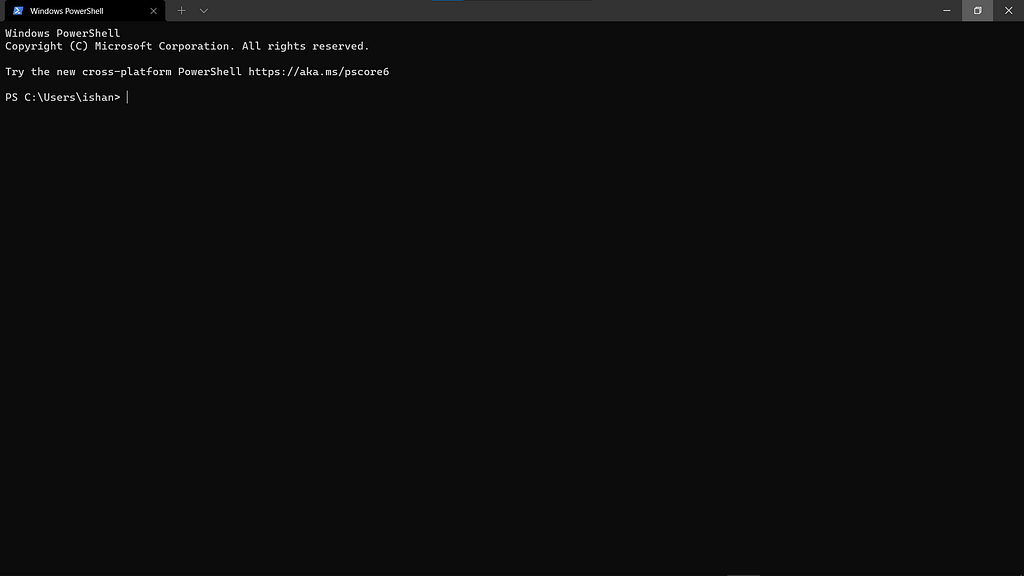
In today’s blog, I’ll be showing how you can customize your PowerShell to look much better. We’ll be changing it from this:

To this:
For this blog, you’ll need to install the windows terminal from Microsoft store, as we’ll be using it. It looks something like this:
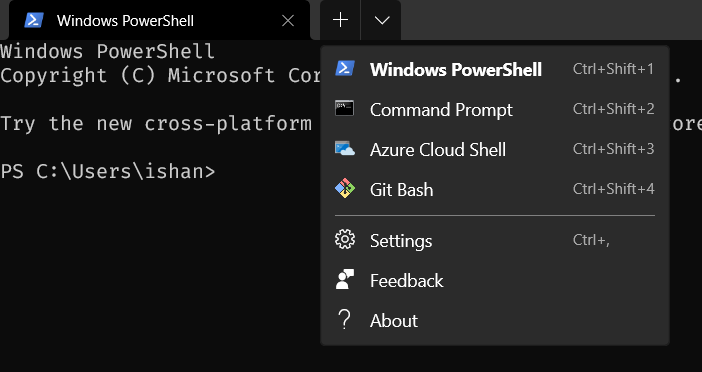
The windows terminal has a bunch of really cool features. Firstly, you can open not only powershell, but even command prompt and azure cloud shell. Additionally, you can also add in other consoles. For example, I added Git Bash.
Now lets get started. Firstly, if you have this message:
Windows PowerShell
Copyright (C) Microsoft Corporation. All rights reserved.
Try the new cross-platform PowerShell https://aka.ms/pscore6
coming on top, lets stop that from happening. Open the windows terminal, then press ‘Ctrl’ + ‘,’ to show the settings. Alternatively, you can click on the drop down arrow on top, and click on settings
Then click on ‘Open JSON file’:
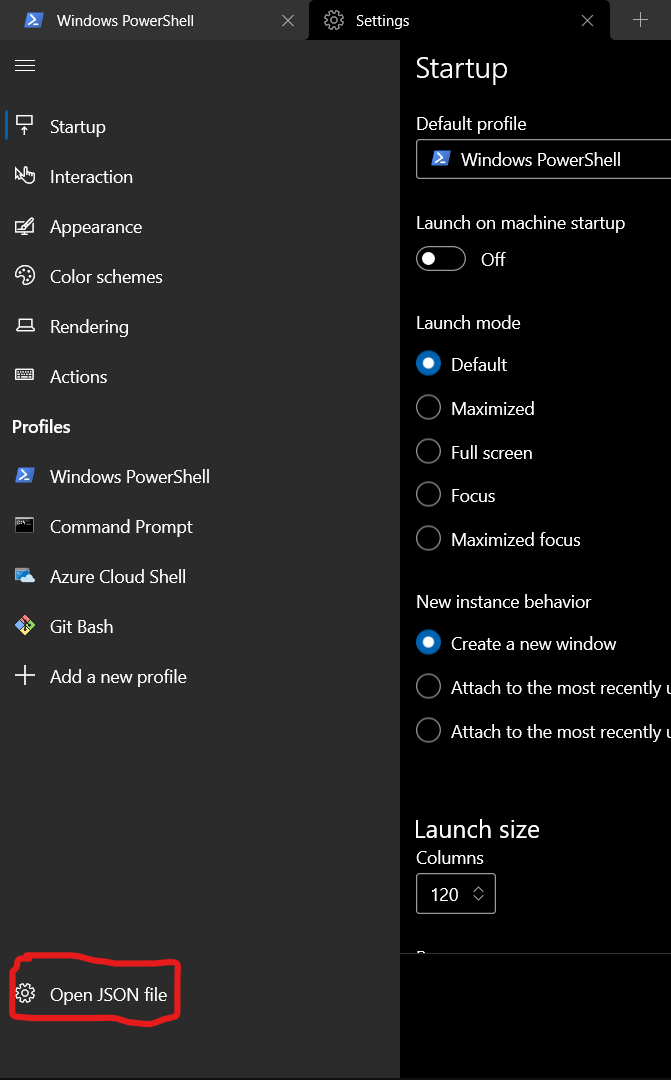
Settings.json should open up in your default text editor. For me, it is visual studio code:
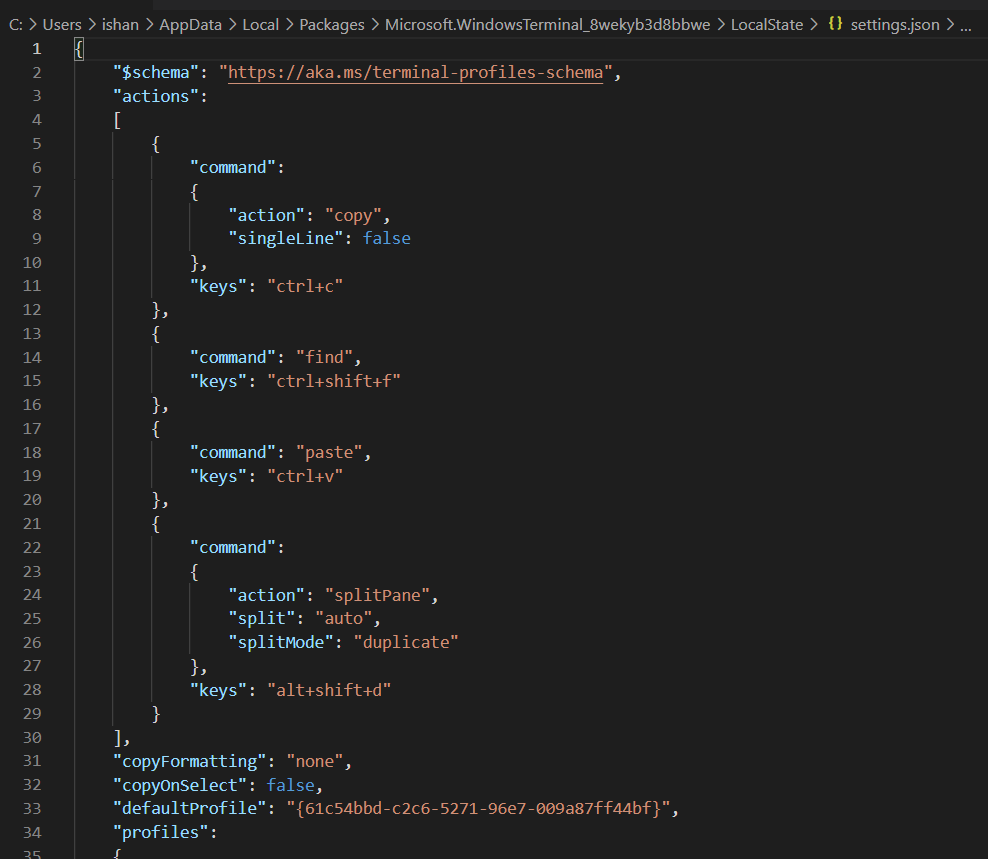
Navigate to the text “list”, it should be under “profiles”:
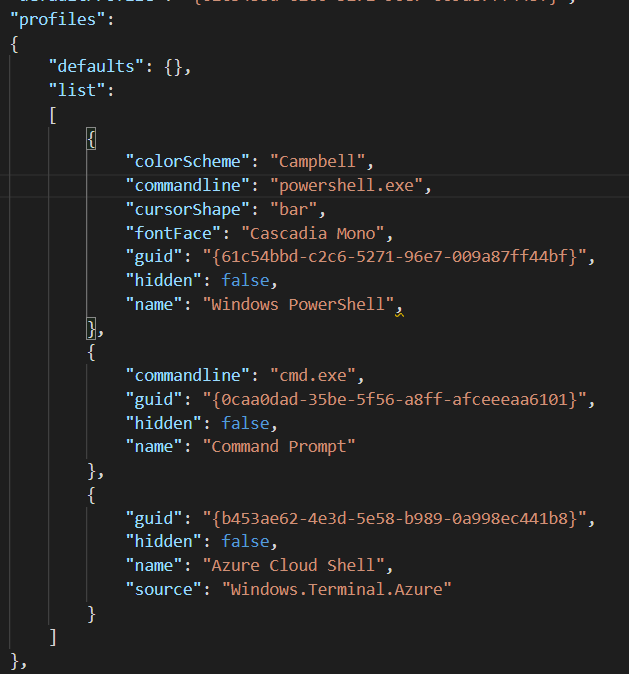
Replace powershell.exe by this:
powershell.exe -nolog
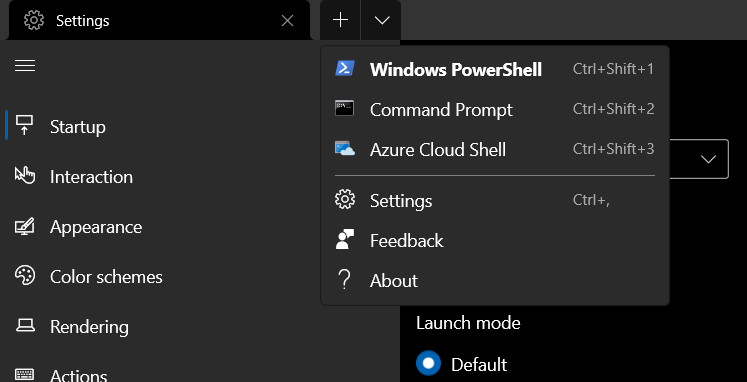
There is no need to restart the entire windows terminal. Just open another powershell tab, by clicking on the top drop down arrow and selecting powershell:
And the message will no longer come.

In the next step we’ll be installing and importing some modules. To do that, firstly we’ll need to change the Execution-Policy for our Current user. So the execution policy is kind of a security feature, that will allow only certain types of scripts to run. In our case, we want to change the execution policy of our ‘Current User’ to ‘Bypass’, meaning that the scripts that we install and run from our powershell, don’t have to be signed. To do that, close the windows terminal then run it as administrator:
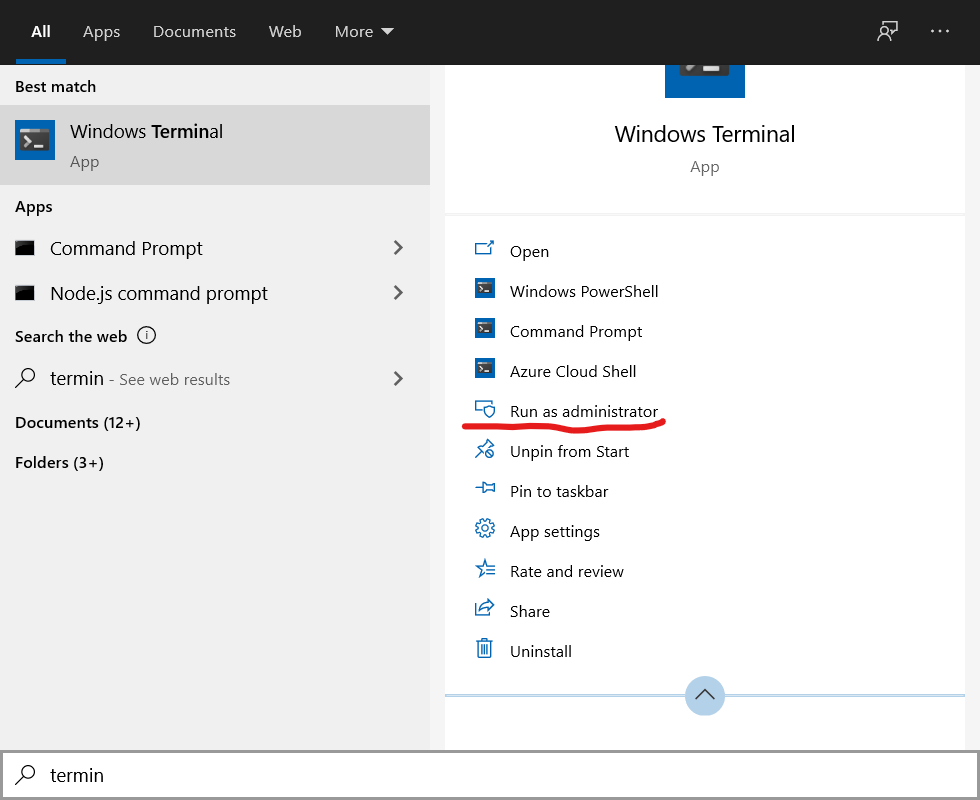
Then, type this command in your powershell window:
Get-ExecutionPolicy -Scope CurrentUser
You will either get “Undefined” or “AllSigned” or “RemoteSigned” or “Unrestricted”. So for me, it is:

To change the execution policy to “Bypass” we will simply write:
Set-ExecutionPolicy -Scope CurrentUser Bypass
It should run without any errors unless you are not a administrator. Now if you run:
Get-ExecutionPolicy -Scope CurrentUser
again, you will get “Bypass”:

Now to install the modules that we require. You can split screens in the new windows terminal like so:
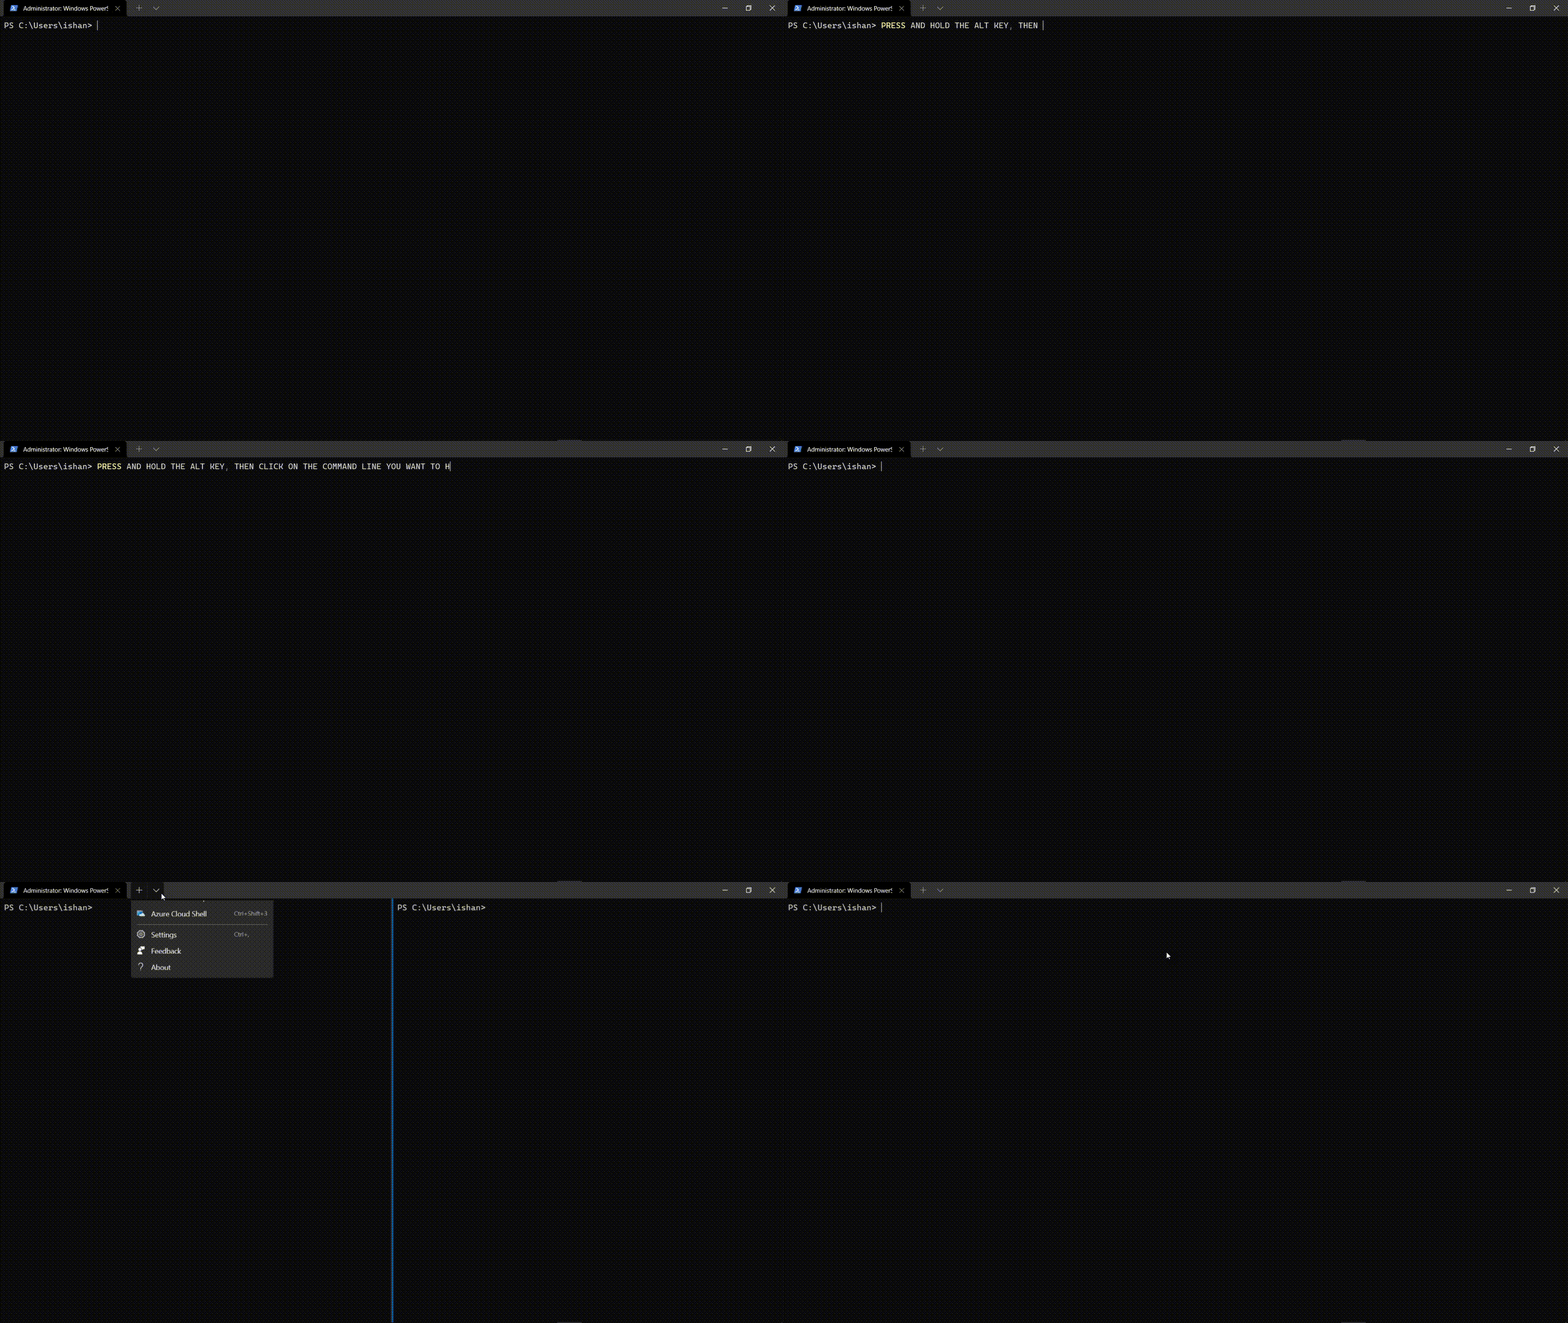
Or:
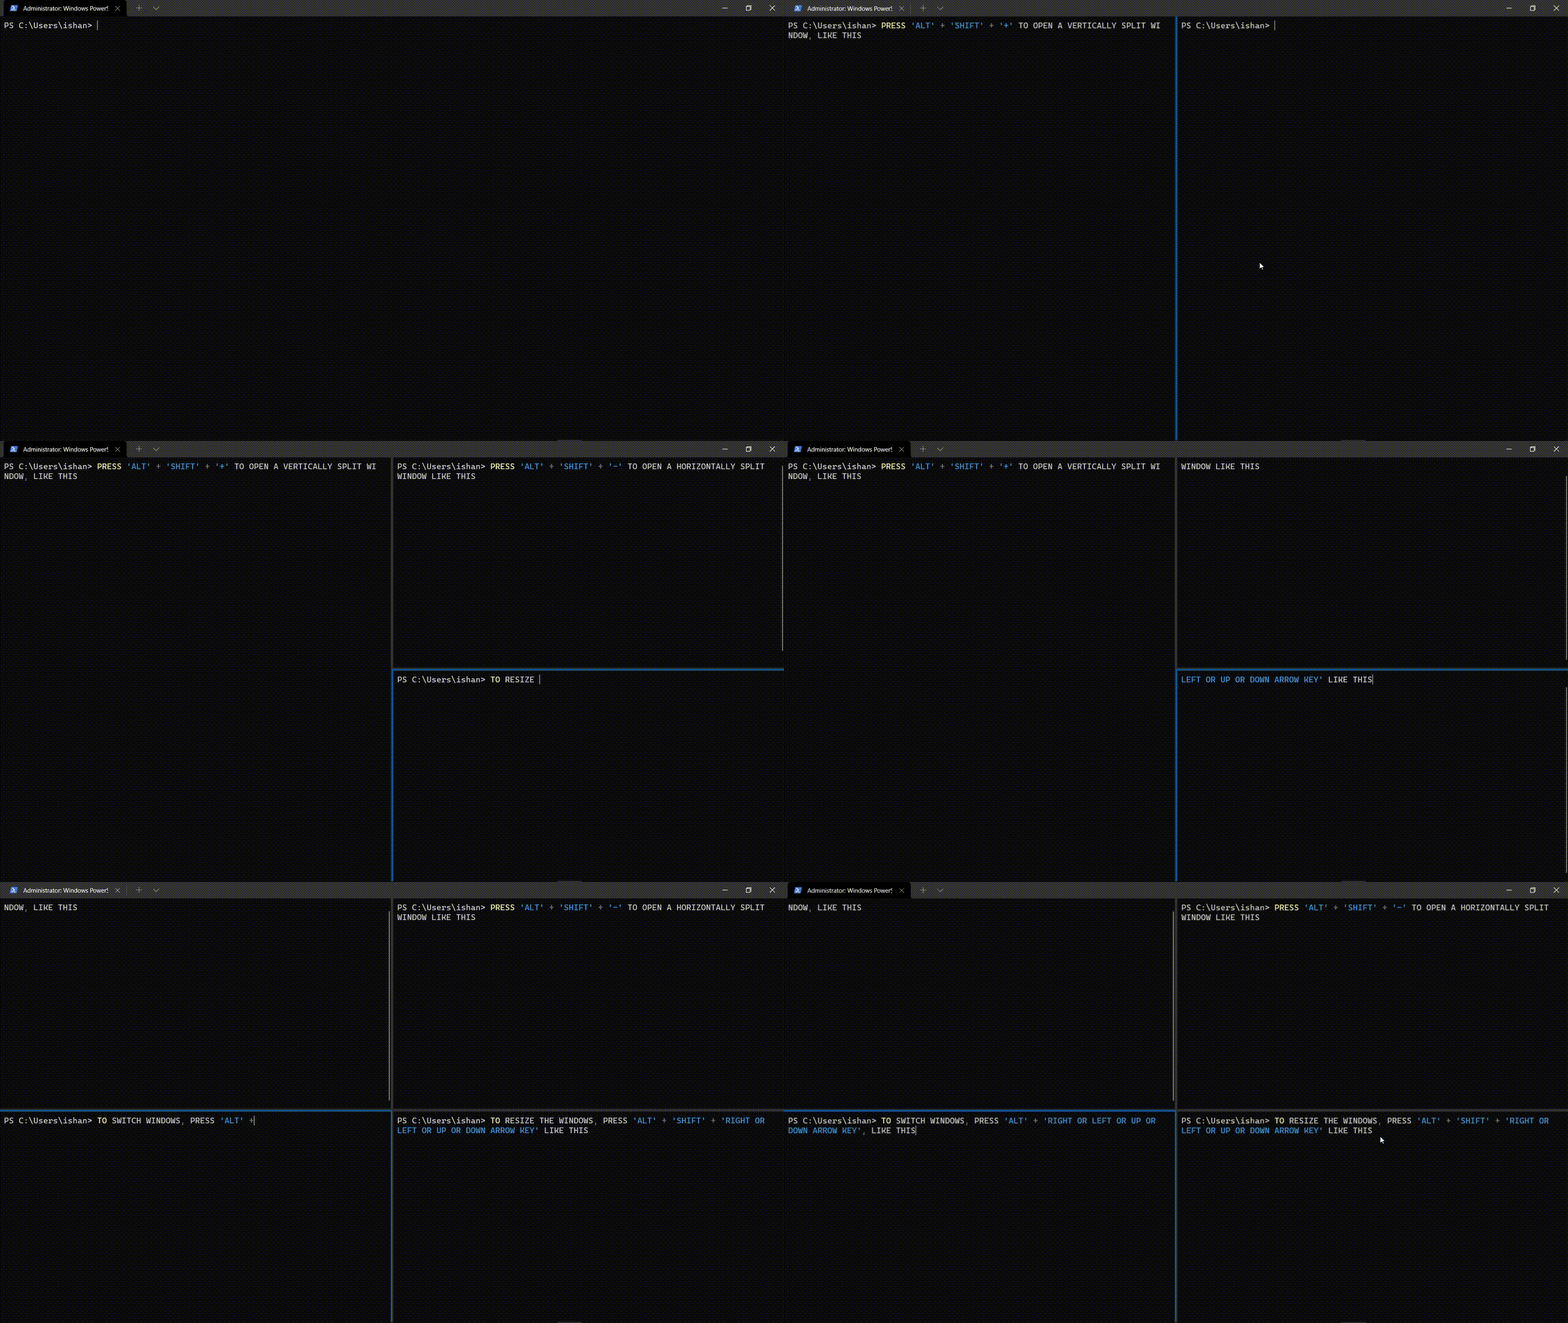
So this is just a quick feature. Now you can open three split terminals and run these three commands to install modules. Or you can simply run the commands after another:
Install-Module windows-screenfetch
Install-Module oh-my-posh
Install-Module posh-git
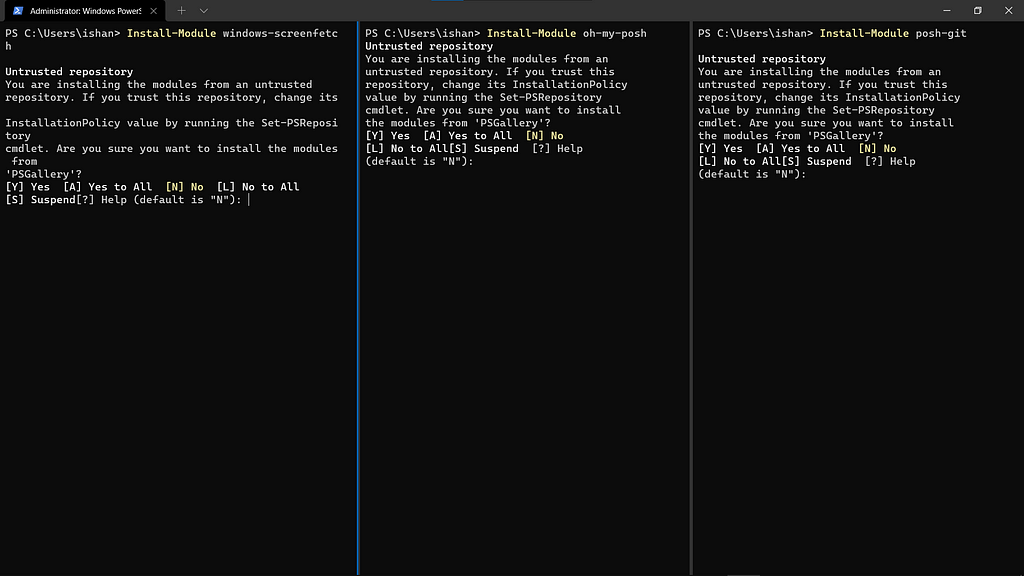
Type ‘a’ and press enter for each of the prompts that come:
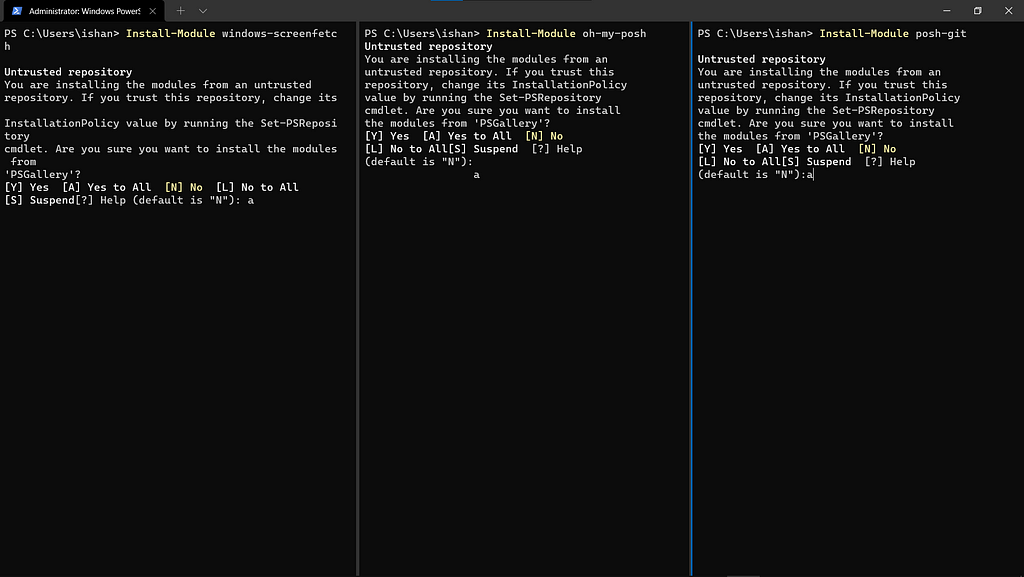

If the command runs without any errors, it means that everything has installed. Now we will import in the modules that we have installed. Type in these commands:
Import-Module windows-screenfetch
Import-Module oh-my-posh
Import-Module posh-git

And now for the fun to begin!
Simply close all the terminals. Then open a new one, and it does not have to be opened as administrator. Now before we continue ahead, a small problem you will notice is that, after restarting your computer, you will have to import the modules again and again. To tackle this problem, we’ll need to create a script that PowerShell will execute once it starts up.
To do the same, type this in your PowerShell:
$PROFILE

Then navigate to the folder that you get as an output.

As you can see, I don’t have the Microsoft.PowerShell_profile.ps1 file. If you have, then you can open it up using notepad.
To create this file, simply go back to the terminal and type:
notepad $PROFILE
You should get something like this:
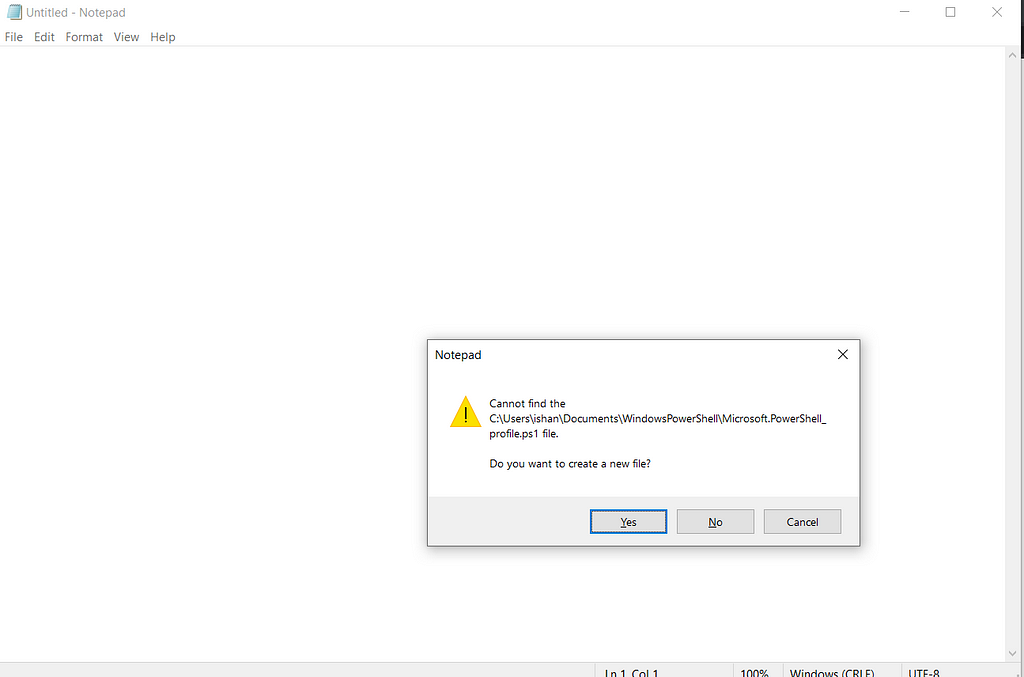
Simply click on Yes. This will create the Microsoft.PowerShell_profile.ps1 script, that will run on startup. Now we will type in all the commands we want to run over here. Type in:
Import-Module oh-my-posh
Import-Module posh-git
Import-Module windows-screenfetch
Screenfetch
If you want the underlined to look exactly like mine:
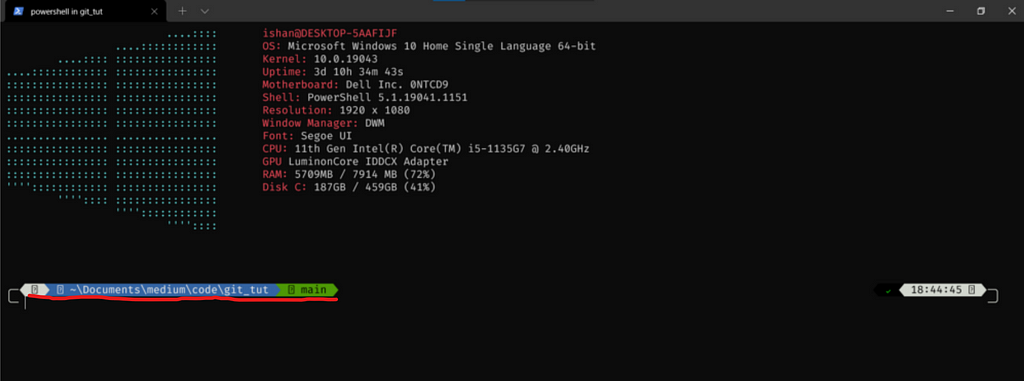
Then type in this in your startup file:
Set-PoshPrompt -Theme powerlevel10k_rainbow
However, if you want some other theme, then simply go to your terminal, then type:
Get-PoshThemes
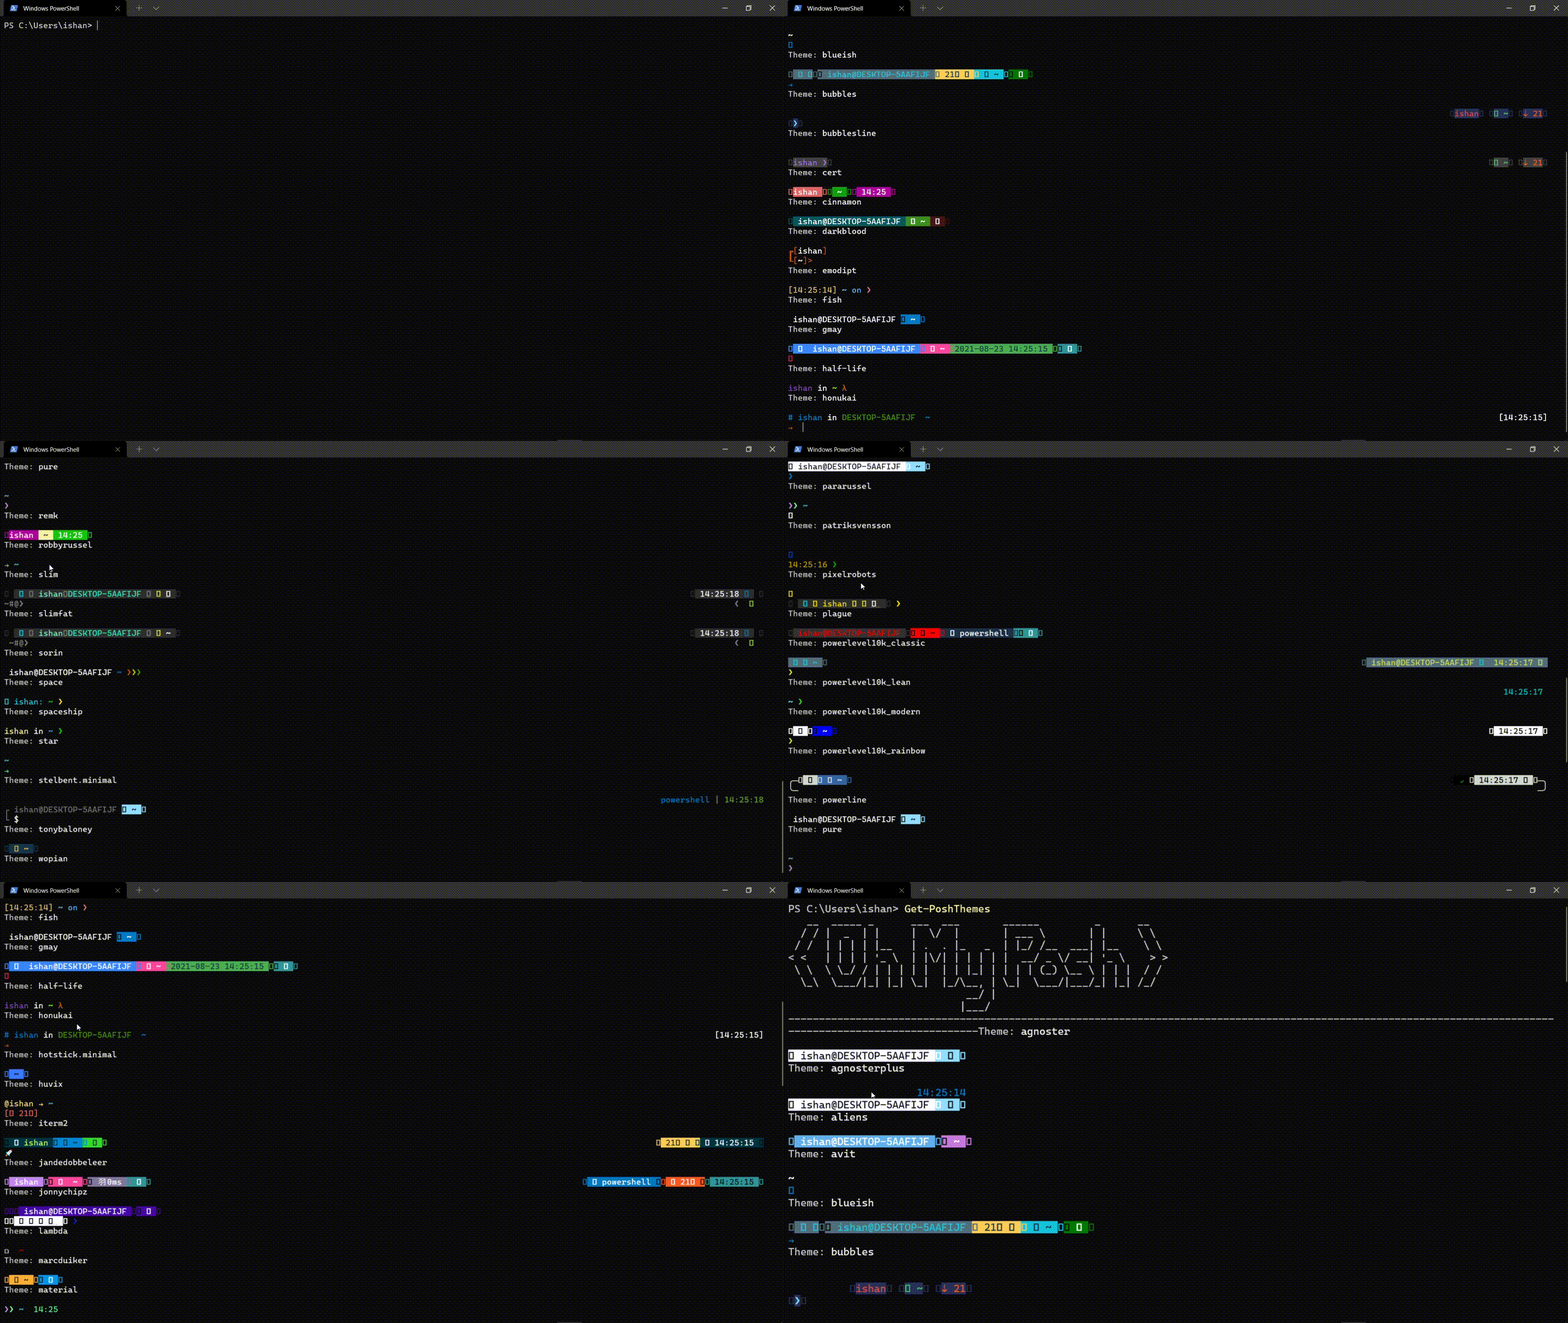
The output will be of this format:
THEME NAME
THEME LOOK
To see which posh theme you like, simply write:
Set-PoshPrompt -Theme THEME_NAME
So this what my configuration file looks like:
Import-Module oh-my-posh
Import-Module posh-git
Import-Module windows-screenfetch
Screenfetch
Set-PoshPrompt -Theme powerlevel10k_rainbow
Set-ExecutionPolicy -Scope CurrentUser RemoteSigned
I set the ExecutionPolicy back to RemoteSigned, so that unauthorised people can’t try and run virus scripts on my device. This is just for safety, and its not necessary to do it.
Now simply save and close the file. Close all terminals that were open and open a new terminal.
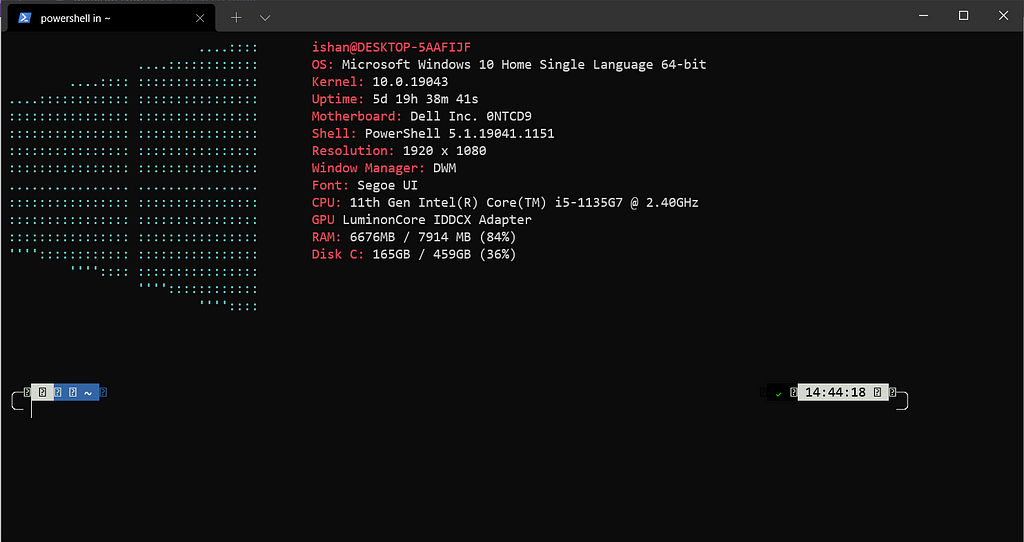
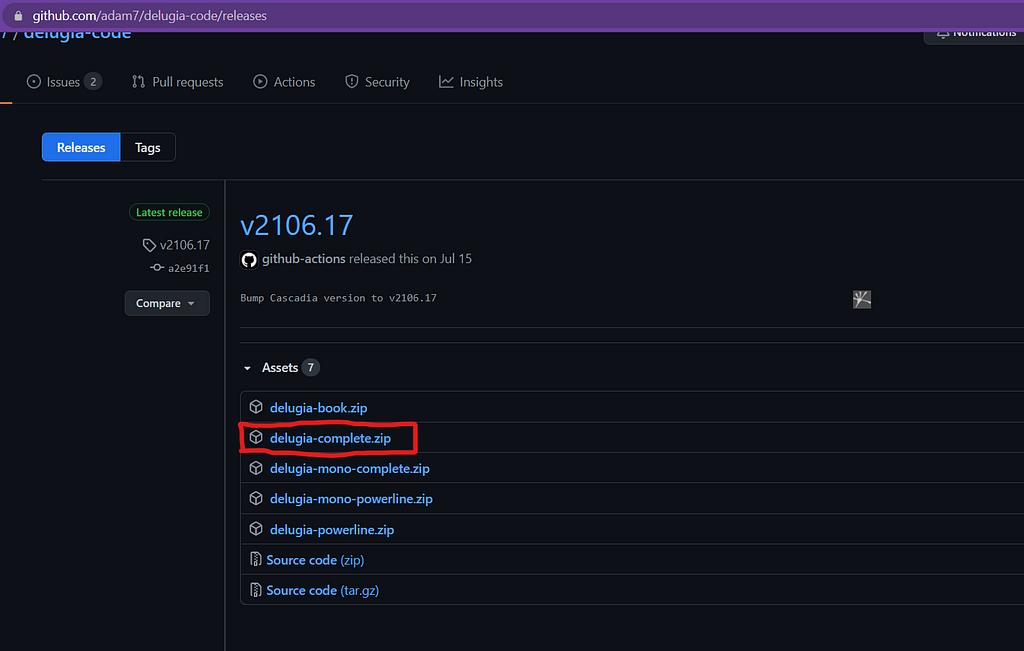
Everything looks great, however, there are tiny boxes with ‘?’ in them. This is because the font that we have chosen, does not contain some of those symbols. To change this, go to Delugia-Code website, then download Delugia-Complete from there:
Once done, extract the zip file:

Then double click on the DelugiaComplete.ttf file.
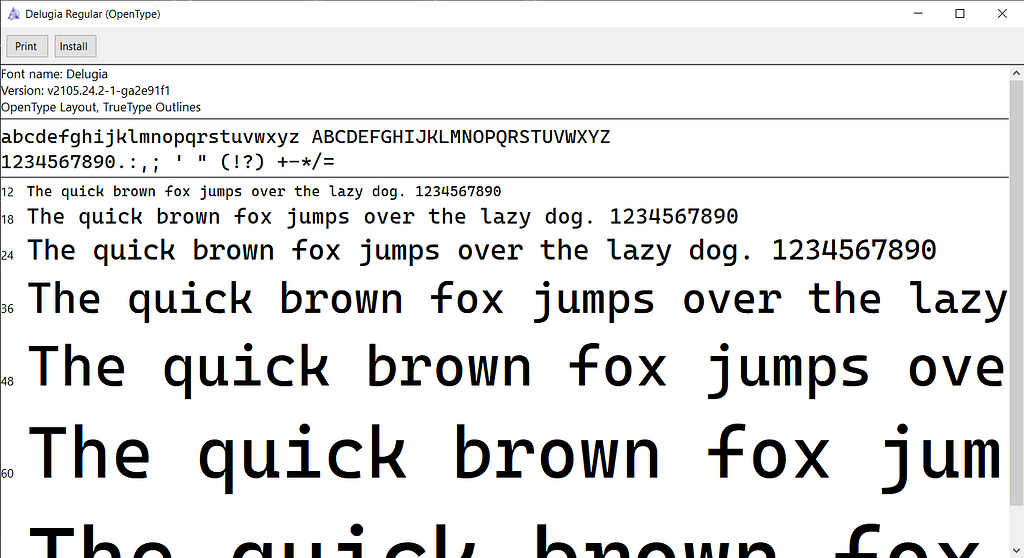
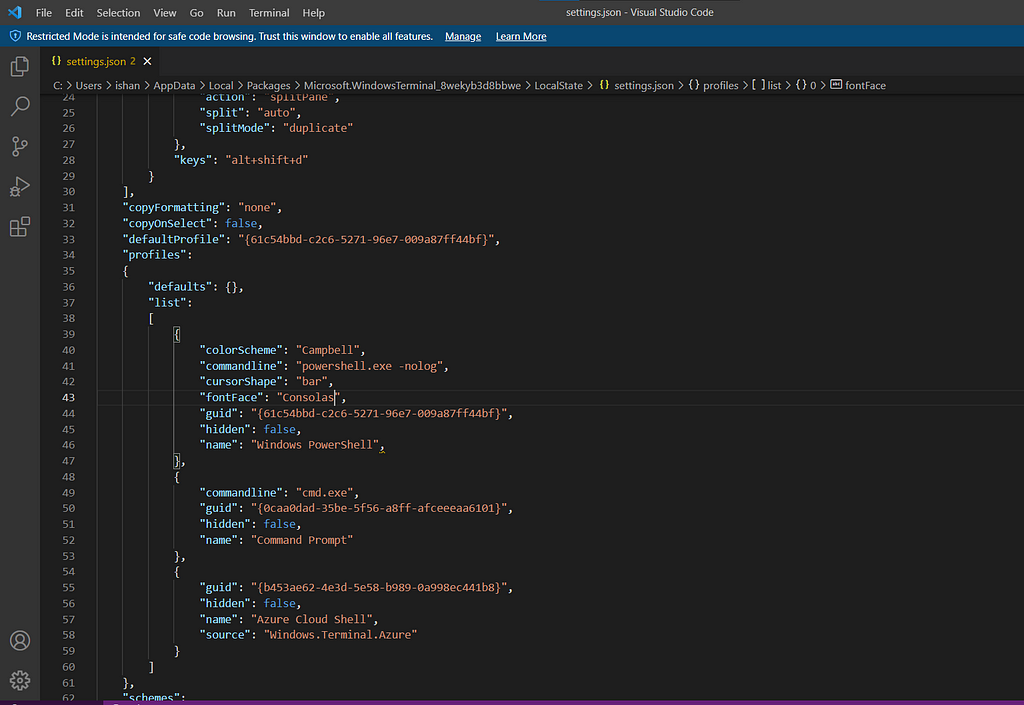
This will open up, just click the install button, and once installation is complete, close the application. Now open the windows terminal settings.json like I showed you above. Then navigate to “fontFace” for the powershell configuration:
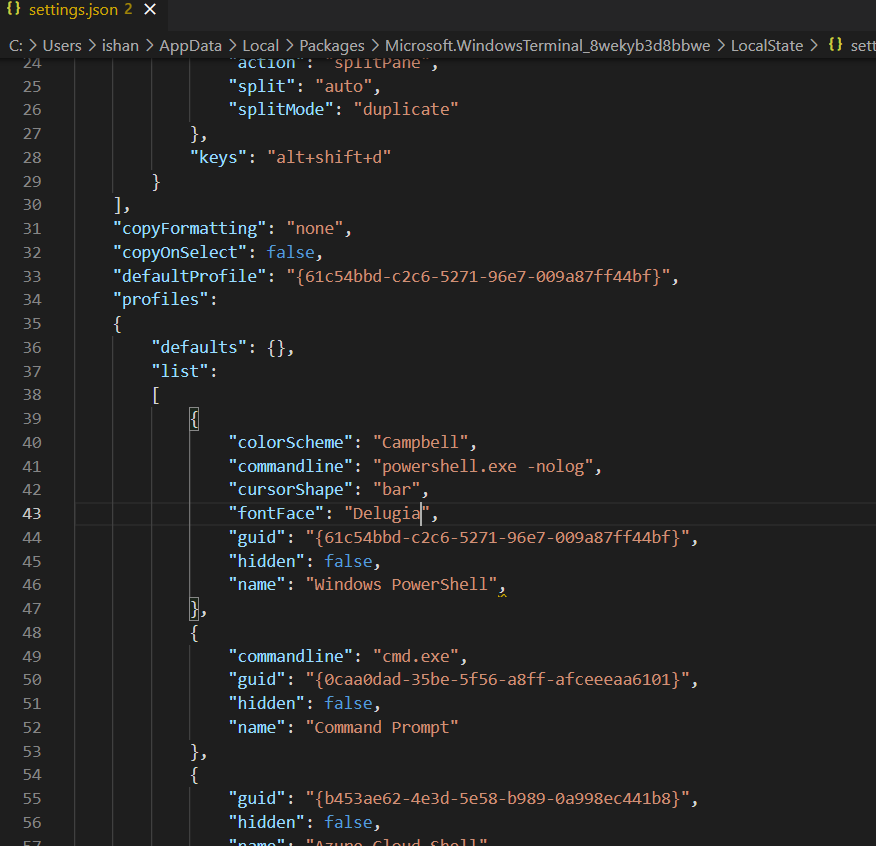
Now replace Consolas with “Delugia”:
Save and close the file, then go back to windows terminal:
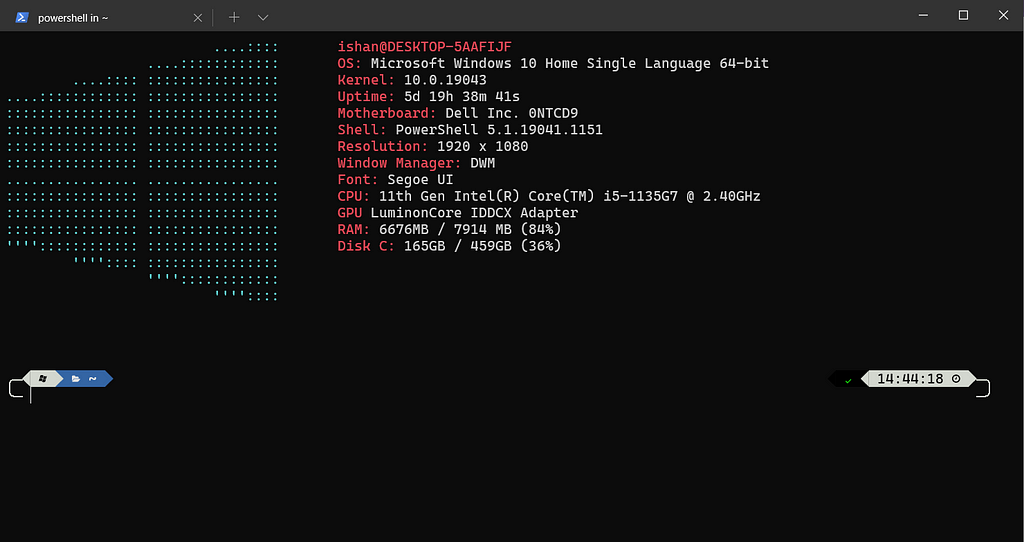
All the missing boxes are gone! You can open a git repository to see all the signs.

So that is it for this blog! I hope you really enjoyed this one. If you think other windows users might find this handy, then definitely share it with them. On that note, thanks for reading!
Windows terminal | Making PowerShell better was originally published in Level Up Coding on Medium, where people are continuing the conversation by highlighting and responding to this story.
This content originally appeared on Level Up Coding - Medium and was authored by Ishan Choudhary
Ishan Choudhary | Sciencx (2021-09-04T02:25:03+00:00) Windows terminal | Making PowerShell better. Retrieved from https://www.scien.cx/2021/09/04/windows-terminal-making-powershell-better/
Please log in to upload a file.
There are no updates yet.
Click the Upload button above to add an update.
