
This content originally appeared on DEV Community and was authored by Shaan Alam
Intro
Hey ya folks!
Have you ever wondered how to implement Google Authentication in your React applications? Well, worry not, because today I am gonna show you exactly how is it done.
But, why is it needed?
OAuth is a Open Standard Authorization protocol that provides appliactions the scopes of the user's data without sharing their password to other applications. It also makes authentication process a lot easier both for the developer and the user. For example, you might have seen "Login with Google" button on some websites. When you click that button, a request is made to Google's servers and the user's data (without password) is returned to the client side. This response can also be used against our own API to authenticate the user.

What are we gonna make?
We are gonna be creating a React App which will use Google OAuth to authenticate the user. For the simplicity of the application I'm gonna store the user's data inside the component state.
What you will learn?
- Implementing Google Authentication in your React App (pretty obvious ?)
- Creating a Node REST API ?
- Using TypeScript on client and server side ?
Folder Structure
Client Side
?client
┣ ? public
┣ ? src
┃ ┣ ? components
┃ ┃ ┣ ? GoogleAuth.tsx
┃ ┣ ? pages
┃ ┃ ┃ ┗ ? Login.tsx
┃ ┣ ? App.tsx
┃ ┣ ? index.tsx
┃ ┣ ? .env
Server side
?server
┣ ? src
┃ ┣ ? controllers
┃ ┃ ┗ ? auth.controller.ts
┃ ┣ ? models
┃ ┃ ┗ ? user.model.ts
┃ ┣ ? routes
┃ ┃ ┗ ? auth.route.ts
┃ ┗ ? index.ts
┣ ? .env
Let's Go!! ?
Create a Google Cloud Project
Go to Google Developer Console. Create a new Project. You'll need to configure your OAuthc consent screen. Give your application a name, user supported email, app logo etc. Goto Credentials tab and create credentials.
Select OAuth Client ID and choose the application type as web.
Give your application a name and mention authorized JavaScript origins and redirect origins.
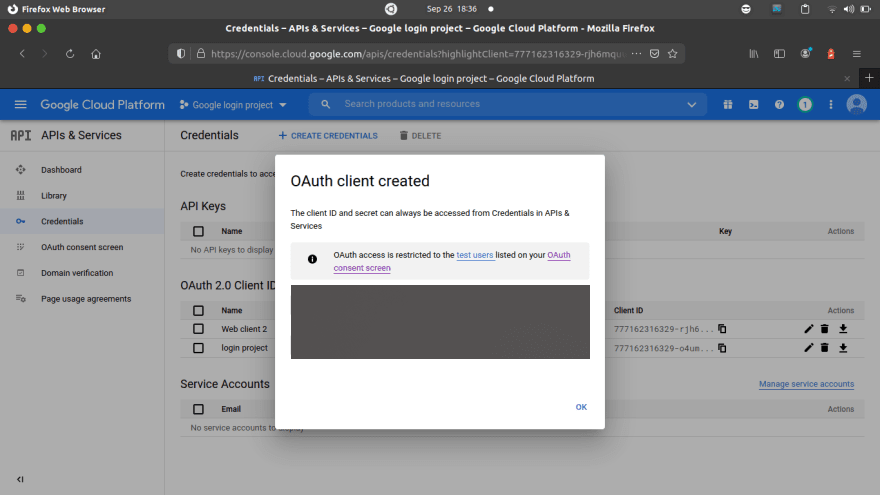
You will get your Client ID. Save this client ID as .env file for both client and server.
Initial Project Setup
First of all, we need to setup our backend and create a REST API to authenticate our user. Create a folder called server and inside it initialize an empty project.
yarn init -y

OR

npm init -y
Install the following dependencies.
yarn add cors dotenv express google-auth-library mongoose
Since I already mentioned that we are going to use TypeScript for our application, we will need to install type definitions for these dependencies. We will install the type definitions as dev dependencies because they are not needed in production.
yarn add @types/cors @types/express @types/mongoose -D
We will also be needing nodemon, ts-node and typescript, let's install them as well
yarn add nodemon ts-node typescript -D
Next, we need to generate a tsconfig.json file. This file contains all the configuration for our TypeScript project like rootDir, compiler options etc.
npx tsc --init
We need to make some changes in the tsconfig.json file.


Also, add the following scripts to your package.json
"scripts": {
    "dev": "nodemon ./src/index.ts",
    "build": "rm -rf && tsc"
  },
Creating an express server
Before creating an express server, I'd like to show you an overall flowchart of how we will be creating our express server.

Create a file src/index.ts and inside it we will create a basic express server.
import express from "express";
import authRoutes from "./routes/auth.route";
import mongoose from "mongoose";
import dotenv from "dotenv";
import cors from "cors";

dotenv.config();

const app = express();
const PORT = process.env.PORT || 5000;

app.use(cors());
app.use(express.json());
app.use("/auth", authRoutes);

mongoose.connect(`${process.env.MONGO_URI}`);

const db = mongoose.connection;
db.once("open", () => console.log("Connected to Mongo DB!!"));
db.on("error", (error) => console.error(error));

app.listen(PORT, () =>
  console.log(`The server is up and running on PORT ${PORT} ?`)
);
Let me explain you what is happening here,
import express from "express";
import authRoutes from "./routes/auth.route";
import mongoose from "mongoose";
import dotenv from "dotenv";
import cors from "cors";

dotenv.config();
First we import all these dependencies and the configure dotenv to load our environment variables.
app.use(cors());
app.use(express.json());
app.use("/auth", authRoutes);
Then we define some middlewares here. We make a middleware to use cors(). The second middleware will help us recieve JSON data through requests. And the third middleware is a route middleware.
const db = mongoose.connection;
db.once("open", () => console.log("Connected to Mongo DB!!"));
db.on("error", (error) => console.error(error));

app.listen(PORT, () =>
  console.log(`The server is up and running on PORT ${PORT} ?`)
);
Then we finally connect to our MongoDB database and listen to our express server on PORT 5000.
The User Model
Next, we need to create a user model to save the user documents into the database. Create a models/user.model.ts file.
import mongoose from "mongoose";

interface UserDocument extends mongoose.Document {
  email: string;
  avatar: string;
  name: string;
}

const UserSchema = new mongoose.Schema({
  email: {
    type: String,
    required: true,
  },
  avatar: {
    type: String,
    default: "",
  },
  name: {
    type: String,
    required: true,
  },
});

export default mongoose.model<UserDocument>("User", UserSchema);
Notice, we are only implementing google auth here, so I haven't specified the password field here, however if you are creating an authentication system by yourself, you might probably want to have a password field too.
Controller
We have to create a controller for authenticating our user and sending back the response to the client.
Create a file controllers/auth.controller.ts.
import { Request, Response } from "express";
import { OAuth2Client } from "google-auth-library";
import User from "../models/user.model";

const googleClient = new OAuth2Client({
  clientId: `${process.env.GOOGLE_CLIENT_ID}`,
});

export const authenticateUser = async (req: Request, res: Response) => {
  const { token } = req.body;

  const ticket = await googleClient.verifyIdToken({
    idToken: token,
    audient: `${process.env.GOOGLE_CLIENT_ID}`,
  });

  const payload = ticket.getPayload();

  let user = await User.findOne({ email: payload?.email });
  if (!user) {
    user = await new User({
      email: payload?.email,
      avatar: payload?.picture,
      name: payload?.name,
    });

    await user.save();
  }

  res.json({ user, token });
};
Let me explain what's happening here.
import { Request, Response } from "express";
import { OAuth2Client } from "google-auth-library";
import User from "../models/user.model";

const googleClient = new OAuth2Client({
  clientId: `${process.env.GOOGLE_CLIENT_ID}`,
});
First we import all the necessary dependencies and libraries we want, and then we initialize our google client using the client ID we received from google.
Next, we create and export a authenticateUser function, which is basically our controller.
Inside the authenticateUser function, we grab the token from req.body. (We will send the token from the client)
const { token } = req.body;
const ticket = await googleClient.verifyIdToken({
  idToken: token,
  audient: `${process.env.GOOGLE_CLIENT_ID}`,
});

const payload = ticket.getPayload();
And then we verify the token and get a payload which will contain the details of our user.
let user = await User.findOne({ email: payload?.email });
if (!user) {
  user = await new User({
    email: payload?.email,
    avatar: payload?.picture,
    name: payload?.name,
  });

  await user.save();
}

res.json({ user, token });
Next, we check if the user received from google already exists in our database. If it exists then we return the same user along with the token, or else, we create and save a new user in our database.
Routes
Now we need to run this controller whenever the server hits the /auth endpoint. For that we need to specify routes to our express server. Create a routes/auth.route.ts file. Import the controller and specify it for the / POST route.
import express from "express";
import { authenticateUser } from "../controllers/auth.controller";

const router = express.Router();

router.post("/", authenticateUser); // (This is actually /auth POST route)

export default router;
Client side
Now, that we have our backend ready, it's time for us to work on front end. Initialize a React App.
yarn create react-app --typescript google-login-project
cd google-login-project
Install the following dependencies
yarn add react-google-login react-router-dom axios
yarn add @types/react-router-dom -D
Creating UI
Let's create UI for our application. Inside App.tsx make the following changes
import { Switch, Route } from "react-router-dom";
import GoogleAuth from "./components/GoogleAuth";

const App = () => {
  return <GoogleAuth />;
};

export default App;
GoogleAuth Component
In App.tsx you have seen that we've used a GoogleAuth component. Let's make that one in the components directory.
// /components/GoogleAuth.tsx
import { useState } from "react";
import axios, { AxiosResponse } from "axios";
import GoogleLogin from "react-google-login";

interface AuthResponse {
  token: string;
  user: User;
}

interface User {
  _id: string;
  name: string;
  email: string;
  avatar: string;
}

const GoogleAuth = () => {
  const [user, setUser] = useState<User | null>(null);
  const onSuccess = async (res: any) => {
    try {
      const result: AxiosResponse<AuthResponse> = await axios.post("/auth/", {
        token: res?.tokenId,
      });

      setUser(result.data.user);
    } catch (err) {
      console.log(err);
    }
  };

  return (
    <div className="h-screen w-screen flex items-center justify-center flex-col">
      {!user && (
        <GoogleLogin
          clientId={`${process.env.REACT_APP_CLIENT_ID}`}
          onSuccess={onSuccess}
        />
      )}

      {user && (
        <>
          <img src={user.avatar} className="rounded-full" />
          <h1 className="text-xl font-semibold text-center my-5">
            {user.name}
          </h1>
        </>
      )}
    </div>
  );
};

export default GoogleAuth;
Since this is a simple application I've used conditional rendering here rather than routing. If the user is not set in state, we will render the Google login component else we will display the user's details (avatar and name).
However, if you want, you can store the user's data in redux store or Context API which seems more practical.
Wrapping up ✨
That was it. We've sucessfully implemented Google OAuth in our React Application.
Github repo - https://github.com/shaan-alam/google-login
Find me here ?
Github - shaan-alam
Twitter - shaancodes
LinkedIn - Shaan Alam
Instagram - shaancodes
This content originally appeared on DEV Community and was authored by Shaan Alam
Shaan Alam | Sciencx (2021-09-26T14:44:46+00:00) How to implement Google Authentication in your React Applications!!. Retrieved from https://www.scien.cx/2021/09/26/how-to-implement-google-authentication-in-your-react-applications/
Please log in to upload a file.
There are no updates yet.
Click the Upload button above to add an update.