This content originally appeared on DEV Community and was authored by Eric Goldman
In this tutorial, you'll add text messaging to a Retool app using Twilio and Sync Inc.
Text messages (SMS) are an excellent medium for chatting with customers or notifying your team. Adding text messaging to a Retool app is easy with Twilio. Still, there are many prerequisites: Before you can send your first SMS from Retool, you'll need to set up and deploy a server that adequately handles Twilio webhooks. Then, as messages come in and out, you'll need to implement middleware to match conversations to your users appropriately. And if you want to pull insights from your conversations, you'll need to work out a process for extracting your data from Twilio.
Using Sync Inc, you'll skip these prerequisites. Sync Inc replicates Twilio to your Postgres database in real-time. No need to handle webhooks, deploy a server, or rethink your schema. With all your Twilio data in your database, mapping conversations to users is a simple JOIN. Pair a Sync Inc database with Retool's first-class support for SQL - and you can add SMS (or phone calls, WhatsApp, etc.) to your app in no time.
To show you how these systems work together, you'll build a Retool app that allows you to select a user, read text message conversation history, and continue the conversation by sending a new reply.
Setting up Twilio
You'll need a Twilio account and a Twilio phone number. Follow Twilio's quickstart guide to get your account and phone number set up.
Out of the box, Twilio uses webhooks to notify you of incoming messages. Without a webhook in place, Twilio will automatically respond to any incoming messages with errors. To assign a webhook to your new phone number, navigate to the active numbers page and select the phone number you just created:
Scroll down to the messaging section, and under A message comes in select webhook. Enter Sync Inc's homepage (https://syncinc.so), select HTTP GET, and click Save:
As the last step, you'll want to be able to test your new messaging capabilities. To make testing possible, go to the Verified Caller ID's page and click the + button to enter and verify a phone number you can send and receive texts from:
You've now configured Twilio so that you can send and receive text messages. Before moving on, note down your Twilio credentials from your Twilio dashboard:
- Phone number
- Account SID
- Auth token
Setting up Sync Inc
Sync Inc will sync your Twilio data to a Postgres database in real-time. Within a couple of seconds, all new Twilio conversation data will be updated in your database.
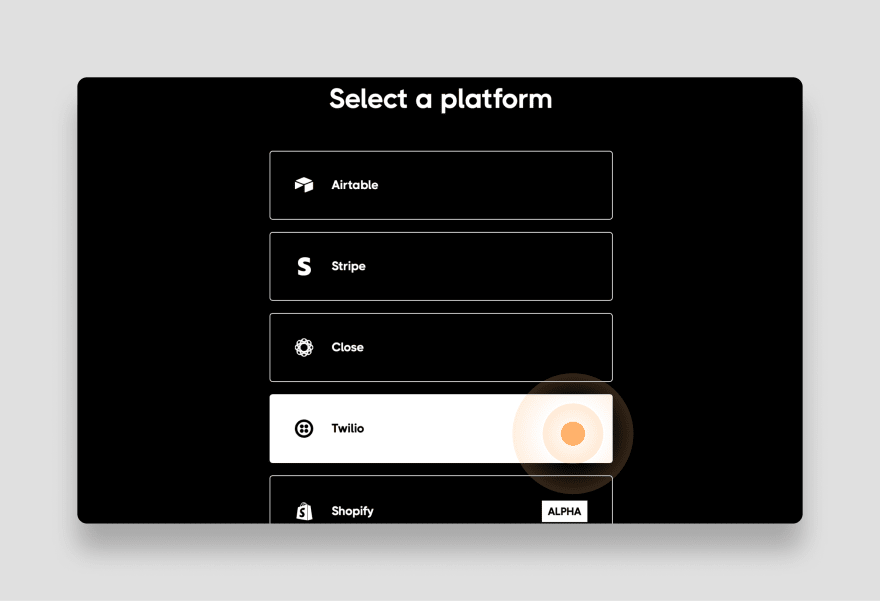
To get your Twilio sync started, create a Sync Inc account and then select Twilio as your source:
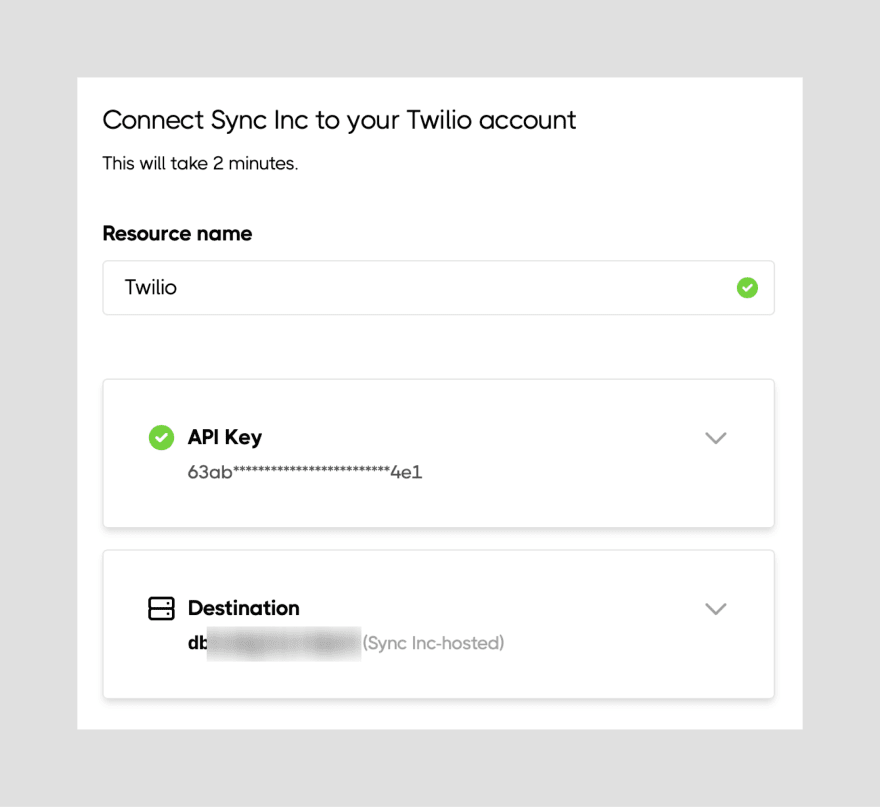
Enter your Twilio Account SID and Auth Token (which you noted down earlier).
For your destination, you have two options. You can sync to a Sync Inc-hosted database that will be immediately provisioned for you. Or, you can select to sync to your self-hosted database. To get up and running quickly in this tutorial, select to sync to a new Sync Inc database.
For your full application, you'll likely want to sync to your database so you have more control and can query across your data with ease. You can learn more about syncing to your database in the Sync Inc docs.
Now, click Start syncing. Sync Inc will provision your database and begin syncing your Twilio data. You can learn more about the full sync process in our Twilio reference docs.
You'll be presented with the credentials for your database. Note down these credentials or keep the Sync Inc tab open as you set up Retool.
Setting up your data
The purpose of your Retool app is to quickly allow you to communicate with users or your team members using SMS. So your app is going to need some user data.
Ideally, you already have this data (i.e., names and phone numbers) in your database. But for this tutorial, we'll use some fake data in Airtable to help jump-start the process:
If you don't have one already, create a free Airtable account. Then, open up the Airtable template we put together for this tutorial and copy it to your workspace by clicking the Copy base link in the top right corner.
Open the Twilio + Retool + Sync Inc base you just added to your workspace, and in the first row, enter your details - including the phone number that you verified in your Twilio account earlier.
Now, sync your Airtable base to your Sync Inc database. To do so, head back to Sync Inc and click the Add Sync button. Select Airtable and enter your Airtable API Key (which you can find on your Airtable account page). Select the Twilio + Retool + Sync Inc base and sync all the tables:
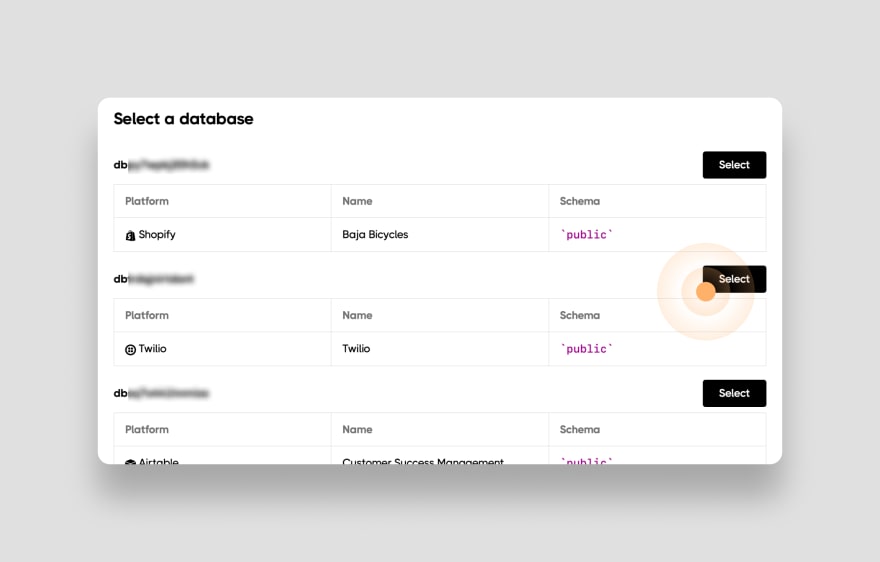
To make things easier, sync your sample user data to the same database you are using for your Twilio data. This way, you'll only need to connect one database to Retool and simplify your queries. To do so, click the Edit button in the Destination section and select Choose existing:
In the window that appears, select the database that contains your Twilio data:
Change the name of the schema Sync Inc will sync to. Something like users will be easy and short. Then click Confirm changes:
Finally, click the Create button to sync your data into a new schema within the same database containing all your Twilio data.
Setting up Retool
With all your data in place, you're ready to connect your Sync Inc database and Twilio to Retool.
To get going, create a free Retool account, then go to the Resources tab and click the Create new button. Select Postgres.
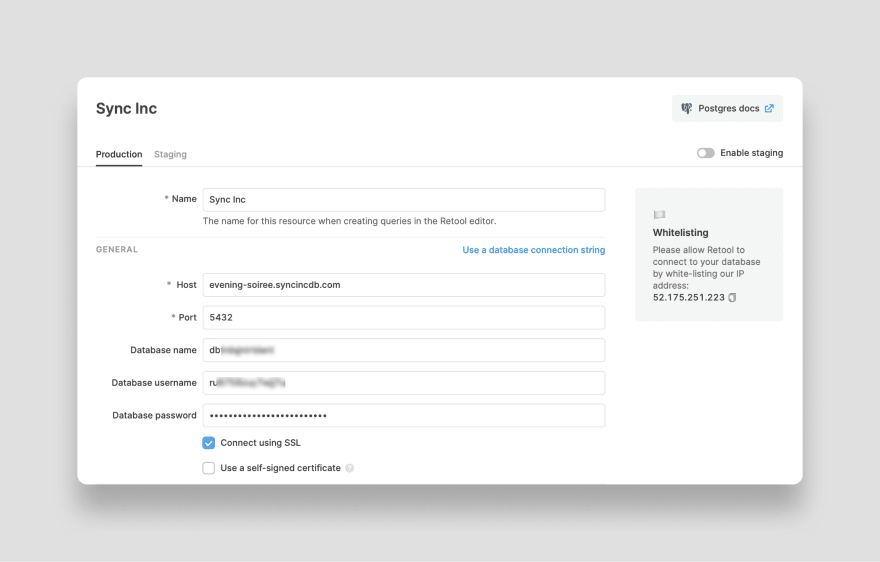
Enter the name for your resource (i.e., Sync Inc) and then enter the Host, Port, Database name, Database username, and Password for your Sync Inc database (you can use the credentials from either your Twilio resource or your Airtable sample data resource — since both are in the same database, the credentials are the same!). You can copy and paste these from Sync Inc. Then click the blue Create resource button:
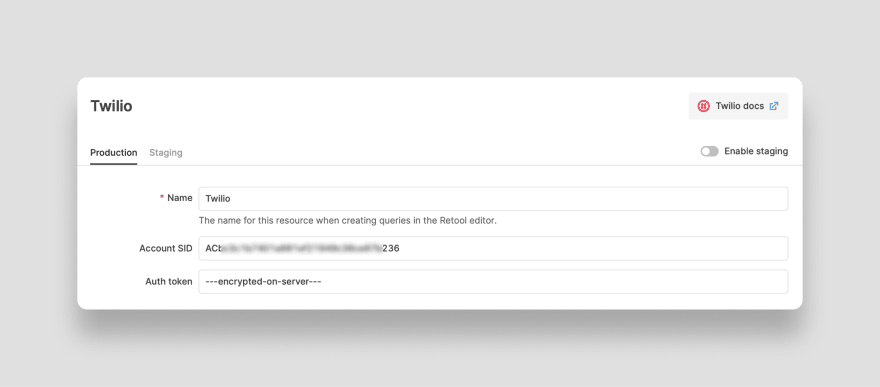
With your Sync Inc database connected, you'll now create a Twilio resource so you can easily write to the Twilio API. On the resources tab, click the Create new button again. This time, select Twilio.
Give your resource a name (something like Twilio :) ) and then enter your Twilio Account SID and Twilio Auth token, which you noted earlier. Click Create resource again.
Building your Retool app
For this Retool app, you want to select a user, see their details and conversation history, and then continue the conversation by sending a new text message to the user.
To build this app, you'll first scaffold the front-end in Retool. Then you'll populate that front-end with data by querying your Sync Inc database. Finally, you'll add the ability to write and send new text messages to the selected user.
To get started, create a new blank Retool app by clicking the Create new button and selecting Create a blank app. Then name your app something like Comms Central Command.
Scaffold the UI
The interface for this app will have four main components:
- A table where you can sort, search, and find the user you want to chat with.
- A user details card that shows some details about the user.
- A chat timeline that shows the chronological order of sent and received messages.
- A form where you can compose and send new messages.
Drag and drop the following components onto your canvas and enter placeholder text for now:
If you need more guidance on scaffolding your UI, check out our more thorough step-by-step Retool tutorial here.
Query your data
With your scaffolding in place, begin to add data to your application, starting with the users table.
Open up the bottom drawer where you can create a new query. Select your Sync Inc Postgres database as the resource and enter the following query:
SELECT
  id_,
  string_agg(first_name || ' ' || last_name, ',') as "name",
  email,
  phone
FROM users.users
GROUP BY id_, email, phone;
This query selects several columns from the users table within the users schema. It also performs a string aggregation to concatenate the first_name and last_name columns.
Click Save and run and then rename the query get_users:
Now, pipe the data from your new get_users query into the table component. Select the table component on the canvas and in the inspector on the right, enter {{get_users.data}} into the data field. The double brackets tell Retool you'll be entering JavaScript. Then the get_users.data pulls the data in from the query.
You'll see the table now contains the data from your query:
With your user data in the table, you can now populate the user details card.
Select the First Last placeholder text in the card. In the inspector on the right, replace the value with # {{table1.selectedRow.data.name}}. This javascript statement pulls the name field from the selected row in your table:
Finish populating the customer card by selecting the 📨 user_email | 💬 user_phone placeholder text. Replace the value in the inspector with 📨 {{table1.selectedRow.data.email}} | 💬 {{table1.selectedRow.data.phone}}. As before, this statement pulls in the user's email and phone details from the selected row in the table component:
You have your user table and user details card populating with data. Now, pull in the conversations for each user from the message table in your Sync Inc database.
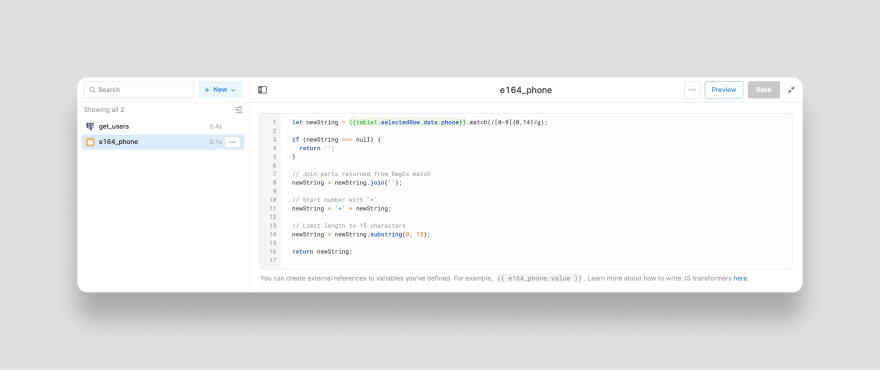
The first step in pulling in the users's messages is to join the user data to the message data using the phone number. To do so, you need to ensure that the format of the phone number is consistent. Twilio uses the E.164 standard format for phone numbers - so you'll need a helper function to ensure all your user's phone numbers are converted into the E.164 format.
Create a helper function by opening up the bottom drawer, and clicking to create a new JavaScript transformer. Then, paste in the following script:
  let newString = {{table1.selectedRow.data.phone}}.match(/[0-9]{0,14}/g);

  if (newString === null) {
    return '';
  }

  // Join parts returned from RegEx match
  newString = newString.join('');

  // Start number with "+"
  newString = '+' + newString;

  // Limit length to 15 characters
  newString = newString.substring(0, 15);

  return newString;
This script pulls in the selected phone number from the table and uses RegEx to format and return the phone number in E.164 format.
Save this helper function and name it e164_phone:
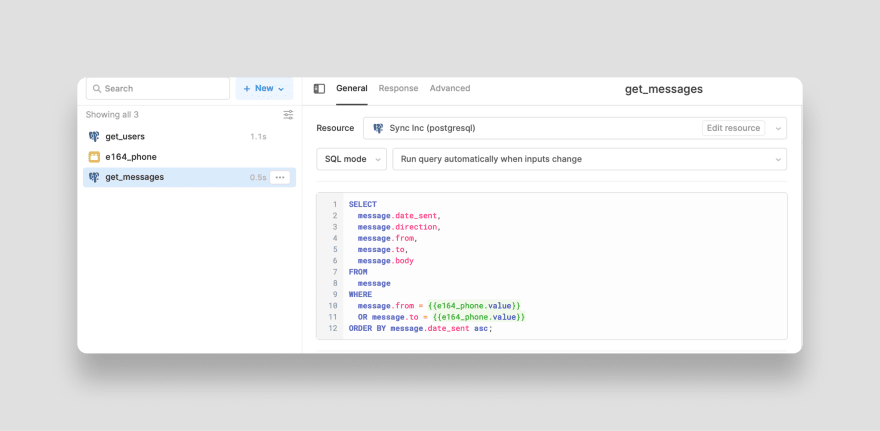
Now, create a new query on your Sync Inc Postgres database and paste in the following:
SELECT
  message.date_sent,
  message.direction,
  message.from,
  message.to,
  message.body
FROM
  message
WHERE
  message.from = {{e164_phone.value}}
  OR message.to = {{e164_phone.value}}
ORDER BY message.date_sent asc;
This query uses the phone number for the selected user (formatted in e.164 by your helper function) to pull in any message sent to or received from that user. Even though the query returns an empty table for now (you haven't sent or received a text yet from your Twilio phone number) can click to save the query and name it get_messages:
We'll want to run this query every 15 seconds or so to see if any new messages from the user arrived. Click on the Advanced tab and check the box to Run this query periodically. Then, set the period interval to 15000:
Finally, map this query to your UI by selecting the timeline component. In the inspector, make the following changes:
- Select Grouped
- For Items enter:
{{get_messages.data.body}} - For Timestamps enter:
{{get_messages.data.date_sent}}
The timeline will appear blank (we still haven't sent a message yet!) but your UI is now pulling in all the data you need from your database:
Send and receive messages
With your database reads working, your Retool app is already configured to receive incoming messages. Now, you'll setup Twilio with the Sync Inc /wait endpoint to send messages - completing the loop.
Open the bottom drawer in Retool and create a new query on your Twilio resource as follows:
-
Operation:
POSTto the/2010-04-01/Accounts/{AccountSid}/Messages.json -
To:
{{format_for_twilio.value}}- this is the phone number of the selected customer. - From: Your Twilio phone number (enter it as a string using "")
-
Body:
{{textArea1.value}}- this is the value of the text input in your UI.
Save the query and name it send_sms.
After sending a message to a user, you'll want to run the get_messages query to populate the new message into your UI. Sync Inc provides a convenient /wait endpoint. It will return a 200 ok after all events have been written to the database. This ensure that when you query your database for new messages it includes the message you just sent.
To configure this into your Retool app, click to create one more query and select RESTQuery as the resource. Then, configure the query as a simple GET request to the wait/ URL for your Twilio resource (you can get the unique wait/ endpoint for your resource from the Sync Inc console by clicking the Connect button on your resource):
Click Save and run. Then name your query sync_inc_wait.
Now, you need to chain these queries together: As soon as a message is sent, the /wait endpoint is called, then the get_messages query is run, and simultaneously the form for sending the text messages is cleared.
To do so, open the send_sms query, and under Event handlers click the New link. Configure the event handler to trigger the sync_inc_wait query on success. Then Save your changes:
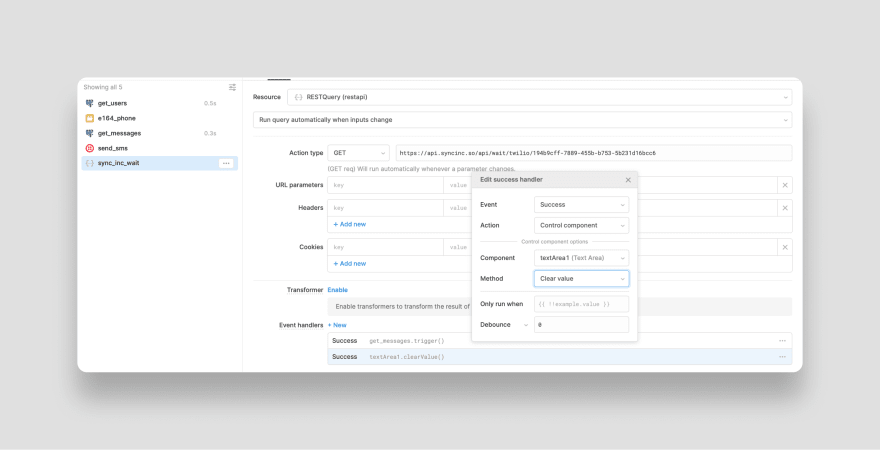
Now, reopen the sync_inc_wait query and add two more event handlers:
- On success, trigger the
get_messagesquery. - On success, clear the value of the
textArea1component.
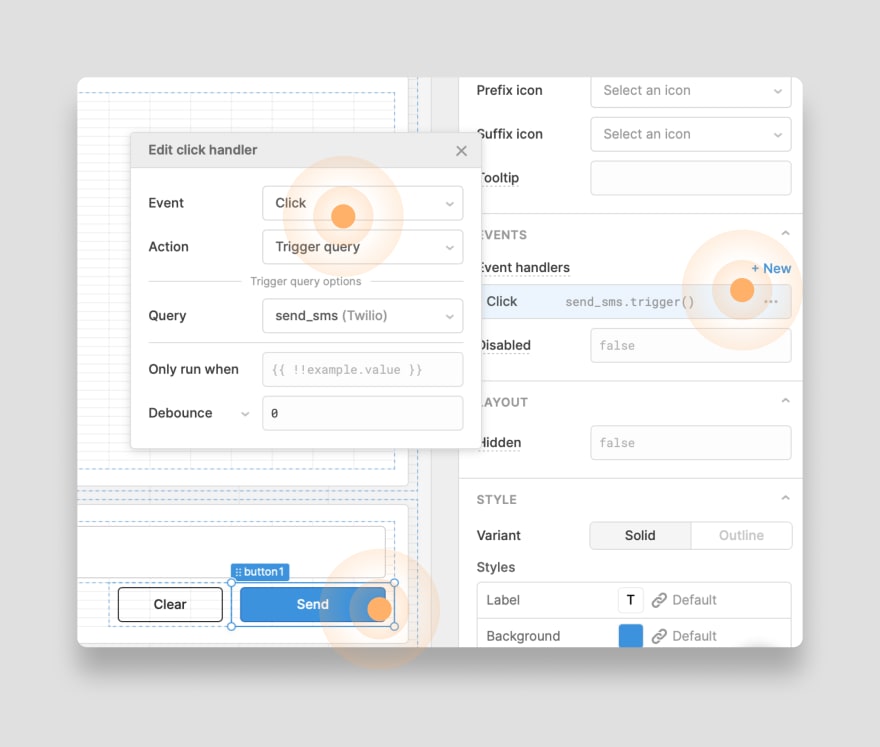
The last step is to connect the send_sms query to your app.
Select the Send button in your UI, and add an event handler that triggers the send_sms query when clicked:
Test your app
Let's see your app in action. Select your test user in the table (i.e., the user with your validated phone number). Then, compose a quick message to yourself and click the Send button.
Voila - the message is sent! On your phone, reply to the message... and it appears in your app:
Next steps
You can now message anyone with a phone number from your Retool app. You didn't need to setup a back-end, deal with webhooks, or think twice about missing an event. You used SQL to quickly pull your data together, and Retools easy to build UI and query management to string it all together.
From here, you can tailor the app to your needs. Add workflows, validation, bulk messaging, and more.
This content originally appeared on DEV Community and was authored by Eric Goldman
Eric Goldman | Sciencx (2021-09-30T23:02:13+00:00) Don’t be an SMS Spammer. Build a tool to help you manage your SMS using Twilio and Retool.. Retrieved from https://www.scien.cx/2021/09/30/dont-be-an-sms-spammer-build-a-tool-to-help-you-manage-your-sms-using-twilio-and-retool/
Please log in to upload a file.
There are no updates yet.
Click the Upload button above to add an update.


