Dockerized Flask Celery RabbitMQ Redis Application

This explains how to configure Flask, Celery, RabbitMQ, and Redis, together with Docker to build a web service that dynamically uploads the content and loads this content when it is ready to be displayed. We’ll focus mainly on Celery and the services that surround it. Docker is a bit more straightforward.

A Video Explanation

https://medium.com/media/9c9dce5f5fb1597496e6d36e43233736/href

Project Structure

The finished project structure will be as follows:

├── Dockerfile
├── docker-compose.yml
├── README.md
├── app
│ ├── app.py
│ ├── tasks.py
│ └── templates
│ ├── download.html
│ └── index.html
├── scripts
│ ├── run_celery.sh
│ └── run_web.sh
└── requirements.txt

Creating the Flask application 🌶

First, we create a folder for our app. For this example, our folder is called `app`. Within this folder, create an `app.py` file and an empty folder named `templates` where our HTML templates will be stored.

For our app, we first include some basic Flask libraries and create an instance of the app:

from io import BytesIO
from flask import Flask, request
from flask import render_template, make_response
APP = Flask(__name__)

We define three routes for Flask to implement: a landing page, a secondary page that embeds and image, and a route for the image itself. Our image route crops an image dynamically. For this example, it crops an image using `pillow`, and some delays are also included so that the time taken to create the image is more apparent.

@APP.route(‘/’)
def index():
return render_template(‘index.html’)
@APP.route(‘/image_page’)
def image_page():
job = tasks.get_data_from_strava.delay()
return render_template(‘home.html’)
@APP.route('/result.png')
def result():
'''
Pull our generated .png binary from redis and return it
'''
jobid = request.values.get('jobid')
if jobid:
job = tasks.get_job(jobid)
png_output = job.get()
png_output="../"+png_output
return png_output
else:
return 404

Next, we need to open our `templates` folder and create the following two templates:

index.html

<div id=”imgpl”><img src=”result.png?{{JOBID}}” /></div>

If we add the following code then run the script, we can load up our webpage and test the image generation.

if __name__ == ‘__main__’:
APP.run(host=’0.0.0.0')

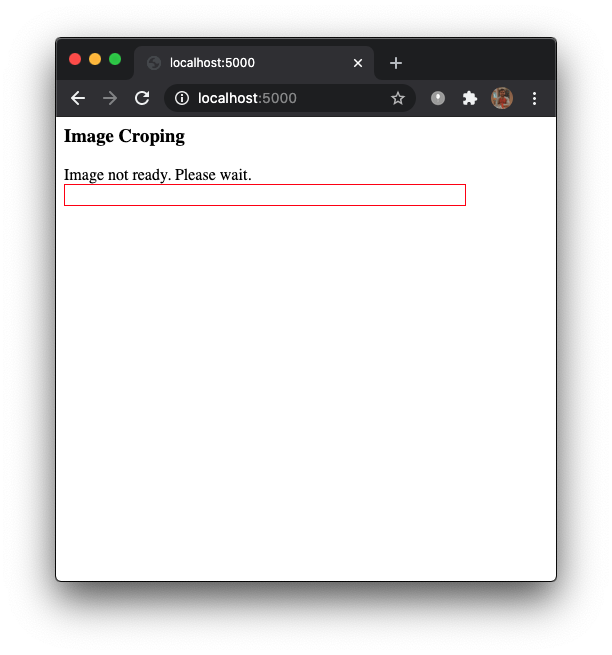
We see that our page load takes a while to complete because the request to `result.png` doesn’t return until the image generation has completed.

Expanding our web app to use Celery 🥬

In our `app` directory, create the `tasks.py` file that will contain our Celery tasks. We add the necessary Celery includes:

from celery import Celery, current_task
from celery.result import AsyncResult

Assuming that our RabbitMQ service is on a host that we can reference by `rabbit` and our Redis service is on a host referred to by `Redis` we can create an instance of Celery using the following:

REDIS_URL = ‘redis://redis:6379/0’
BROKER_URL = ‘amqp://admin:mypass@rabbit//’CELERY = Celery(‘tasks’,backend=REDIS_URL,broker=BROKER_URL)

We then need to change the default serializer for results. Celery with versions 4.0 and above use JSON as a serializer, which doesn’t support serialization of binary data. We can either switch back to the old default serializer (pickle) or use the newer MessagePack which supports binary data and is very efficient.

Since we’re changing the serializer, we also need to tell Celery to accept the results from a non-default serializer (as well as still accepting those from JSON).

CELERY.conf.accept_content = [‘json’, ‘msgpack’]
CELERY.conf.result_serializer = ‘msgpack’

First, we’ll implement a function that returns jobs given an ID. This allows our app and the Celery tasks to talk to each other:

def get_job(job_id):
return AsyncResult(job_id, app=CELERY)

Next, we define the asynchronous function and move the image generation code from `app.py` and add the function decorator that allows the method to be queued for execution:

@CELERY.task()
def image_demension(img):
time.sleep(2)
im = Image.open(img)
width, height = im.size
left = 4
top = height / 5
right = 154
bottom = 3 * height / 5
# Cropped image of above dimension \
im1 = im.crop((left, top, right, bottom))
newsize = (300, 300)
im1 = im1.resize(newsize)
width, height = im1.size
location=os.path.join(‘static/worker-img’,’cropped_img.’+im.format.lower())
im1.save(os.path.join(‘static/worker-img’,’cropped_img.’+im.format.lower()))
print(width,height)
print(“pass”)
return location

Instead of building a response, we return the binary image which will be stored on Redis. We also update the task at various points with a progress indicator that can be queried from the Flask app.

We add a new route to `app.py` that checks the progress and returns the state as a JSON object so that we can write an ajax function that our client can query before loading the final image when it’s ready.

@APP.route(‘/progress’)
def progress():
jobid = request.values.get(‘jobid’)
if jobid:
job = tasks.get_job(jobid)
if job.state == ‘PROGRESS’:
return json.dumps(dict(
state=job.state,
progress=job.result[‘current’],
))
elif job.state == ‘SUCCESS’:
return json.dumps(dict(
state=job.state,
progress=1.0,
))
return ‘{}’

Extend our `templates/download.html` with the following Javascript code:

<script src=”//code.jquery.com/jquery-2.1.1.min.js”></script>
<script>
function poll() {
$.ajax(“{{url_for(‘.progress’, jobid=JOBID)}}”, {
dataType: “json”
, success: function(resp) {
if(resp.progress >= 0.99) {
$(“#wrapper”).html(‘’);
$.get(“result.png?jobid={{JOBID}}”, function(data, status){
end_file=data;
$(“#imgpl”).html(‘<img src=’+end_file+’>’);
console.log(“success”)
});
return;
}
else {
setTimeout(poll, 500.0);
}
}
});
}
$(function() {
var JOBID = “{{ JOBID }}”;
poll();
});
</script>

The `poll` function repeatedly requires the `/progress` route of our web app. When it reports that the image has been generated, it replaces the HTML code within the placeholder with the URL of the image, which is then loaded dynamically from our modified `/result.png` route:

@APP.route(‘/result.png’)
def result():
‘’’
Pull our generated .png and return it
‘’’
jobid = request.values.get(‘jobid’)
if jobid:
job = tasks.get_job(jobid)
png_output = job.get()
png_output=”../”+png_output
return png_output
else:
return 404

At this stage, we have a working web app with asynchronous image generation.

Using Docker to package our application 🐳

Our app requires 4 separate containers for each of our services:

– Flask

– Celery

– RabbitMQ 🐇

– Redis

Docker provides prebuilt containers for [RabbitMQ](https://hub.docker.com/_/rabbitmq/) and [Redis](https://hub.docker.com/_/redis/). These both work well, and we’ll use them as is.

For Flask and Celery, we’ll build two identical containers from a simple `Dockerfile`.

Dockerfile

# Pull the latest version of the Python container.
FROM python:latest
# Add the requirements.txt file to the image.
ADD requirements.txt /app/requirements.txt
# Set the working directory to /app/.
WORKDIR /app/
# Install Python dependencies.
RUN pip install -r requirements.txt
# Create an unprivileged user for running our Python code.
RUN adduser — disabled-password — gecos ‘’ app

We pull all of this together with a Docker compose file, `docker-sdfcompose.yml`. While early versions composing one needed to expose ports for each service, we can link the services together using the `links` keyword. The `depends` keyword ensures that all of our services start in the correct order.

docker-compose.yaml

version: '3'
services:
redis:
image: redis:latest
hostname: redis
rabbit:
hostname: rabbit
image: rabbitmq:latest
environment:
- RABBITMQ_DEFAULT_USER=admin
- RABBITMQ_DEFAULT_PASS=mypass
web:
build:
context: .
dockerfile: Dockerfile
hostname: web
command: ./scripts/run_web.sh
volumes:
- .:/app
ports:
- "5000:5000"
links:
- rabbit
- redis
worker:
build:
context: .
dockerfile: Dockerfile
command: ./scripts/run_celery.sh
volumes:
- .:/app
links:
- rabbit
- redis
depends_on:
- rabbit

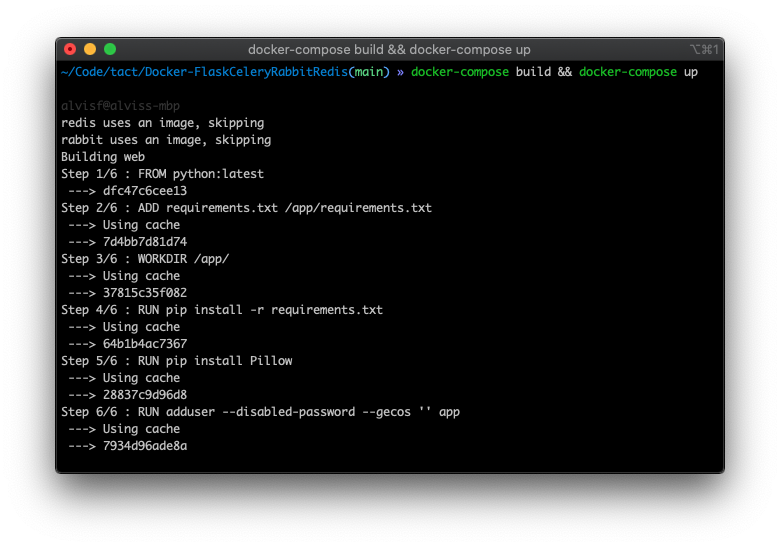
To create and run the container, use:

docker-compose builddocker-compose up

One of the major benefits of Docker is that we can run multiple instances of a container if required. To run multiple instances of our Celery consumers, do:

docker-compose scale worker=N

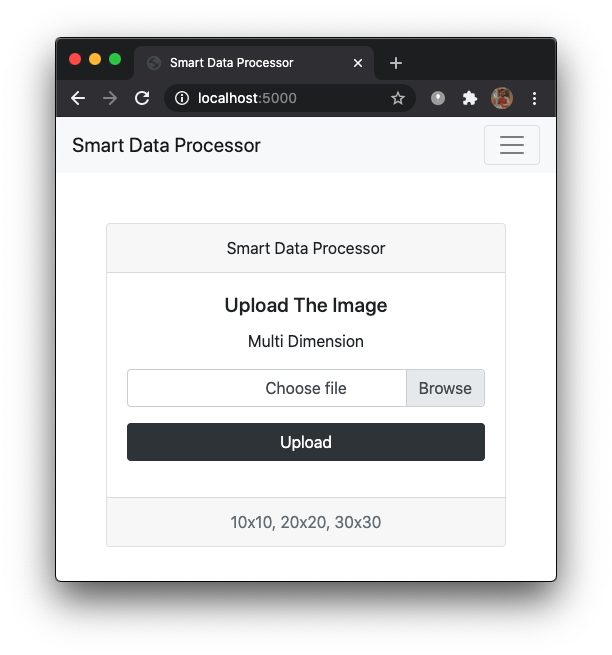
where N is the desired number of backend worker nodes. Visit http://localhost:5000 to view our complete application. 🥳

Github 🧟

alvisf/Dockerized-Flask-Celery-RabbitMQ-Redis

Conclusion 🤝

This is a simple POC on how to use everything together and get the async function up and running.


Dockerized 🐳 Flask Celery RabbitMQ Redis Application was originally published in Level Up Coding on Medium, where people are continuing the conversation by highlighting and responding to this story.


This content originally appeared on Level Up Coding - Medium and was authored by Falvis
This explains how to configure Flask, Celery, RabbitMQ, and Redis, together with Docker to build a web service that dynamically uploads the content and loads this content when it is ready to be displayed. We’ll focus mainly on Celery and the services that surround it. Docker is a bit more straightforward.

A Video Explanation

Project Structure

The finished project structure will be as follows:

├── Dockerfile
├── docker-compose.yml
├── README.md
├── app
│ ├── app.py
│ ├── tasks.py
│ └── templates
│ ├── download.html
│ └── index.html
├── scripts
│ ├── run_celery.sh
│ └── run_web.sh
└── requirements.txt

Creating the Flask application 🌶

First, we create a folder for our app. For this example, our folder is called `app`. Within this folder, create an `app.py` file and an empty folder named `templates` where our HTML templates will be stored.

For our app, we first include some basic Flask libraries and create an instance of the app:

from io import BytesIO
from flask import Flask, request
from flask import render_template, make_response
APP = Flask(__name__)

We define three routes for Flask to implement: a landing page, a secondary page that embeds and image, and a route for the image itself. Our image route crops an image dynamically. For this example, it crops an image using `pillow`, and some delays are also included so that the time taken to create the image is more apparent.

@APP.route(‘/’)
def index():
return render_template(‘index.html’)
@APP.route(‘/image_page’)
def image_page():
job = tasks.get_data_from_strava.delay()
return render_template(‘home.html’)
@APP.route('/result.png')
def result():
'''
Pull our generated .png binary from redis and return it
'''
jobid = request.values.get('jobid')
if jobid:
job = tasks.get_job(jobid)
png_output = job.get()
png_output="../"+png_output
return png_output
else:
return 404

Next, we need to open our `templates` folder and create the following two templates:

index.html

<div id=”imgpl”><img src=”result.png?{{JOBID}}” /></div>

If we add the following code then run the script, we can load up our webpage and test the image generation.

if __name__ == ‘__main__’:
APP.run(host=’0.0.0.0')

We see that our page load takes a while to complete because the request to `result.png` doesn’t return until the image generation has completed.

Expanding our web app to use Celery 🥬

In our `app` directory, create the `tasks.py` file that will contain our Celery tasks. We add the necessary Celery includes:

from celery import Celery, current_task
from celery.result import AsyncResult

Assuming that our RabbitMQ service is on a host that we can reference by `rabbit` and our Redis service is on a host referred to by `Redis` we can create an instance of Celery using the following:

REDIS_URL = ‘redis://redis:6379/0’
BROKER_URL = ‘amqp://admin:mypass@rabbit//’CELERY = Celery(‘tasks’,backend=REDIS_URL,broker=BROKER_URL)

We then need to change the default serializer for results. Celery with versions 4.0 and above use JSON as a serializer, which doesn’t support serialization of binary data. We can either switch back to the old default serializer (pickle) or use the newer MessagePack which supports binary data and is very efficient.

Since we’re changing the serializer, we also need to tell Celery to accept the results from a non-default serializer (as well as still accepting those from JSON).

CELERY.conf.accept_content = [‘json’, ‘msgpack’]
CELERY.conf.result_serializer = ‘msgpack’

First, we’ll implement a function that returns jobs given an ID. This allows our app and the Celery tasks to talk to each other:

def get_job(job_id):
return AsyncResult(job_id, app=CELERY)

Next, we define the asynchronous function and move the image generation code from `app.py` and add the function decorator that allows the method to be queued for execution:

@CELERY.task()
def image_demension(img):
time.sleep(2)
im = Image.open(img)
width, height = im.size
left = 4
top = height / 5
right = 154
bottom = 3 * height / 5
# Cropped image of above dimension \
im1 = im.crop((left, top, right, bottom))
newsize = (300, 300)
im1 = im1.resize(newsize)
width, height = im1.size
location=os.path.join(‘static/worker-img’,’cropped_img.’+im.format.lower())
im1.save(os.path.join(‘static/worker-img’,’cropped_img.’+im.format.lower()))
print(width,height)
print(“pass”)
return location

Instead of building a response, we return the binary image which will be stored on Redis. We also update the task at various points with a progress indicator that can be queried from the Flask app.

We add a new route to `app.py` that checks the progress and returns the state as a JSON object so that we can write an ajax function that our client can query before loading the final image when it’s ready.

@APP.route(‘/progress’)
def progress():
jobid = request.values.get(‘jobid’)
if jobid:
job = tasks.get_job(jobid)
if job.state == ‘PROGRESS’:
return json.dumps(dict(
state=job.state,
progress=job.result[‘current’],
))
elif job.state == ‘SUCCESS’:
return json.dumps(dict(
state=job.state,
progress=1.0,
))
return ‘{}’

Extend our `templates/download.html` with the following Javascript code:

<script src=”//code.jquery.com/jquery-2.1.1.min.js”></script>
<script>
function poll() {
$.ajax(“{{url_for(‘.progress’, jobid=JOBID)}}”, {
dataType: “json”
, success: function(resp) {
if(resp.progress >= 0.99) {
$(“#wrapper”).html(‘’);
$.get(“result.png?jobid={{JOBID}}”, function(data, status){
end_file=data;
$(“#imgpl”).html(‘<img src=’+end_file+’>’);
console.log(“success”)
});
return;
}
else {
setTimeout(poll, 500.0);
}
}
});
}
$(function() {
var JOBID = “{{ JOBID }}”;
poll();
});
</script>

The `poll` function repeatedly requires the `/progress` route of our web app. When it reports that the image has been generated, it replaces the HTML code within the placeholder with the URL of the image, which is then loaded dynamically from our modified `/result.png` route:

@APP.route(‘/result.png’)
def result():
‘’’
Pull our generated .png and return it
‘’’
jobid = request.values.get(‘jobid’)
if jobid:
job = tasks.get_job(jobid)
png_output = job.get()
png_output=”../”+png_output
return png_output
else:
return 404

At this stage, we have a working web app with asynchronous image generation.

Using Docker to package our application 🐳

Our app requires 4 separate containers for each of our services:

- Flask

- Celery

- RabbitMQ 🐇

- Redis

Docker provides prebuilt containers for [RabbitMQ](https://hub.docker.com/_/rabbitmq/) and [Redis](https://hub.docker.com/_/redis/). These both work well, and we’ll use them as is.

For Flask and Celery, we’ll build two identical containers from a simple `Dockerfile`.

Dockerfile

# Pull the latest version of the Python container.
FROM python:latest
# Add the requirements.txt file to the image.
ADD requirements.txt /app/requirements.txt
# Set the working directory to /app/.
WORKDIR /app/
# Install Python dependencies.
RUN pip install -r requirements.txt
# Create an unprivileged user for running our Python code.
RUN adduser — disabled-password — gecos ‘’ app

We pull all of this together with a Docker compose file, `docker-sdfcompose.yml`. While early versions composing one needed to expose ports for each service, we can link the services together using the `links` keyword. The `depends` keyword ensures that all of our services start in the correct order.

docker-compose.yaml

version: '3'
services:
redis:
image: redis:latest
hostname: redis
rabbit:
hostname: rabbit
image: rabbitmq:latest
environment:
- RABBITMQ_DEFAULT_USER=admin
- RABBITMQ_DEFAULT_PASS=mypass
web:
build:
context: .
dockerfile: Dockerfile
hostname: web
command: ./scripts/run_web.sh
volumes:
- .:/app
ports:
- "5000:5000"
links:
- rabbit
- redis
worker:
build:
context: .
dockerfile: Dockerfile
command: ./scripts/run_celery.sh
volumes:
- .:/app
links:
- rabbit
- redis
depends_on:
- rabbit

To create and run the container, use:

docker-compose builddocker-compose up
One of the major benefits of Docker is that we can run multiple instances of a container if required. To run multiple instances of our Celery consumers, do:

docker-compose scale worker=N

where N is the desired number of backend worker nodes. Visit http://localhost:5000 to view our complete application. 🥳
Github 🧟

alvisf/Dockerized-Flask-Celery-RabbitMQ-Redis

Conclusion 🤝

This is a simple POC on how to use everything together and get the async function up and running.


Dockerized 🐳 Flask Celery RabbitMQ Redis Application was originally published in Level Up Coding on Medium, where people are continuing the conversation by highlighting and responding to this story.


This content originally appeared on Level Up Coding - Medium and was authored by Falvis


Print Share Comment Cite Upload Translate Updates
APA

Falvis | Sciencx (2021-11-04T04:19:19+00:00) Dockerized Flask Celery RabbitMQ Redis Application. Retrieved from https://www.scien.cx/2021/11/04/dockerized-flask-celery-rabbitmq-redis-application/

MLA
" » Dockerized Flask Celery RabbitMQ Redis Application." Falvis | Sciencx - Thursday November 4, 2021, https://www.scien.cx/2021/11/04/dockerized-flask-celery-rabbitmq-redis-application/
HARVARD
Falvis | Sciencx Thursday November 4, 2021 » Dockerized Flask Celery RabbitMQ Redis Application., viewed ,<https://www.scien.cx/2021/11/04/dockerized-flask-celery-rabbitmq-redis-application/>
VANCOUVER
Falvis | Sciencx - » Dockerized Flask Celery RabbitMQ Redis Application. [Internet]. [Accessed ]. Available from: https://www.scien.cx/2021/11/04/dockerized-flask-celery-rabbitmq-redis-application/
CHICAGO
" » Dockerized Flask Celery RabbitMQ Redis Application." Falvis | Sciencx - Accessed . https://www.scien.cx/2021/11/04/dockerized-flask-celery-rabbitmq-redis-application/
IEEE
" » Dockerized Flask Celery RabbitMQ Redis Application." Falvis | Sciencx [Online]. Available: https://www.scien.cx/2021/11/04/dockerized-flask-celery-rabbitmq-redis-application/. [Accessed: ]
rf:citation
» Dockerized Flask Celery RabbitMQ Redis Application | Falvis | Sciencx | https://www.scien.cx/2021/11/04/dockerized-flask-celery-rabbitmq-redis-application/ |

Please log in to upload a file.


There are no updates yet.
Click the Upload button above to add an update.

You must be logged in to translate posts. Please log in or register.