
This content originally appeared on DEV Community and was authored by Anthony Viard 🥑
Hey my fellow developers,
Liquibase is an open-source solution that helps you track, version, and deploy database changes. It adds version control for changes to your database schema, makes database upgrades repeatable across environments, and supports rollbacks so you can undo changes when it’s needed.
It’s the solution chosen by JHipster as well as Entando to manage database updates.
In this blog post, we’ll explore the Liquibase architecture, and how we can incrementally upgrade the database schema for our own JHipster and Entando applications.
Liquibase Architecture
Liquibase defines a master file (aka master.xml in JHipster) as well as changelog files that represent the incremental updates to your database schema. A changelog file contains a changeSet (e.g add, edit or delete a table) while the master file defines the order in which the database updates are to be run.
Here are some examples of what a Liquibase architecture looks like from the official documentation.
The directory structure
 com
      example
        db
          changelog
            db.changelog-master.xml
            db.changelog-1.0.xml
            db.changelog-1.1.xml
            db.changelog-2.0.xml
          DatabasePool.java
          AbstractDAO.java
The master file
<?xml version="1.0" encoding="UTF-8"?>
<databaseChangeLog
 xmlns="http://www.liquibase.org/xml/ns/dbchangelog"
 xmlns:xsi="http://www.w3.org/2001/XMLSchema-instance"
 xsi:schemaLocation="http://www.liquibase.org/xml/ns/dbchangelog
                     http://www.liquibase.org/xml/ns/dbchangelog/dbchangelog-3.8.xsd">
 <include  file="com/example/db/changelog/db.changelog-1.0.xml"/>
 <include  file="com/example/db/changelog/db.changelog-1.1.xml"/>
 <include  file="com/example/db/changelog/db.changelog-2.0.xml"/>
</databaseChangeLog>
A sample changelog
<?xml version="1.0" encoding="UTF-8"?>
<databaseChangeLog
 xmlns="http://www.liquibase.org/xml/ns/dbchangelog"
 xmlns:xsi="http://www.w3.org/2001/XMLSchema-instance"
 xsi:schemaLocation="http://www.liquibase.org/xml/ns/dbchangelog
                     http://www.liquibase.org/xml/ns/dbchangelog/dbchangelog-3.8.xsd">
 <changeSet  author="authorName"  id="changelog-1.0">
   <createTable  tableName="TablesAndTables">
     <column  name="COLUMN1"  type="TEXT">
       <constraints  nullable="true"  primaryKey="false"  unique="false"/>
     </column>
   </createTable>
 </changeSet>
</databaseChangeLog>
Your Liquibase survival kit
Every time you start your application, Liquibase checks if it is synchronized with the latest configuration in your master file, and deploys the new changesets if it’s not up to date. Liquibase uses the checksums of the previous changelogs to ensure their integrity and fires an alert if they have changed. Here are some tips to follow to ensure your database upgrades go smoothly.
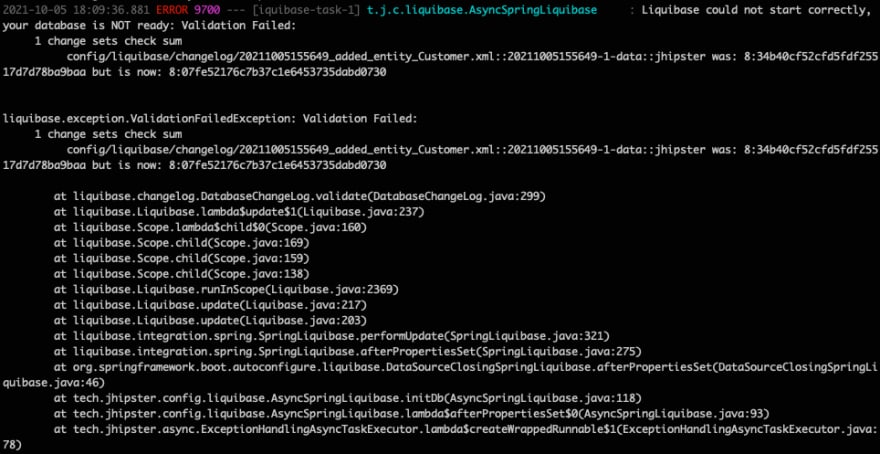
#1 Avoid modifying a changelog
You should not change the content of a changelog once it has been executed on a database. Instead, perform a rollback or add a new changelog.
If the validation fails, your database will not be able to start correctly.
#2 Keep database changes in order
The master file executes the changelogs in the order they are defined. So, if you have a changelog that modifies a table created in a previous changelog, be sure to respect the order to have the proper plan executed. It’s recommended to keep a clear and maintainable file.
#3 Keep changesets small
The changeset is contained in a changelog and defines actions to perform in the database (e.g. create, drop, alter tables, etc.). By default, JHipster creates one changeset per entity. This is a good pattern to follow unless there’s a reason to make updates to multiple tables in a single changelog. Avoid creating BIG one-shot changesets.
How to Update Your Schema in JHipster 6
JHipster makes it simple and intuitive to generate entities using JDL Studio or via the command line. Every time a new entity is created, a new changeset is generated and the master file is updated. However, modifying an existing entity will simply update the original changelog. If this changeset has already been run, we break rule #1.
Consolidate schema changes in a single changeset
When adding a new database entity, it’s quite common during local development to make several changes to the data model before arriving at the final schema. In this case, the easiest approach is to make updates to the entity as needed and only commit the final changelog that’s generated once you’ve finished development.
However, a changelog that has already been applied to a given environment cannot be modified without risking potential data loss or other breaking changes.
The solution is to generate incremental changes using Maven and Gradle plugins.
Generate incremental changesets with plugins
Maven and Gradle plugins, combined with the Liquibase Hibernate plugin, can be used to generate incremental changesets without breaking rule #1.
JHipster provides the configuration to make it work out of the box with most databases but you may need to modify it in some circumstances. Check the official guide for more information.
Below, we’ll cover a sample app from Entando that’s using an H2 database.
Maven configuration
<plugin>
<groupId>org.liquibase</groupId>
<artifactId>liquibase-maven-plugin</artifactId>
<version>${liquibase.version}</version>
<configuration>
<changeLogFile>${project.basedir}/src/main/resources/config/liquibase/master.xml</changeLogFile>
<diffChangeLogFile>${project.basedir}/src/main/resources/config/liquibase/changelog/${maven.build.timestamp}_changelog.xml</diffChangeLogFile>
<driver>org.h2.Driver</driver>
<url>jdbc:h2:file:${project.build.directory}/h2db/db/sample</url>
<defaultSchemaName></defaultSchemaName>
<username>sample</username>
<password></password>
<referenceUrl>hibernate:spring:com.entando.sample.domain?dialect=org.hibernate.dialect.H2Dialect&hibernate.physical_naming_strategy=org.springframework.boot.orm.jpa.hibernate.SpringPhysicalNamingStrategy&hibernate.implicit_naming_strategy=org.springframework.boot.orm.jpa.hibernate.SpringImplicitNamingStrategy</referenceUrl>
<verbose>true</verbose>
<logging>debug</logging>
<contexts>!test</contexts>
<diffExcludeObjects>oauth_access_token, oauth_approvals, oauth_client_details, oauth_client_token, oauth_code, oauth_refresh_token</diffExcludeObjects>
</configuration>
Workflow
- Update your entity with JHipster using the command
jhipster entity yourEntityName - Discard the changes made by JHipster in the Entity changelog
git checkout -- [ENTITY_CHANGELOG].xml - Run
./mvnw liquibase:difffor Maven or./gradlew liquibaseDiffChangelog -PrunList=diffLogfor Gradle - A new changelog will be generated that contains the diff between your updated Entity and the original database table.
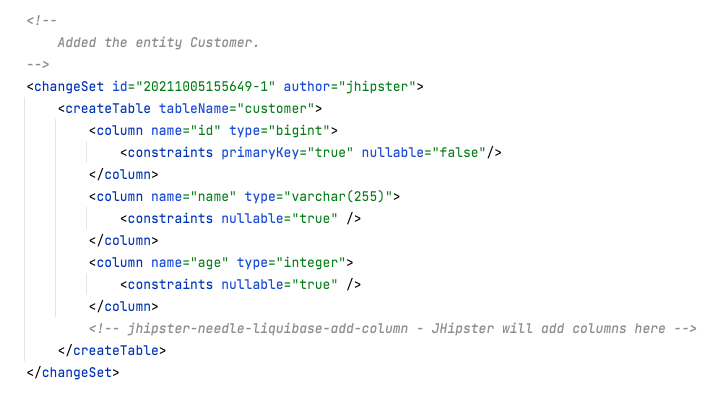
In my application, I have added a customer entity with a field “name”. Later on, I want to add an “age” field so I update it with JHipster: jhipster entity customer


The changelog is now updated with the “age” field, but because my first version has already been run against my database I will break rule #1. I’ll need to revert this file and replace it with the original version.
Next, I can run ./mvnw liquibase:diff. I now have an incremental changelog that contains just the updates that I made. Now, I can add this new changelog to the master.xml file.

Note: This could not work if you’re using an H2 database. However, you can easily create incremental changelogs manually by extracting the generated XML code from the changelog generated by JHipster.
Incremental changelogs in JHipster 7
With the release of JHipster 7, the --incremental-changelog option allows us to generate a separate changelog when modifying an Entity.
This means we don’t need to rollback the original changelog anymore, and we can generate incremental changelogs for our entities without breaking rule #1.
You can run JHipster with the incremental option: jhipster --incremental-changelog. It also works when you import a JDL, e.g. jhipster jdl app.jdl --incremental-changelog --with-entities.
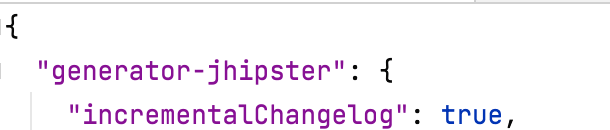
You can check the “incrementalChangelog” entry is set to “true” in .yo-rc.json.
Then, create the entity as usual with jhipster entity customer.

Finally, update the entity by running the same command to add a new field.
Two new changelogs are generated, one for updating the entity and the second for injecting sample data for development.


Incremental changelogs work well when you don’t need to execute a lot of changes for a given entity, but multiplying the number of changelogs can lead to complex change management. If there’s no risk of breaking your existing database, consider merging changelogs to simplify your project structure.
Conclusion
Upgrading your database schema can be tricky, especially when working with multiple environments. In today’s blog, we learned how Liquibase helps you version control updates to your schema, and how to generate incremental changesets for entities generated by JHipster.
Entando is an application composition platform for Kubernetes that adds support for generating micro frontends along with JHipster microservices. Entando 6.3.2 currently supports JHipster 6 and will be updated to JHipster 7 in the next Entando release.
This content originally appeared on DEV Community and was authored by Anthony Viard 🥑
Anthony Viard 🥑 | Sciencx (2021-11-04T22:05:26+00:00) How to Use Liquibase to Update the Schema of Your JHipster Application. Retrieved from https://www.scien.cx/2021/11/04/how-to-use-liquibase-to-update-the-schema-of-your-jhipster-application/
Please log in to upload a file.
There are no updates yet.
Click the Upload button above to add an update.