This content originally appeared on DEV Community and was authored by Pascal Thormeier
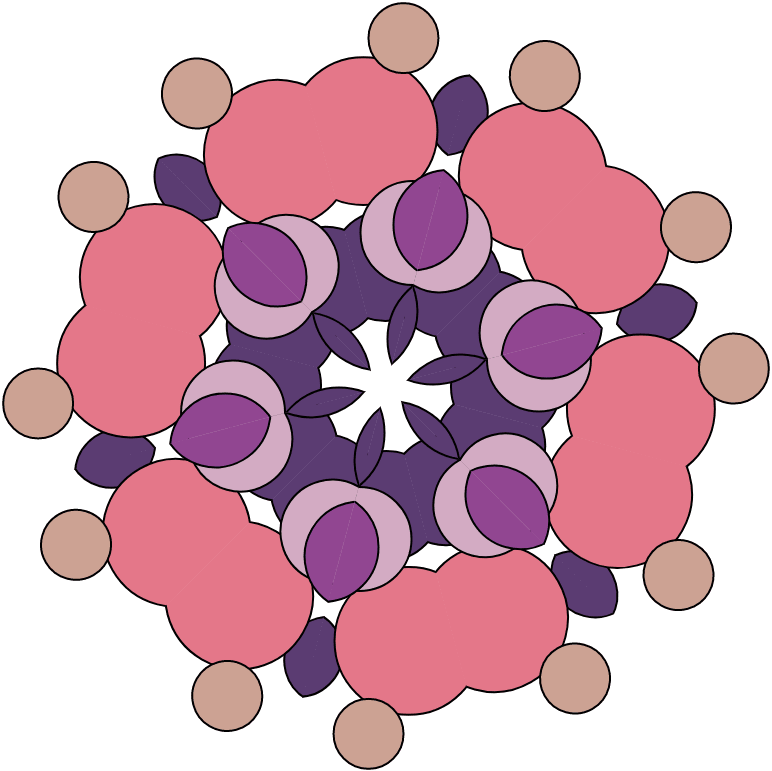
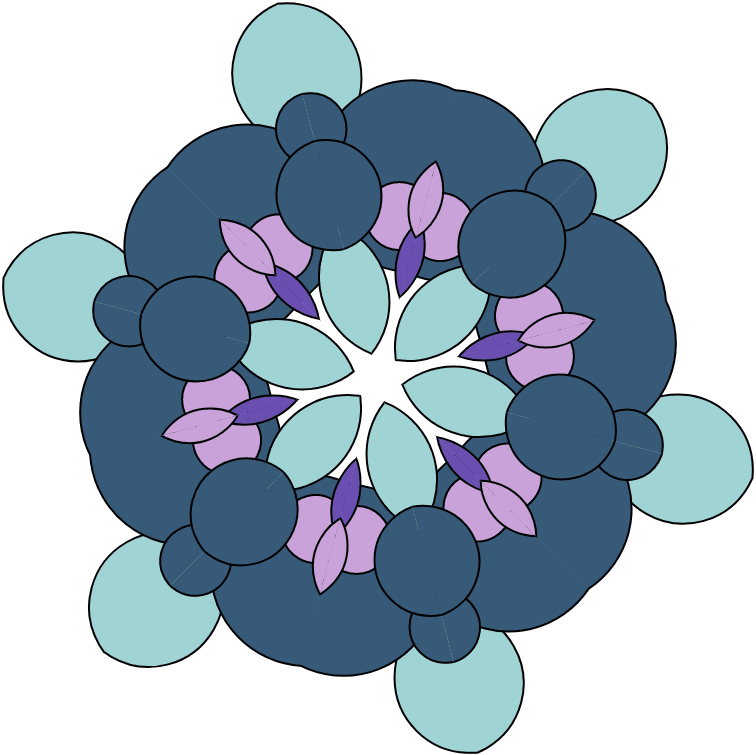
I mean, aren't they just beautiful to look at? I mean, look at them:
 |
 |
|---|
Amazing, aren't they? The symmetry, the complexity, the maths! Let's build something like this today! We'll use an SVG and some JS for that.
Wait, wait, wait! The maths?
Yup, the maths! In order to generate these beautiful patterns, we'll need some geometry. We're only going to define the radius of the circle of the rosette pattern, the amount of segments and a few other variables that contribute to the overall pattern. We'll derive the rest from that.
Let's start by analyzing how rosette patterns are structured.
The structure
The symmetry of such a circular pattern is given by its segments. The same segment is used over and over, by mirroring, rotating, mirroring again and rotating again and so on.
So to line up the individual elements of a segment, the circle needs to be cut into an even number of equally sized (meaning: same angle) slices, just like a cake.
The content of an individual segment doesn't matter. It can be anything - the mirroring guarantees that the borders between slices line up perfectly.
Now how does this help us with implementing a rosette pattern? We could create a single segment as an SVG and reuse it via SVGs handy <use> tag and some transform statements.
Since SVGs usually come in rectangular shapes only, we need some way to know the exact width and height of a segments. That's nothing geometry hasn't solved yet.
Creating a segment
In order to create a segment, we want to know the radius of the final rosette pattern and its angle. A segment is roughly speaking a triangular shape.
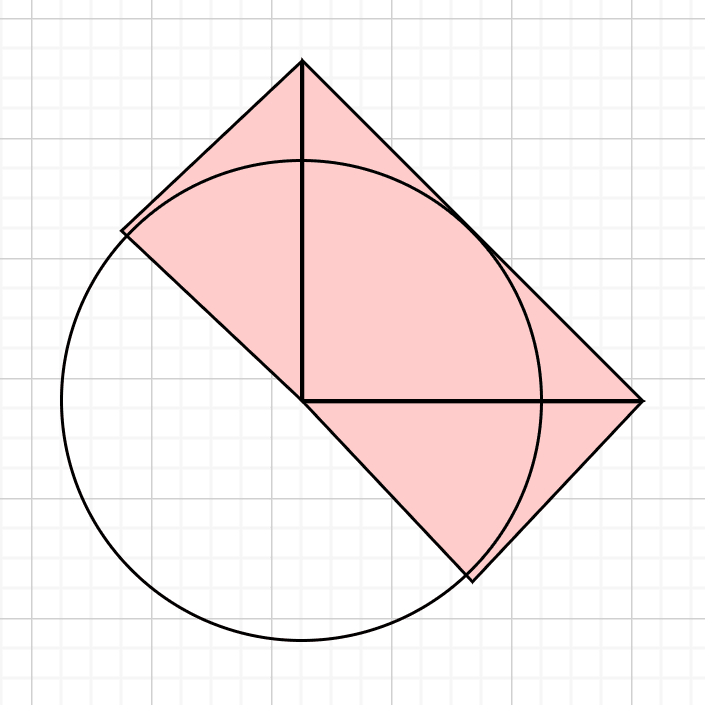
Let's do an example. If we want to slice a circle into, say, 4 equally sized slices, a single segment would basically look like this:
If we would like to create triangular shape out of that, we can extend the two lines, until we find the spot where we can draw a tangent line to the circle, forming a triangle:
(Side note: In this example, the triangle is already a 90 degrees triangle, but that only works with 4 segments, since 360°/ 4 = 90°.)
By moving the tangent over and connecting the dots, we get a full rectangle containing the segment:
The height can be calculated with this formula:
With hsegmenth_{segment}hsegment being the height, α\alphaα being the angle of the segment (in this case: 90°) and rrr being the radius of the segment. This formula uses the fact that every triangle can be divided into two right angle triangles and that these triangles are similar if the the triangle has two sides of equal length.
The width can then be calculated using Pythagorases theorem:
You may have noticed that we're not using the radius directly here. Calculating the width again from the radius and the height will make the triangle have the actual angle we want. Otherwise it would be a bit too narrow.
With the height and the width of the segment, we can now also calculate the final width and height of the entire rosette SVG using Pythagorases theorem:
Now we know how to get the size of a segment. Let's take care of its content!
Generating a segments content
We're gonne be a bit... cheap about that. Let's just use more circles! By randomly placing differently colored and differently sized circles into the rectangle and cutting them off at the edges of the triangle, we can create very interesting shapes and designs.
To select a bunch of colors that go well together, we will use a technique described in this Twitter thread:
The technique is rather straight-forward: Generate a random HSL color, add 75 (or any number, really) to its hue, chose random lightness and saturation values and you've got two colors! Repeat that with the second color to get a third one, and repeat a few more times until you've got the number of colors you want.
If you don't know how HSL colors work, this post I did a while ago has an in-depth explanation:

Let's build a rainbow on a canvas from scratch! 🌈📐
Pascal Thormeier ・ Sep 25 ・ 7 min read
So far so good. I think we can start coding!
Let's code the foundation
Let's start with a rounding function and random number function, because JavaScripts Math.random is kind of bulky at times:
/**
 * Rounds a number
 * @param n Number to round
 * @param places Number of places to round to
 * @returns {number}
 */
const round = (n, places) => Math.round(n * (10 ** places)) / (10 ** places)

/**
 * Random number between min and max
 * @param min Lower end of range
 * @param max Upper end of range
 * @param precision Number of decimal places
 * @returns {*}
 */
const rand = (min, max, precision = 0) => {
  return round((Math.random() * (max - min) + min), precision)
}
Next, we create a Color class and a function that creates a palette of a given size. I'll add a function to the Color class that gives me the next color.
/**
 * Represents a color
 */
class Color {
  /**
   * Constructor
   * @param h Hue
   * @param s Saturation
   * @param l Lightness
   */
  constructor(h, s, l) {
    this.h = h
    this.s = s
    this.l = l
  }

  /**
   * Creates a random color
   * @returns {Color}
   */
  static createRandom() {
    return new Color(
      rand(0, 360),
      rand(25, 75),
      rand(25, 75)
    )
  }

  /**
   * Generates the next color
   * @param hueStepSize By how much the Hue value should change
   * @returns {Color}
   */
  getNextColor(hueStepSize) {
    let nextHue = this.h + hueStepSize

    // Wrap around if hue is not between 0 and 360
    if (nextHue < 0) {
      nextHue += 360
    } else if (nextHue > 360) {
      nextHue -= 360
    }

    return new Color(
      nextHue,
      rand(25, 75),
      rand(25, 75)
    )
  }

  /**
   * Get a string representation of this color
   * @returns {string}
   */
  toString() {
    return `hsl(${this.h}, ${this.s}%, ${this.l}%)`
  }
}

/**
 * Creates a color palette of a given size.
 * @param numberOfColors Number of colors.
 * @param hueStepSize By how much the hue should change.
 * @returns {*[]}
 */
const getRandomColorPalette = (numberOfColors, hueStepSize) => {
  const colors = []

  let currentColor = Color.createRandom()
  colors.push(currentColor)

  while (numberOfColors > 0) {
    currentColor = currentColor.getNextColor(hueStepSize)
    colors.push(currentColor)
    numberOfColors--
  }

  return colors
}
Off for a good start. Next, we'll create a Circle class that represents part of the content of a single segment:
class Circle {
  /**
   * Represents a circle within a segment
   * @param cx
   * @param cy
   * @param r
   * @param color
   */
  constructor(cx, cy, r, color) {
    this.cx = cx
    this.cy = cy
    this.r = r
    this.color = color
  }

  /**
   * Get a string representation of this circle
   * @returns {string}
   */
  toString() {
    return `<circle
      cx="${this.cx}"
      cy="${this.cy}"
      r="${this.r}"
      fill="${this.color.toString()}"
      stroke="#000"
      stroke-width="2"
    />`
  }
}
Next up, we want to create a Segment class that can generate its own circles:
class Segment {
  /**
   * Represents a single Segment
   * @param width Width of the segments rectangle
   * @param height Height of the segments rectangle
   * @param numberOfCircles Number of circles it should contain
   * @param colorPalette The color palette used
   */
  constructor(width, height, numberOfCircles, colorPalette) {
    this.width = width
    this.height = height
    this.circles = []

    this.generateCircles(numberOfCircles, colorPalette)
  }

  /**
   * Generates a given number of random circles with
   * different colors from a given palette
   * @param numberOfCircles Number of circles to generate
   * @param colorPalette Palette to chose colors from
   */
  generateCircles(numberOfCircles, colorPalette) {
    while (numberOfCircles > 0) {
      // 5% to 25% of the segments width.
      const radius = rand(this.width * 0.05, this.width * 0.25)
      this.circles.push(new Circle(
        // Width - radius guarantees that the circle doesn't overlap the width.
        rand(0, this.width - radius),
        rand(0, this.height),
        radius,
        colorPalette[rand(0, colorPalette.length - 1)]
      ))

      numberOfCircles--
    }
  }

  /**
   * Creates a string representation of this segment
   * @returns {string}
   */
  toString() {
    // ...
  }
}
Notice how I left out the toString method of the segment? I want to give this one some special attention. In order to cut out the actual segment, we'll use clippath. Remember the triangle from earlier? Its points align perfectly with the top right, bottom right and center left of the rectangle:
class Segment {
  // ...

  /**
   * Creates a string representation of this segment
   * @param id DOM id for referencing
   * @returns {string}
   */
  toString(id) {
    // This is used to "scale" the clippath a bit without using transform: scale
    // When finished, there will be some artifacts at the borders, this reduces them.
    const tolerance = 1

    return `
      <svg width="${this.width + tolerance}" height="${this.height + tolerance}" id="${id}">
        <defs>
          <clipPath id="triangle">
            <!-- scaleZ(1) forces GPU rendering -->
            <polygon transform="scaleZ(1)" points="
              -${tolerance / 2},${this.height / 2}
              ${this.width + (tolerance / 2)},-${tolerance / 2}
              ${this.width + (tolerance / 2)},${this.height + (tolerance / 2)}"
            />
          </clipPath>
        </defs>

        <g style="clip-path: url(#triangle)">
          ${this.circles.map(c => c.toString()).join("\n")}
        </g>
      </svg>
    `
  }

  // ...
}
However, we added the tolerance variable. SVG's transform in combination with clippath adds some artifacts at the borders of the triangle. I haven't exactly figured out why this is happening, but enlarging the segment just a tiny little bit is already helping a lot.
Let's try that:
const segment = new Segment(
  400, // width
  200, // height
  12, // number of circles
  getRandomColorPalette(5, 25)
)

const container = document.createElement('div')
container.innerHTML = segment.toString('segment')
document.body.appendChild(container)
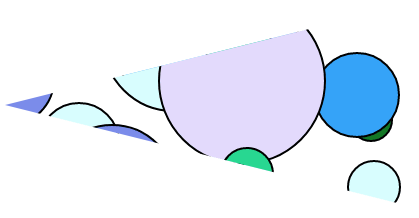
And we get something like this:
Almost there! Now we only need to repeat the segment a few times.
Creating the full pattern
Next up, we need a class called Pattern that shows all the segments by rotating and mirroring them.
class Pattern {
  /**
   * Creates a full pattern
   * @param numberOfSegments
   * @param radius
   */
  constructor(numberOfSegments, radius) {
    this.numberOfSegments = numberOfSegments
    const angle = 360 / numberOfSegments
    // The formula we used earlier.
    // `angle * Math.PI / 180.0` is necessary, because Math.sin
    // uses radians instead of degrees.
    const segmentHeight = 2 * Math.sin((angle * Math.PI / 180.0) / 2) * radius

    const segmentWidth = Math.sqrt(radius ** 2 - (segmentHeight / 2) ** 2)

    const colorPalette = getRandomColorPalette(5, 25)

    this.segment = new Segment(segmentWidth, segmentHeight, rand(5, 12),  colorPalette);

    this.segmentHeight = this.segment.height
    this.width = 2 * Math.sqrt((this.segment.height / 2) ** 2 + radius ** 2)
    this.height = this.width
  }

  /**
   * Creates a string representation of this pattern
   * @returns {string}
   */
  toString() {
    // ...
  }
}
To render the entire pattern, we first need to get the rotation working:
  /**
   * Creates a string representation of this pattern
   * @returns {string}
   */
  toString() {
    const segments = []
    let numberOfSegmentsLeft = this.numberOfSegments
    while (numberOfSegmentsLeft > 0) {
      // Rotate the segment
      const rotationRadius = (360 / this.numberOfSegments * numberOfSegmentsLeft) % 360

      let transformRotation = `rotate(${rotationRadius})`

      segments.push(`
        <use
          href="#segment"
          transform="${transformRotation} translate(${this.width / 2} ${this.width / 2 - this.segmentHeight / 2})"
          transform-origin="${this.width / 2} ${this.width / 2}"
        ></use>
      `)

      numberOfSegmentsLeft--
    }

    return `
      <div>
        ${this.segment.toString('segment')}
      </div>

      <div>
        <svg width="${this.width}" height="${this.height}">
          ${segments.join("\n")}
        </svg>
      </div>
    `
  }
Now, to flip every second segment, we need to add a scale to the transform:
// ...
      let transformRotation = `rotate(${rotationRadius})`
      if (numberOfSegmentsLeft % 2 === 0) {
        transformRotation += ' scale(1, -1)'
      }
// ...
The result
And here's the result:
And since everything's random, every pattern you get is unique and is only ever generated for you! If the one you see on load is boring, simply click on the "Show new" button to (hopefully) get a more beautiful one.
I hope you enjoyed reading this article as much as I enjoyed writing it! If so, leave a ❤️ or a 🦄! I write tech articles in my free time and like to drink coffee every once in a while.
If you want to support my efforts, you can offer me a coffee ☕ or follow me on Twitter 🐦! You can also support me directly via Paypal!
This content originally appeared on DEV Community and was authored by Pascal Thormeier
Pascal Thormeier | Sciencx (2021-11-14T13:36:25+00:00) How to simply create beautiful rosette patterns with JavaScript and SVG ✨🖌️. Retrieved from https://www.scien.cx/2021/11/14/how-to-simply-create-beautiful-rosette-patterns-with-javascript-and-svg-%e2%9c%a8%f0%9f%96%8c%ef%b8%8f/
Please log in to upload a file.
There are no updates yet.
Click the Upload button above to add an update.


