This content originally appeared on DEV Community and was authored by Thiago Pacheco
In this tutorial, we are going to walk through an example of how to create a Restful API with Golang. We are going to cover the initial setup of the application, how to structure your app, how to handle persistence, docker config, HTTP requests and even debugging with vscode.
This tutorial covers many concepts since the basics of setting up an application, so I recommend that you check the table of contents below, decide how you want to follow this tutorial and maybe jump to the sections you are more interested in.
Table of contents
- 1. Why Golang
- 2. Initial Setup
- 3. Create your first endpoint with fiber
- 4. Run with Docker
- 5. Setup VSCode debugger
- 6. Create a Todo API
- 6.1. Include Database connection
- 6.2. Todo module implementation
- 6.2.1. Todo model definition
- 6.2.2. Todo repositories
- 6.2.3. Todo handlers
- 6.3. Start the database and register endpoints
- Build and test
-
Test with insomnia
- 8.1. Import swagger
- 8.2. Test create Todo
- 8.3. Test get Todo collection
- 8.4. Test get single todo
- 8.5. Test update Todo
- 8.6. Test delete Todo
Why Golang?
Golang is an extremely lightweight and fast language that can be used to build CLIs, DevOps and SRE, web development, distributed services, database implementations, and much more. Applications like Docker and Kubernetes are written in Go for example.
Go is known for its performance and by its simplicity to learn (only 25 reserved keywords) and improve the existing codebase.
Initial setup
Create your folder and initialize the app
mkdir go-todo
cd go-todo
git init
Go has its own package manager, and it is handled through the go.mod file. To generate this base file you can run the following command:
go mod init <YOUR API NAME>
You can replace the <YOUR API NAME> for whatever name you want to give your app, but keep in mind that the convention is to use the name of the remote repository your app will be available.
For example github.com/pachecoio/go-todo
go mod init github.com/pachecoio/go-todo
This is especially important because that is how Go manages dependencies. Go does not download the dependencies to your local project directory, rather it handles them in a decentralized fashion through modules and we will be seeing that soon in the following sections.
If you want to dive deeper into this concept, you can check out the here to learn more about it.
Now let's create our entry point file for this app.
touch main.go # Create a main.go file
code . # Open with vscode
Let's include some boilerplate code to test our initial setup:
package main

import "fmt"

func main() {
    fmt.Println("App running")
}
You can run this app by running go main.go in your terminal or pressing F5 if you are using vscode.
Create your first endpoint with fiber
In this example, we will be using Fiber to handle our HTTP requests and create the base structure of the API.
Fiber is a Web Framework built with Fasthttp and inspired by Express, designed to ease things up for fast development with zero memory allocation and performance in mind.
First, let's fetch the fiber dependencies:
go get github.com/gofiber/fiber/v2
Now we can import the fiber modules into the main.go file and replace the code inside the main function.
package main

import (
    "log"

    "github.com/gofiber/fiber/v2"
    "github.com/gofiber/fiber/v2/middleware/cors"
)

func main() {
    app := fiber.New()
    app.Use(cors.New())

    api := app.Group("/api")

    // Test handler
    api.Get("/", func(c *fiber.Ctx) error {
        return c.SendString("App running")
    })

    log.Fatal(app.Listen(":5000"))
}
Let's walk through what is happening here:
First we can see that go uses the URLs of the remote repos for importing the dependencies/modules.
Next we create a new fiber instance that contains a series of helpers and the main function is to listen to HTTP requests on port 5000 as specified at the end of the file.
Theapivariable is an example of a grouping that can be used to organize the endpoint paths. In this example, we have used the/apiextension and that means that our base URL to access the endpoints would behttp://localhost:5000/api.
At this point you can run the app again and try to make a request to http://localhost:5000/api and receive the following response:
App running
You can test it by just typing this URL in your browser but I would recommend using an HTTP client like Insomnia, as it would be also required for the rest of this lesson.
Run with Docker
At this point, we already can run the app and debug it with vscode by pressing F5, but the more we add dependencies and complexity it gets harder to have a production ready app as we rely too much on our local setup (especially when we start adding databases into it).
So a good solution for that is to containerize this app with Docker.
You can skip this section if you don't want to run this with Docker, but keep in mind that for the following sections you would need a Postgres database up and running to continue the tutorial.
Setup Dockerfile
The first step here is to create the Dockerfile:
FROM golang:1.16-alpine AS base
WORKDIR /app

ENV GO111MODULE="on"
ENV GOOS="linux"
ENV CGO_ENABLED=0

RUN apk update \
    && apk add --no-cache \
    ca-certificates \
    curl \
    tzdata \
    git \
    && update-ca-certificates

FROM base AS dev
WORKDIR /app

RUN go get -u github.com/cosmtrek/air && go install github.com/go-delve/delve/cmd/dlv@latest
EXPOSE 5000
EXPOSE 2345

ENTRYPOINT ["air"]

FROM base AS builder
WORKDIR /app

COPY . /app
RUN go mod download \
    && go mod verify

RUN go build -o todo -a .

FROM alpine:latest as prod

COPY --from=builder /app/todo /usr/local/bin/todo
EXPOSE 5000

ENTRYPOINT ["/usr/local/bin/todo"]
Let's walk through what is happening here:
You can skip this section if you are already familiar with Docker.
- First, we refer to the base image
golang:1.16-alpineand we set an alias calledbase. - Lines 4 to 6 we set up some base environment variables:
-
GO111MODULE=onForces go to use modules even if the project is in the GOPATH. Requires go.mod to work -
GOOS=linuxtells the compiler for which OS it needs to build. -
CGO_ENABLED=0allows the program to build without any external dependencies, using a statically-linked binary.
-
- Lines 8 to 14 are used to update local dependencies and install ca-certificates (important if you aim to use SSL/TLS)
- Line 16 we create a
devstage based on thebasestage - Line 19 we install air, which will be used for hot-reloading
- Lines 20 and 21 we expose the main port 5000 and the debug port 2345.
Line 23 we have the entry point for the dev stage, which basically runs
airNext from lines 25 to 32 we create a builder stage, which is used to create a compiled application for a production run. In this step, we basically copy all the code, install the dependencies and compile the app.
And last but not least, from lines 34 to 39 we set up our prod config, where we pull the compiled code from the builder stage, expose the port 5000 and set up the entry point for this compiled app.
Include Air for hot-reloading
We are going to be using air to allow hot-reloads on dev/debug mode. The Dockerfile already accounts for that, but we still need to include the air config.
Let's include that by creating a new file called .air.toml with the following content:
# Config file for [Air](https://github.com/cosmtrek/air) in TOML format

# Working directory
# . or absolute path, please note that the directories following must be under root.
root = "."
tmp_dir = "tmp"

[build]
# Just plain old shell command. You could use `make` as well.
cmd = "go build -gcflags='all=-N -l' -o ./tmp/main ."
# Binary file yields from `cmd`.
bin = "tmp/main"
# Customize binary.
full_bin = "dlv exec --accept-multiclient --log --headless --continue --listen :2345 --api-version 2 ./tmp/main"
# Watch these filename extensions.
include_ext = ["go", "tpl", "tmpl", "html"]
Create a docker-compose.yaml config
Now let's add a docker-compose.yaml file so we can continuously build, run and customize this app easily.
# docker-compose.yaml
version: "3.7"

services:
  go-todo:
    container_name: go-todo
    image: thisk8brd/go-todo:dev
    build:
      context: .
      target: dev
    volumes:
      - .:/app
    ports:
      - "5000:5000"
      - "2345:2345"
    networks:
      - go-todo-network

networks:
  go-todo-network:
    name: go-todo-network
Awesome!
At this point, you should be able to run with docker and have the same result as the last section.
To run the app, execute the following command in your terminal:
docker compose up
Visit the http://localhost:5000/api again and you should have the app up and running.
You are also able to make changes to your files and see this reflecting with a nice hot-reload in your terminal logs.
Setup VSCode debugger
It is already good to have the app running and seeing the logs, but it is even better if we could use the vscode debugging functionality inside the container. So let's include that:
In the root of the project, create a folder called .vscode and add a file named launch.json inside of it with the following content:
// .vscode/launch/json
{
  "version": "0.2.0",
  "configurations": [
    {
      "name": "Delve into Docker",
      "type": "go",
      "request": "attach",
      "mode": "remote",
      "substitutePath": [
        {
          "from": "${workspaceFolder}/",
          "to": "/app/"
        }
      ],
      "port": 2345,
      "host": "127.0.0.1",
      "showLog": true,
      "apiVersion": 2,
      "trace": "verbose"
    }
  ]
}
Now, as your app is already running you can simply press F5 and the VSCode debugger will be attached to your running container.
You can set a breakpoint inside of your endpoint handler, try to access the http://localhost:5000/api and see this working.

Create a Todo API
Now that we already have the initial setup ready and running, we can start implementing our API.
For this example, we are going to be creating a Todo API, containing the basic CRUD operations for a Todo entity.
Include Database connection
We are going to be using Postgres and a dependency called gorm for the connection.
So let's jump into the code!
First, let's create a .env file with the credentials for the database we are going to use:
DB_HOST=go-todo-db
DB_PORT=5432
DB_USER=postgres
DB_PASSWORD=root
DB_NAME=go-todo-db
Now, let's include a new service into our docker-compose.yaml file right after our go-todo service with the following code:
  go-todo-db:
    container_name: go-todo-db
    image: postgres
    environment:
      - POSTGRES_USER=${DB_USER}
      - POSTGRES_PASSWORD=${DB_PASSWORD}
      - POSTGRES_DB=${DB_NAME}
    volumes:
      - postgres-db:/var/lib/postgresql/data
    ports:
      - "5432:5432"
    networks:
      - go-todo-network
After this service, let's include a new volume named postgres-db:
volumes:
  postgres-db:
Your complete docker-compose.yaml file should look like the following:
version: "3.7"

services:
  go-todo:
    container_name: go-todo
    image: thisk8brd/go-todo:dev
    build:
      context: .
      target: dev
    volumes:
      - .:/app
    ports:
      - "5000:5000"
      - "2345:2345"
    networks:
      - go-todo-network

  go-todo-db:
    container_name: go-todo-db
    image: postgres
    environment:
      - POSTGRES_USER=${DB_USER}
      - POSTGRES_PASSWORD=${DB_PASSWORD}
      - POSTGRES_DB=${DB_NAME}
    volumes:
      - postgres-db:/var/lib/postgresql/data
    ports:
      - "5432:5432"
    networks:
      - go-todo-network

volumes:
  postgres-db:

networks:
  go-todo-network:
    name: go-todo-network
Create a folder named config and add a config.go file in it with the following content:
// config/config.go
package config

import (
    "fmt"
    "os"

    "github.com/joho/godotenv"
)

func Config(key string) string {
    err := godotenv.Load(".env")
    if err != nil {
        fmt.Print("Error loading .env file")
    }
    return os.Getenv(key)
}
This code will be responsible for loading the .env content we had just created.
Create a module named database and create two files inside of it: connect.go and database.go.
Include the following content in the database.go file:
// database/database.go
package database

import "github.com/jinzhu/gorm"

// DB gorm connector
var DB *gorm.DB
Next, include the following in the connect.go file:
// database/connect.go
package database

import (
    "fmt"
    "strconv"

    "github.com/pachecoio/go-todo/config"

    "github.com/jinzhu/gorm"
    _ "github.com/lib/pq"
)

func ConnectDB() {
    var err error
    p := config.Config("DB_PORT")
    port, err := strconv.ParseUint(p, 10, 32)

    configData := fmt.Sprintf(
        "host=%s port=%d user=%s password=%s dbname=%s sslmode=disable",
        config.Config("DB_HOST"),
        port,
        config.Config("DB_USER"),
        config.Config("DB_PASSWORD"),
        config.Config("DB_NAME"),
    )

    DB, err = gorm.Open(
        "postgres",
        configData,
    )

    if err != nil {
        fmt.Println(
            err.Error(),
        )
        panic("failed to connect database")
    }

    fmt.Println("Connection Opened to Database")
}
Todo module implementation
Now let's create our todo module:
Create a new folder named todo and create a file named models.go:
// todo/models.go
package todo

import "github.com/jinzhu/gorm"

const (
    PENDING  = "pending"
    PROGRESS = "in_progress"
    DONE     = "done"
)

type Todo struct {
    gorm.Model
    Name        string `gorm:"Not Null" json:"name"`
    Description string `json:"description"`
    Status      string `gorm:"Not Null" json:"status"`
}
Next, let's create our repository which will be responsible for handling all the database interactions for this Todo model just created.
Create a file named repositories.go inside of the todo module:
// todo/repositories.go
package todo

import (
    "errors"

    "github.com/jinzhu/gorm"
)

type TodoRepository struct {
    database *gorm.DB
}

func (repository *TodoRepository) FindAll() []Todo {
    var todos []Todo
    repository.database.Find(&todos)
    return todos
}

func (repository *TodoRepository) Find(id int) (Todo, error) {
    var todo Todo
    err := repository.database.Find(&todo, id).Error
    if todo.Name == "" {
        err = errors.New("Todo not found")
    }
    return todo, err
}

func (repository *TodoRepository) Create(todo Todo) (Todo, error) {
    err := repository.database.Create(&todo).Error
    if err != nil {
        return todo, err
    }

    return todo, nil
}

func (repository *TodoRepository) Save(user Todo) (Todo, error) {
    err := repository.database.Save(user).Error
    return user, err
}

func (repository *TodoRepository) Delete(id int) int64 {
    count := repository.database.Delete(&Todo{}, id).RowsAffected
    return count
}

func NewTodoRepository(database *gorm.DB) *TodoRepository {
    return &TodoRepository{
        database: database,
    }
}
This repository file provides the base CRUD operations for this todo model and also a helper function to instantiate it. We will be covering how to use it next.
Now let's create our endpoint handlers.
Create a new file named handlers.go inside the todo module
// todo/handlers.go
package todo

import (
    "strconv"

    "github.com/gofiber/fiber/v2"
    "github.com/jinzhu/gorm"
)

type TodoHandler struct {
    repository *TodoRepository
}

func (handler *TodoHandler) GetAll(c *fiber.Ctx) error {
    var todos []Todo = handler.repository.FindAll()
    return c.JSON(todos)
}

func (handler *TodoHandler) Get(c *fiber.Ctx) error {
    id, err := strconv.Atoi(c.Params("id"))
    todo, err := handler.repository.Find(id)

    if err != nil {
        return c.Status(404).JSON(fiber.Map{
            "status": 404,
            "error":  err,
        })
    }

    return c.JSON(todo)
}

func (handler *TodoHandler) Create(c *fiber.Ctx) error {
    data := new(Todo)

    if err := c.BodyParser(data); err != nil {
        return c.Status(500).JSON(fiber.Map{"status": "error", "message": "Review your input", "error": err})
    }

    item, err := handler.repository.Create(*data)

    if err != nil {
        return c.Status(400).JSON(fiber.Map{
            "status":  400,
            "message": "Failed creating item",
            "error":   err,
        })
    }

    return c.JSON(item)
}

func (handler *TodoHandler) Update(c *fiber.Ctx) error {
    id, err := strconv.Atoi(c.Params("id"))

    if err != nil {
        return c.Status(400).JSON(fiber.Map{
            "status":  400,
            "message": "Item not found",
            "error":   err,
        })
    }

    todo, err := handler.repository.Find(id)

    if err != nil {
        return c.Status(404).JSON(fiber.Map{
            "message": "Item not found",
        })
    }

    todoData := new(Todo)

    if err := c.BodyParser(todoData); err != nil {
        return c.Status(400).JSON(fiber.Map{"status": "error", "message": "Review your input", "data": err})
    }

    todo.Name = todoData.Name
    todo.Description = todoData.Description
    todo.Status = todoData.Status

    item, err := handler.repository.Save(todo)

    if err != nil {
        return c.Status(400).JSON(fiber.Map{
            "message": "Error updating todo",
            "error":   err,
        })
    }

    return c.JSON(item)
}

func (handler *TodoHandler) Delete(c *fiber.Ctx) error {
    id, err := strconv.Atoi(c.Params("id"))
    if err != nil {
        return c.Status(400).JSON(fiber.Map{
            "status":  400,
            "message": "Failed deleting todo",
            "err":     err,
        })
    }
    RowsAffected := handler.repository.Delete(id)
    statusCode := 204
    if RowsAffected == 0 {
        statusCode = 400
    }
    return c.Status(statusCode).JSON(nil)
}

func NewTodoHandler(repository *TodoRepository) *TodoHandler {
    return &TodoHandler{
        repository: repository,
    }
}

func Register(router fiber.Router, database *gorm.DB) {
    database.AutoMigrate(&Todo{})
    todoRepository := NewTodoRepository(database)
    todoHandler := NewTodoHandler(todoRepository)

    movieRouter := router.Group("/todo")
    movieRouter.Get("/", todoHandler.GetAll)
    movieRouter.Get("/:id", todoHandler.Get)
    movieRouter.Put("/:id", todoHandler.Update)
    movieRouter.Post("/", todoHandler.Create)
    movieRouter.Delete("/:id", todoHandler.Delete)
}
This file is responsible for handling the HTTP requests.
We provide here a set of functions to get all Todos, get single, update, create and delete a Todo.
We also provide a helper to register this handler and it also covers auto migrating the databases so we don't need to create the tables ourselves.
Wrapping up
Now in our main.go file, let's connect to the database and register our todo handlers:
initialize the DB connection right after our CORS definition:
// main.go
// ...
    app.Use(cors.New())
    database.ConnectDB()
    defer database.DB.Close()
Remove the test endpoint we had in place and register the new todo handlers:
todo.Register(api, database.DB)
The complete main.go file should look like the following:
// main.go
package main

import (
    "log"

    "github.com/gofiber/fiber/v2"
    "github.com/gofiber/fiber/v2/middleware/cors"
    "github.com/pachecoio/go-todo/database"
    "github.com/pachecoio/go-todo/todo"
)

func main() {
    app := fiber.New()
    app.Use(cors.New())
    database.ConnectDB()
    defer database.DB.Close()

    api := app.Group("/api")
    todo.Register(api, database.DB)

    log.Fatal(app.Listen(":5000"))
}
At this point, we can run the app again and test the endpoints. Run the following command to rebuild and run the app with docker:
docker compose up --build
We pass the
--buildflag to make sure we rebuild and install the dependencies we have just included, but you don't need to include this flag every time you run it. Include it only if you change any dependency or the Dockerfile itself.
Press F5 to attach the VSCode debugger and test the app!
You can use this swagger file to check and test the endpoints we just created for this app.
To test the endpoints, I recommend you to download a HTTP client like Insomnia. Follow below the steps to test it:
Testing with Insomnia
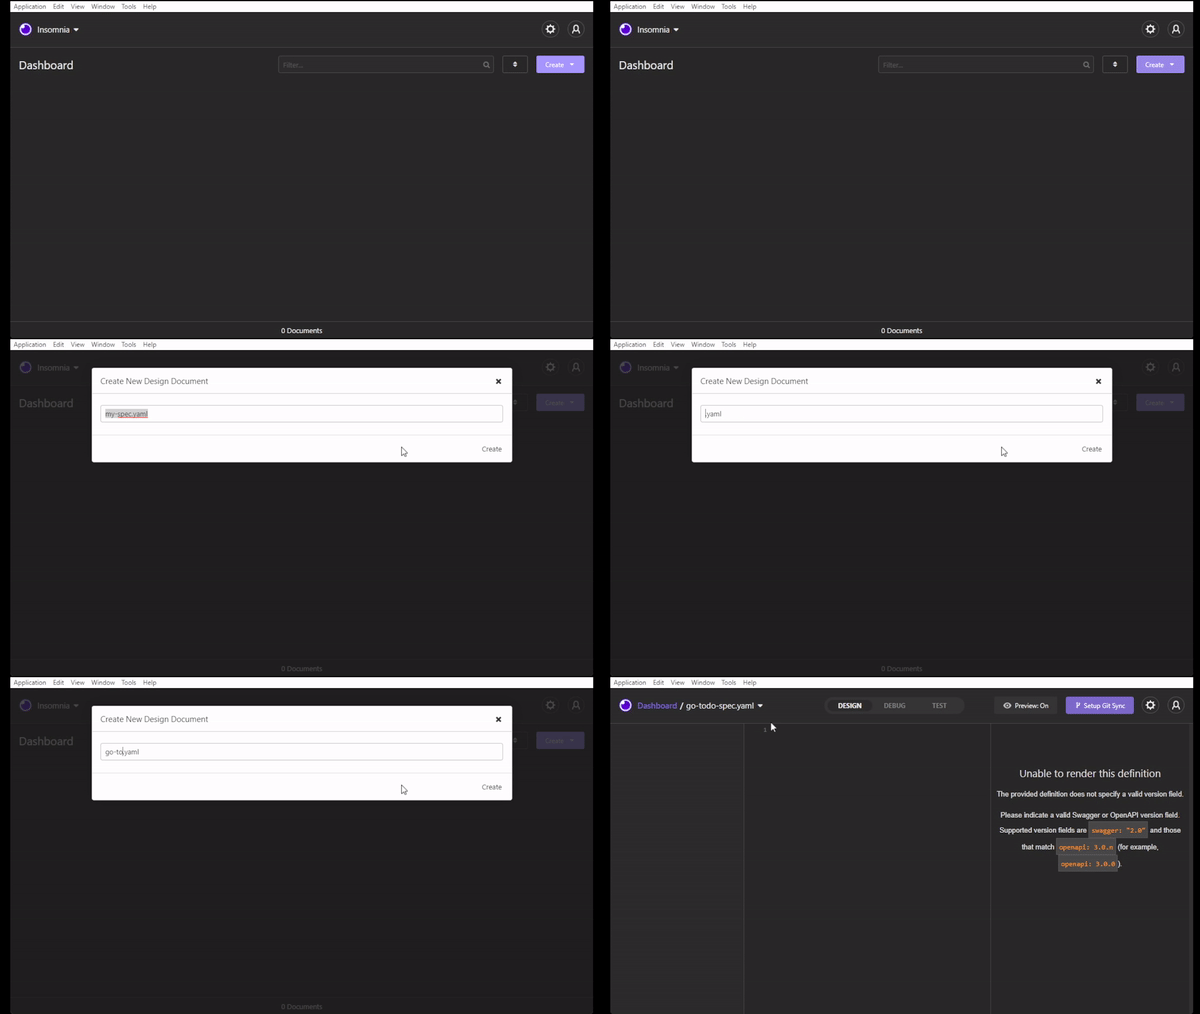
Create a new design document
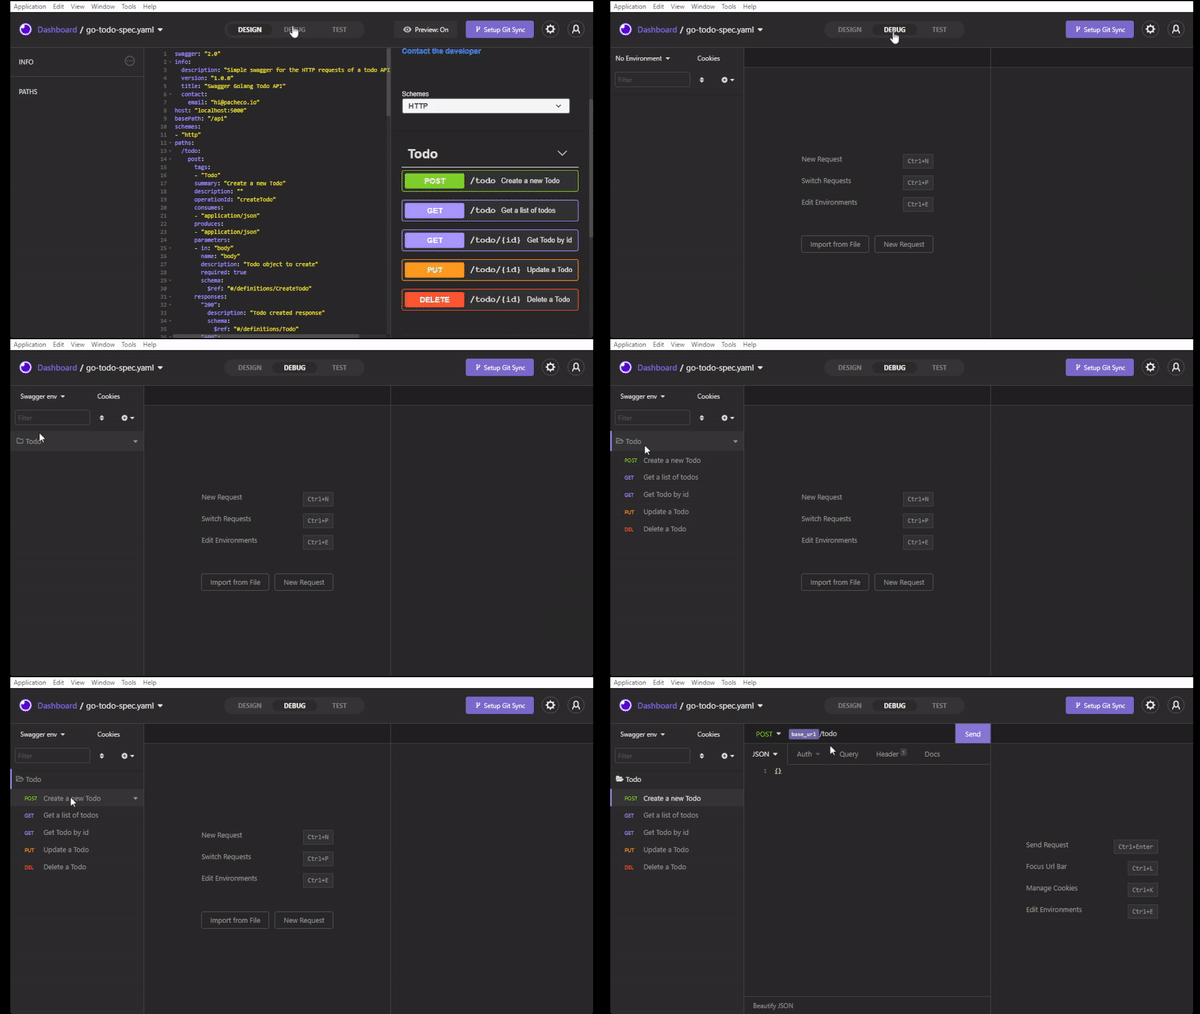
Go to the Design tab, copy the swagger content and paste in the editor
Go to the debug section and check the endpoints generated
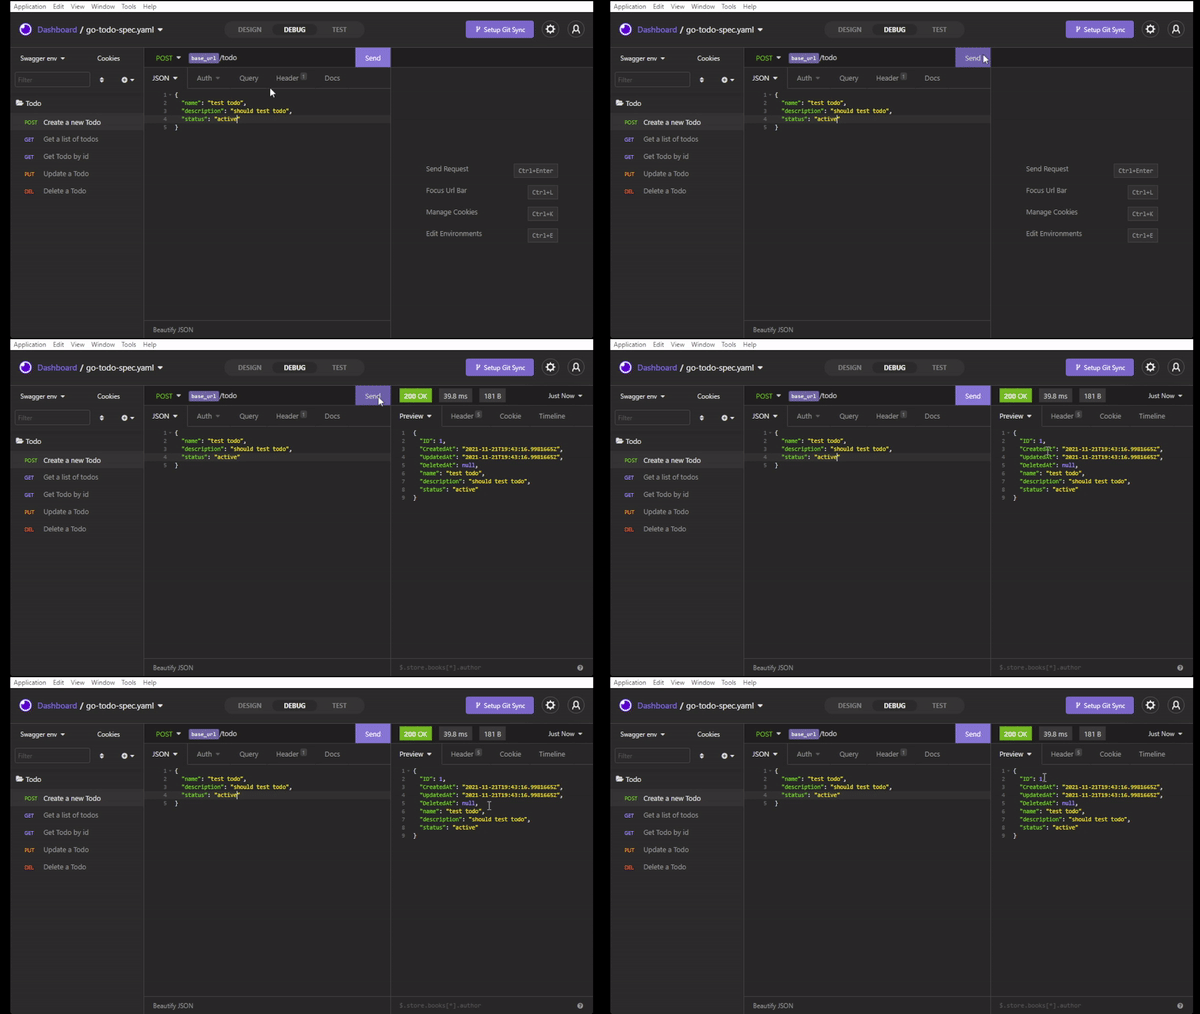
Test the Create todo endpoint
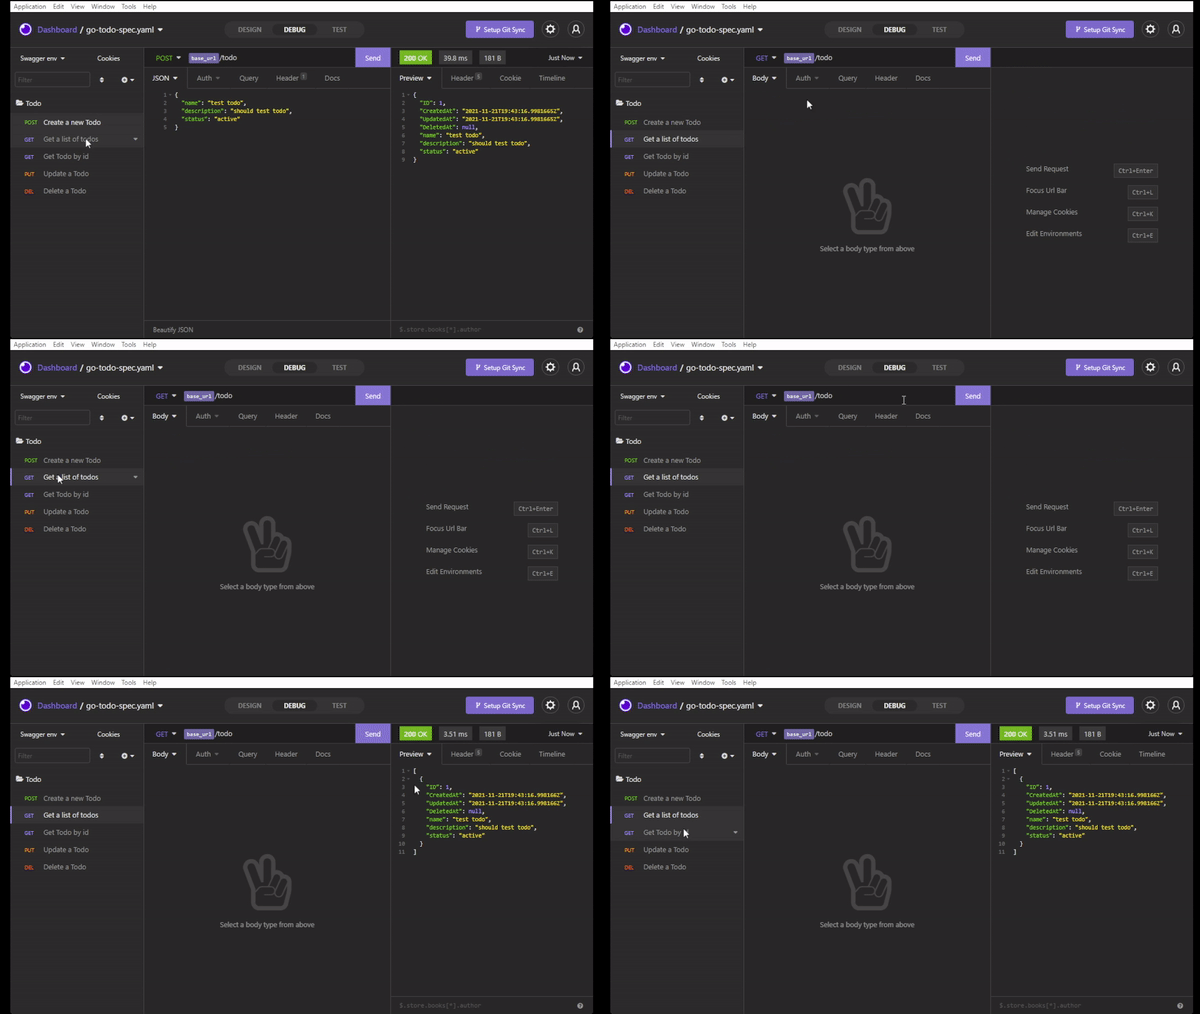
Test the Todo collection endpoint
Test get single todo endpoint
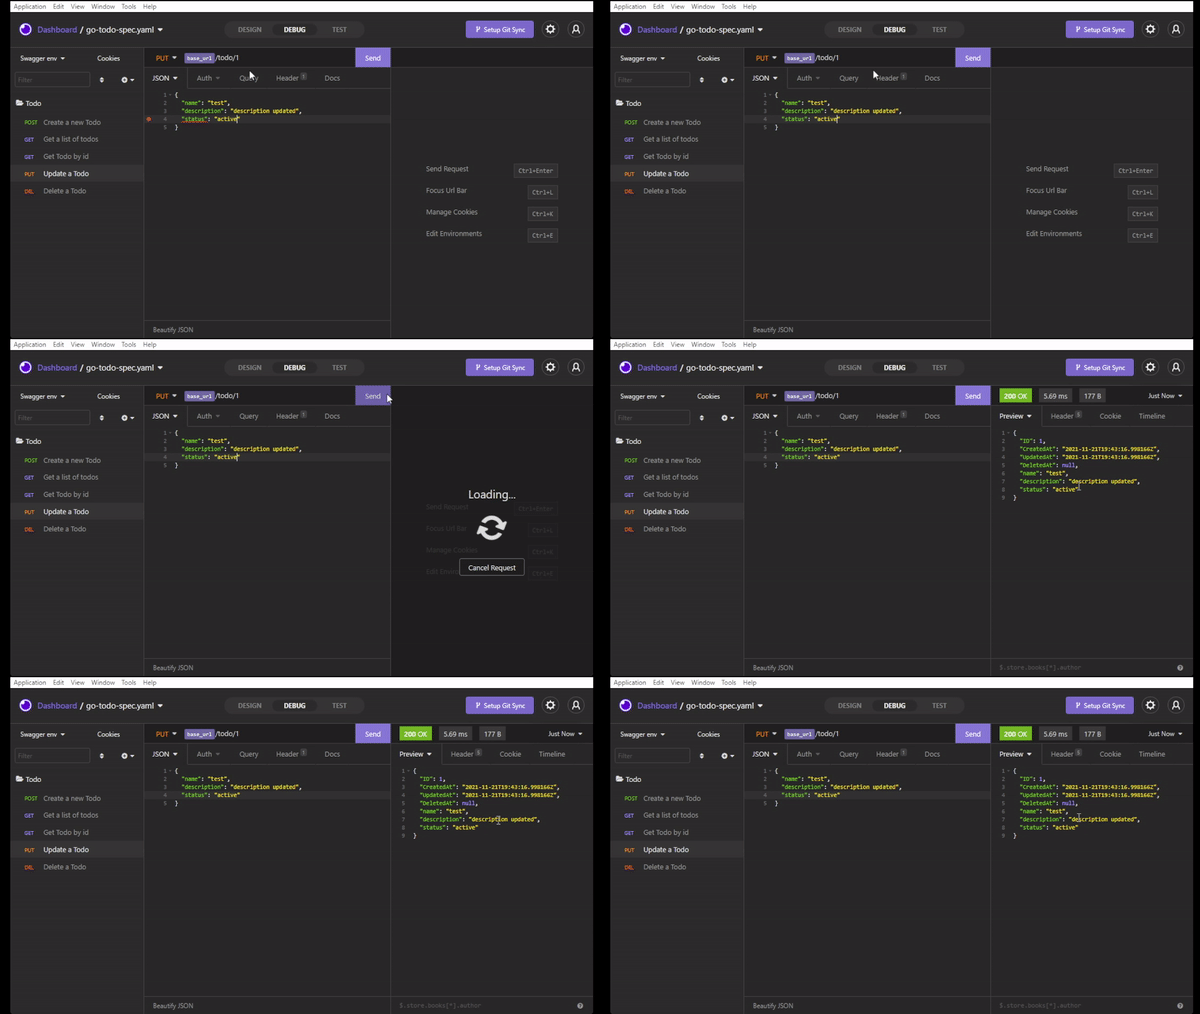
Test update todo endpoint
Test delete todo endpoint
I encourage you to add extra functionalities like filtering the Todo by status and keywords, validating allowed status and so on. Share your results in the comments!
I hope this tutorial was useful and I would be more than happy to receive questions, doubts or suggestions about it!
The source code can be found here.
Have fun, stay safe and see you in the next one!

This content originally appeared on DEV Community and was authored by Thiago Pacheco
Thiago Pacheco | Sciencx (2021-11-21T21:33:11+00:00) Create a Restful API with Golang from scratch. Retrieved from https://www.scien.cx/2021/11/21/create-a-restful-api-with-golang-from-scratch/
Please log in to upload a file.
There are no updates yet.
Click the Upload button above to add an update.


