This content originally appeared on DEV Community and was authored by Bingeh Afumbom
Starting with a new framework can be really tedious sometimes. Don't get me started about the starter files you have to build.
In this article, I'll show you how to set up tailwind css easy peasy, without having to dig too much through the internet. We'll start from making sure you have node installed in your computer, easy/awesome terminal tricks, right down to making sure you are set to start using tailwind in your code.
Check for node in your computer
Side note: You do not need any knowledge of node to use tailwind. We'll just use it for necessary installations.
To check if you already have node installed, then run the following command in your terminal.
node -v
If node was previously installed, then it should display the current version after you hit enter. If it wasn't, then you'll have to install node. You can get it for whatever OS you are using from this website.
What next?
After installing node, check the version again just to be sure. Use the first terminal command above to do so.
Our node is in place (Let's assume that you installed without much struggle lol), we'll get started by creating project folders. There's a really neat way to do this through the terminal. It's faster, and I personally think it's fun...?
Start by creating a folder. We'll call it tailwind. In your terminal, type mkdir tailwind and hit enter. After this folder has been created we have to enter it. Do this by typing cd tailwind where cd means change directory.
Then we want to make a project folder in this tailwind folder. We say mkdir project1 again, and then cd project1. To ensure that these folders are indeed being created, trying finding them on your computer.
To summarize the commands we've used...
mkdir tailwind
cd tailwind
mkdir project1
cd project1
The last command on your terminal should be something like this...
njong@njong-Latitude-E6440:~/tailwind/project1$
Disclaimer: I use Linux, specifically ubuntu as an OS. But the directives are pretty much the same in Windows, so do not worry.
In order for us to open this folder in vscode directly from the terminal, we add code and . like this
njong@njong-Latitude-E6440:~/tailwind/project1$ code .
The dot is telling the terminal to open the folder project1 in vscode.
Are we done yet?
Not quite. But almost, I promise. Your IDE should have opened by now, and your workspace should be in the project1 folder. This is where everything gets real.
Click terminal on vscode access tool bar, and chose new terminal. We want to create a .json file. In your vscode terminal, type,
npm init -y
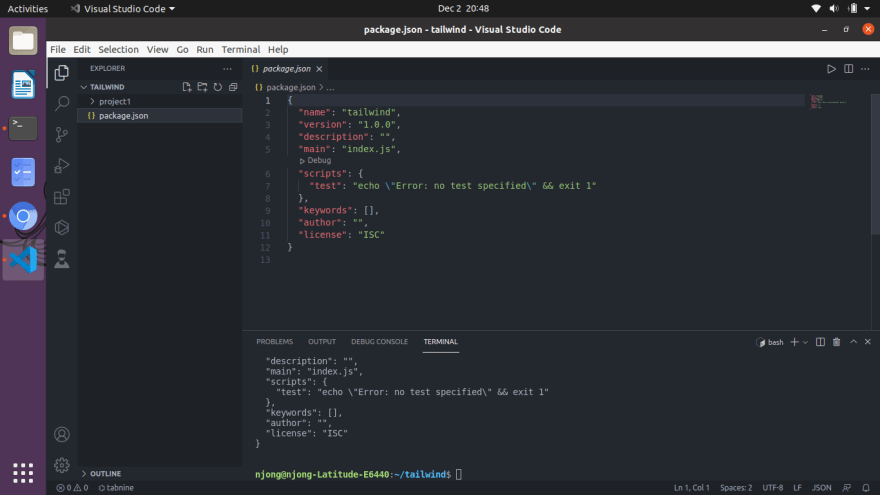
After pressing enter, you should see a package.json file added to your explorer tab. Open it, and it should look something like this;
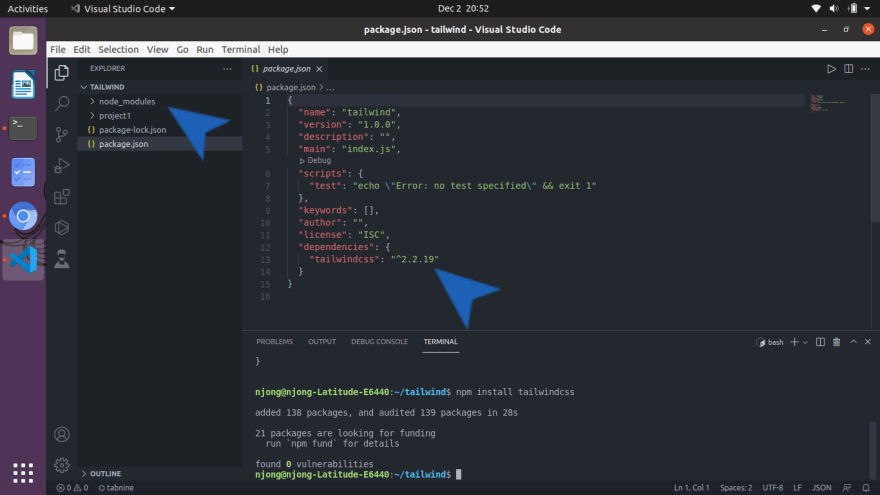
After creating the package.json file, you actually want to install tailwind. In your terminal, type;
npm install tailwindcss
Check your package.json file again, and you'll see that a dependency has been included. Also notice on the explorer tab, a new folder called node_modules has been created. Don't let the contents scare you, as you will rarely ever have to work with this folder.
In order to fully comprehend tailwind, we'll need to create two more folders. A source folder, and a public folder. The source folder is where we want to keep any other css styles we might need for our project. Between the source and and public folder, we have tailwind. Whenever we change a style in the source folder, tailwind will need to process those changes and output them to a certain file in the public folder. This is what our index.html file will then use. I hope the image below clarifies this paragraph by a bit.
So, go ahead and create two folders. Name one src, and the other one public. In the src folder, create a file, and name it style.css. Add the following lines to the styles.css file you just created.
@tailwind base;

@tailwind components;

@tailwind utilities;
This will inject the the base, component, and utility styles. Navigate back to your package.json file, and change the test script inside the scripts braces to,
"build-css":"tailwindcss build src/styles.css -o public/styles.css"
This basically means that when we build in the styles.css file of the src folder, we want to process and output in a certain styles.css folder which will be automatically created in the public folder.
One step away...
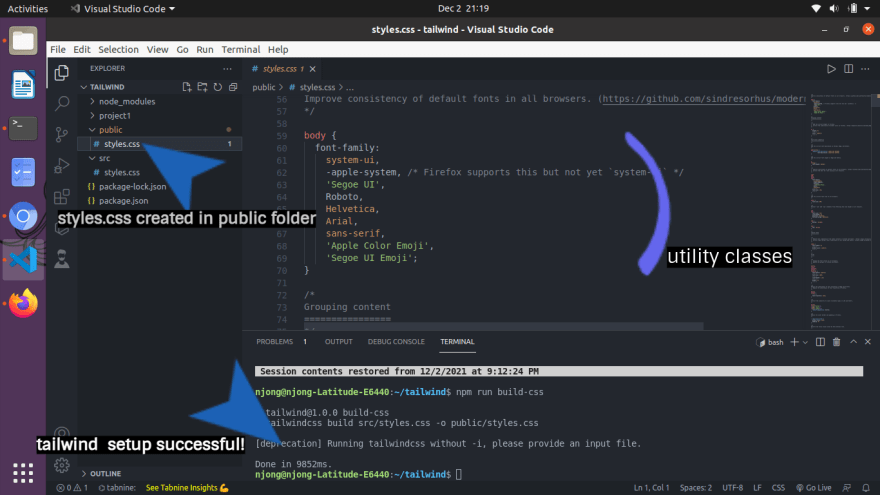
We are one step away from finally setting up our tailwind for use. Save the changes you've made to the package.json file, and dive back into your terminal. We need to run this script, and it will install all the tailwind dependencies for us in the styles.css file, which will be created in the public folder. To run a script,
npm run (script-name). In this case, we type npm run build-css. Hit enter.
Ladies and gentlemen, you have officially set up tailwind for use. As you can see, a styles.css file was created in the public folder and you can now see the utility classes you'll be using, in that file. You can start by working with these utility classes in an index.html file that you will create.
Remember that if we were to add normal css styling to our src/styles.css, we would need to run the script again, so that it affects our public/styles.css and hence, our index.html.
If you found this article useful, please share. Feel free to connect with me on twitter
This content originally appeared on DEV Community and was authored by Bingeh Afumbom
Bingeh Afumbom | Sciencx (2021-12-02T21:12:14+00:00) Starting with tailwind css from scratch. Retrieved from https://www.scien.cx/2021/12/02/starting-with-tailwind-css-from-scratch/
Please log in to upload a file.
There are no updates yet.
Click the Upload button above to add an update.


