This content originally appeared on DEV Community and was authored by Jayanth Acharya
I am always impressed by the websites that showcase products in unique ways on scroll of the page. Transitions, fades, warps, zooms so on. One very particular animation I want to try is the 360 degree rotation of the product on scroll.
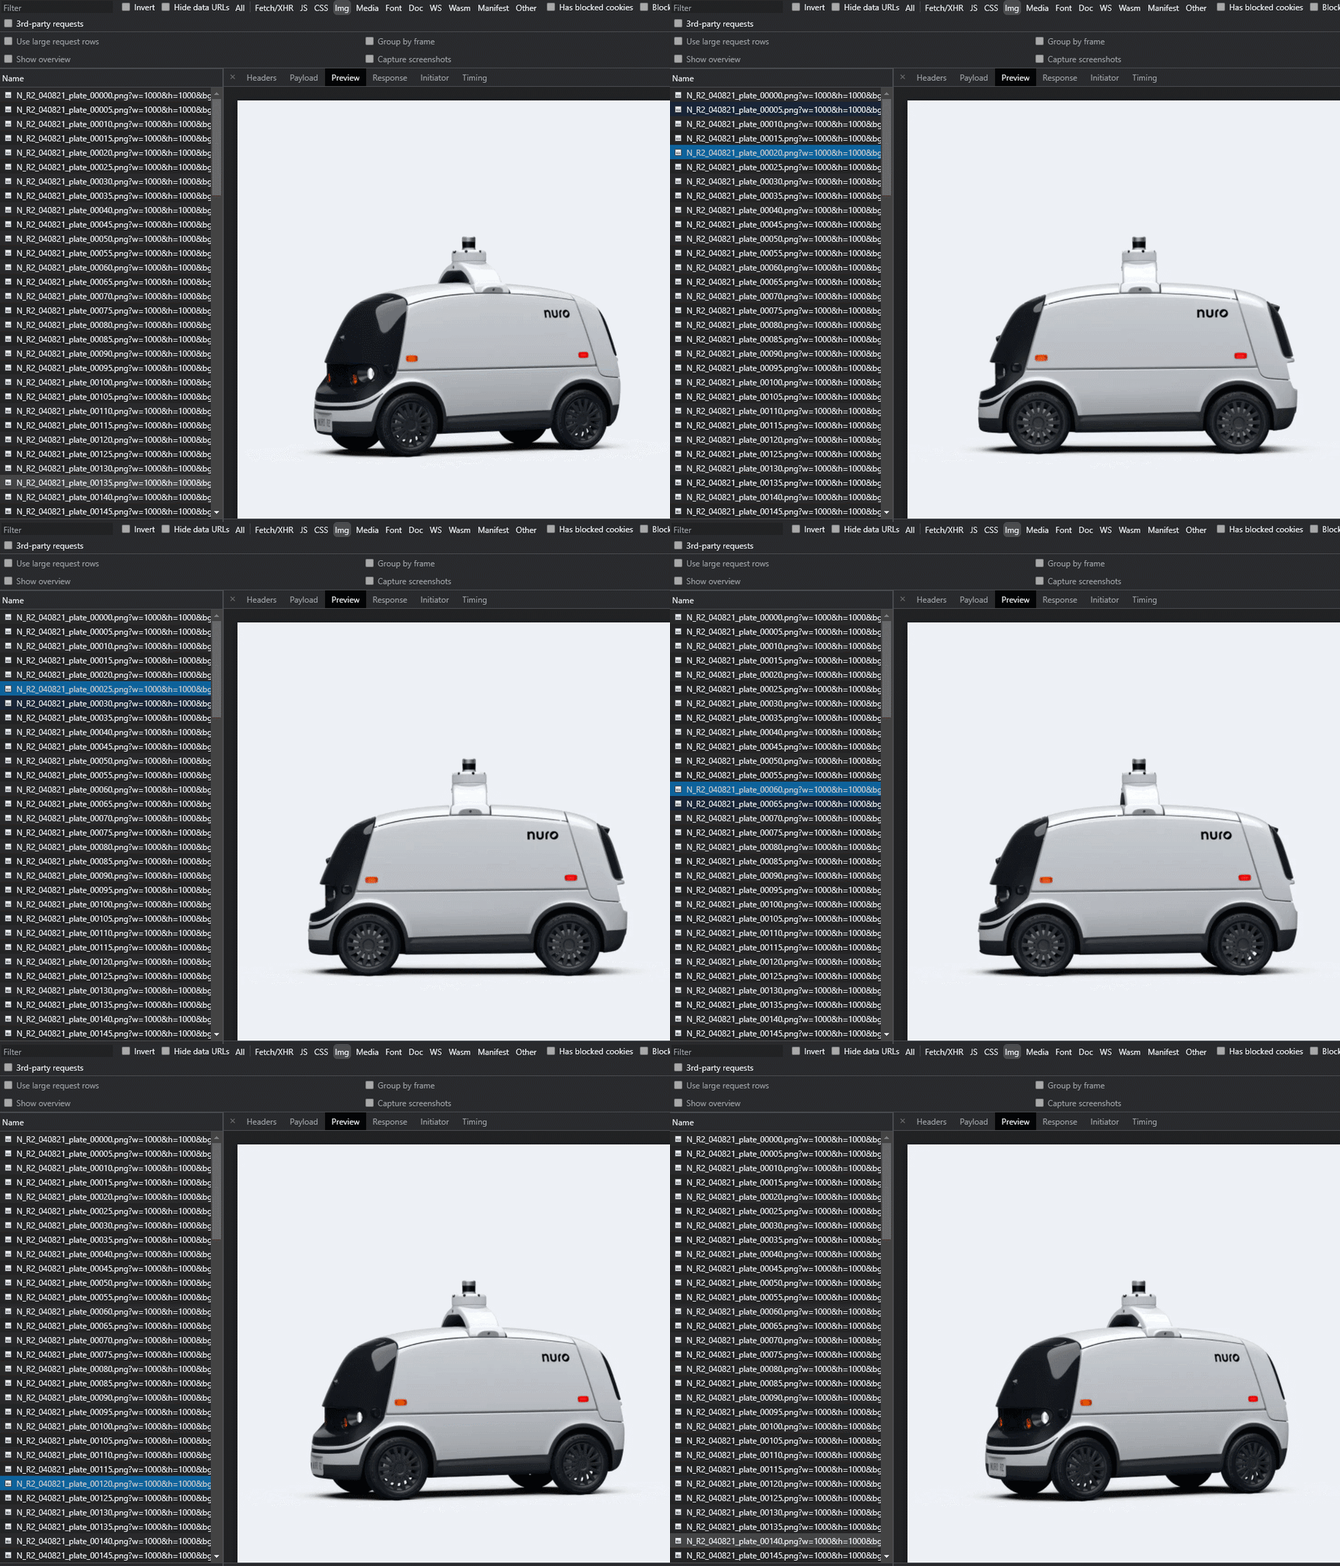
Like this from Nuro
It gives complete 360 view of the product.
The Nuro implementation
After a bit of digging around the side I see the website downloads each and every image required to create the full view of the vehicle. That's a lot of images, 127 images to be precise.
And these images are loaded onto a canvas to create an animation. Long story short, I want an easier solution.
Then it flashed, Sprite sheet
Sprite sheet
Using a sprite sheet, I can load a single image file with all the individual frames required to complete the 360 view of the product
Hoping someone had already thought of the sprite sheet method, My next task was to find a relevant sprite sheet of a car.
Now let's begin the animation
Concept
The idea is simple, one used since the dawn of cinema. Create a view window that only sees a certain section of the whole image, and move new frame into the view on each scroll, hence creating an 360 view effect
Think of red box as the only part visible at the time and we move image on each scroll step

Implementation
First thing to know is what is the height and width of the individual image.
The image used here each frame is
height : 600px
width : 350px
Let us create a div and set the background as the image along with height and width. also let us set the height of body so we have something to scroll
body {
    height: 2000px;
}

#car {
    width: 600px;
    height: 350px;
    position: fixed;
    background: transparent url(https://www.cssscript.com/demo/product-viewer-animate-sprite/car.jpg);
  }
That should complete the CSS.
Lets move on to the javascript part
First let's query select the html elements that will be used,the div that holds the car image and a counter that we will use for debugging (not necessary for the implementation)
const car = document.querySelector("#car");

// only used for debugging
const countIndicator = document.querySelector(".counter");
Next the height and width of the single image, we will also need number of individual images(sprites) in the the entire image, in this case it is 61. this is so that we can loop back to first image when we reach the end.
Things would have been easier if all images were in the same line, but we have 13 images each line, so let us keep that in imagePerLine which will help us know to jump to next line of images
const imageCount = 61;
const imageWidth = 600;
const imageHeight = 350;
const imagePerLine = 13;
All initialization done, let's create the scroll event listener
window.addEventListener("scroll", function (e) {})
Now that we have a scroll event listener, we can get all the scroll related properties, what we want is the scrollTop property
const { scrollTop } = e.target.scrollingElement;
Next task : count from 0-61 then back to 0.
Performing a mod % operation on the scrollTop value we can ensure a value stays within our image count
i.e
let stepCount = scrollTop % imageCount
Test the update of stepCount by assigning it to the countIndicator on scroll.
The steps increment way too many times per scroll we need reduce steps per scroll.
Dividing the scrollTop by some number say 10 will give 'smoother' transition values, also a Math.Floor to avoid float values.
We finally have the stepCount as
let stepCount = Math.floor((scrollTop / 10) % imageCount);
Giving us smoother transition of stepCount per scroll
Now that stepCount is calculated we need the row and column index to the select the image from sprite sheet, this is where the image per line imagePerLine comes into play.
 let columnIndex = stepCount % imagePerLine;
 let rowIndex = Math.floor(stepCount / imagePerLine);
Now that we have the row and column indexes, we can calculate our x and y position in pixels by multiplying with imageWidth and imageHeight respectively, this value can be used to set div css backgroundPosition.
Read more about backgroundPosition
x = columnIndex * imageWidth * -1;
y = rowIndex * imageHeight * -1;
car.style.backgroundPosition = x + "px " + y + "px";
And voila!! we now have a 360 degree view of the car on scroll
You can find the demo and complete code here
If you have any questions, reach out to me on Twitter or check my Github
This content originally appeared on DEV Community and was authored by Jayanth Acharya
Jayanth Acharya | Sciencx (2021-12-03T16:15:33+00:00) 360° Product View. Retrieved from https://www.scien.cx/2021/12/03/360-product-view/
Please log in to upload a file.
There are no updates yet.
Click the Upload button above to add an update.


