This content originally appeared on DEV Community and was authored by sadiul hakim
Hey guys,Today i am going to build a complete user authentication with express-graphql.So, Let's get started....
This is going to be our folder structure...
After initializing your project install these dependencies...
$ npm i bcrypt dotenv express express-graphql jsonwebtoken graphql mongoose
Now use need to create some private and public key to make our token secure.To generate those key visit
Now we need to encode our key.To encode keys visits
now add these key and port in out .env file
PORT=5000
MONGODB_URL='mongodb://localhost:27017/graphql'
PRIVATE_KEY='LS0tLS1CRUdJTiBSU0EgUFJJVkFURSBLRVktLS0tLQpNSUlFb1FJQkFBS0NBUUIySk01dDUxMmdKQytwcTM5TEN0RjZQRkVWZVIvd09LcHV4cUVxUHcvZ0lGNGtmWlFNCisyaGNiSDhQZ2Qvd3BnUHh2QUFxYXNRRmJyekNkK09EcGx5ajRYNUx5c0R0RWIyeERxTDVXK3Nua1pMMWFmV3EKTGlHMG15TFRHMjV1VmlyWTdYYzgvay9MOEE5VGlrUHdGRERsVVZucjVFem50ZkJ4aVl2aDdkK05GazFodGtkawp6VmY0K3NhdnlMUWcxdjNSMExEYXpvbW0yeHN0K0pwNFNnWUdDRXErdEdWZGovMDNmOTJUSTY1dmNYQWtDY2hECmpMUS96YzhKZUd4N29ndUFkektNM2cwc3dhUThJUGxxeVFGU0RWNnBEZGFoRFpoRGpzNUFYUzI5WWhMYTViOEoKNlRUTm0zektqekdPZEFDK1pKNmh5Z2JMbHRvZkhNZms3VkN4QWdNQkFBRUNnZ0VBQmxuV0t2eE1BU2JRMVJzZAovYWU0T1F6ekF1ZCsrd2ZneVpHdDZqcDNuUUhBYmMrK1hMQkxIT1RNTThZMGhwZzJFQkdlSkttV25nQWs3NE5JClhMUmR1SVdQcDMxZnY1Njdoc0FWckxmdlBUSkxKeHdxRTVybFB2TXovUXMxZFlMMlRMRC9QdTBnMXdLeG9Ea0gKaStsWjg0bmEvcDVJTUJDTXUxMjhna21xUWNoRk1ZUHovZ3lyOGlUaU9mNWJDcUpMOTZ2a1B1R1JXRDUybVFkego5dEI2YkhWR3ltcGgxTnBObnJla0llWDBLb2tPMkhUUTRPVTNiZzNvcG1hZzYzbW9QK1lwbndOMWpJd0xyRFRkCkFYd1B4Zkxha0FheUFXRGw0N3c2WXhlT0xDTWdHTkJ2VkdsK0ZVYUZQak9vdkdYWnBPWHhSdDlDS0pycW9yd0oKM003b3dRS0JnUURNWVFOVnYxUVY2V2czRWVyV0ZPYlByYWNZWVVPdXhMTk9jNUdBdzdMdmh5NHdtWGxKWTQ4TApRcXErM2Y0U1dYRjN6d0hNVkMxREJ2RERSRFBsbElPVlZOWGZzTkFLN1pCUU1GTnJRSVUzN1RDakJnbFRDbkV4CmRoUGdjU3M3Z00yN3puRW93bFN6akFFMUV3elhWY3Q4REVZNFhQdlNJdlZZd0xPc1YyakYyUUtCZ1FDVCsrUjIKL0xKTStWbHJTdnhpWHZoWkJDQ1hWQ0lndW42QVA1ZzVBVGhRb2VZQVRJZkExbEN5aEo1RXZydURmVkJQYTZlYgpCVHo1cXY4QWpyK1pSNU9lUGNRODV1QkM2eVg1L3RSZTFhMXNZYkVyVlFkckdFREFSOFIxRnNaUFJVY1VhejY3ClJ3TCtMMUhlSjM1Y1FIYXF0OUVTSXNKYjZHenpaL1FTc3VKaW1RS0JnRElydm4zV01mWVBEaDQycjhkTjZqc2gKRGR2V1JKOHFlam5QOU8vL0duWGlZVnhjMElGTGgxbmtTN1gvR05lNFRUcHovcVVDSlBwSFFlTXRZdkFBdlN4egpYdTFDb2srTWNkaTloRHpYNGR3UXhkZS9LNXJPL1dwKzZmSTIxYjROcUhOcUFpMVhSeU9zUXIrY3BaSlc1VlRXClRvYVhqTm5RNnhtV2RJVGlFRDVCQW9HQU50bC9aY2JsdzNnTWQ2TTBocldTc1ZQQlRMWEhiSUFUVVMvQkdTZmwKbXFWWFhiYi8vaTZ4ZkdtQlRCT3g1dHUwdjZzMFZWWU1zckY1a05oWUZkVWMxdU1uOERiVzJwYlQzYVJoVE1GQQpaVktVVzI1SnNKMHRxdGN1N3dOQS83SzYxTXVuVmJ6TlZDOXYxYnFuc0VQSWVDQm5vcVExaStGTE9MRElHNElvClBNa0NnWUFNcWx5TnMyNXlrTjBPZ0k1eDhMQ0YxN0NRcC85QlpGVk9PdzZETUUwZGtIN2RXQXRGK1ZkYW5Sc0QKc1Q4K2dJYUYweC9oM0lqNDFOWlBaaUEvTE16bEg4MGJ2ZlAvcVJmb2VLWm9kYWc0UTZSYmdlRzkrOUlJNDFqbApaYXllL01xQ09oRXQxTURiTkp0WkZTcnY3RTBwNTNwMUxpbjg5NWR6V2ltZ2gvcGdFQT09Ci0tLS0tRU5EIFJTQSBQUklWQVRFIEtFWS0tLS0t'
PUBLIC_KEY='LS0tLS1CRUdJTiBQVUJMSUMgS0VZLS0tLS0KTUlJQklUQU5CZ2txaGtpRzl3MEJBUUVGQUFPQ0FRNEFNSUlCQ1FLQ0FRQjJKTTV0NTEyZ0pDK3BxMzlMQ3RGNgpQRkVWZVIvd09LcHV4cUVxUHcvZ0lGNGtmWlFNKzJoY2JIOFBnZC93cGdQeHZBQXFhc1FGYnJ6Q2QrT0RwbHlqCjRYNUx5c0R0RWIyeERxTDVXK3Nua1pMMWFmV3FMaUcwbXlMVEcyNXVWaXJZN1hjOC9rL0w4QTlUaWtQd0ZERGwKVVZucjVFem50ZkJ4aVl2aDdkK05GazFodGtka3pWZjQrc2F2eUxRZzF2M1IwTERhem9tbTJ4c3QrSnA0U2dZRwpDRXErdEdWZGovMDNmOTJUSTY1dmNYQWtDY2hEakxRL3pjOEplR3g3b2d1QWR6S00zZzBzd2FROElQbHF5UUZTCkRWNnBEZGFoRFpoRGpzNUFYUzI5WWhMYTViOEo2VFRObTN6S2p6R09kQUMrWko2aHlnYkxsdG9mSE1mazdWQ3gKQWdNQkFBRT0KLS0tLS1FTkQgUFVCTElDIEtFWS0tLS0t'
To again decode and use then write these code in 'helper/key.js'
import dotenv from 'dotenv';

dotenv.config();

export const private_key = Buffer.from(process.env.PRIVATE_KEY, "base64").toString('ascii');
export const public_key = Buffer.from(process.env.PUBLIC_KEY, "base64").toString('ascii');
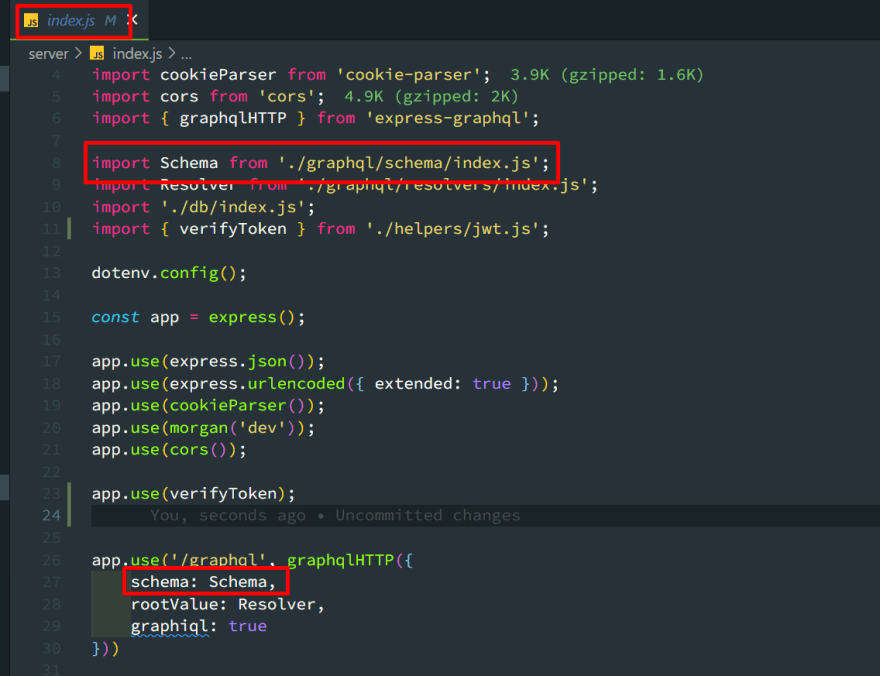
write these code in ./index.js file...
import express from 'express';
import dotenv from 'dotenv';
import morgan from 'morgan';
import cookieParser from 'cookie-parser';
import cors from 'cors';
import { graphqlHTTP } from 'express-graphql';

import Schema from './graphql/schema/index.js';
import Resolver from './graphql/resolvers/index.js';
import './db/index.js';
import { verifyToken } from './helpers/jwt.js';

dotenv.config();

const app = express();

app.use(express.json());
app.use(express.urlencoded({ extended: true }));
app.use(cookieParser());
app.use(morgan('dev'));
app.use(cors());

app.use(verifyToken);


app.use('/graphql', graphqlHTTP({
    schema: Schema,
    rootValue: Resolver,
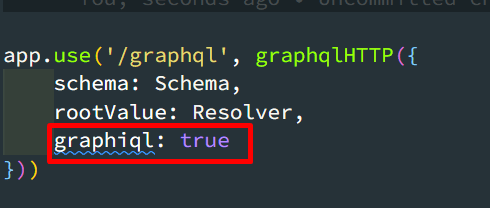
    graphiql: true
}))

app.listen(process.env.PORT, () => {
    console.log('server is running on ' + process.env.PORT);
})
You may notice that i am using import instead of 'require'.To use this in your package.json file add this line anywhere
"type":"module"
Now in db/index.js file write these code..
import mongoose from 'mongoose';
import dotenv from 'dotenv';

dotenv.config();

mongoose.connect(process.env.MONGODB_URL).then(() => {
    console.log('mongoose connected')
}).catch(err => {
    console.log(err);
})
And import this file in './index.js'
import './db/index.js';
To create a User Model write these code in models/user.model.js
import mongoose from 'mongoose';
import bcrypt from 'bcrypt';

const userSchema = new mongoose.Schema({
    username: {
        type: String,
        required: true
    },
    email: {
        type: String,
        required: true
    },
    password: {
        type: String,
        required: true
    },
})

userSchema.pre('save', async function () {
    const salt = await bcrypt.genSalt(10);
    const hashedPassword = await bcrypt.hash(this.password, salt);
    this.password = hashedPassword;
})

const User = mongoose.model('User', userSchema);

export default User
Now to create schema write these code in 'graphql/schema/index.js'
import { buildSchema } from "graphql";

export default buildSchema(`
    type User{
        _id:ID!
        username:String!
        email:String!
        password:String!
    }
    type Post{
        title:String
        description:String
    }
    input UserInput{
        username:String!
        email:String!
        password:String!
    }
    type LoginReturnType{
        token:String
        userId:ID
    }
    type RootMutation{
        createUser(userInput:UserInput!):User!
    }
    type RootQuery{
        users:[User!]!
        login(email:String!,password:String!):LoginReturnType!
        posts:[Post!]!
    }
    schema{
        query:RootQuery
        mutation:RootMutation
    }
`)
Notice that this schema is exported from here and used in './index.js'
and to create some resolvers write these code in 'graphql/resolvers/userResolver.js'
import User from "../../models/user.model.js";
import jwt from 'jsonwebtoken';
import bcrypt from 'bcrypt';

import { private_key } from '../../helpers/key.js';

export default {
    createUser: async (args) => {
        const newUser = new User(args.userInput);
        const user = await newUser.save();
        return user
    },
    login: async ({ email, password }) => {
        try {
            const user = await User.findOne({ email });
            if (!user) {
                throw new Error('Invalid Credentials!user')
            }
            const isCorrectPassword = await bcrypt.compare(password, user.password);
            if (!isCorrectPassword) {
                throw new Error("Invalid Credentials!password")
            }
            const token = jwt.sign({ _id: user._id, email: user.email }, private_key, {
                algorithm: "RS256"
            });
            return {
                token,
                userId: user._id
            }
        } catch (error) {
            return error
        }
    },
    posts: (_, req) => {
        if (!req.isAuth) {
            throw new Error("Unauthorized");
        }
        return [{ title: "accident", description: "accident ocurred" }, { title: "Laptop", description: "Buy A new Laptop" }]
    }
}
Make sure you are using RS256 algorithm otherwise we will not be able to use private and public two different key while generating and verifying token.
now import userResolver in 'graphql/resolvers/index.js' and export as an root object.Because there may remain more resolvers like postResolver.
import userResolvers from "./userResolvers.js";

export default { ...userResolvers }
May be you have notices i am checking if req.isAuth exists where do i get that.To get that write these code is helper/jwt.js
import jwt from 'jsonwebtoken';
import dotenv from 'dotenv';
import User from '../models/user.model.js';

import { private_key, public_key } from './key.js';

dotenv.config();

export const verifyToken = async (req, res, next) => {

    const authToken = req.get('Authorization');
    if (!authToken) {
        req.isAuth = false;
        return next()
    }
    const token = authToken.split(' ')[1];
    let verify;
    try {
        verify = jwt.verify(token, public_key);
    } catch (error) {
        req.isAuth = false;
        return next()
    }
    if (!verify._id) {
        req.isAuth = false;
        return next()
    }
    const user = await User.findById(verify._id);
    if (!user) {
        req.isAuth = false;
        return next()
    }
    req.userId = user._id;
    req.isAuth = true;
    next()
}
We are almost done. Make sure you setgraphiql to true in graphqlHTTP.
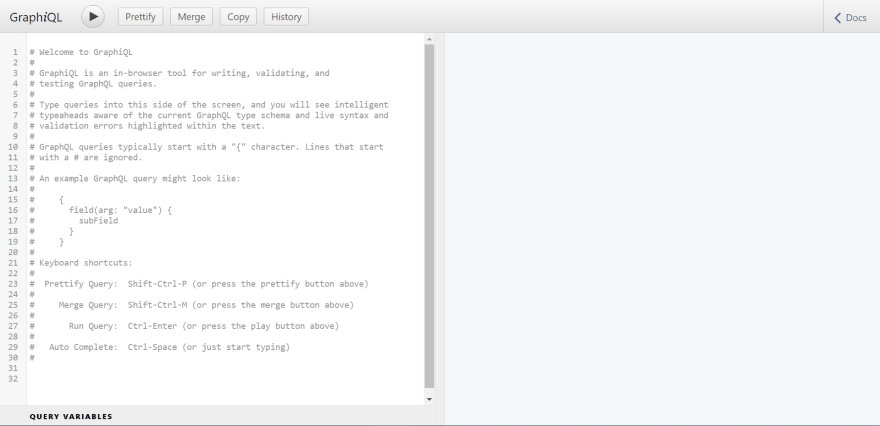
Now if you visit to 'http://localhost:5000/graphql' you will see something like this..
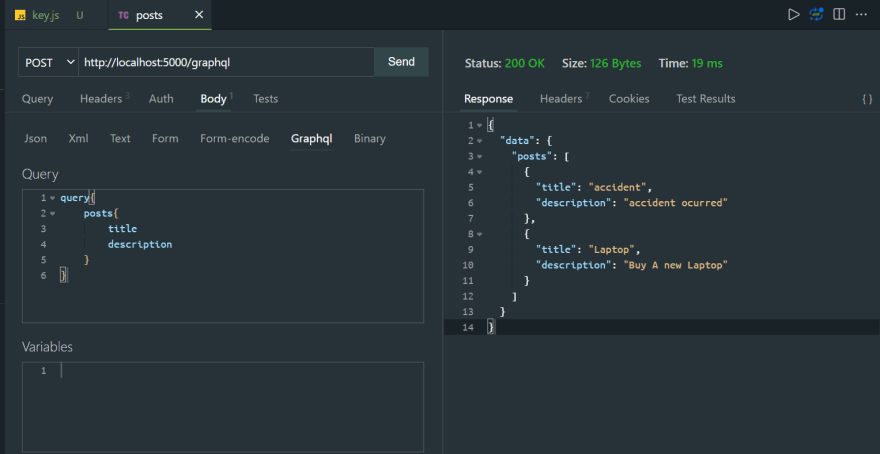
now try to create a user,login and get some post
Now to send Authorization header i am using another rest client that is vs code extension thunder client.
Make sure you added Bearer or any keyword before token and separate then with an empty space
So this is ours authentication api with graphql
Thanks ❤.
This content originally appeared on DEV Community and was authored by sadiul hakim
sadiul hakim | Sciencx (2021-12-26T21:56:34+00:00) Complete User Authentication with express and graphql….. Retrieved from https://www.scien.cx/2021/12/26/complete-user-authentication-with-express-and-graphql/
Please log in to upload a file.
There are no updates yet.
Click the Upload button above to add an update.


