This content originally appeared on Level Up Coding - Medium and was authored by Federico Valles

What is accessibility?
First, let’s take a look at the MDN definition about web accessibility:
When someone describes a site as “accessible,” they mean that any user can use all its features and content, regardless of how the user accesses the web — even and especially users with physical or mental impairments.
The definition above can be easily extrapolated to the mobile world and we can think of it as the following: an accessible application is that one developed in a way in which the majority of users are able to use it, taking into account: blind people, without education, and color blindness among other disabilities.
Accessibility is commonly abbreviated as a11y, due to the amount of letters present in that word between the initial a and the final y.
Let’s analyze two different types of a11y.
A11y for sighted people
It’s the one that refers to developing an app usable by sighted people, and contemplates aspects like:
- App content mustn’t overflow the device screen and/or be cut by it.
- If the typography size is increased or decreased from the operating system, the app should still be accessible and readable.
A11y for blinded people
This is the one that I’m going to focus from now on in this post.
It refers to users with vision disabilities who need a voice assistant to be able to use the app. In this case, the app should be developed to indicate which content the user taps, and tell them useful information e.g. if a button is disabled, or if they are tapping a checkbox or a slider.
There area two voice assistants that rule the mobile world:
iOS: its voice assistant is called VoiceOver, and it comes installed by default in the operating system.
Android: the voice tool is called TalkBack and it comes installed by default in the majority of the devices carrying this O.S. There are some cases, such as old devices and the Android Emulator for developers, that lack the assistant though. For the latter, the voice tool can be easily installed searching “Android Accessibility Suite” in the Play Store.
How to make a React Native app accessible for blinded people?
To achieve this, there is the official React Native Accessibility API.
This API provides devs with different properties to make an app accessible. Some of the most important ones are the following:
accessibilityLabel
The string assigned to this prop is the one that the voice assistant will read when a user taps a component, such as a text, a button or a view.
If this prop is undefined, its default value will be the concatenation of each string present in the component’s children.
Example 1
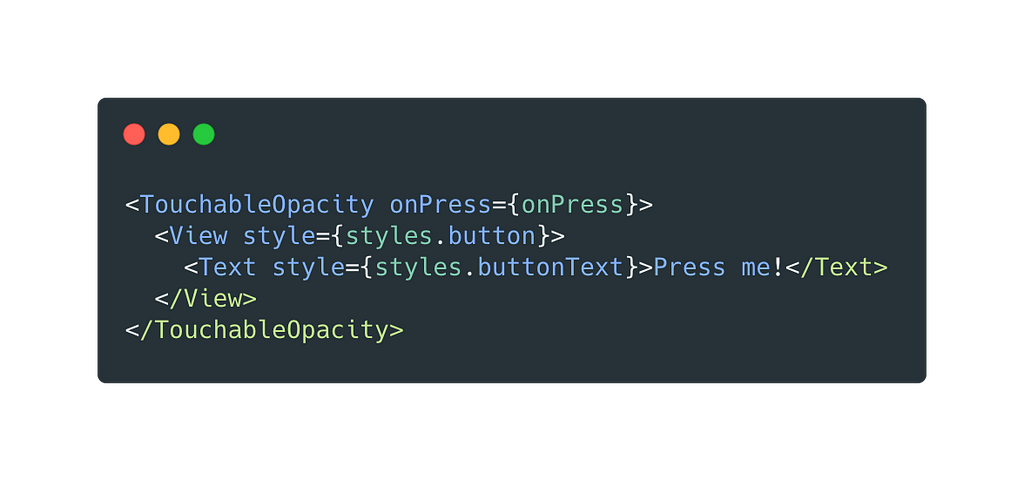
In the previous example, when the user taps the <TouchableOpacity> component, the voice assistant will read “Press me!” as the accessibilityLabel is undefined, and the only child it has is the <Text> component with the value “Press me!”.
Important note: when a component like a <TouchableOpacity> doesn’t have at least one <Text> child, the voice assistant won’t know what to read when the user taps that button and no sound will be reproduced to the user.
Example 2
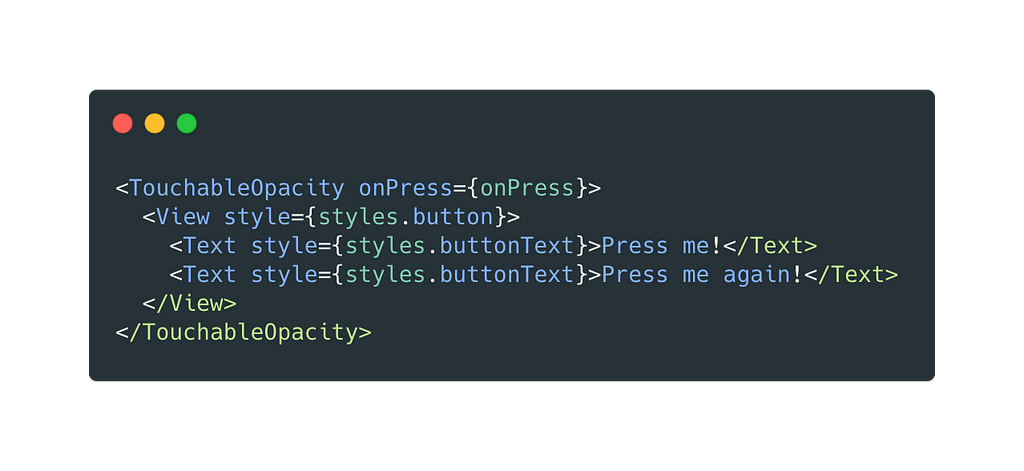
A similar situation happens when the user taps a <TouchableOpacity> with two <Text> children: the voice assistant will read “Press me! Press me again!” due to the fact that the a11yLabel is undefined. What React Native does in this case is concatenate every string that it finds in the parent’s children, and set that new value as the component a11yLabel.
Example 3
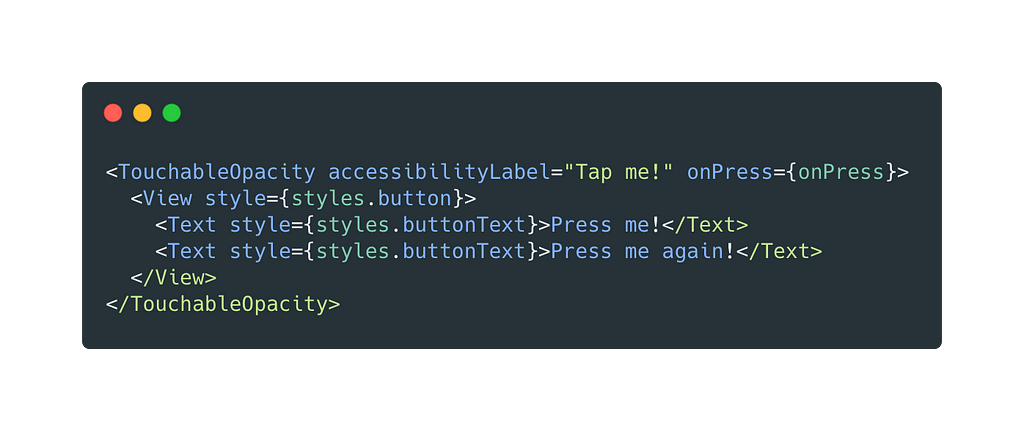
In this last example, the voice assistant will read “Tap me!” when the user taps the button, because the a11yLabel is defined and has that string as its value. React Native doesn’t concatenate the <Text> children’s values because the a11yLabel of its parent isn’t undefined.
accessibilityRole
This prop tells the voice assistant the purpose (or role) of a component. By default this prop isn’t set, so it’s a developer responsibility assigning the correct role to the components that need it.
In my opinion, one of the components that needs a defined role is the button, so that the voice assistant could tell the user that they are tapping content in which a double tap is possible to produce an action.
Some of the various roles that the React Native API provides are (check the full list in their official page):
- adjustable
- alert
- checkbox
- button
- link
- header
- search
- text
accessibilityHint
This prop provides additional information to help the user understand what will happen when they tap a component. The a11yHint is commonly used for buttons and links, and it’s recommended to use in very specific cases where that additional information gives extra value to the user.
Both TalkBack and VoiceOver will always read a11y props in the following order:
- accessibilityLabel
- accessibilityRole
- accessibilityHint
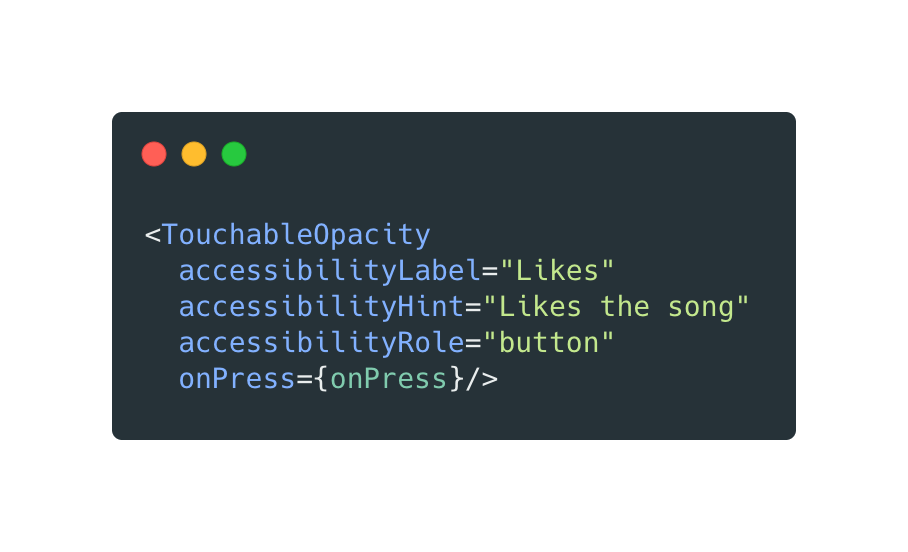
E.g. in the next example, the assistant will read “Likes. Button. Likes the song”:
accessibilityState
This prop is useful to tell the assistant a component state, that could be:
- disabled
- selected
- checked
- busy
- expanded
This prop expects an object with the previous keys, whose values type are all boolean.
In my experience, I found that this prop didn’t work well on iOS devices. The workaround implemented in cases where I needed to tell the assistant which state had a component was using the a11yHint.
E.g. for disabled buttons:
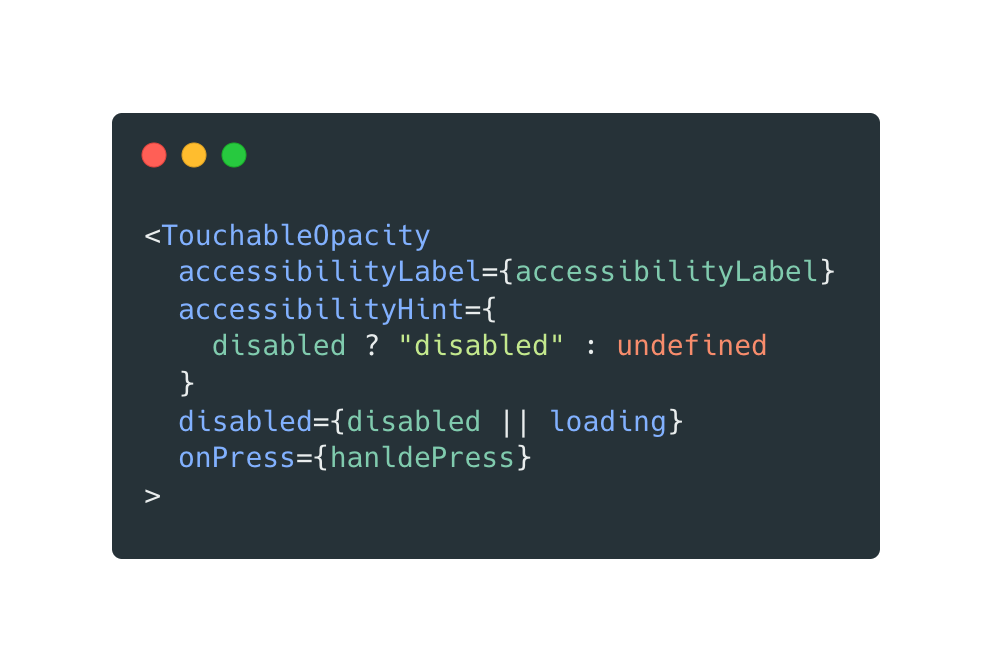
When the button receives the prop disabled with the value true, what this code does is assigning the string “disabled” to its a11yHint in order to tell the user the button state.
Now that we’ve learned what accessibility is, looked at some of the properties that the official React Native API provides and a few examples to understand its use, let’s dive into how to test a11y on both iOS and Android devices.
Testing a11y on iOS devices
Physical device
To turn on VoiceOver on iOS devices, go to Settings — Accessibility — VoiceOver.
In the beginning it is a bit tough to get used to how VoiceOver works as the gestures are quite different from the ones corresponding to the standard use of the device. It’s highly recommended to read Apple official guide to understand how to use your device when VoiceOver is turned on.
Simulator device
To test the accessibility of a React Native application, open Xcode and go to Open Developer Tool — Accessibility Inspector.
This tool is really easy to use. Once Accessibility Inspector is open, click on the target icon as shown below:
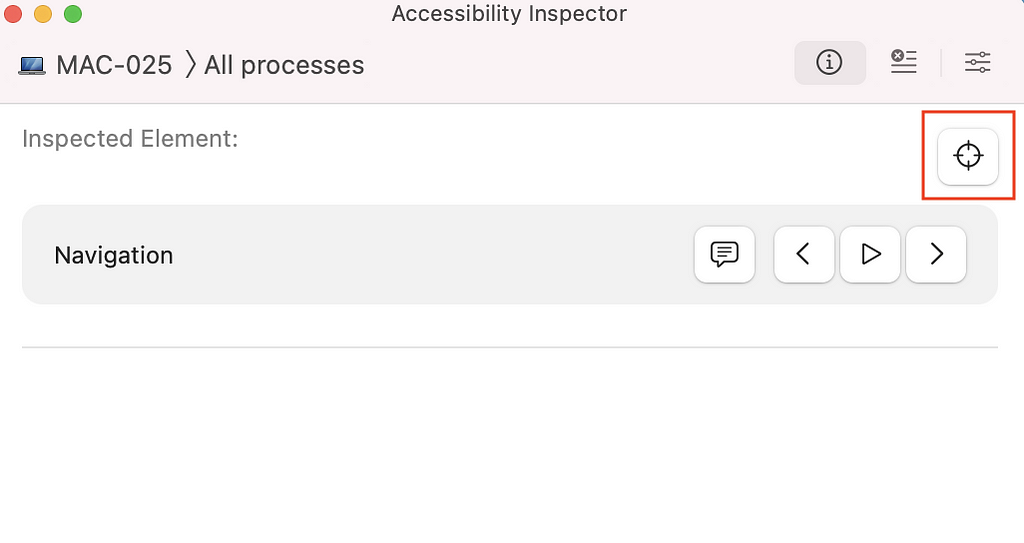
After clicking the icon, search for your emulator window and select the desired component to inspect its accessibility props.
Let’s look at an example of a component with accessibility label, role and hint set:
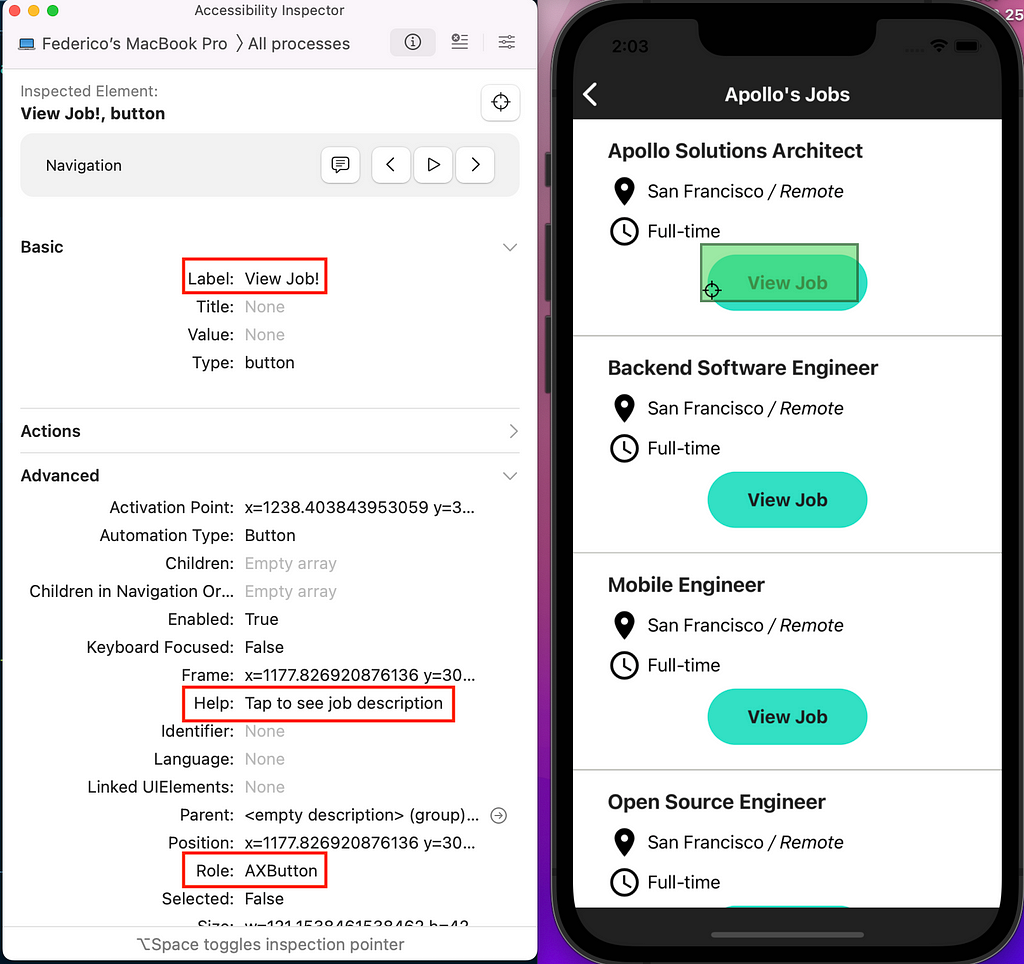
Note: This option is only possible if you have a Mac pc or laptop because Xcode isn’t available for Linux or Windows O.S.
Testing a11y on Android devices
Physical device
To activate the voice assistant on android physical devices go to Settings — Accessibility — Talkback — Use Service.
Take into consideration that gestures change when Talkback is turned on, so it’s recommended to read the Android official guide before its activation.
For devices where Talkback is not installed, it can be easily downloaded from Play Store searching for “Android Accessibility Suite”.
Simulator device
There are two possibilities in order to test accessibility on an Android simulator:
- Download Talkback through the app Android Accessibility Suite (keep in mind that you have to sign in with a gmail user first)
- Download the app Accessibility Scanner from Play Store. This option applies when testing a11y in Android physical devices too.
Let’s take a brief look at the latter:
Once the Accessibility Scanner is downloaded, a blue button with a white tick inside will appear on the simulator screen:
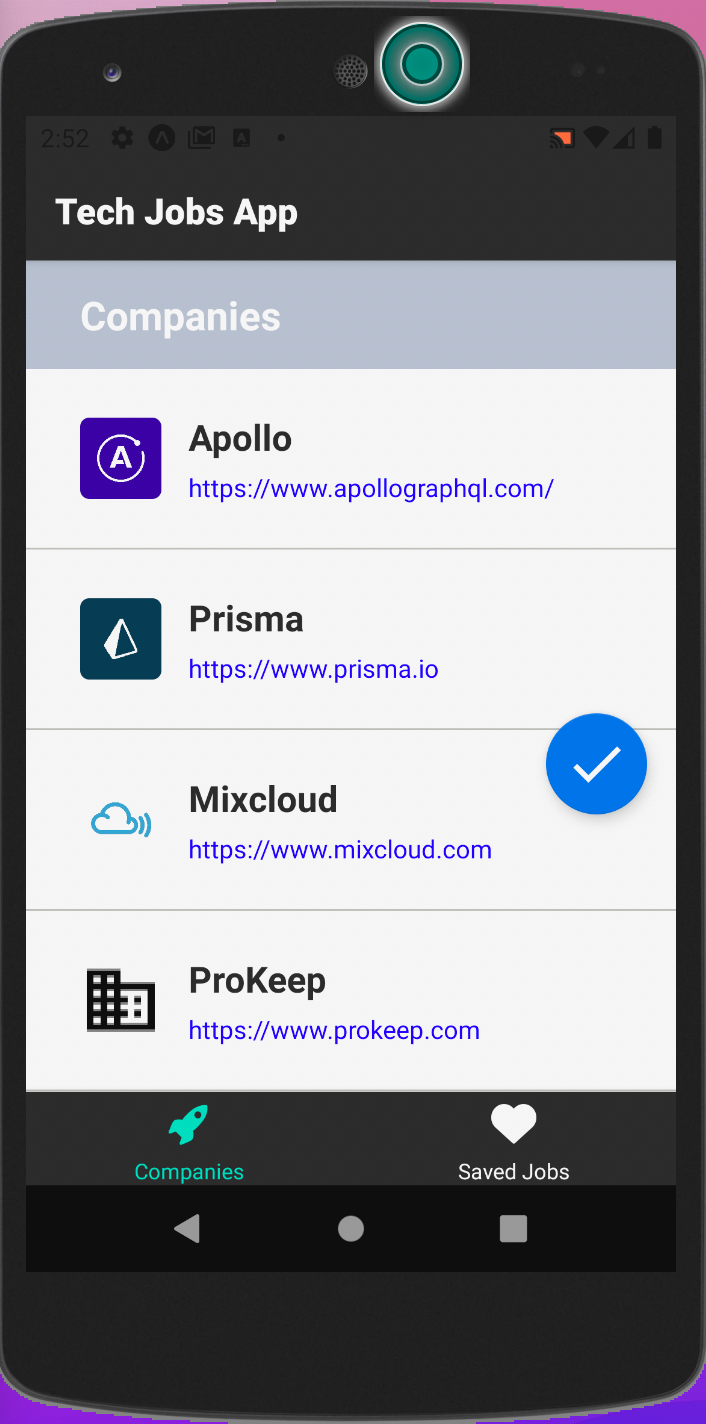
And if you click it:
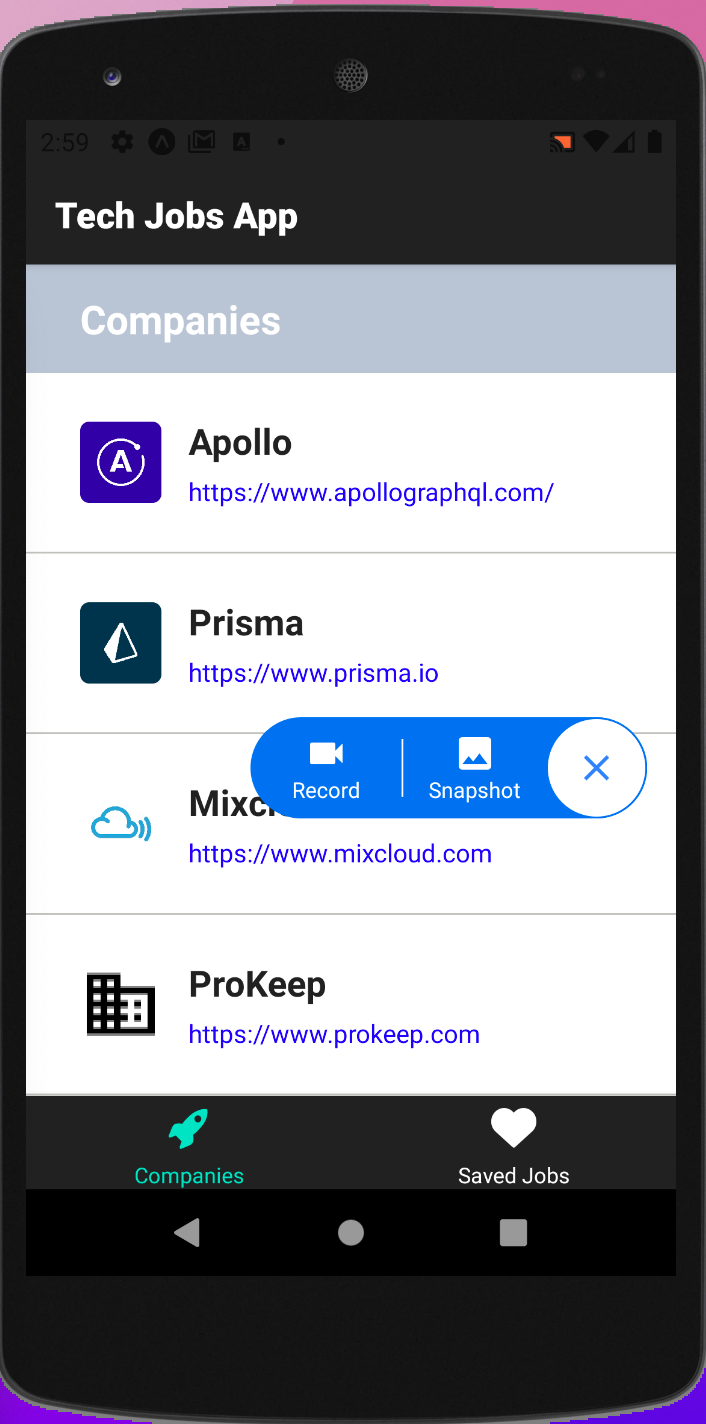
A little menu appears and offers the possibility to:
- take a snapshot of the screen’s app that is focused. In this case an accessibility report is generated.
- record the device screen so that you can interact with your app while this tool generates a complete report of all the screens you have navigated.
In both cases, the reports make different kind of suggestions such as:
- Item label: accessibilityLabel not defined
- Touch target: clickable items are very small
- Text contrast: you should improve the contrast between a text and the background where it is rendered
Let’s see an example of a Snapshot report:
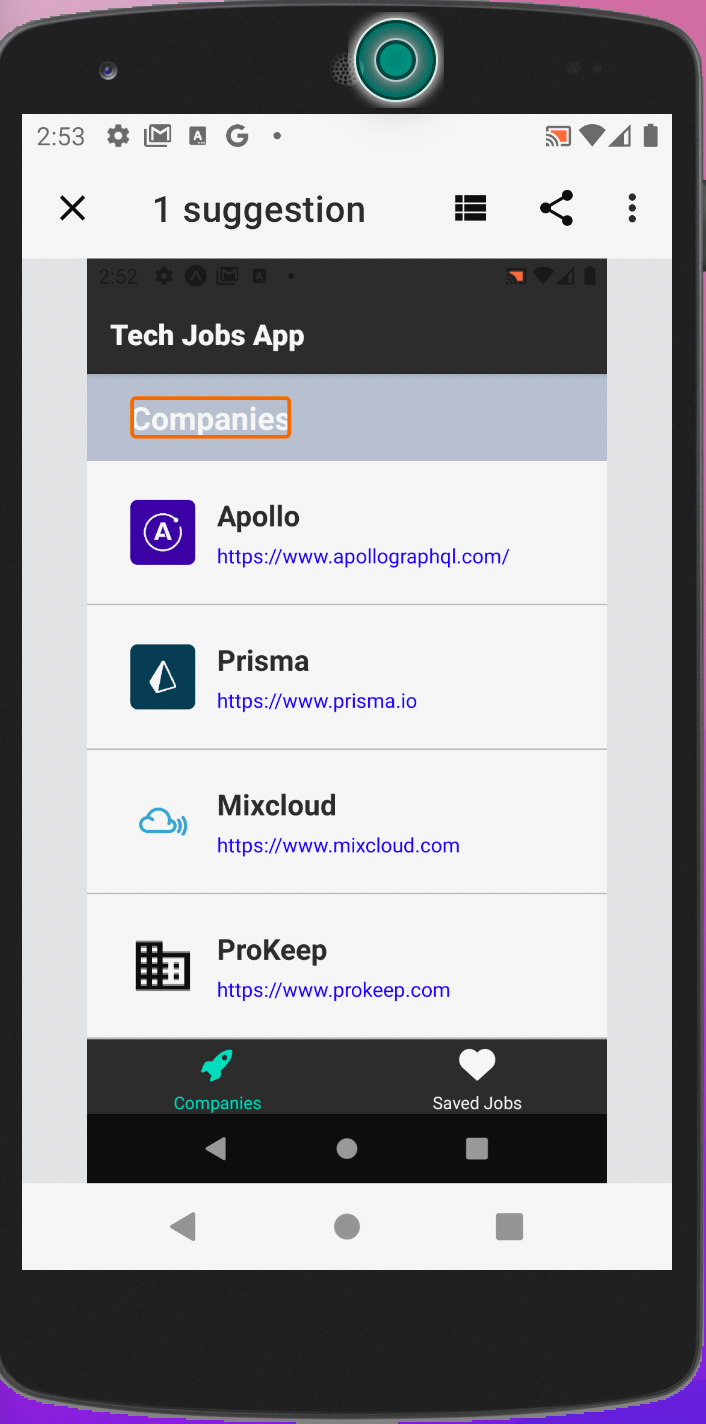
The report in this case tells us that there is one suggestion we could apply to improve the accessibility.
We can open the suggestion making a tap on the string “Companies” which is marked with an orange rectangle:
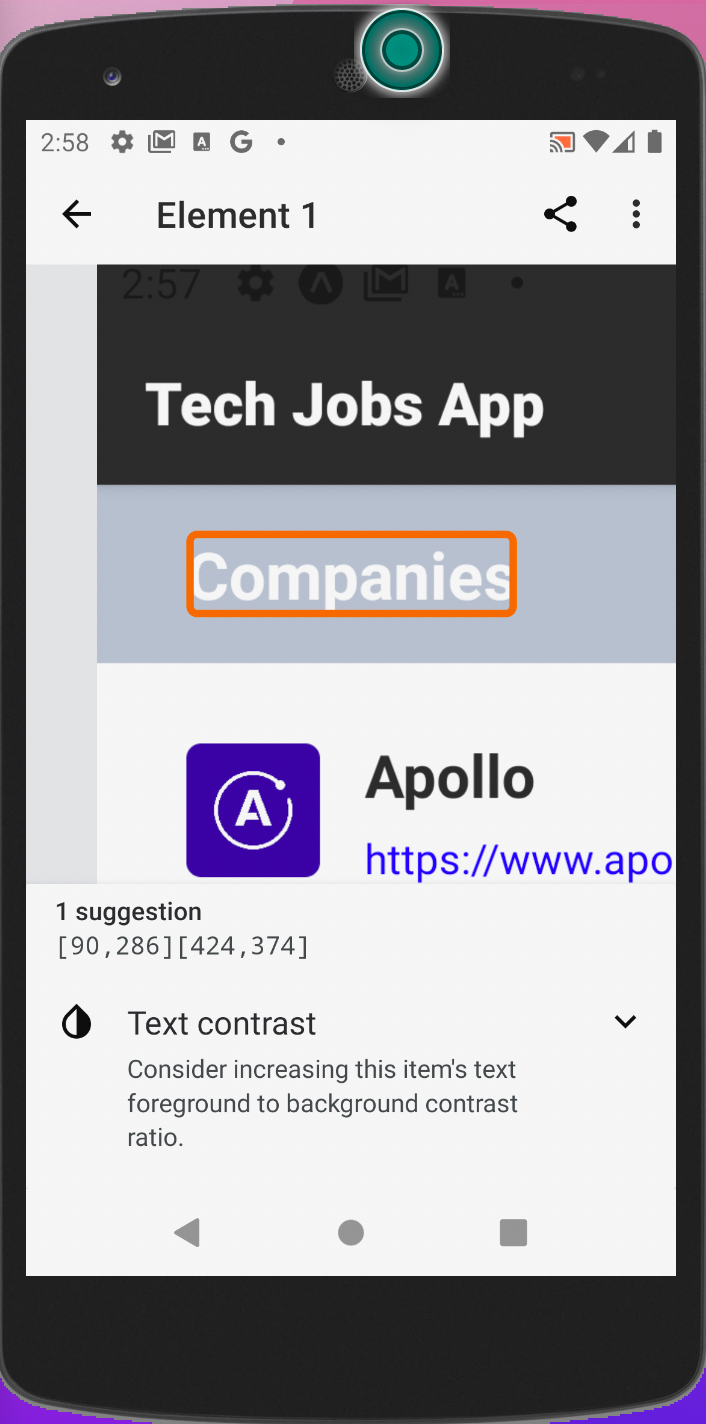
In the previous example the app suggests to change the colors applied to the text Companies and its background to have a better contrast.
If we would have small touchable images or icons in our app without their corresponding a11yLabel, the Test Scanner app would provide us suggestions to improve these kind of things too.
Conclusions
Making accessible React Native apps is easy thanks to the React Native Accessibility API 😁.
There are different ways to test if an app is accessible from a physical device and also from a simulator.
Last but not least, I think accessibility is a very important aspect of our apps if we don’t want to exclude users with specific disabilities, so I encourage you devs to start taking this into consideration and make the world a bit more accessible to everyone 💪.
Bibliography
- MDN — Accessibility
- React Native Accessibility API
- Apple VoiceOver official guide
- Android Accessibility Suite
- Android Accessibility Scanner
Accessibility in React Native Apps was originally published in Level Up Coding on Medium, where people are continuing the conversation by highlighting and responding to this story.
This content originally appeared on Level Up Coding - Medium and was authored by Federico Valles
Federico Valles | Sciencx (2021-12-29T23:02:14+00:00) Accessibility in React Native Apps. Retrieved from https://www.scien.cx/2021/12/29/accessibility-in-react-native-apps/
Please log in to upload a file.
There are no updates yet.
Click the Upload button above to add an update.
