This content originally appeared on Bits and Pieces - Medium and was authored by Simon Ugorji (Octagon)
How to create a table using with JavaScript in 5 steps
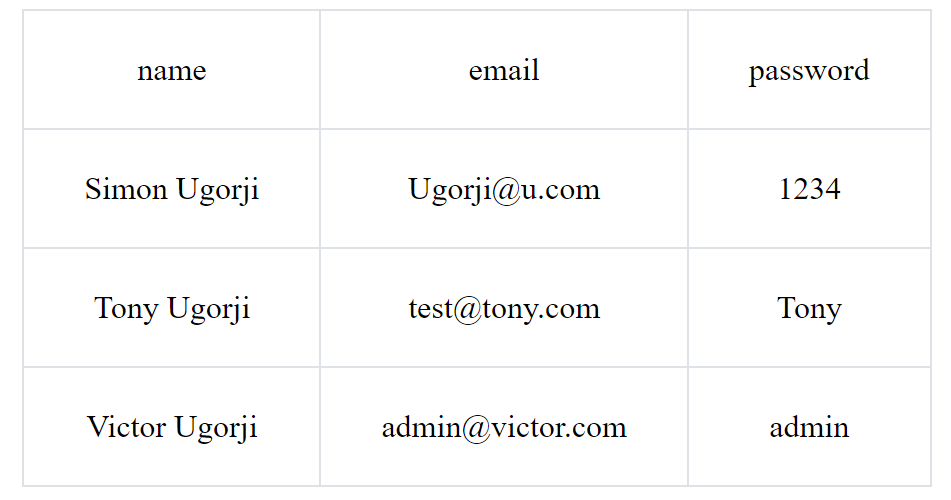
Step 1. Declare the table data
First we will need to create the following three variables:
theadData
This object holds the columns needed for the table head.
We will add a new property { “1” } with its value as an array [“name”, “text-danger”]. The first index of the array is the column needed for the table head, and the second index is the CSS class of that column.
tbodyData
This object holds the columns needed for the table body.
The structure is almost the same as the one above, except that you will have to add more values depending on the table head columns.
tableClass
This variable holds the ClassList of our table. You can separate multiple classes with a space.
Step 2. Create a function to generate a table
In our function, we need to specify a local variable t that we will use within a loop.
Now we will use document.createElement(), to create the elements needed within our table.
Now we need to loop through the table head data provided in the variable theadData and append each piece of data inside our table head. For this, we will use the t variable we created earlier.
Our loop will check the length of the thead data provided, then it will access its properties and values, and create a table row with a single table data from our loop, inside of it.
Inside the loop, we will use the method appendChild() to append all elements found within table head > table row to its parent which is table row.
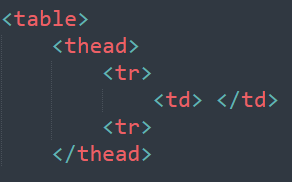
After the loop must have finished, we will append the table row to its parent element which is table head thead.
Note: I used Object.keys(theadData).length to retrieve the length of our theadData Object. This is a known method of accessing the length of an object.
So far our HTML table structure should Look like this:
Step 3. Create the table body
The reason why the table head was so easy to complete was because, in a horizontal table, table heads will contain a max of one row for all columns.
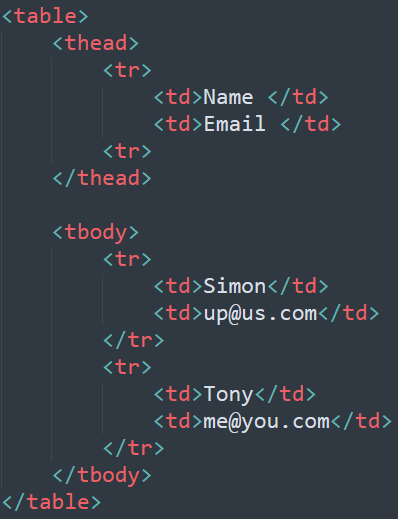
This is unlike the table body, where you will need to check the number of records provided before you can create the row for that data.
In other words, a head will usually have 1 row, but the body could have an infinite number of row.
Just like the image below, we have 2 rows specifying 2 different records. So we have to check properly, the number of records that we are dealing with, then create a row for each record.
Step 4. Loop through data
Inside the second loop, we need another loop that will go through the records again and append the values of each property to the element table body > table data (td).
You may have noticed that I created a new object var tbodyTd = {}. This will hold all of the element’s table data (td) needed for table body > table row (tr).
Still inside this loop, we will create the table data td element and then store it in the object tbodyTd. Since we can refer to a property in this object as a Node, we can directly append our value to this property using the method .innerText(), and then append that property to table body > table row.
After this loop, we will then append all elements found inside table body > table row to table body.
Step 5. Append the thead and tbody to our table
We have succeeded in creating the table elements below:
- table > thead > tr > td
- table > tbody > tr > td
Now it’s time to append thead and tbody to our table and then provide the element we should append our table to.
And that’s it! We have successfully built our ‘Horizontal Table Generator’ function!
Let’s test it out in our console with the sample data below.
Before we can be able to append our table, we need to create an element with the id table .
I will copy the code below and paste it directly on the console of a blank page where I had created an element with the id table .
It works!
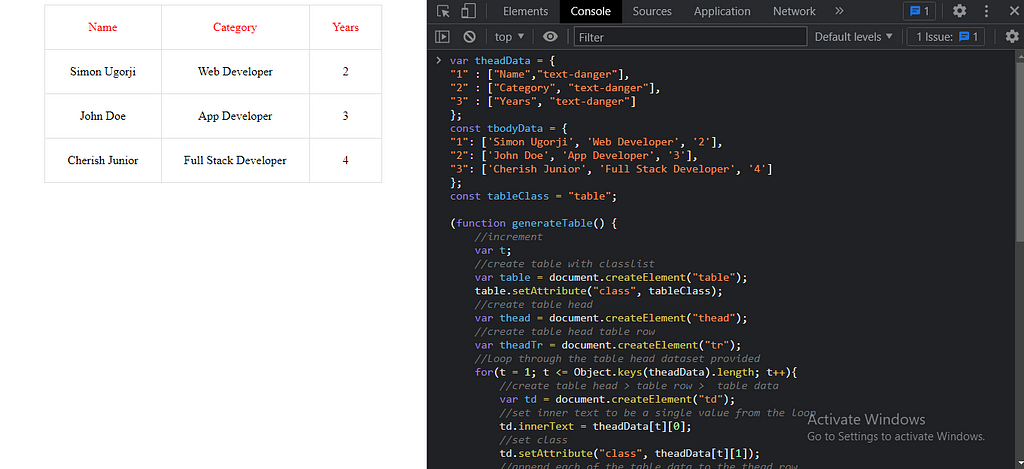
Note: I added some minor CSS styling to my table. You may see a different design when you run yours.
And now that you’re up and running, you can go and modify the function to suit your needs.
Build Micro Frontends with components
Microfrontends are a great way to speed up and scale app development, with independent deployments, decoupled codebases, and autonomous teams.
Bit offers a great developer experience for building component-driven Micro frontends. Build components, collaborate, and compose applications that scale. Our GitHub has over 14.5k stars!
Learn more
- Building a React Component Library — The Right Way
- Microservices are Dead — Long Live Miniservices
- 7 Tools for Faster Frontend Development in 2022
Easily Generate A Horizontal Table with JavaScript was originally published in Bits and Pieces on Medium, where people are continuing the conversation by highlighting and responding to this story.
This content originally appeared on Bits and Pieces - Medium and was authored by Simon Ugorji (Octagon)
Simon Ugorji (Octagon) | Sciencx (2021-12-29T09:28:30+00:00) Easily Generate A Horizontal Table with JavaScript. Retrieved from https://www.scien.cx/2021/12/29/easily-generate-a-horizontal-table-with-javascript/
Please log in to upload a file.
There are no updates yet.
Click the Upload button above to add an update.
