This content originally appeared on DEV Community and was authored by shiva kumar
If you want to get started in DevOps, Jenkins is most important and handy software you should learn.In this article, I will run you through how to install Jenkins and create first Pipeline
Jenkins can be installed in numerous ways, I will be using docker to run the jenkins locally.
To run the below command you need docker.
docker run --name jenkin-master

 -d -v /Users/shiva/jenkins_home:/var/jenkins_home

 -p 8080:8080 jenkins/jenkins:jdk11
This command downloads the jenkins:jdk11 image and runs it, -v create a volume to maintain data persistence, runs the Jenkins in port 8080 with name jenkin-master
Go to http://localhost:8080 to access the Jenkins. You will see below screen
To access the path given in the Jenkins page, we need to log into the docker image with below command
docker exec -it jenkin-master /bin/bash
-it stands for interactive terminal
Once you are in, use the below command to get the password
cat /var/jenkins_home/secrets/initialAdminPassword
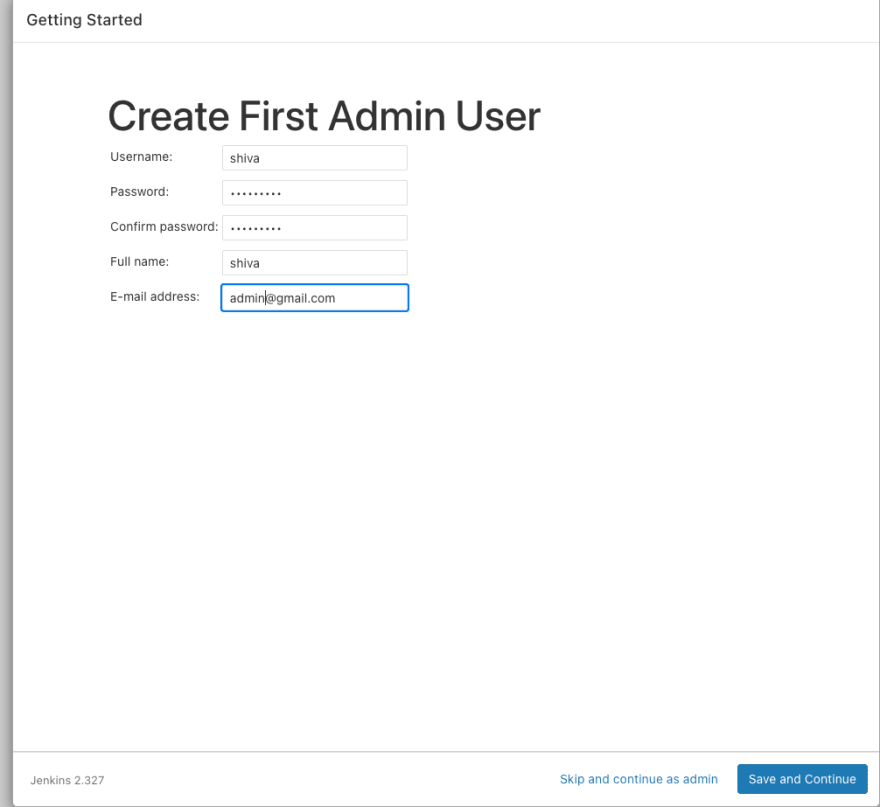
In Next screen, select Install suggested plugins, once its done you can create a new admin user.
click next and start using jenkins
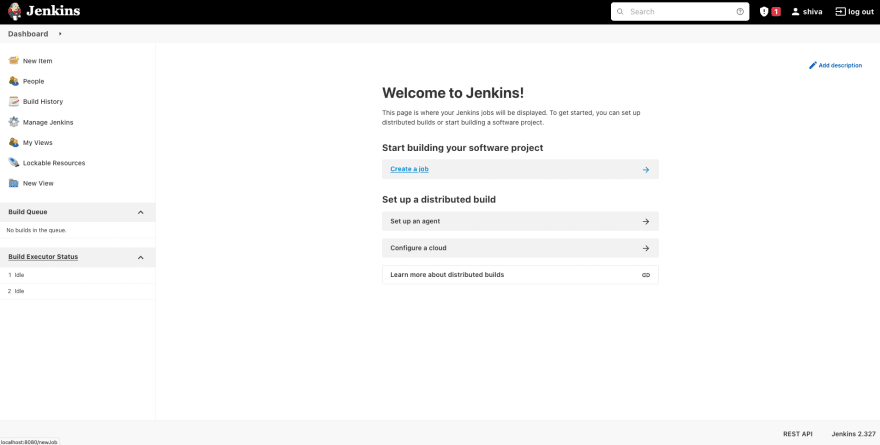
You will land on this page.
On the left you will see the menu, click on New Item , then select Pipeline and give it a name firstJob
Pipeline is a series of step which helps in building the software. In other words, pipeline is used to implement and integrate continuous delivery.
There are two types of pipeline,
-> scripted &
-> declarative
We are going to write our first declarative pipeline.
After creating your firstJob scroll down to Pipeline and write the below code in the editor
Pipeline -> All the declarative scripted pipeline starts with a pipeline block
agent -> instructs Jenkins to run the stages on any agent or node
stages -> Stages contain one or more stage.
stage -> Stage reside inside the stages and it should have a steps block. Every stage will have a name like Test, Build, Deploy. Here we named our stage as Hello
steps -> Steps are written inside the stage and it contains list of commands or scripts that need to run. Here we just wanted to echo "Hello World."
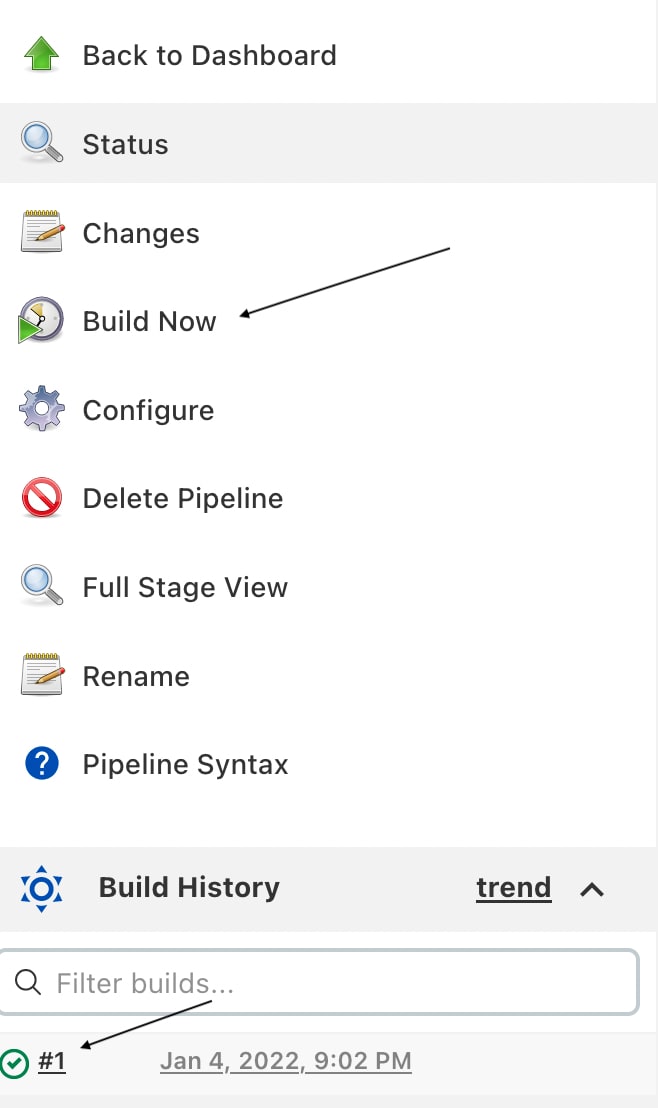
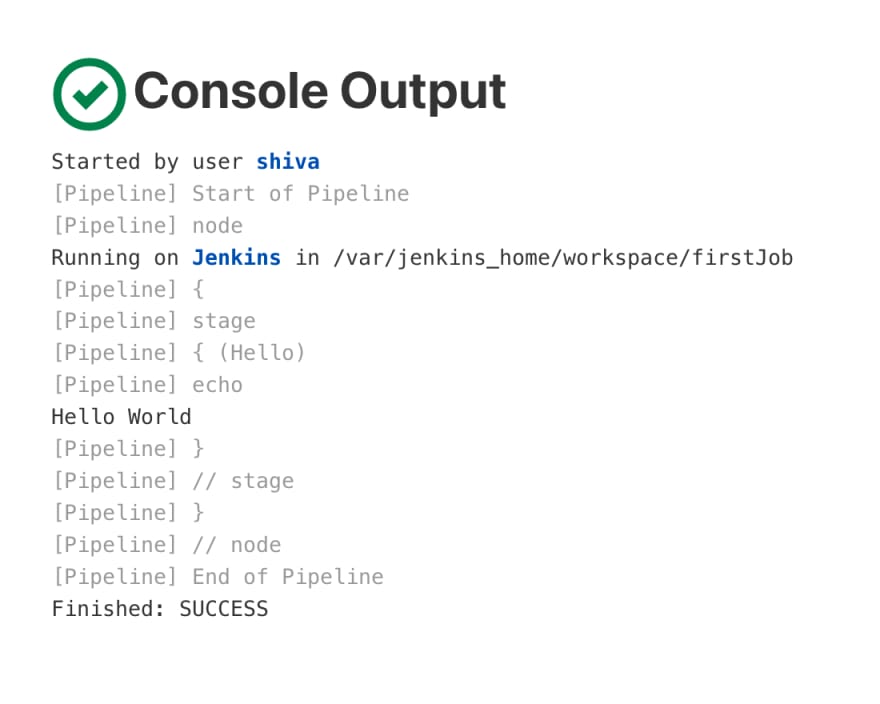
Once you have saved your first declarative Pipeline, let's run it. Click on Build Now. After the build is done, you can click on build number 1 from build history then in the left menu click on Console Output to view the output of the build
As you can see, the "Hello World" is successfully printed in the output console.
Congratulations! You have created your first pipeline in Jenkins, We will use this as a base to build complete continuous delivery.
This content originally appeared on DEV Community and was authored by shiva kumar
shiva kumar | Sciencx (2022-01-04T21:51:47+00:00) Creating Pipeline in Jenkins. Retrieved from https://www.scien.cx/2022/01/04/creating-pipeline-in-jenkins/
Please log in to upload a file.
There are no updates yet.
Click the Upload button above to add an update.


