This content originally appeared on DEV Community and was authored by Fredrick Emmanuel
Uniform Resource Locator (URL), also referred to as web address, is a specific type of URI that specifies the address of web resources on a computer network.
A URL basically consists of a Scheme (https://), a Host-Name (dev.to), and a Path (/divofred). Sometimes, a URL can contain Parameters and Anchors.
All these put together makes the URL long and not decent. This calls for a URL Shortener.
As the name implies, URL Shortener helps to reduce the length of the web address while retaining the address to the web resources of the URL.
Goal
In this tutorial, you will learn how to shorten URLs, store these short URLs in Firebase, and Deploy the Application to Heroku.
Prerequisites
- Knowledge in NodeJS and ES6 Syntax
- A Text Editor preferably Visual Studio code.
- Firebase Account
Getting Started
Here is the link to the GitHub repository.
Please note that this tutorial is a modification of Traversy's YouTube Video
Run npm init in your terminal to initialize our project.
Let's install the dependencies that we will use in this tutorial:
npm i express firebase shortid valid-url nodemon
firebase connects our application to firebase database.
shortid creates the short-url code.
valid-url validates the URLs that are sent to our API.
Setting up Firebase
To get started with firebase, you need to own a Gmail.
Creating a Project
Open your browser and navigate to Firebase Official Website and create a project.
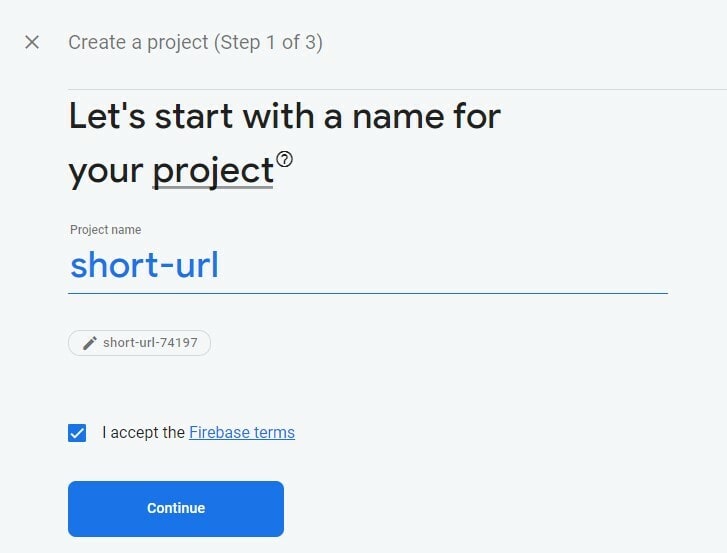
Choose a name for the project:
Google Analytics would not be necessary for our project, toggle it off and Create a project.
After successfully creating a new project you will be brought to the screen below. When you click continue, you will be redirected to your dashboard.
Getting our Projects Details
We need our Web API key from our dashboard to connect our application to Firebase.
On the sidebar, click on Authentication and Get Started. This automatically generates our Web API key.
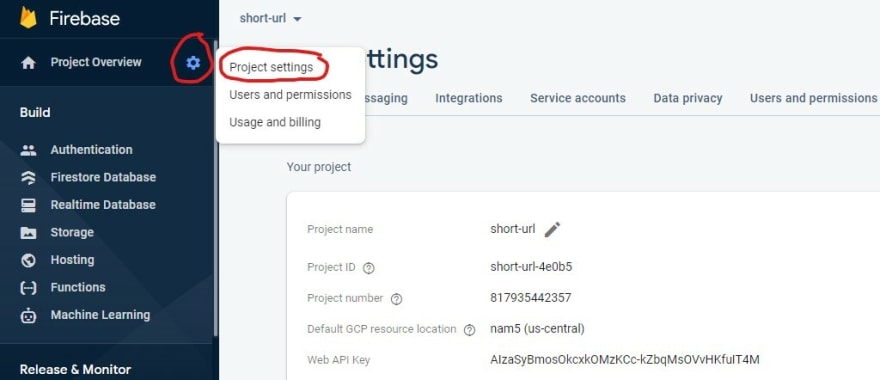
Click on the settings icon on the sidebar and click on Project settings to get our projects Details.
Setting up the server
Let's set up an express listening event, that will listen for a connection to port 5000.
Create a new file named server.js and open it:
const express = require("express");
const app = express();

app.use(express.json());

const PORT = process.env.PORT || 5000;

app.listen(PORT, () => console.log("Sever running at port " + PORT));
Shortening Links
We will have two files, one for generating the URL Code and the other for redirecting the shortened URL to the long URL.
Create a new folder named routes and add two new files named index.js and url.js.
Open up url.js to create the short URL:
const express = require("express");
const router = express.Router();

const valid_url = require("valid-url");
const shortid = require("shortid");

const Shorten = async (req, res) => {
  const { longURL } = req.body;
  const baseURL = "http://localhost:5000";

  // Check base URL
  if (!valid_url.isUri(baseURL)) {
    return res
      .status(401)
      .json({ success: false, message: "Invalid base URL" });
  }
  const urlCode = shortid.generate();
}

router.post("/shorten", Shorten);
We will get the longURL from the body and specify the baseURL of our application which is http://localhost:5000.
We used the package valid-url to check if the baseURL we specified is valid. If it is not valid, we will send a status code of 401 else, we will randomly generate a urlCode using the shortid package.
Connecting our application to Firebase Database
In your dashboard, click on Realtime Database and create a new web database.
To create a new web database click on an icon that looks like
</>]
Create a new folder in our project's root directory named firebase and add fb_connect.js to it.
Open fb_connect.js to connect to our Database:
const { initializeApp } = require("firebase/app");

const app = initializeApp({
  apiKey: "",
  authDomain: "projectID.firebaseapp.com",
  //authDomain: "short-url-4e0b5.firebaseapp.com",
  projectId: "projectID",
  //projectId: "short-url-4e0b5"
});

module.exports = app;
From Project settings in your dashboard, insert your apiKey and projectID in the above code.
Saving Data
Before we can save data in our database, we also need to check the validity of the longURL.
url.js:
const app = require("../firebase/fb_connect");
const { getDatabase, ref, set } = require("firebase/database");

const database = getDatabase(app);

...

const urlCode = shortid.generate();

  // Check long URL
  if (valid_url.isUri(longURL)) {
    const shortURL = `${baseURL}/${urlCode}`;
    const ofirebase = async () => {
      await set(ref(database, "url/" + urlCode), {
        longURL, //From the body
        shortURL,
        urlCode,
      });
      res.status(200).json({ success: true, message: 'Inserted Successfully ' });
    };
    ofirebase();
  } else {
    res.status(401).json({ success: false, message: "Invalid longURL" });
  }
};

router.post("/shorten", Shorten);

module.exports = router;
We initialized our app, imported it into our url.js file, and used it to set up our database. We also required some firebase database functions.
The ref function takes in the instance of our database, the name of the collection we want to add the data to, and the id of each row (which we specified as the urlCode).
The set function takes in the ref function and the data we want to add to the database.
Redirecting users to the Long URL
Open up the index.js file inside the routes folder:
index.js:
const express = require("express");
const router = express.Router();

const app = require("../firebase/fb_connect");
const { getDatabase, ref, child, get } = require("firebase/database");
const dbRef = ref(getDatabase(app));

router.get("/:code", (req, res) => {
  get(child(dbRef, `url/${req.params.code}`))
    .then((snapshot) => {
      if (snapshot.exists()) {
        console.log("redirecting");
        const longURL = snapshot.val().longURL;
        return res.redirect(longURL);
      } else {
        return res
          .status(404)
          .json({ success: false, message: "URL doesn't exist" });
      }
    })
    .catch((error) => {
      return res.status(500).json({ success: false, message: error.message });
    });
});

module.exports = router;
We will get the urlCode from the parameter, use that urlCode to get the LongURL from our database, and redirect the user to the LongURL. If the urlCode doesn't exist, we will send a status code of 404.
Let's set up a middleware in our server.js file that uses our url.js and index.js file to navigate to specific routes.
server.js:
...

app.use("/", require("./routes/index"));
app.use("/api", require("./routes/url"));

...
If you encounter any error or have any questions, send a message in the comment section or refer to the GitHub repo for this tutorial.
Deploying to Heroku
You will need to create an account with Heroku or Sign in if you already have one.
After Signing in, you will be redirected to your dashboard. Click on New at the top-right corner of the page and click create new app.
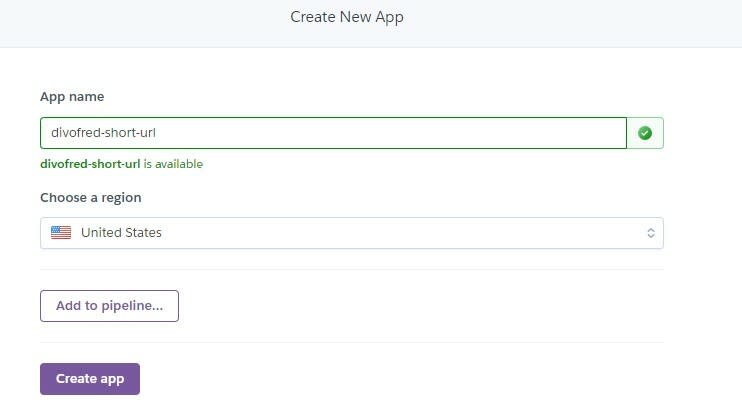
Choose a unique name for the application and create the app:
Download and Install Heroku's CLI.
After Installing Heroku's CLI, log in to Heroku in your terminal:
heroku login
This will prompt for a Login in your browser.
If you get an error like Ip address mismatch, run this code instead:
heroku login -i
This will ask you to put your Heroku's login details in your terminal.
Any other error? send a message in the comment section.
Let's deploy our app to Heroku
git init
heroku git:remote -a divofred-short-url
git add .
git commit -am "make it better"
git push heroku master
Changing our baseURL
Since our project has gone from Local to Production, we need to change the baseURL to the URL of our Heroku's app.
url.js:
...

const baseURL = "https://divofred-short-url.herokuapp.com";

...
We can use Postman to test our application:
Conclusion
We have successfully built a URL Shortener using Node, Firebase Database, and Heroku as our Hosting Platform.
Please submit any question or contributions to the comment section.
You can make a POST request from your Front-end application to our API.
Here is the link to the GitHub repository.
Till We Cross Path, I remain Fredrick Emmanuel (divofred)😁😁❤❤.
This content originally appeared on DEV Community and was authored by Fredrick Emmanuel
Fredrick Emmanuel | Sciencx (2022-01-15T10:24:08+00:00) Build and Deploy a URL Shortener using NodeJS, Firebase, and Heroku. Retrieved from https://www.scien.cx/2022/01/15/build-and-deploy-a-url-shortener-using-nodejs-firebase-and-heroku/
Please log in to upload a file.
There are no updates yet.
Click the Upload button above to add an update.


