This content originally appeared on Bits and Pieces - Medium and was authored by Kyle DeGuzman
A Step by Step Guide on How to Imitate multi-threading in JavaScript with Web Workers

JavaScript is a single-threaded language. This means that JavaScript engines (or compilers) can only execute one instruction at a time. JavaScript cannot multitask or run code in parallel, in contrast to other computer languages. From this, you can also infer that JavaScript can only execute one script at a time.
This can be problematic.
It obviously means that if we want to multi-task and execute more than one instruction at a given moment, we have to wait for the current instruction to completely terminate. This is called blocking. And it becomes a major issue when the current instruction requires a hefty amount of time. What if we have to wait ten, twenty, or forty seconds for the current instruction (like a function or server request) to finish terminating?
It would leave the rest of our page unresponsive. Any other functionality on our site that requires JavaScript would not work because the JavaScript engine/compiler would be occupied with the current instruction.
To combat blocking, we have a few tools at our disposal. One of those tools is web workers.
What are web workers?
A Web Worker is a tool provided by browsers that allow developers to run an additional script in the background.
You can totally think of it as transforming JavaScript from a single-threaded language to a multi-threaded language.
There are a few caveats, though. Web workers cannot access the window or document objects. And web workers cannot manipulate the DOM. Instead, the web worker will have to provide the information to the main thread, and the main thread can manipulate the DOM directly.
Truly, web workers should primarily be used for heavy and lengthy computation.
Tutorial (+ Comparison)
For this tutorial, I am going to show you two scenarios: one scenario that does not use web workers and another scenario that does. If you still do not fully understand the purpose of web workers, hopefully, this tutorial will change that.
To get started, we’re going to need two scripts: a main script and a worker script. I am going to assign the name index.js to my main script and worker.js to my web worker script.
In my index.js script, this is my code:
var i;
for(i=0; i<=2000; i++){console.log(i);
}
console.log("---------------EXECUTED ------------------")We have a for-loop that will loop 2,000 times, and we have a console log statement.
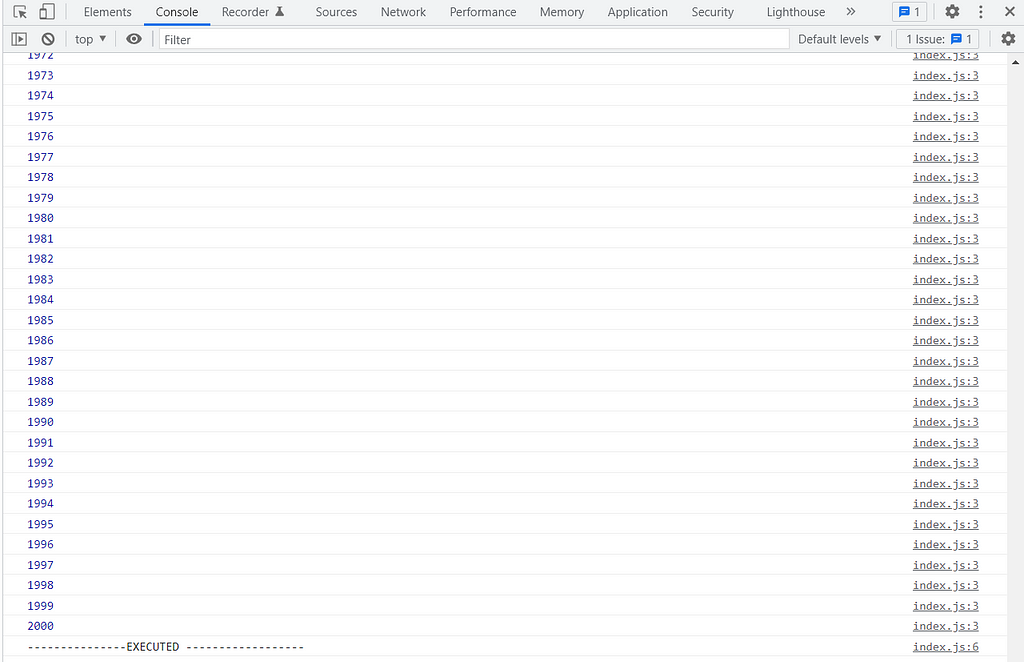
Let’s execute it and see what happens.

In order for the instruction console.log("----EXECUTED--") to be executed, it has to wait for the previous instruction to be completely finished. In this case, the for-loop had undergone 2000 repetitions before console.log("----EXECUTED--") could be executed.
In this example, I used a big number like 2000 to mimic a task that will take a hefty amount of time. As said earlier, while that hefty task is occupying the attention of the JavaScript Engine/Compiler, other functionality of your site that uses JavaScript will be unresponsive. Your site will be unresponsive.
What if you need JavaScript to open your navigation bar? or you need JavaScript for website animations or dealing with button clicks? None of those features will work until the current task is finished. And to the user, the user will experience an unresponsive website which is definitely not an enjoyable experience.
Let’s implement a Web Worker
In my index.js file, let’s make a few changes:
var webWorker = new Worker("worker.js");console.log("---------------EXECUTED ------------------");First, we create our web worker. You can name your web worker anything you want. I creatively named my worker webWorker . And to the right of the = we simply write new Worker followed by the path to your script file in quotes.
Note: This is case-sensitive.
As you may have noticed, the for-loop that executes 2000 loops is missing. We are going to place that in our worker.js file so that our web worker can handle it.
And then we keep our console log statement at the end.
In our web worker file, we should only have the for-loop.
var i;
for(i=0; i<=2000; i++){console.log(i);
}
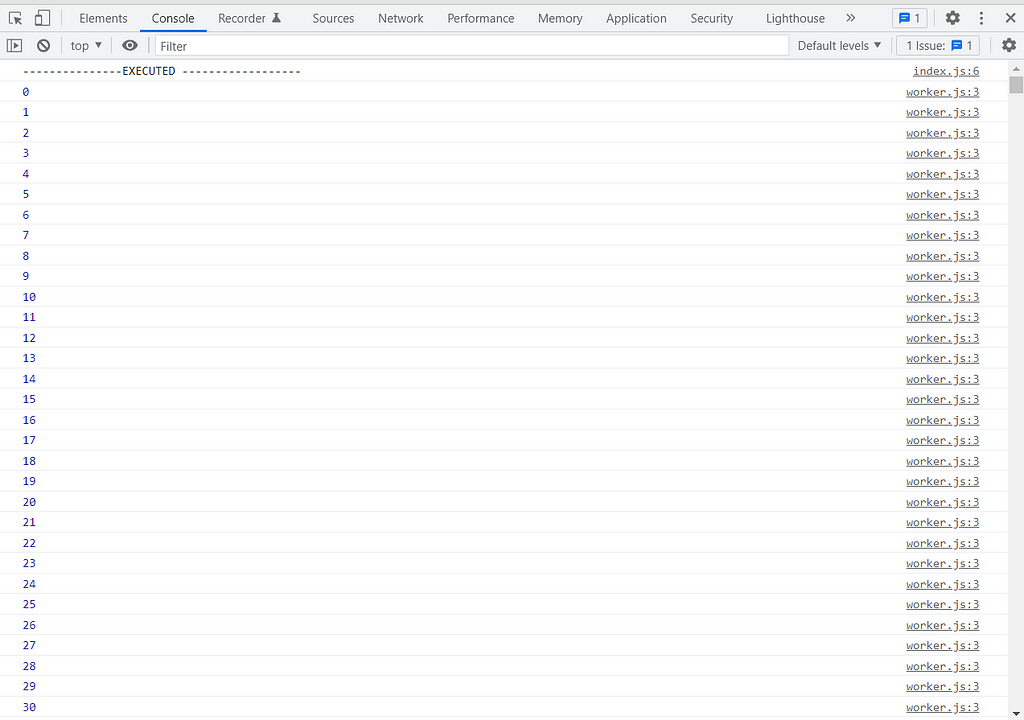
Let’s run it.

Notice how console.log(“ — — — — — — — -EXECUTED — — — — — — — — — “); executed immediately at the beginning. This is because the two scripts: index.js and worker.js are working simultaneously, in parallel. This is why Web Workers are powerful tools.
This means we can run hefty JavaScript with web workers while leaving our JavaScript engines free and available to handle the user interface.
Communication Between Two Scripts
In the example I showed, the main script does not communicate with the worker script. What if we wanted to share values between two scripts?
We do this with the onmessage() function and the postMessage() function.
The postMessage() function is how you send data to the other script. And the onmessage() function is how a script receives data; this function is activated when the other script sends data using postMessage() .
Let’s try it out.
My index.js file looks like this:
var webWorker = new Worker("worker.js");var customer = {fName: "Kyle",
lName: "De Guzman",
age: "21",
city: "Vegas"
}
webWorker.postMessage(customer);
webWorker.onmessage = function (response){console.log(response.data.result)
}
Here, we create a JavaScript object called customer. It holds the first name, last name, age, and city.
Then, we access the Worker object’s postMessage() function. Again, this allows us to send data to the worker.js script. In this case, we are sending data in the form of the customer object.
And then we also access the Worker object’s onmessage() function — which activates after worker.js sends a response. This function noticeably has a parameter called response. response is the data that worker.js has sent to us back.
Moving on, let’s look at our worker.js file.
this.onmessage=function(response){var sentence = "Hello " + response.data.fName + " " + response.data.lName;
this.postMessage({result: sentence});}
We start off with onmessage() . Basically, this worker script is activated once the main script sends over data. If you can recall, the main script sent over customer information.
In this case, the data sent over will be referenced by the name response. You can change it to whatever reference name you want. Then to access the response, we use response.data .
Since the response is in the form of an object, you see me write: respone.data.fName and response.data.lName . If the data sent over was merely a string, number, or boolean, you would just have to write response.data .
At the conclusion of the worker script, we use postMessage() . Again, this is used to send over data. As shown, the data we are sending back is in the form of an object. You can totally send data back in the form of string if you wanted to.
Let’s run it.

As you can see, we successfully communicated between two scripts.
And there you have it!
For more information on the Web Workers API, check out the official MDN Web Docs.
Build component-driven. It’s better, faster, and more scalable.
Forget about monolithic apps, start building component-driven software. Build better software from independent components and compose them into infinite features and apps.
OSS Tools like Bit offer a great developer experience for building component-driven. Start small and scale with many apps, design systems or even Micro Frontends. Give it a try →

Boost Performance with Web Workers: A Detailed Guide was originally published in Bits and Pieces on Medium, where people are continuing the conversation by highlighting and responding to this story.
This content originally appeared on Bits and Pieces - Medium and was authored by Kyle DeGuzman
Kyle DeGuzman | Sciencx (2022-01-20T06:18:04+00:00) Boost Performance with Web Workers: A Detailed Guide. Retrieved from https://www.scien.cx/2022/01/20/boost-performance-with-web-workers-a-detailed-guide/
Please log in to upload a file.
There are no updates yet.
Click the Upload button above to add an update.
