This content originally appeared on Bits and Pieces - Medium and was authored by Byte Blogger
Learn how to export a webpage to PDF with JavaScript, html2pdf, and jsPDF

Hustling around to simply export a webpage to a PDF file or do you just want to export something from your webpage to PDF and want a simple solution?
You might get your answer here.
There are two approaches to exporting a webpage to PDF:
- Server Side PDF file generation
- Client (browser) side PDF file generation
The server side PDF approach is quite expensive and complex. The easier solution involves exporting a webpage on the client side.
First, let’s understand the benefits hereL
- All the computation to generate a PDF file will happen on the client machine — this can be faster than sending to the server and generating there.
- The solution is great for handling static websites.
- Simple to implement for basic requirements.
Let’s begin
Client side PDF generation is all about browsers’ API calls, which JavaScript and its related libraries consume to get things done. There are many JavaScript libraries we could use here, including:
- jsPDF
- html2pdf
- pdfmake
- PDFsKit
- ReLaXed
- nodeice
- Electron
- PDFObject
- pdf2json
Here, we are going to use jsPDF and html2pdf.

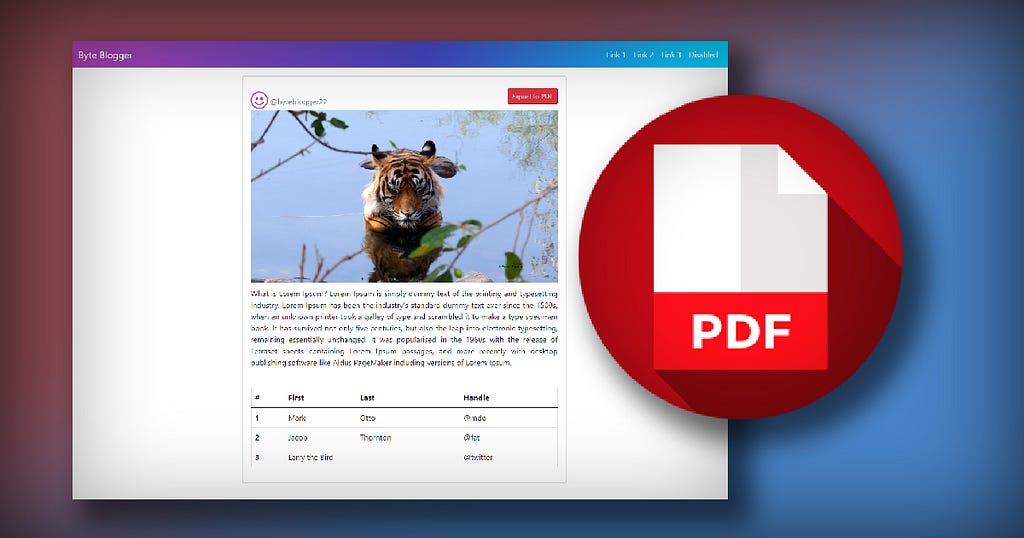
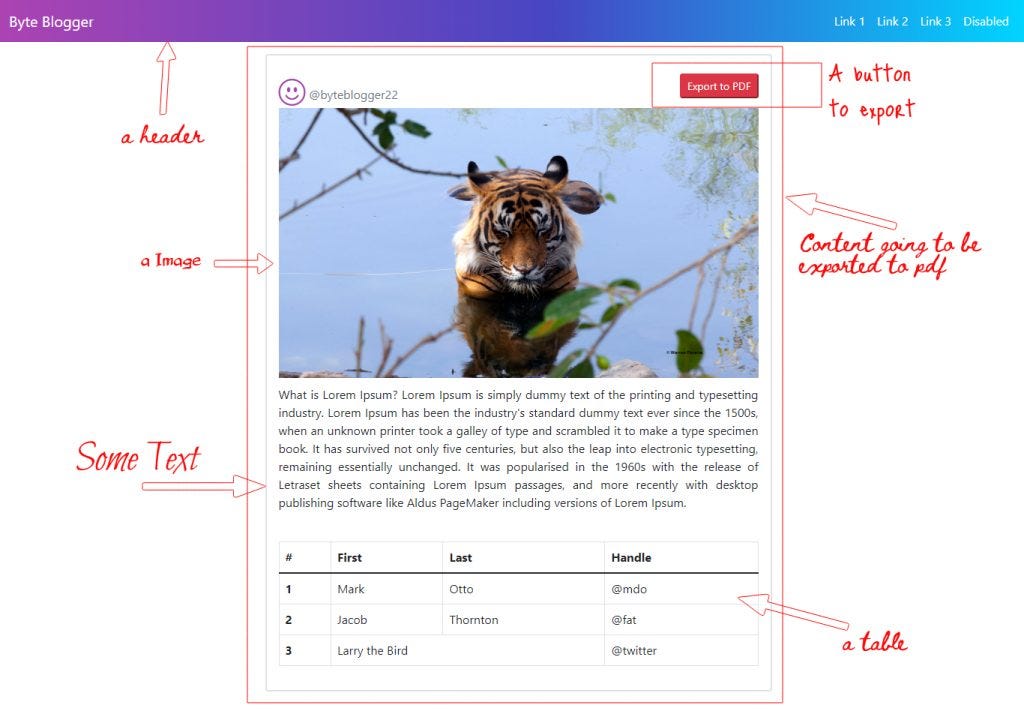
Above is the image of a static webpage we are going to use for our tutorial. Let me sketch around this image and see the edited one below.

As you see above, we are going to export this grey bordered box out of the complete page. we have a header as extra on this page, you might have other things as well on your webpage which you don’t bother about, to get exported. All our focus is on the grey-bordered rectangle.
The content of this box mainly is three things- an Image, a text graph, and a table. how to draw this webpage anyway in the first place? well, check the index.html file code below, the main file we have.
Let’s understand this index.html code.
Line 7–13: Integration of all important CDNs
<link href="style.css" rel="stylesheet">
  <link href="https://cdn.jsdelivr.net/npm/bootstrap@5.1.3/dist/css/bootstrap.min.css" rel="stylesheet">
  <script src="https://cdn.jsdelivr.net/npm/bootstrap@5.1.3/dist/js/bootstrap.bundle.min.js"></script>
  <link rel="stylesheet" href="https://cdn.jsdelivr.net/npm/bootstrap-icons@1.3.0/font/bootstrap-icons.css">

  <script src="https://cdnjs.cloudflare.com/ajax/libs/jspdf/1.5.3/jspdf.min.js"></script>
  <script src="https://cdnjs.cloudflare.com/ajax/libs/html2pdf.js/0.9.3/html2pdf.bundle.min.js"></script>
Firstly integrate a stylesheet file style.css, where you want some look and feel tweaks in CSS, then I added Bootstrap CSS bundle and Bootstrap JS library CDNs, just for better webpage creation.
Note: Use of Bootstrap is purely optional.
Line 12 and 13 are important, here we are integrating CDNs of jsPDF and html2pdf libraries.
Line 40–82: The Div(Content) to be exported
In our code, from line 40–82 is the <div> element code, where we have to design the grey-bordered central element which has to be exported to pdf. you can code anything in this div but the most important part is the div ID or I would say element ID, which will be a reference to the PDF generation code for the html2pdf library.
Line 44: Export to PDF Button
Check this line 44, I know a simple HTML button with some Bootstrap classes on it, but rather more important is the function we are calling here, yes onclick=”generatePDF()” parameter. we are calling a JavaScript function here on the click event of this button generatePDF() function is the crux of this blog and the core of our example, let’s check the code.
Line 86–104: generatePDF() function

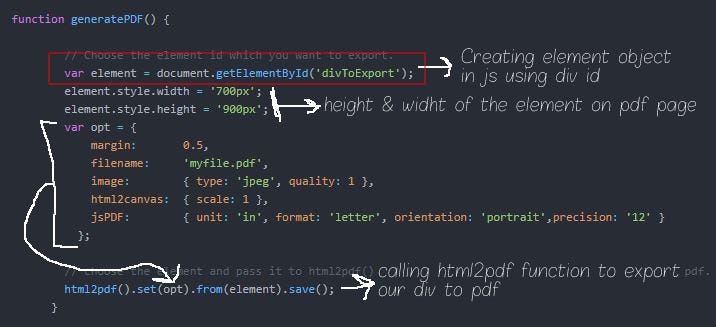
The image above is explaining things itself, I will explain the html2pdf() function call and opt variable.
The opt variable holds all the values which are defining the configuration of a pdf file. Margin, of course, the page margin we need on each PDF page, the filename is the name of the exported PDF file. The image is an important parameter of the opt object.
The html2pdf library uses the html2canvas library to paint an image on the webpage as a screenshot on the pdf page. It’s important to note here you can export only “jpeg”, “png” and “webp”(chrome) images, check here.
The html2canvas object is passed with scale parameter, which generates PDF based on browsers device pixel ratio. Check the parameters here we can pass in this object.
The jsPDF object, here we are passing dimensions of the PDF page, the format of the page, precision, and the measurement units, like in “mm”, “in” or “px”. This object will be passed to the jsPDF library to set up the pdf page. check the complete list of parameters here.
A final call to the html2pdf() function. Here, we have to call multiple worker API library functions) to achieve our goal. The flow basically goes like this:
.from() -> .toContainer() -> .toCanvas() -> .toImg() -> .toPdf() -> .save()
We have to call all the functions in this order. If you want a page setting of a pdf, call the set() function on a from() function and pass the opt object and at last we have to call save() function to save our pdf file.
In our generatePDF() function line 102 can be simply html2pdf().from(element).save(), then it will set all the page setting to default for pdf, default layout is portrait scaling is one, margin is 1 and element will be left aligned.
I hope you have found this useful. Let me know in the comments, and feel free to ask questions!
Build with independent components, for speed and scale
Instead of building monolithic apps, build independent components first and compose them into features and applications. It makes development faster and helps teams build more consistent and scalable applications.
OSS Tools like Bit offer a great developer experience for building independent components and composing applications. Many teams start by building their Design Systems or Micro Frontends, through independent components. \

How to Export Webpage to PDF with JavaScript was originally published in Bits and Pieces on Medium, where people are continuing the conversation by highlighting and responding to this story.
This content originally appeared on Bits and Pieces - Medium and was authored by Byte Blogger
Byte Blogger | Sciencx (2022-01-21T14:43:43+00:00) How to Export Webpage to PDF with JavaScript. Retrieved from https://www.scien.cx/2022/01/21/how-to-export-webpage-to-pdf-with-javascript/
Please log in to upload a file.
There are no updates yet.
Click the Upload button above to add an update.
