This content originally appeared on Level Up Coding - Medium and was authored by George Argyrousis

Assistive technology users rely on the correct usage of HTML semantic elements to easily navigate and identify areas of interest within a given web-page. During a 2016 screen reader strategy survey, users reported heading hierarchy and landmark regions as the first means of informational retrieval when browsing an unfamiliar website.
Without the usage of landmarks and headings, we seriously disaffect screen reader users, effectively forcing them to Tab through the entire website in the pursuit of desirable content. Evidently, incorrect usage (or no usage) of landmarks, heading levels, and labelling is a deeper indication of accessibility problems. However, these issues can be amended with relatively little engineering effort.
HTML landmarks

Landmark areas implicitly provide context regarding the nature of groupings in an HTML element. Screen readers can easily identify all available landmarks in a page and showcase them to the user:
- <aside> — role="complementary" refers to an independently supporting section. It can potentially relate to the main content.
- <header> —The role="banner" is used to define the site’s header. It typically includes a logo and navigation elements, generally at the top of a page.
- <nav> — Large groups of navigation links can be found with a parent element having the attribute role="navigation".
- <main> — The main content of each page should be placed within the element with the role="main".
- <section> — The role="region" should be used for areas of sufficient importance that visitors will likely want to quickly navigate towards.
- <footer> — At the far bottom of a page, we find the element having the role="contentinfo" attribute. Usually children/?/ include navigation items about the global site along with privacy or copyright information.
For the exhaustive list of landmark roles along with their semantic meaning, visit MDN’s WAI-ARIA Landmark roles.
You can use landmarks interchangeably with a div having a matching role attribute. For example, <div role=”nav”> is semantically identical to the equivalent <nav> element.
Correct landmark usage
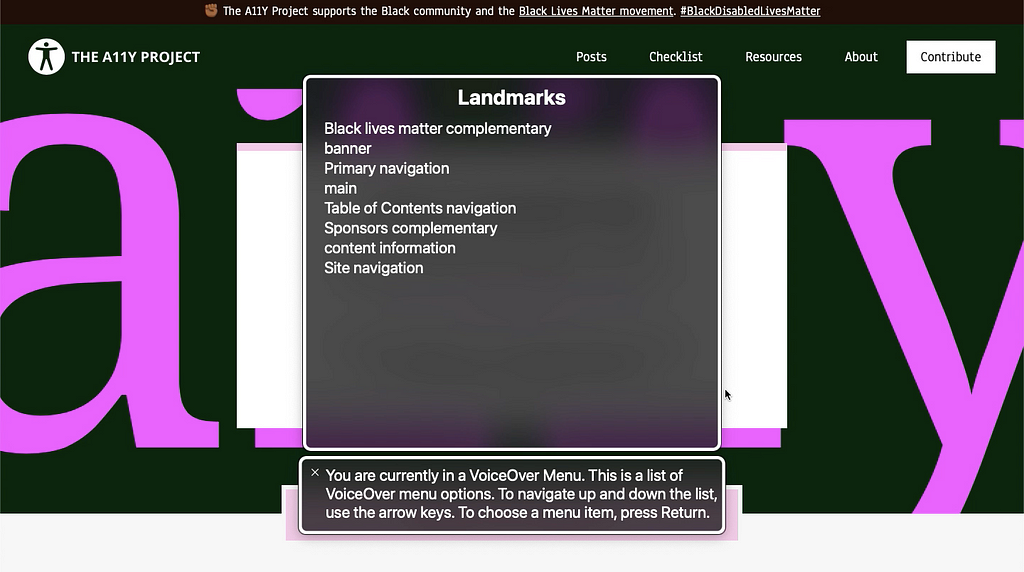
When using Mac’s VoiceOver (cmd + f5) on a11y.com we can observe the following landmarks (ctrl + alt + u in combination with left, right arrows):

Given the information provided by our screen reader, we can derive the following; An aside element at the beginning of the document, followed by a header containing the primary nav. Furthermore, we have a main section containing a nav named table of contents with an aside pertaining Sponsors. Finally, we have a footer with a nav about site links.
Our derivation is not far from the visual hierarchy discerned on the a11y website. The engineers are also utilising aria-label to further enhance the linguistic representation and meaning of said landmarks. Screen readers announce the aria-label first followed by the explicit or implicit role attribute of an HTML element. For example, <nav aria-label="Primary"> (having the implicit role="navigation") will be interpreted as “Primary navigation”.
Heading levels

Heading tags (<h1> to <h6>) outline the information structure on the web-page. By using headings, you can effectively create an interpretable table of contents for the screen reader. Ultimately, users can quickly find areas of interest without frustration.
Heading ranks are ofter misused due to their inherited visual styling. We must refrain from doing so and utilise ranks for their semantic meaning. The <h1> acts as the title of the document conveying the highest degree of importance, whereas, a <h2> can be characterised as a sub-heading. Ideally, we conform placement of headings following common document writing formats:
- It is recommended that each page has only one <h1> tag placed before all other heading in your document.
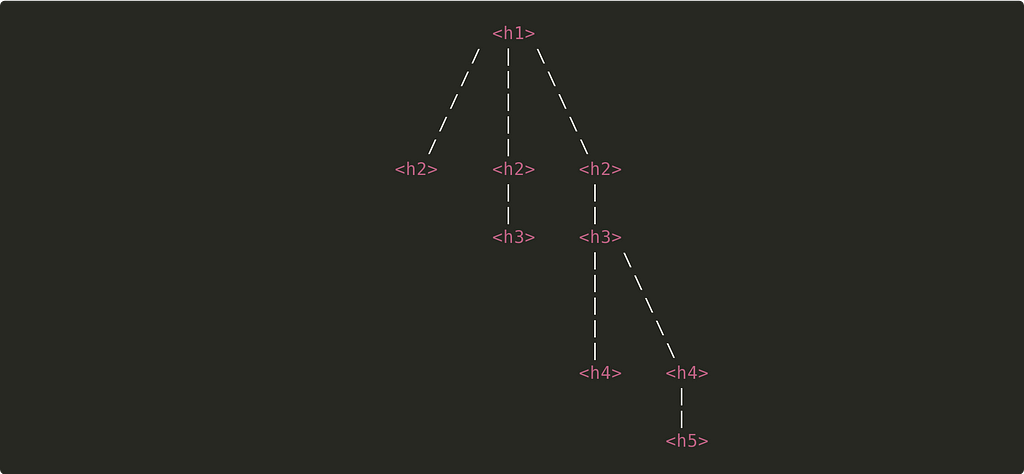
- Skipping ranks can be confusing. Ideally, ranks should cascade downwards based on their innate numbering scheme. You can visualise ranks as an upside down tree with a base trunk being your level 1, following branches act as level 2 etc. You could “skip” ranks when closing a subsection and opening another one.
- You can visually conceal headings for better accessibility coverage. Screen reader users may opt to explicitly navigate using headings and potentially miss important areas. Insert hidden heading levels to achieve improved navigational experience within landmark areas.
Screen readers will parse headings by the order of HTML placement instead of the perceived visual hierarchy.
Great heading placement
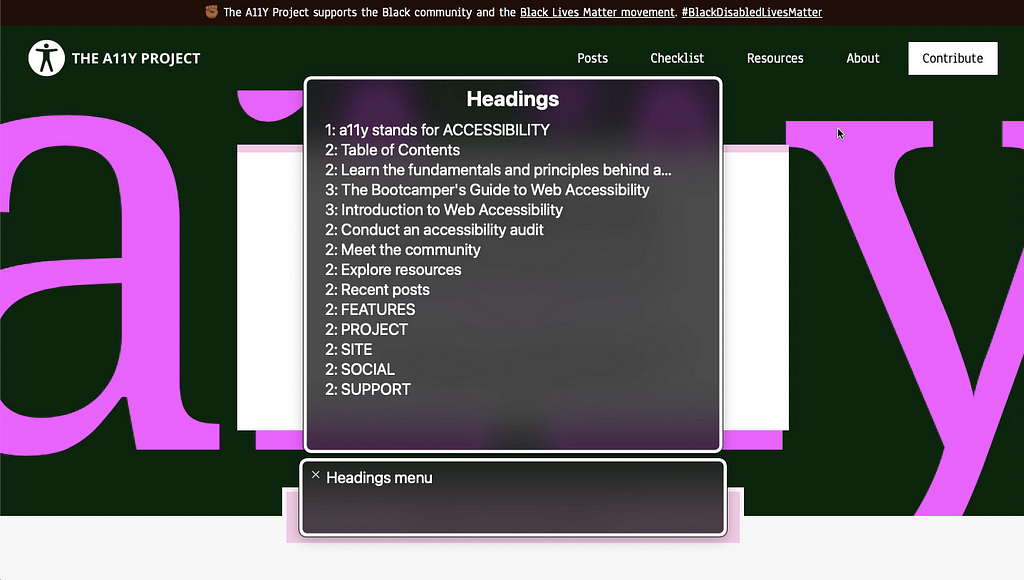
We will go through a11y.com once more to observe the following heading hierarchy:

We can immediately observe great labelling that conveys immediate meaning of the content related to each section. Furthermore, the <h2> with text “Table of Contents” cannot be visually observed on the website. This labelling approach enables screen readers to interchangeably pick up landmark areas that would otherwise be missed when browsing the headings menu.
The last five <h2> headings utilise a single uppercased word. This is an intentional approach that conveys a relation with a list or a grouping of anchor links.
Implement landmarks & heading levels

Firstly we must conduct an accessibility audit to further understand the degree of change that needs to take place. Use a screen reader and try navigating your website using the landmark or heading navigator. Even better if you conduct such an experiment with a tester that is unfamiliar with your website to avoid biased results. Collect as much information and feedback as possible to track your current state and evaluate your progress towards a desired accessibility baseline.
Begin by identifying logical structured blocks of content such as navigation, main content and footer. Once these areas are found, replace their outer container with a semantic HTML landmark. Introduce additional labelling with aria-label for better separation and understanding of context.
Once your areas are correctly assigned, identify areas of further concern that might need interchangeable tagging with heading levels. Ensure that your heading structure follows a valid cascade and refrain from using headings for their default user agent styling. Repedetly audit to confirm your incremental improvements.
Final thoughts
We’ve examined the topics of landmarks and heading levels in sufficient depth along with their implications. When applying the aforementioned principles, be conscious of potential over (or under) labelling as it can be problematic.
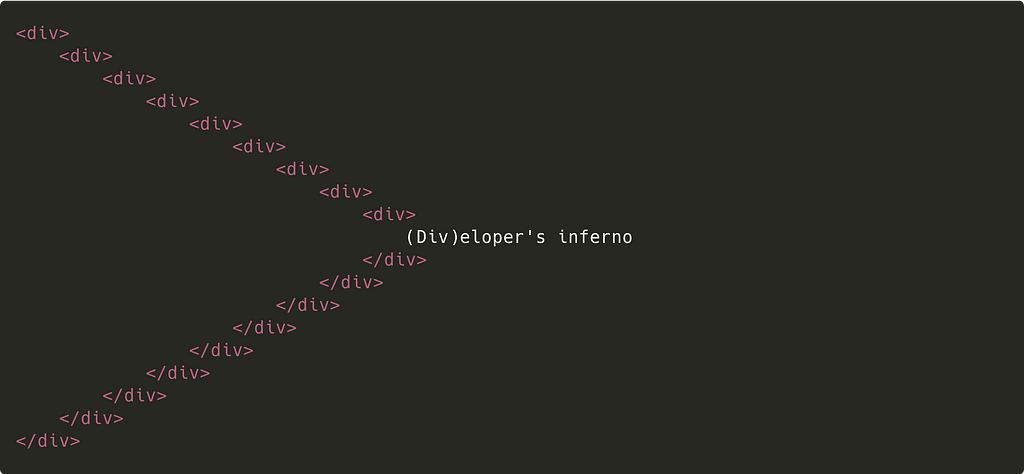
Remember to use semantic HTML when applicable -beyond landmark areas. Hopefully, you are now a few steps away from the (Div)eloper’s inferno.
References & further reading
- Responses To The Screen Reader Strategy Survey
- WAI-ARIA Roles - Accessibility | MDN
- Semantics and Navigating Content | Web Fundamentals | Google Developers
- HTML Sectioning Elements
- Accessibility Landmarks
Video explanations
If you found this post useful, please share it with others. Some claps 👏🏻 below help a lot!
By clapping, you help others discover this content and motivate the writing of more articles about accessibility, design, React and JavaScript!
Build an accessible HTML structure using ARIA landmark regions and headings. was originally published in Level Up Coding on Medium, where people are continuing the conversation by highlighting and responding to this story.
This content originally appeared on Level Up Coding - Medium and was authored by George Argyrousis
George Argyrousis | Sciencx (2022-01-24T16:50:35+00:00) Build an accessible HTML structure using ARIA landmark regions and headings.. Retrieved from https://www.scien.cx/2022/01/24/build-an-accessible-html-structure-using-aria-landmark-regions-and-headings/
Please log in to upload a file.
There are no updates yet.
Click the Upload button above to add an update.
