This content originally appeared on DEV Community and was authored by Web.Developer.io
What
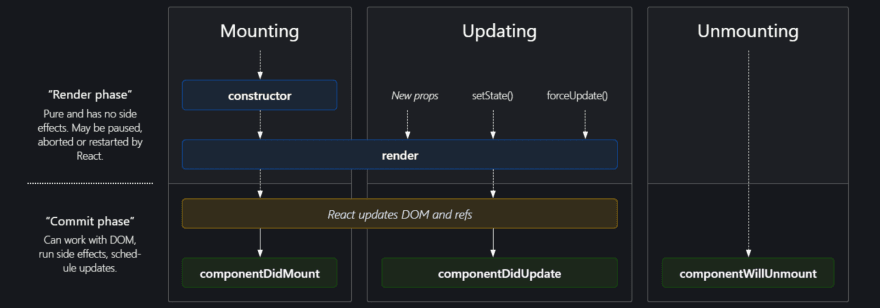
Every Component in React has a lifeCycle which we can moniter or update During it’s 3 main Phases.
So Every Component has 3 main Phase during it’s Life
1.) Mounting → This Means Adding the Component into the DOM.
2.) Updating → Updating the State or any other data of the Component.
3.) UnMounting → Removing the Component From the DOM.
How
Mounting
When a Component is rendered in the DOM for the 1st Time then it is called as Mounting.
React has 3 methods that got called During Mounting.
1.) Constructor()
2.) render()
3.) ComponentDidMount()
Before you Move further you should know about this the methods which are prefixed by will are called right before Something happen and the methods which are prefixed by Did are called right after Something happen.
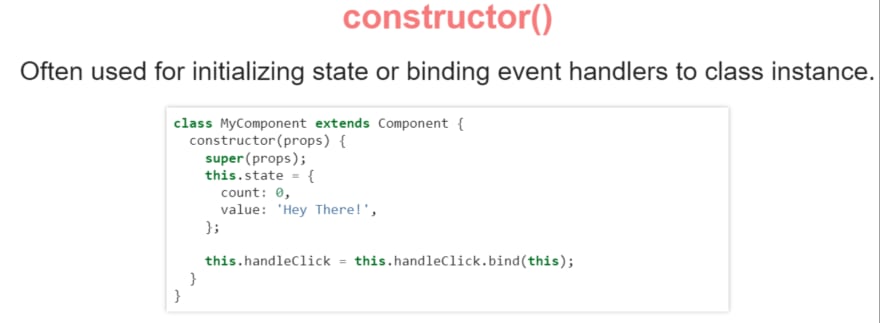
The Constructor will called 1st and used for initialize the state and Bind the event handlers.
After that render will be called
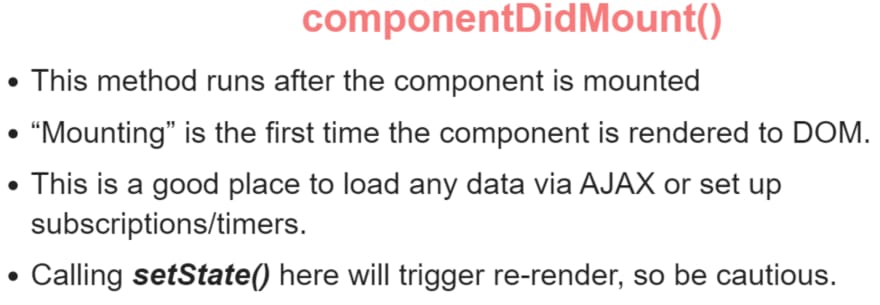
After the Component is rendered React will call the ComponentDidMount().
- As the Component is Already Rendered if we will try to change state in the
componenetDidMount()It will cause aRe-rendering.
Let’s have a Look to this Example
import React,{Component} from "react"

class ReactLifestyle extends Component{
  constructor(props){
    super(props);
    this.state = {count:1}
    console.log('In Constructor Method')
  }
  componentDidMount(){
    console.log('IN Component Did Mount')
    this.setState({count:2})
  }
  render(){
    console.log('In Render method')
    return(
      <div>
      hi
      </div>
    )
    }
}

export default ReactLifestyle;
The Output of the Code will be 👇
As u can see 1st Constructor Method is called then Render Method and then Component Did Mount
Also If we try to set state in the ComponentDidMount then it will cause re-rendering as u can in the output.
Loading Data Via Ajax
import React, { Component } from 'react';
import axios from 'axios';
import "./Zenquote.css"

class Zenquote extends Component {
    constructor(props) {
        super(props);
        this.state = {quote:"",isloading:true};
    }
    componentDidMount() {
        //WE are adding the setTimeout so can we can get in a Condition when after rendering the Data Fetching takes time.
        setTimeout(() =>{
        axios.get("https://api.github.com/zen")
        .then((res)=>{
            console.log(res.data);
            this.setState({quote:res.data,isloading:false});
        })
        .catch((err)=>{
            console.log(err);
        })
    },1000)

    }
  render() {
    return( <div>
        {this.state.isloading?
        (<p className="circle">
        Loading .........
        </p>)
        : (<div>
            <h3>Always Remember ....</h3>
            <p>{this.state.quote}</p>
        </div>)}

    </div>);
  }
}

export default Zenquote
- So in the code every-time we refresh the page we got new
quote, I use the axios to fetch the data and also , I have to use the setTimeout to depict that sometime the data fetching take time so at that time we can add aanimated Loader.
Loading data using the Async Function →
Async/await make promises easier to write.
Async makes a function return a Promise.
Await makes a function wait for a Promise.
componentDidmount(){
    async GetData(){
        let res = await fetch('http://github.com.api/users');
        console.log(res);
    }
}
- When we Write it will wait for the data to come then move on to another line.
Example →
import React, { Component } from 'react';
import axios from 'axios';

class GithubUsersInfo extends Component {
    constructor(props) {
        super(props);
        this.state = {imgUrl:"",name:"",followers:""};
    }
    async componentDidMount() {
        let user = `https://api.github.com/users/${this.props.user}`
        const res = await axios.get(user)
        console.log(res);
        this.setState({imgUrl :res.data.avatar_url,name:res.data.name,followers:res.data.followers})
    }
  render() {
    return <div>
        <h2>Github User Name : {this.state.name}</h2>
        <img src={this.state.imgUrl} alt="image"/>
        <p>Followers : {this.state.followers}</p>
    </div>;
  }
}

export default GithubUsersInfo
- This takes user name as a props.
- This will gives us the Github User Data.
ComponentDidUpdate →
Updating can be done by changing the the State , Props (Changed Form the Parent Side) , or any other External Data.
Like forceUpdate is used to update the things which are not in the state and often they are external Data so to change that we can use the forcedata().
When we update Something Re-rendering Happen after then ComponentDidUpdate() called.
So we can use the ComponentDidUpdate() to save all your data into the database which has been changed .
Example →
import React, { Component } from 'react';
import axios from 'axios';
import "./Zenquote.css"

class Zenquote extends Component {
    constructor(props) {
        console.log("In Constructor")

        super(props);
        this.state = {quote:"",isloading:true};
    }
    componentDidMount() {
        console.log("In Component Did Mount")
        setTimeout(() =>{
        axios.get("https://api.github.com/zen")
        .then((res)=>{
            this.setState({quote:res.data,isloading:false});
        })
        .catch((err)=>{
            console.log(err);
        })
    },1000)

    }
    componentDidUpdate(){
        console.log("In Component Did Update")
    }
  render() {
      console.log("Rendering .....")
    return( <div>
        {this.state.isloading?
        (<p className="circle">
        Loading .........
        </p>)
        : (<div>
            <h3>Always Remember ....</h3>
            <p>{this.state.quote}</p>
        </div>)}

    </div>);
  }
}

export default Zenquote
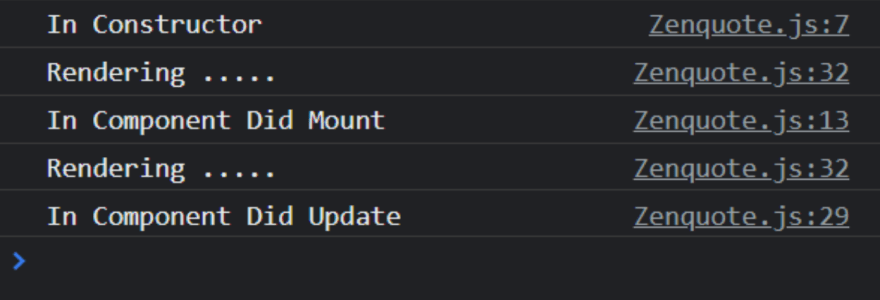
The Output of the Below Code is :
1st the Constructor is called , then rendering happened and then ComponentDidMount got called and in the ComponentDidMount we change the State so this causes the Re-rendering and when we change the state after Re-rendering the ComponentDidUpdate Got called.
Whenever u update something the ComponentDidUpdate got called after Re-rendering. So we can use the Component Did Mount to save the data to the Database.
Also In the Component Did Update we can access the Previous State and the Previous Props so U can use this to compare the State or props with the previous ones.
To use the Previous state and prop u should write like this.
componentDidUpdate(prevProps,prevState){
    // Inside this u can use the previous props & the state
    console.log(prevProps);
    console.log(this.props);
}
- Remember the 1st argument will be the previous props and the 2nd argument will be previous state.
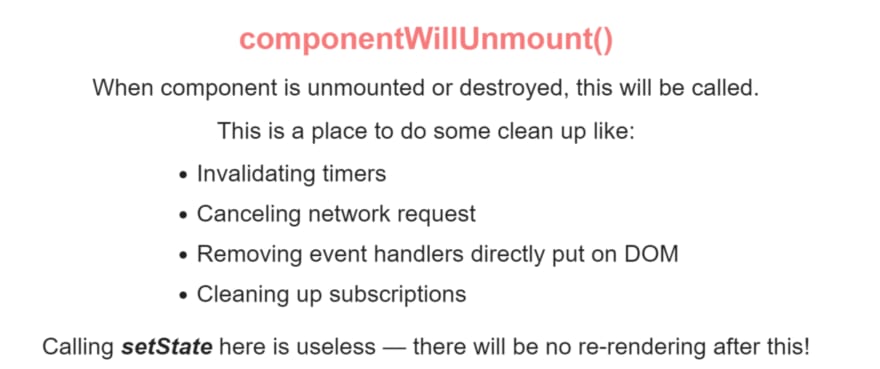
ComponentWillUnmount()
This will be called when we are removing something from the DOM
componenetWillUnmount(){
    console.log('In Component Will Unmount')
    //It will be called before the removal of the Component.
}
Happy Coding 🙂
This content originally appeared on DEV Community and was authored by Web.Developer.io
Web.Developer.io | Sciencx (2022-01-24T19:03:03+00:00) React LifeCycle Method | Day 16. Retrieved from https://www.scien.cx/2022/01/24/react-lifecycle-method-day-16/
Please log in to upload a file.
There are no updates yet.
Click the Upload button above to add an update.

