
This content originally appeared on DEV Community and was authored by Spacial
Getting Ready
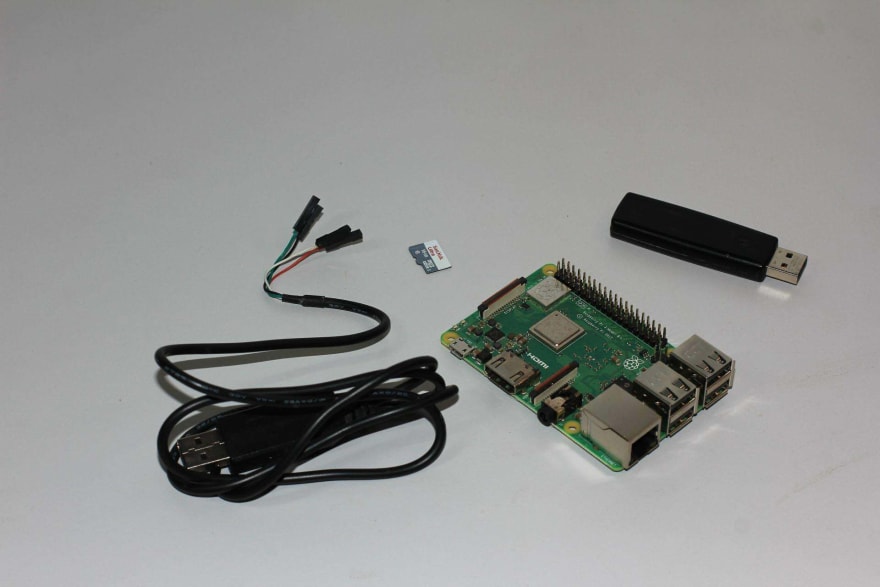
Before anything, you'll need:
- An Raspberry Pi 3 or 4 (only
armv7) - An Serial FTL Cable (example)
- An micro SD Card (your target disk)
- An usb thumb drive (your installer disk)
I suggest you go to OpenBSD arm64 page and download both miniroot.img and install.img.
Preparing the disks
SD Card
Format your SDcard (on OpenBSD, Linux or whatever) - BEWARE of your disk name! see on dmesg after plug it:
Linux
(Optional) Clean your MBR:
# dd if=/dev/zero of=/dev/mmcblk0 count=4096
then you transfer miniroot.img to it:
# dd if=miniroot.img of=/dev/mmcblk0 status=progress
Formatting USB thumb drive
Linux
(Optional) Clean your MBR:
# dd if=/dev/zero of=/dev/sda count=4096
then you transfer install.img to it:
# dd if=install.img of=/dev/sda status=progress
Installation
After both disks ready, you get your cable (ATTENTION) connect it on correct GPIO's pins, plug it on computer (and turn it on, if you didn't connected the +5V pin). See both connection options bellow.
Connecting on board
To start, you'll need to connect the cable on raspberry pi on GPIO. The pins are 4 (5V), 6 (GND), 8 and 10 (TX/RX).
BEWARE!!!:
If you want to connect your raspberry pi in your computer AND on power, you need only 3 wires on GPIO.
if you connect both, you'll fry your USB port AND your Raspberry pi.<<
Console
After connection you'll need to run (Linux):
# screen /dev/ttyUSB0 115200
You'll see:
Setup boot environment with:
Installation Options
Step-by-step:
Welcome to the OpenBSD/arm64 7.0 installation program.
(I)nstall, (U)pgrade, (A)utoinstall or (S)hell? I <ENTER>
(Optional) Update RasPi's firmware
(Optional) Post-install
Network
To configure your device to use dhcp you need to create a /etc/hostname.<device> file, and include dhcp \n up on it.
Example (as root):
# echo 'dhcp
up' > /etc/hostname.mue0
# chown root:wheel /etc/hostname.mue0
# chmod 0640 /etc/hostname.mue0
# sh /etc/netstart
For wifi, see Further Links.
Time
If you get WARNING: CHECK AND RESET THE DATE! on dmesg or on console, you need to configure ntpd to start and ignore big time offset.
HDMI
If you want to get your raspi to activate the console on HDMI (it will break the serial console after kernel boot) you need to include set tty fb0 on /etc/boot.conf.
Disk Encryption
I didn't encrypted my disk, but if you want to, this tutorial is great.
Updating after install
After installation and date ok, you need to run:
syspatch
then
pkg_add -Uu
Final Thoughts
Installing OpenBSD on Raspberry Pi was fun. OpenBSD 7 runs flawlessly and you can use it as firewall (adding some usb ethernet adapter), as DNS server, and other stuff.
Further Links
- INSTALLATION NOTES for OpenBSD/arm64 7.0
- OpenBSD FAQ - Installation Guide
- Running OpenBSD on Raspberry Pi 3
- Getting OpenBSD running on Raspberry Pi 3
- HOW TO INSTALL OPENBSD 6.1, STEP BY STEP
- OpenBSD on Raspberry Pi
- Installing OpenBSD on Raspberry Pi 3
- OpenBSD 6.8 on RaspberryPi 4 B
- OpenBSD Handbook
- OpenBSD FAQ - Networking
- OpenBSD WiFi 802.1x WPA-EAP setup
- connect to wi-fi and ethernet networks from openbsd
- Keeping OpenBSD up to date
- OpenBSD on Raspberry Pi 4 with Full-Disk Encryption
- The complete idiot's guide to OpenBSD on the Pinebook Pro
- KVM virt-install: Install OpenBSD As Guest Operating System
- Why I use OpenBSD
Credits
- Pufferfish baby photo by Marty Wakat - shutterstock
This content originally appeared on DEV Community and was authored by Spacial
Spacial | Sciencx (2022-02-13T00:35:15+00:00) Installing OpenBSD 7 on Raspberry Pi 3. Retrieved from https://www.scien.cx/2022/02/13/installing-openbsd-7-on-raspberry-pi-3/
Please log in to upload a file.
There are no updates yet.
Click the Upload button above to add an update.