This content originally appeared on DEV Community and was authored by Elvis2280
Leaflet is an open-source library that allows us to render a map on our website where we can show data, put marks wherever we want, and a lot more things, this is so useful and cool with Mapbox because we can custom our map and make it can fit with our website color pallet palette.
Instalation
First of all, we need to install React-Leaflet, for this we'll use this on our npm
npm i leaflet leaflet-defaulticon-compatibility leaflet-geosearch react-leaflet
after this is added to our package.json we can import this to our map component, I recommend you to create a separate component for the map, something like Map.jsx and add there all the necessary code and import all the dependence we need for our map
So, in our Map.jsx let's import the next things
import { MapContainer, TileLayer, Marker, Popup } from 'react-leaflet';
import 'leaflet/dist/leaflet.css';
import 'leaflet-defaulticon-compatibility/dist/leaflet-defaulticon-compatibility.css';
import 'leaflet-defaulticon-compatibility';
Components
MapContainer: this wrap and display our map, so we need to pass some props
- center: we need to pass the latitude and longitude in an array something like [8.9880228180055, -79.52932768202]
- zoom: we pass a number, more high number means more zoom
- scrollWheelZoom: true or false for allowing zoom with the mouse scroll
TileLayer: this allows us to add our custom map and attribution if we want
Marker: this holds all the popup we wanna add to a point in the map
- position: this is the place we wanna add the mark
Popup: We can add all the HTML labels or components around this, then display that in the popup.
Final Map's code
import { MapContainer, TileLayer, Marker, Popup } from 'react-leaflet';
import 'leaflet/dist/leaflet.css';
import 'leaflet-defaulticon-compatibility/dist/leaflet-defaulticon-compatibility.css';
import 'leaflet-defaulticon-compatibility';
import { chakra, Flex } from '@chakra-ui/react';
const MapFooter = () => {
const place = [8.988022628180055, -79.52932561768202];
return (
<div>
<MapContainer
center={place}
zoom={17}
scrollWheelZoom={false}
style={{ width: '100%', height: '350px' }}
>
<TileLayer
attribution='Map data © <a href="https://www.openstreetmap.org/">OpenStreetMap</a> contributors, <a href="https://creativecommons.org/licenses/by-sa/2.0/">CC-BY-SA</a>, Imagery © <a href="https://www.mapbox.com/">Mapbox</a>'
url="https://api.mapbox.com/styles/v1/**YOUR_USER_NAME**/**YOUR_STYLE_TOKEN**/tiles/256/{z}/{x}/{y}@2x?access_token=**YOUR_ACCESS_TOKEN**"
/>
<Marker position={place}>
<Popup className="mapBtn">
<Flex flexDir={'column'} alignItems="center">
<chakra.p fontWeight={'bold'} fontSize="lg">
Anubis
</chakra.p>
<chakra.a
target={'_blank'}
href="https://goo.gl/maps/3bqJp4NzEiQU86ai6"
bg={'primary.900'}
textDecor={'none'}
p="2"
rounded={'base'}
style={{ color: 'orange !important' }}
_hover={{
bg: 'primary.400',
}}
>
Google Maps
</chakra.a>
</Flex>
</Popup>
</Marker>
</MapContainer>
</div>
);
};
export default MapFooter;
Fix NextJs problem with Leaflet
The leaflet is made without thinking about SSR so it works with the windows object is not defined when the SSR start preparing our components for render the website, this will make you have an error like windows is undefined for fix this we need to use something we can find in the nextjs documentation
then in the component we wanna add our map component, we have to import it with a dynamic function is made by nextjs
is something like this
const MapLealfet = dynamic(() => import('../MapFooter/MapFooter'), {
  ssr: false,
});
with this, your map should work fine now :)
Custom Map with MapBox
How maybe you realize in the URL of our TileLayer have a direction with names like YOUR_USER_NAME, YOUR_STYLE_TOKEN and YOUR_ACCESS_TOKEN this is because you need to add this information using your MapBox's account, so go to MapBox and create your account
When you access your account you should see something like this

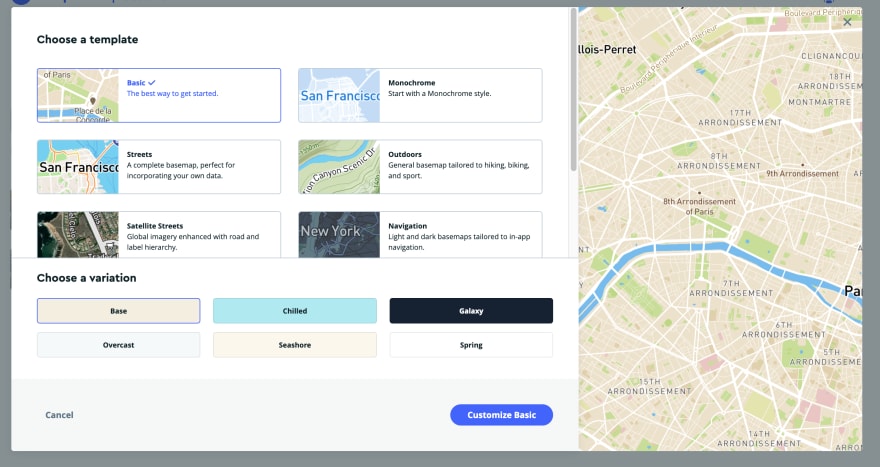
then after that let's create a new style, click that button and you should see something now like this

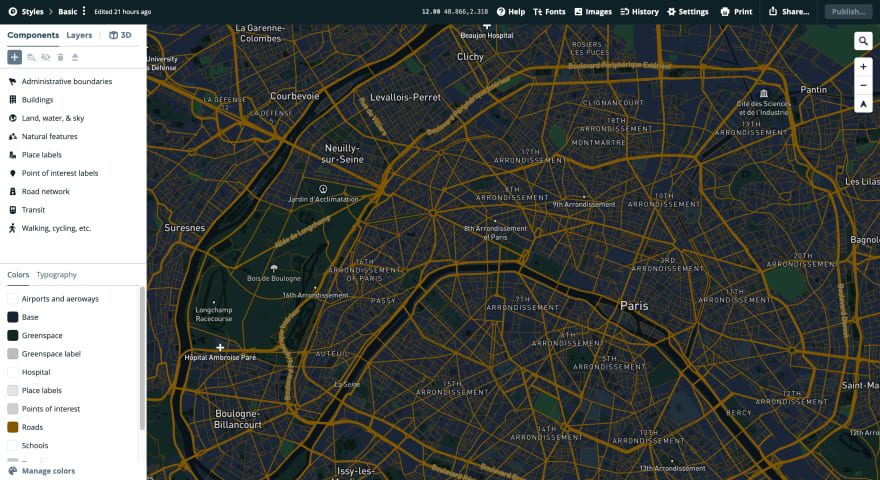
here you can choose the style you prefer and after that you can even custom more that like change the street color, bus street color etc.
now enter to your account that will show you a dashboard with tokens, I recommend you to create a Token per map you wanna use then it will work separately and can skip some future problems

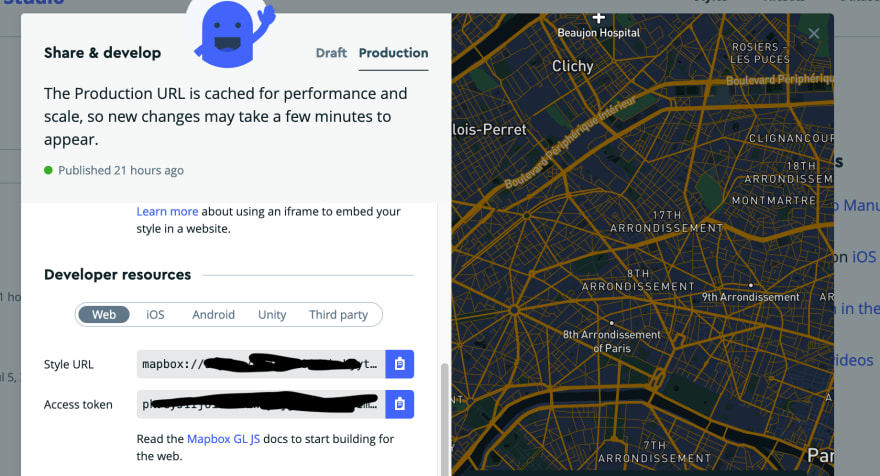
so the final part is to come to our styles section and click on the share icon of the style we wanna use, which will show this

here we have
our username, our style token and you can use the access token we create for the map in our account section.
so add that information in the TileLayer URL --> url="https://api.mapbox.com/styles/v1/**YOUR_USER_NAME**/**YOUR_STYLE_TOKEN**/tiles/256/{z}/{x}/{y}@2x?access_token=**YOUR_ACCESS_TOKEN**"
Final
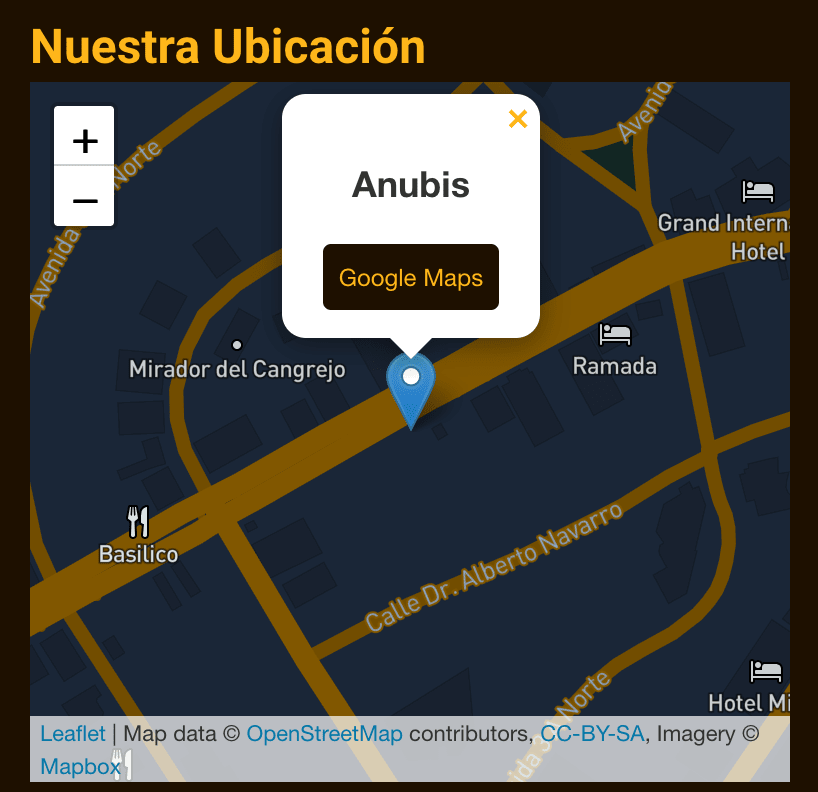
So here you should have a custom map cool can fit perfectly in your website design with the ability to add icons and the directions we need, and show different data we need, there is not limit for your creativity
Thank u for read this article and give me some of your time, feel free to visit my website if you want :)
Happy Code!
This content originally appeared on DEV Community and was authored by Elvis2280
Elvis2280 | Sciencx (2022-02-14T05:26:31+00:00) NextJs Leaflet + MapBox. Retrieved from https://www.scien.cx/2022/02/14/nextjs-leaflet-mapbox/
Please log in to upload a file.
There are no updates yet.
Click the Upload button above to add an update.


