This content originally appeared on DEV Community and was authored by DEV Community
When you first log into the Google Cloud Console it can be extremely intimidating. The number of resources at your disposal is overwhelming but if you focus on a couple specific services you can actually use Cloud Run as free (or virtually free) web host. In this tutorial we're going to spotlight Google Cloud Run and Google Container Registry, but before we jump into deploying a website, there are a couple of things that we will need to get set up first.
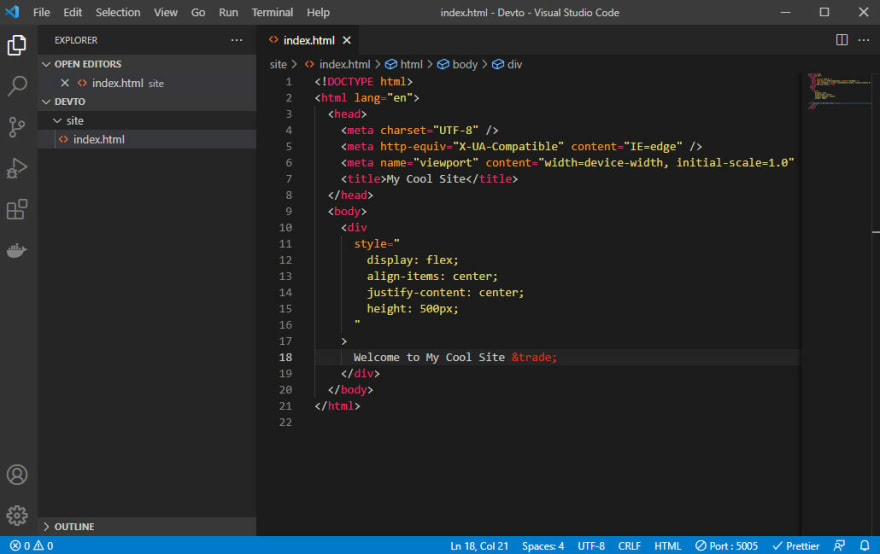
We will be hosting a simple website using an Nginx container. Instead of using a typical "Hello World" container, lets start by creating our own site. Open up your favorite code editor and create a new folder called "/site" and save this index.html file in the folder:
<!DOCTYPE html>
<html lang="en">
<head>
<meta charset="UTF-8" />
<meta http-equiv="X-UA-Compatible" content="IE=edge" />
<meta name="viewport" content="width=device-width, initial-scale=1.0" />
<title>My Cool Site</title>
</head>
<body>
<div
style="
display: flex;
align-items: center;
justify-content: center;
height: 500px;
"
>
Welcome to My Cool Site ™
</div>
</body>
</html>
Once we have that saved, let's build a new Nginx image that creates a basic HTML server. In order to build our image you will need to have Docker Desktop installed or use one of the many Docker Desktop alternative tutorials.
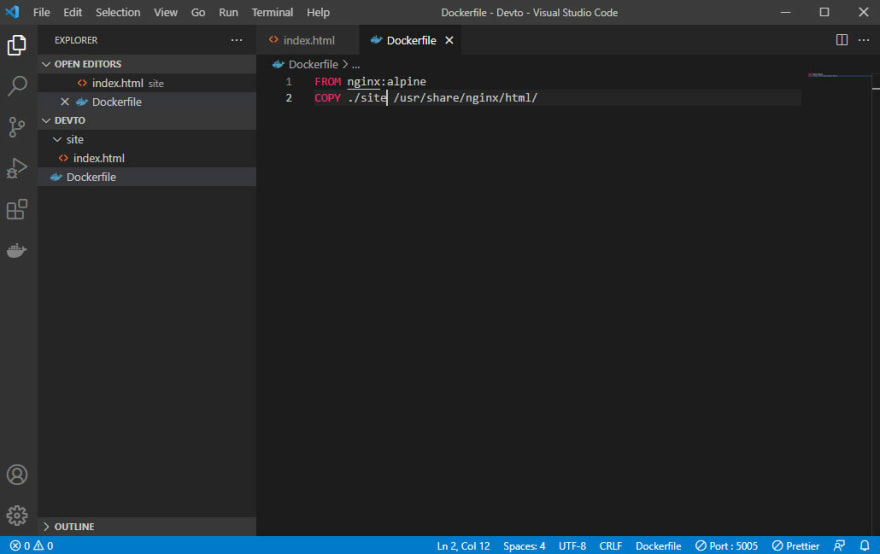
Create a new file simply called "Dockerfile" (no extension needed) with the following code:
FROM nginx:alpine
COPY ./site /usr/share/nginx/html/
Those are all the files we need to get our site up and running, so open a new terminal in our code editor and run the following command:
docker build -t my-cool-site:latest .
At this point, we have a completely contained HTML server that just needs to be deployed. This is where we actually start to dive into the Google Cloud Console. If you currently don't have a Google Cloud account, click on the "Get Started For Free" button on the homepage and complete the 3 step process to set up your account. The free account includes $300 in credits but for a personal site that gets a moderate amount of traffic, you'll most likely never need any of the free credits.
The first step is to set up the initial connection between your code editor terminal and Google Cloud by installing the gcloud CLI application. The installation process is very different depending on your operating system, but there's pretty straight forward installation documentation on the Google Cloud site here. Once the CLI application is installed we will go back to the dashboard.
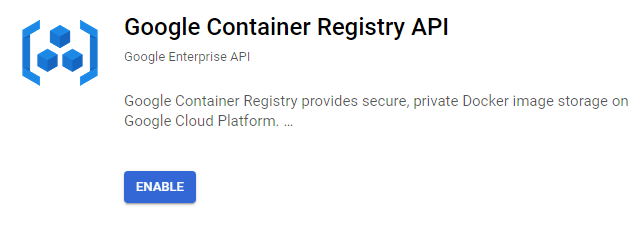
The next step to deploy our site is to enable the Google Container Registry API. That can be found by searching for "Container Registry" in the search bar. This is Google Cloud's version of Docker Hub and it will be where we will push our images for hosting on Cloud Run. Click on the "Enable" button to start using the API.
Once Container Registry is enabled on your account, it's time to push our image to our private repo. Go back to your gcloud terminal and type the command:
gcloud auth login
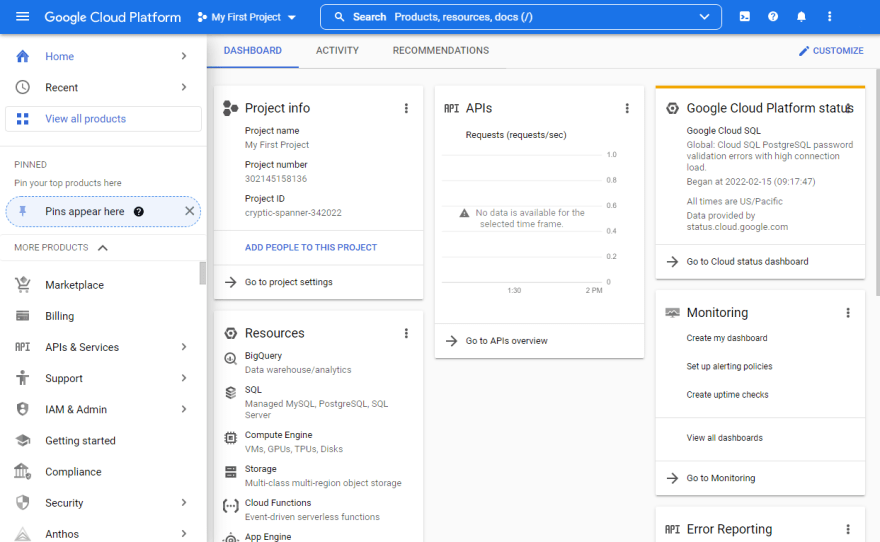
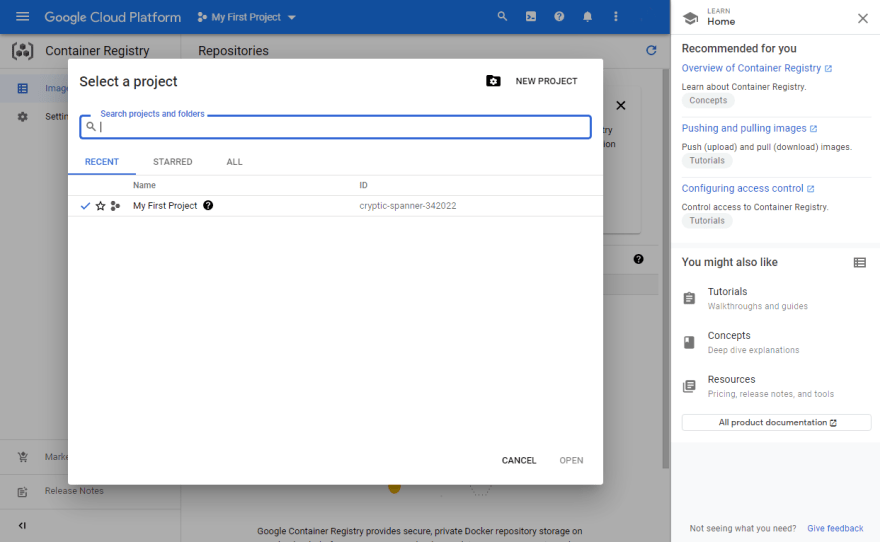
This will create the access credentials for your Google Cloud account in the terminal. We're now finally ready to push our Nginx image up to Container Registry. The first step is to tag the image with the correct registry name. If you go back to the Dashboard, you will see the dropdown at the top of the screen that says "My First Project". If you click that, it will present you with your own project ID (if you prefer, you can also create a New Project at this point).
In my case, Google Cloud has created a unique ID for my project called "cryptic-spanner-342022". We will now tag our local Nginx image with the one that is required for use with Google Container Registry. Go back to your terminal and type in the following but using your own project ID (replace out "cryptic-spanner-342022" with your own project ID):
docker tag my-cool-site:latest gcr.io/cryptic-spanner-342022/my-cool-site:1.00
As you can see, the basic flow for tagging is to have the name of your local image, the location of your GCR container registry and then some kind of registry name (in this case, I called it 'my-cool-site' again, but it can be anything you like). I also elected to add my own version number versus 'latest' at the end (1.00) which I like to do to keep track of versions. GCR will also keep track of versions, but I generally like to do it manually as well. Now we're finally ready to push the container up to our registry. Run the following command but using your own project ID:
docker push gcr.io/cryptic-spanner-342022/my-cool-site:1.00
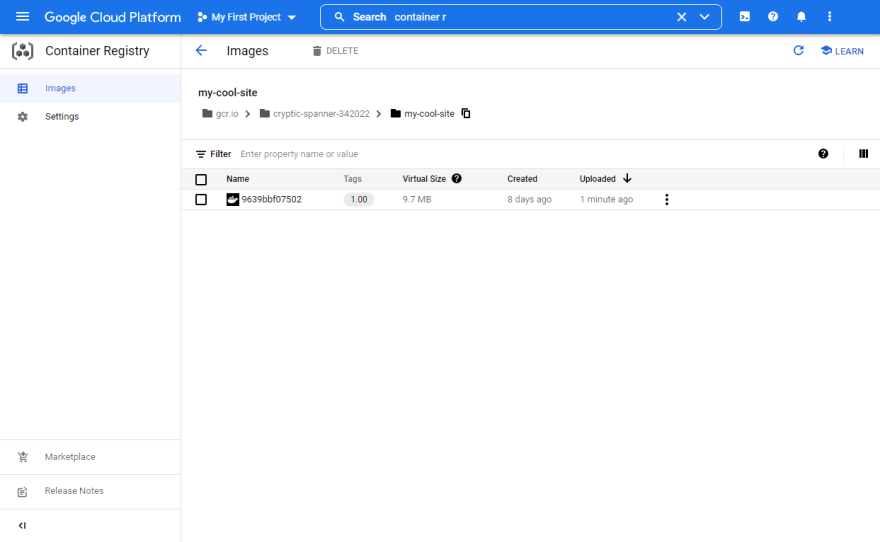
If everything was successful we can now go back to Google Container Registry on the Dashboard and click on "Images" and you will now see your custom 'my-cool-site' repository. If you click on the name, you'll see all the info about your new container including the version, size, when it was created and when it was uploaded.
We now have access to our container in the Google Cloud ecosystem so it's now time to deploy the container with Cloud Run. Once again, we need search for Cloud Run in the search bar and enable the Cloud Run service in the Console. On the Cloud Run page, click on the 'Create Service' button and wait for the service to start.
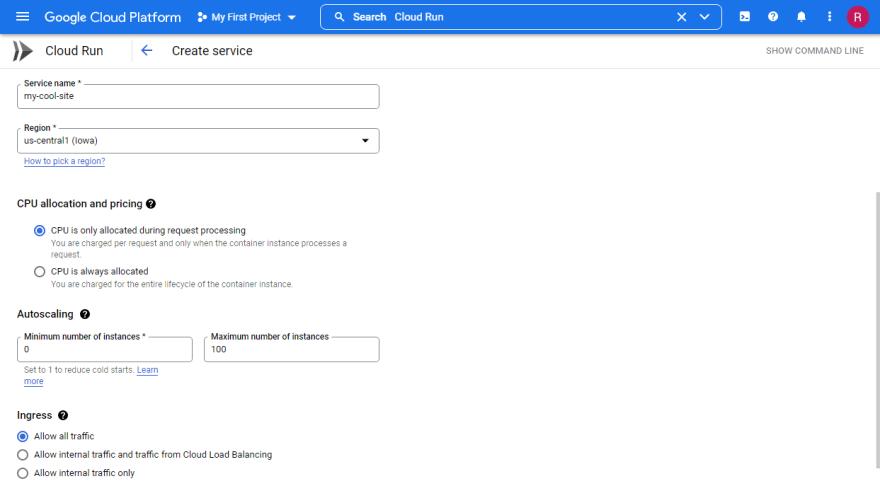
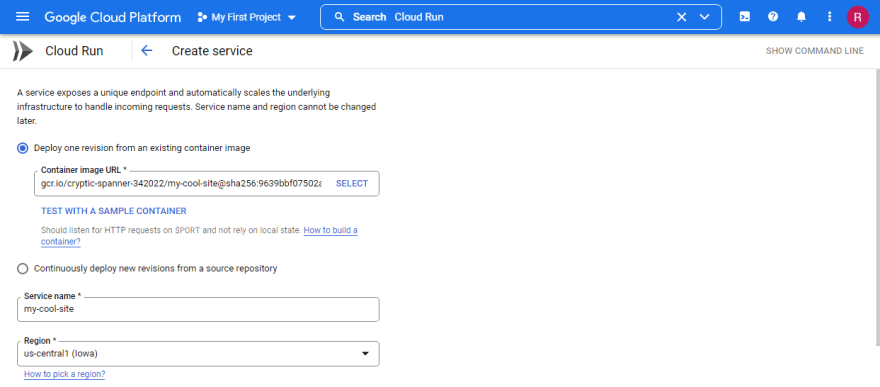
Once Cloud Run has been enabled, we are ready to create our first service (aka our website). This is a surprisingly simple process. The "Deploy one revision from an existing container image" should already be highlighted, so if you click on "Select", we will see our own image that we just pushed to Container Registry. If you click on the name of our Registry, we can select the image that we just pushed.
We can now select a custom Service Name. Pick something that describes your project so if you deploy multiple projects in the future, it will be easy to recognize. In this case, I'll just use the same name as my container registry to make things easier.
We will leave the number of minimum instances at 0 and max it out at 3. This should be sufficient for a small personal site and will also keep resources in the monthly "free" zone.
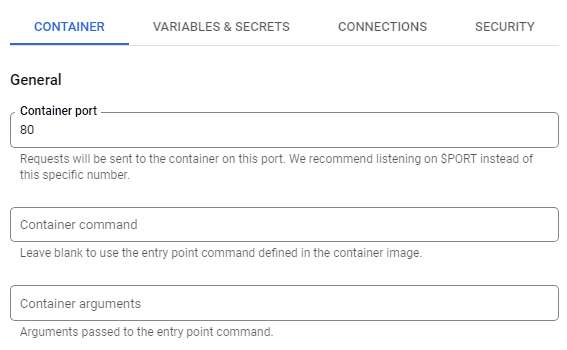
Ingress should be set to "Allow all traffic" and Authentication should be set to "Allow unauthenticated invocations" already, so we can leave them as is. We do need to do a bit of setup to direct traffic to the internal port of our Nginx container so it's accessible by the general public. If you click "Container, Variables & Secrets, Connections, Security" it will bring up all of our options that will need to be set. Nginx requires a default container port of 80, so that will need to be set.
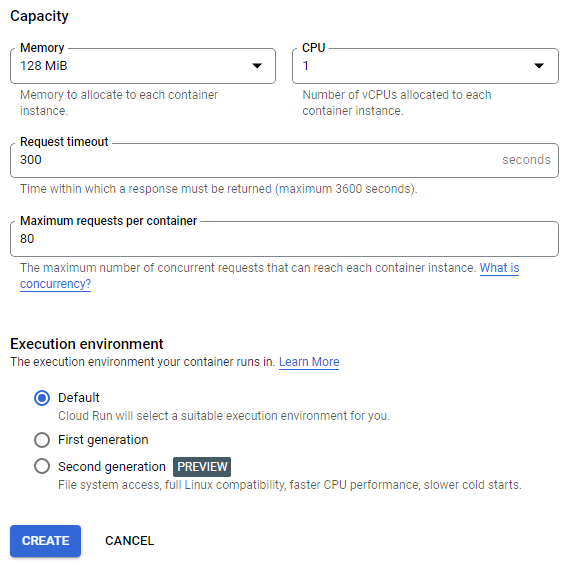
Once again, under "Capacity" we will drop the Memory down to 128MB to keep it in the "free" service tier. Lastly, we will leave the "Execution environment" as Default. With all of those settings selected, we're ready to press the "Create" button.
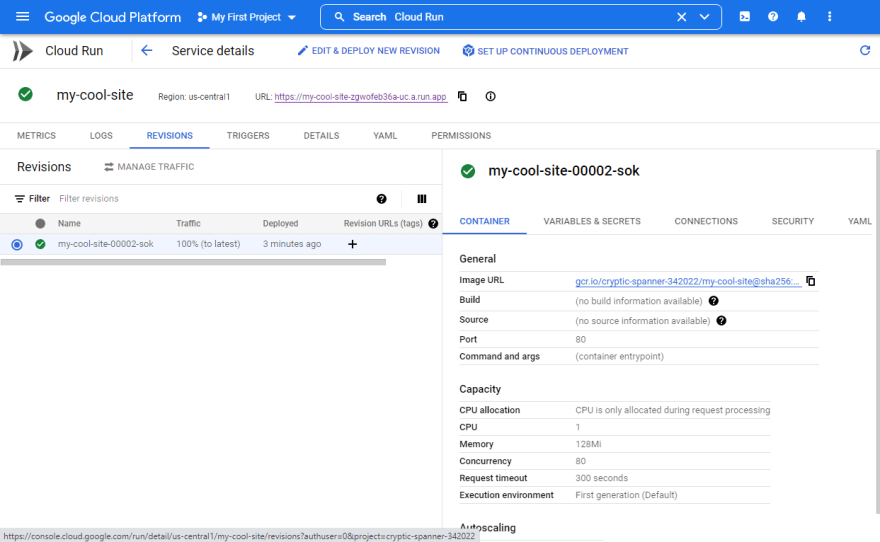
The initial creation of resources will take a few minutes so be patient. Eventually "Setting IAM Policy", "Creating revision" and "Routing traffic" will show "Completed" and you will be brought to the Service page:
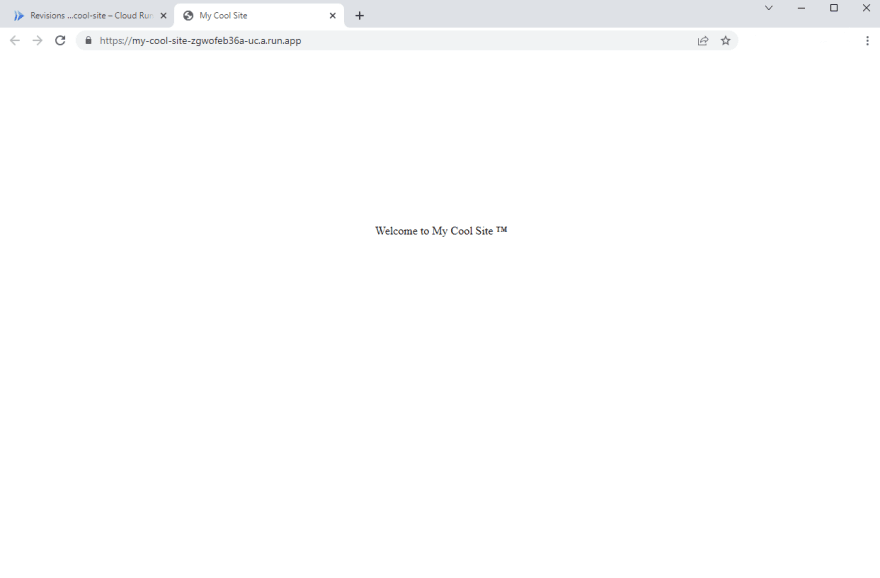
If you now click on the URL in the header, you'll be brought to our brand new site we just deployed at the specified URL:
And there it is! Our site is now live for the world to see. You have successfully went through the entire creation, build and deployment of a website on Cloud Run. Congrats!
This was an simple example but it gives you an easy project to get started using both the Google Cloud Dashboard and CLI. There are a bunch of things we could do take this project a step further. Google Cloud is migrating from "Container Registry" to the more robust "Artifact Registry" so another thing to try would be to deploy your site from there instead. You could also figure out how to map your custom domain name to your Cloud Run service. Or you could have a couple containers running on Cloud Run and connect a database container to your front end container (Drupal? Wordpress?, etc.). The possibilities are pretty endless. If you found this helpful and use it to build something cool, definitely let me know in the comments.
*About that 'free' claim...there are limits of 2 million requests, 360GB of memory/180k CPU-seconds of compute time and 1GB network egress. For most sites, you'll never come near those numbers, but even if you start to use more compute resources, it will still most likely be pennies a month. Long story short, don't run reddit on Cloud Run and you should be fine.
This content originally appeared on DEV Community and was authored by DEV Community
DEV Community | Sciencx (2022-02-23T17:57:39+00:00) How to Host Your Site for Free* on Google Cloud Run. Retrieved from https://www.scien.cx/2022/02/23/how-to-host-your-site-for-free-on-google-cloud-run/
Please log in to upload a file.
There are no updates yet.
Click the Upload button above to add an update.

