This content originally appeared on DEV Community and was authored by DEV Community
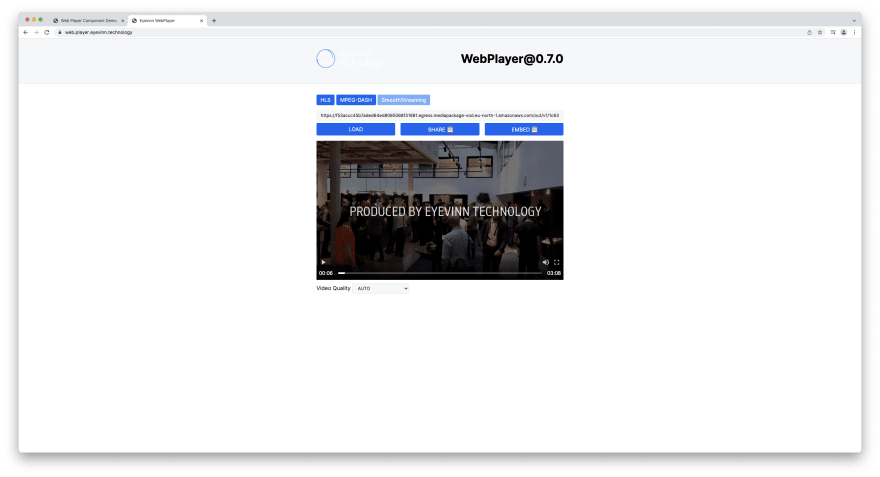
Eyevinn has an open-source web player that can play both HLS and MPEG-DASH streams, automatically selecting the appropriate library for either format.

You can check it out here! It's simple to use: Just enter a manifest URI and press "LOAD" (or use one of the preset buttons).
Voilà! If we want to share a link to the page with our manifest URI of choice, we can use the "SHARE" button.
But what if we want to embed the player on our own web page? Then we can click the "EMBED" button to display a code snippet. We copy this snippet, paste it into our HTML file, and we should see an eyevinn-video element on our webpage.
How does this work? It's thanks to the use of web components.
<script type="text/javascript" src="https://unpkg.com/@eyevinn/web-player-component@0.1.1/dist/web-player.component.js"></script>
<eyevinn-video source="https://f53accc45b7aded64ed8085068f31881.egress.mediapackage-vod.eu-north-1.amazonaws.com/out/v1/1c63bf88e2664639a6c293b4d055e6bb/ade303f83e8444d69b7658f988abb054/2a647c0cf9b7409598770b9f11799178/manifest.m3u8" muted autoplay ></eyevinn-video>
The snippet consists of two parts:
A script tag containing the web component code
An
eyevinn-videocustom element
Let's have a look at the code:
import WebPlayer from '@eyevinn/web-player-core';
import { renderEyevinnSkin } from '@eyevinn/web-player-eyevinn-skin';
import style from '@eyevinn/web-player-eyevinn-skin/dist/index.css';

export default class PlayerComponent extends HTMLElement {
  static get observedAttributes() {
    return ['source', 'starttime', 'muted', 'autoplay'];
  };
  constructor() {
    //Call constructor of HTMLElement
    super();
    //Attach shadow DOM
    this.attachShadow({ mode: 'open' });
    const { shadowRoot } = this;
    //Create style and attach to shadow DOM
    let styleTag = document.createElement('style');
    styleTag.innerHTML = style;
    shadowRoot.appendChild(styleTag);
    //Create wrapper and attach to shadow DOM
    const wrapper = document.createElement('div');
    shadowRoot.appendChild(wrapper);
    //Create video element and attach to shadow DOM
    this.video = document.createElement('video');
    wrapper.appendChild(this.video);
    //Init player and skin
    this.player = new WebPlayer({ video: this.video });
    renderEyevinnSkin({
      root: wrapper,
      player: this.player,
      castAppId: {}
    });
  }

  attributeChangedCallback(name) {
    if (name === 'source') {
      if (this.hasAttribute('source')) {
        this.player.load(this.getAttribute('source')).then(() => {
          if (this.hasAttribute('starttime')) {
            this.video.currentTime = this.getAttribute('starttime');
          }
          if (this.hasAttribute('autoplay')) {
            this.player.play();
          }
        });
      }
      else {
        console.error("Invalid source was provided to <eyevinn-video> element");
      }
    }
    if (name === 'muted') {
      if (this.hasAttribute("muted")) {
        this.video.muted = true;
      }
      else {
        this.video.muted = false;
      }
    }
  }

  connectedCallback() {
    this.setupEventProxy();
  }

  disconnectedCallback() {
    this.player.reset();
  }

  setupEventProxy() {
    if (!this.player) return;
    this.player.on('*', (event, data) => {
      this.dispatchEvent(new CustomEvent(event, { detail: data }));
    });
  }
}
//Register custom element
customElements.define('eyevinn-video', PlayerComponent);
First off, we need to import the necessary libraries. We then create a custom class for our web component, PlayerComponent, which extends the basic HTMLElement class. The class contains several observedAttributes; as the name implies, these are the attributes of the custom element that we want to observe.
When an observedAttribute is changed, the attributeChangedCallback function is triggered. The function has the properties name, oldValue and newValue, and we use the the name property to determine which code to run. For example, when name === 'source', this means that the source attribute of the element has been changed. In that case we want to load the new manifest URI, and apply other attributes if present, such as starttime.
As for the constructor, it's important to first call the constructor of the super class HTMLElement, to give our custom element its basic functionality. And rather than appending the elements inside our class to the DOM directly, we're using a shadow DOM: This encapsulates code inside our web component, ensuring that it doesn't affect anything outside it.
Besides attributeChangedCallback, we also have access to other callback functions, including connectedCallback and disconnectedCallback, which are run when the component is added to or removed from the DOM. In our case, we want to initiate an event proxy with our setupEventProxy function when the component is added, and reset the player when the component is removed.
Finally, in order for our custom element to be used in the regular DOM, we need to register it with customElements.define. This will allow us to add our PlayerComponent in our HTML under the name eyevinn-video.
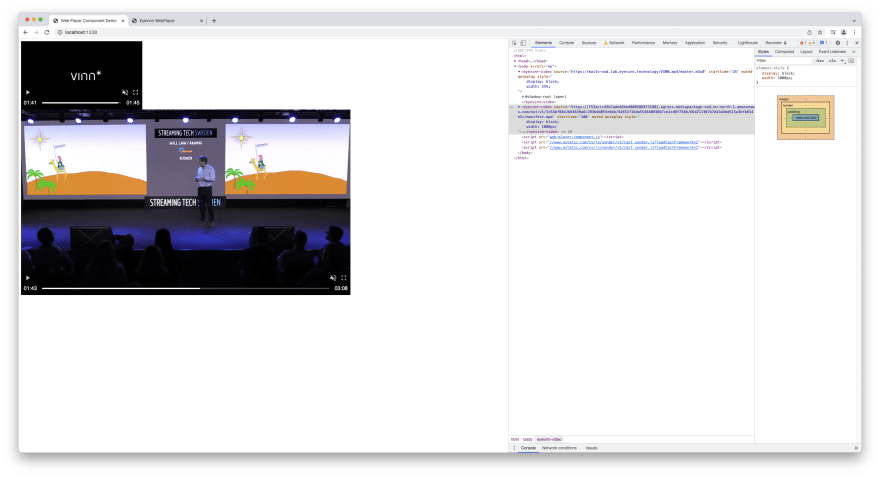
That's it! We can now include as many eyevinn-video elements as we want on our webpage. We can also add our own style to the element with CSS. Keep in mind that for the super class HTMLElement, the default value of the display property is inline. In the example below, an HLS stream and an MPEG-DASH stream are playing on the same webpage, both using our web player component. The attributes starttime, muted and autoplay were set for both videos, resulting in automatic, muted (required by browsers for autoplay) playback starting at the specified times.
You might be wondering why we should go through the effort of making our own web components, instead of using iFrame: iFrames have been around forever, and are still the most common way of embedding external HTML on webpages. They are also supported by older browsers.
Web components, however, give greater control over what parts to include, and may offer both search engine optimization and performance benefits.
This content originally appeared on DEV Community and was authored by DEV Community
DEV Community | Sciencx (2022-02-24T14:35:33+00:00) Creating a video player web component. Retrieved from https://www.scien.cx/2022/02/24/creating-a-video-player-web-component/
Please log in to upload a file.
There are no updates yet.
Click the Upload button above to add an update.


