This content originally appeared on DEV Community and was authored by DEV Community
## Introduction
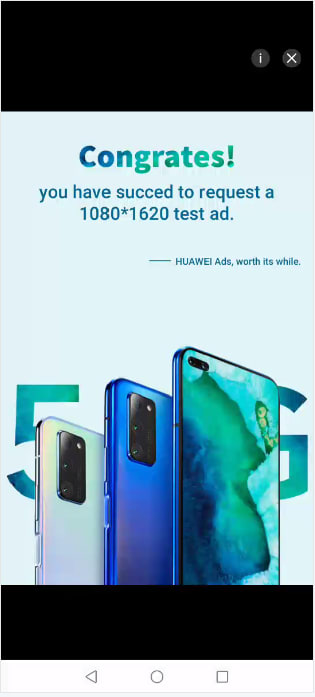
In this article, we can learn how to integrate Huawei Ads Kit in an Application. I will be using Interstitial Ads. Interstitial ads are full-screen ads that cover the interface of an app. Such an ad is displayed when a user starts, pauses or exits an app, without disrupting the user's experience.
## Ads Kit
Huawei Ads Kit leverages the vast user base of Huawei devices and Huawei's extensive data capabilities to provide you with the Publisher Service, helping you to monetize traffic.
HMS Ads Kit has 7 types of Ads kits. Now we can implement Interstitial Ads in this application.
## Requirements
- Any operating system (MacOS, Linux and Windows).
- Must have a Huawei phone with HMS 4.0.2.300 or later.
- Must have a laptop or desktop with Android Studio, Jdk 1.8, SDK platform 26 and Gradle 4.6 installed.
- Minimum API Level 21 is required.
- Required EMUI 9.0.0 and later version devices.
## Integrate HMS Dependencies
- First register as Huawei developer and complete identity verification in Huawei developers website, refer to register a Huawei ID.
- Create a project in android studio, refer Creating an Android Studio Project.
- Generate a SHA-256 certificate fingerprint.
- To generate SHA-256 certificate fingerprint. Choose View > Tool Windows > Gradle > Signingreport > SHA256 code. Or use cmd as explained in SHA256 CODE
- Create an App in AppGallery Connect.
- Download the agconnect-services.json file from App information, copy and paste in android Project under app directory.
- Enter SHA-256 certificate fingerprint and click Save.
Add the below maven URL in build.gradle(Project) file under the repositories of buildscript, dependencies and allprojects, refer Add Configuration.
maven { url 'http://developer.huawei.com/repo/' }

classpath 'com.huawei.agconnect:agcp:1.6.0.300'
Add the below plugin and dependencies in build.gradle(Module) file.
apply plugin: 'com.huawei.agconnect'
// Huawei AGC
implementation 'com.huawei.agconnect:agconnect-core:1.6.0.300'
// Ads Kit
Implementation 'com.huawei.hms:ads-lite:13.4.40.301'Now Sync the gradle.
Add the required permission to the Manifestfile.xml file.
<uses-permission android:name="android.permission.ACCESS_NETWORK_STATE" />
<!--check wifi state-->
<uses-permission android:name="android.permission.ACCESS_WIFI_STATE" />
- If the project is using progaurd, copy and paste the below code in the progaurd-rules.pro file.
-keep class com.huawei.openalliance.ad.** { *; }
-keep class com.huawei.hms.ads.** { *; }
Development
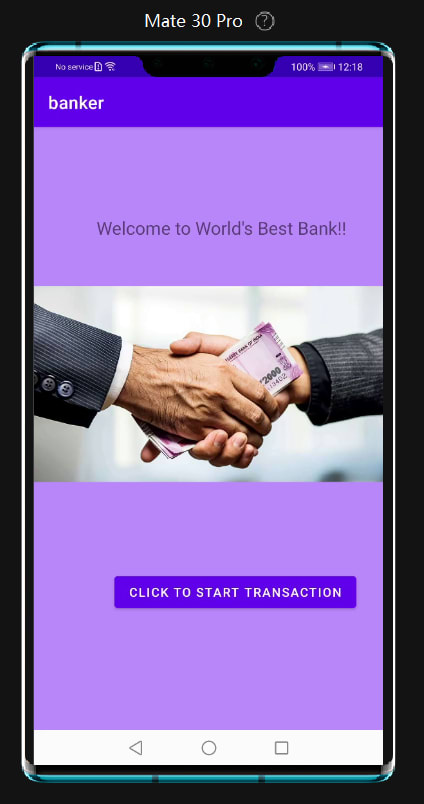
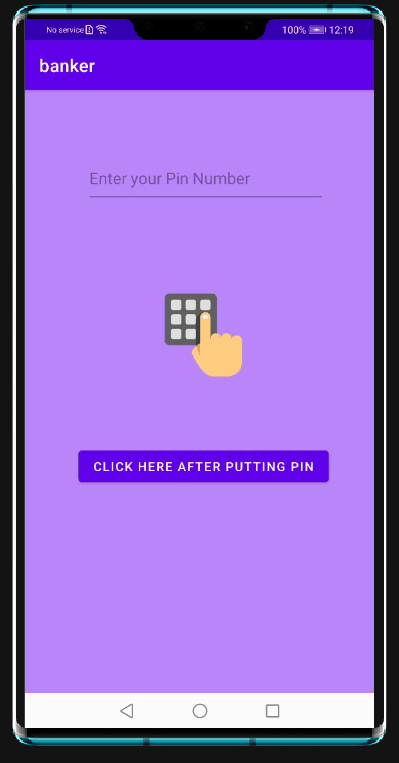
In this example, we will place the interstitial ad between two activities. When the “CLICK TO START TRANSACTION” button is clicked on while in the MainActivity (the first activity in this example), an interstitial ad will be shown first, then the pin (the second activity in this example) will come to the place.
- Create an interstitial ad object.
Create an InterstitialAd object and use the setAdId() method of the InterstitialAd class to set a test ad unit ID

private var interstitialAd: InterstitialAd? = null
var nextPageBtn: Button? = null
override fun onCreate(savedInstanceState: Bundle?) {
    super.onCreate(savedInstanceState)
    setContentView(R.layout.activity_main)
nextPageBtn = findViewById(R.id.btTrans)
  interstitialAd = InterstitialAd(this)
        interstitialAd.setAdId(adId)
        interstitialAd.setAdListener(adListener)
}
- Load an ad.
Call the loadAd() method of the InterstitialAd object to load an ad.
private fun loadInterstitialAd() {
    ...
    // Load an interstitial ad.
    val adParam = AdParam.Builder().build()
    interstitialAd!!.loadAd(adParam)
    ...
}
- Display an ad.
Call the isLoaded() method to check whether an ad has been loaded. If the ad has been loaded, call the show(Activity activity) method of the InterstitialAd object to display the ad.
private fun showInterstitial() {
        // Display an interstitial ad.
        if (interstitialAd != null && interstitialAd.isLoaded()) {
            interstitialAd.show()
        } else {
            startActivity(Intent(this@MainActivity, pin::class.java))
        }
    }
- Listen for ad events.
Call the setAdListener(AdListener adListener) method of the InterstitialAd class to add the ad event listener AdListener for the InterstitialAd object, and implement the methods in AdListener to listen to ad events.
fun adEvent() {
    adListener = object : AdListener() {
        fun onAdLoaded() {
            // Called when an ad is loaded successfully.
            super.onAdLoaded()
            Toast.makeText(this@MainActivity, "Ad loaded", Toast.LENGTH_SHORT).show()
            // Display an interstitial ad.
            showInterstitial()
        }

        fun onAdFailed(errorCode: Int) {
            // Called when an ad fails to be loaded.
            Toast.makeText(
                this@MainActivity, "Ad load failed with error code: $errorCode",
                Toast.LENGTH_SHORT
            ).show()
            Log.d(
                TAG,
                "Ad load failed with error code: $errorCode"
            )
            startActivity(Intent(this@MainActivity, pin::class.java))
        }

        fun onAdClosed() {
            // Called when an ad is closed
            super.onAdClosed()
            Log.d(TAG, "onAdClosed")
            startActivity(Intent(this@MainActivity, pin::class.java))
        }

        fun onAdClicked() {
            // Called when an ad is clicked.
            Log.d(TAG, "onAdClicked")
            super.onAdClicked()
            adListener.onAdClosed()
        }

        fun onAdOpened() {
// Called when an ad is opened.
            Log.d(TAG, "onAdOpened")
            super.onAdOpened()
        }

        fun onAdLeave() {
            // Called when an ad leaves an app.
            ...
        }
        fun onAdLeave() {
            // Called when an ad leaves an app.
            ...
        }
    }
}
Activity_mail.xml
<?xml version="1.0" encoding="utf-8"?>
<RelativeLayout
xmlns:android="http://schemas.android.com/apk/res/android"
    xmlns:app="http://schemas.android.com/apk/res-auto"
    xmlns:tools="http://schemas.android.com/tools"
    android:layout_width="wrap_content"
    android:layout_height="wrap_content"
    tools:context=".MainActivity"
    android:id="@+id/activity_main"
    android:background="@color/purple_200">

    <Button
        android:id="@+id/btTrans"
        android:layout_width="wrap_content"
        android:layout_height="wrap_content"
        android:text="@string/click_to_start_transaction"
        app:layout_constraintEnd_toEndOf="parent"
        app:layout_constraintStart_toStartOf="parent"
        tools:layout_editor_absoluteY="327dp" />

    <TextView
        android:id="@+id/textView"
        android:layout_width="wrap_content"
        android:layout_height="wrap_content"
        android:text="@string/welcome_to_world_s_best_bank"
        android:textSize="20dp" />

    <ImageView
        android:id="@+id/imageView"
        android:layout_width="match_parent"
        android:layout_height="match_parent"
        app:srcCompat="@drawable/hello" />
</RelativeLayout>
Adjust UI according to your application.
Result
Tips and Tricks
- Set minSDK version to 24 or later, otherwise you will get AndriodManifest merge issue.
- Make sure you have added the agconnect-services.json file to app folder.
- Make sure you have added SHA-256 fingerprint without fail.
- Make sure all the dependencies are added properly.
Conclusion
In this article, we have learnt integration of Ads Kit in application. It provides developers different capabilities to deliver good quality ads content to users.
Reference
Ads Kit: Documentation
This content originally appeared on DEV Community and was authored by DEV Community
DEV Community | Sciencx (2022-02-25T09:00:24+00:00) Kickstarting Ads Kit by integrating Interstitial Ads in Application (Kotlin). Retrieved from https://www.scien.cx/2022/02/25/kickstarting-ads-kit-by-integrating-interstitial-ads-in-application-kotlin/
Please log in to upload a file.
There are no updates yet.
Click the Upload button above to add an update.


