
This content originally appeared on Level Up Coding - Medium and was authored by Siddharth Kshirsagar
In this small article, I will illustrate how to write SQL queries in jupyter lab, perform data manipulations as well as visualizations.

Recently most of my work is focused on writing MySQL analytics queries in MySQL work bench so when I finish my queries, If I want to perform some visualization I used to download the result of queries in a csv file, load it into pandas and perform visualizations. So I thought is there a better way to do this. And yes there is. Enter ipython-sql.
In this case I will be demonstrating connecting MySQL but connecting other SQL engines is fairly similar
Find the jupyter notebook at this link, and moreover this article is best understood with the notebook.
Link For: Jupyter Notebook For This Article
- Step One: Installation
To install ipython-sql just open your command line and type
pip install ipython-sql
pip install mysqlclient
2. Define the connection string: In order to connect to a database make sure your database server is running, if you are localhost start your sql server form the command line. Below if the example connection string to make the connection.
<engine>://username:passsword@hostname/dbname
In our case we are connecting to MySQL so our connection string will be like
mysql://username:passsword@hostname/dbname
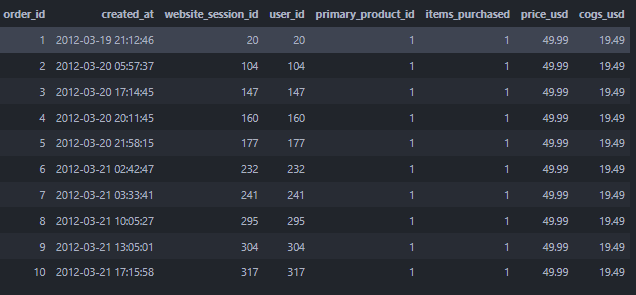
Perform simple select query multi line
%%sql
select * from orders
limit 10;
* mysql://root:***@localhost/mavenfuzzyfactory
10 rows affected.
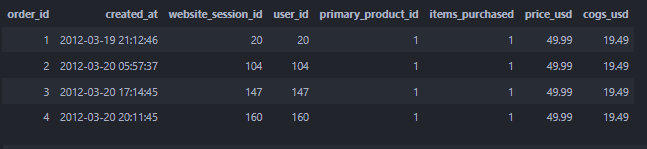
Storing the results in a variable
results = %sql select * from orders limit 4;
results
* mysql://root:***@localhost/mavenfuzzyfactory
4 rows affected.
converting to a DataFrame
results_df = results.DataFrame()
results_df.head()

Converting to a python Dictonary
# Returns a single dict built from the result set
results.dict()
{'order_id': (1, 2, 3, 4),
 'created_at': (datetime.datetime(2012, 3, 19, 21, 12, 46),
  datetime.datetime(2012, 3, 20, 5, 57, 37),
  datetime.datetime(2012, 3, 20, 17, 14, 45),
  datetime.datetime(2012, 3, 20, 20, 11, 45)),
 'website_session_id': (20, 104, 147, 160),
 'user_id': (20, 104, 147, 160),
 'primary_product_id': (1, 1, 1, 1),
 'items_purchased': (1, 1, 1, 1),
 'price_usd': (Decimal('49.99'),
  Decimal('49.99'),
  Decimal('49.99'),
  Decimal('49.99')),
 'cogs_usd': (Decimal('19.49'),
  Decimal('19.49'),
  Decimal('19.49'),
  Decimal('19.49'))}
# Iterator yielding a dict for each row
for elem in results.dicts():
print(elem)
{'order_id': 1, 'created_at': datetime.datetime(2012, 3, 19, 21, 12, 46), 'website_session_id': 20, 'user_id': 20, 'primary_product_id': 1, 'items_purchased': 1, 'price_usd': Decimal('49.99'), 'cogs_usd': Decimal('19.49')}
{'order_id': 2, 'created_at': datetime.datetime(2012, 3, 20, 5, 57, 37), 'website_session_id': 104, 'user_id': 104, 'primary_product_id': 1, 'items_purchased': 1, 'price_usd': Decimal('49.99'), 'cogs_usd': Decimal('19.49')}
{'order_id': 3, 'created_at': datetime.datetime(2012, 3, 20, 17, 14, 45), 'website_session_id': 147, 'user_id': 147, 'primary_product_id': 1, 'items_purchased': 1, 'price_usd': Decimal('49.99'), 'cogs_usd': Decimal('19.49')}
{'order_id': 4, 'created_at': datetime.datetime(2012, 3, 20, 20, 11, 45), 'website_session_id': 160, 'user_id': 160, 'primary_product_id': 1, 'items_purchased': 1, 'price_usd': Decimal('49.99'), 'cogs_usd': Decimal('19.49')}
Get Column Names
results.field_names
['order_id',
 'created_at',
 'website_session_id',
 'user_id',
 'primary_product_id',
 'items_purchased',
 'price_usd',
 'cogs_usd']
Get index of results
results.index
<function ResultSet.index(value, start=0, stop=9223372036854775807, /)>
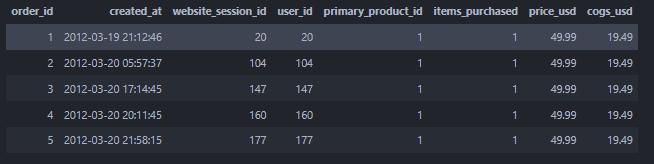
Store results of multi line queries in a variable using `<<`
%%sql
result <<
SELECT
    *
FROM orders
limit 5
* mysql://root:***@localhost/mavenfuzzyfactory
5 rows affected.
#Returning data to local variable result
result
Variable Substitution (using variables in where clause)
item_value = 2
%%sql
result <<
SELECT user_id
FROM orders
WHERE items_purchased = :item_value
LIMIT 4
* mysql://root:***@localhost/mavenfuzzyfactory
4 rows affected.
Returning data to local variable result
result
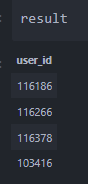
user_id 116186 116266 116378 103416
Visualization
1. find the price paid for 1 item vs 2 items in the dataset
%%sql
result <<
SELECT items_purchased,
       AVG(price_usd) as price
FROM orders
GROUP BY items_purchased;
result.DataFrame().style.background_gradient()

2. find the distribution of website sessions in morning, afternoon, evening and night
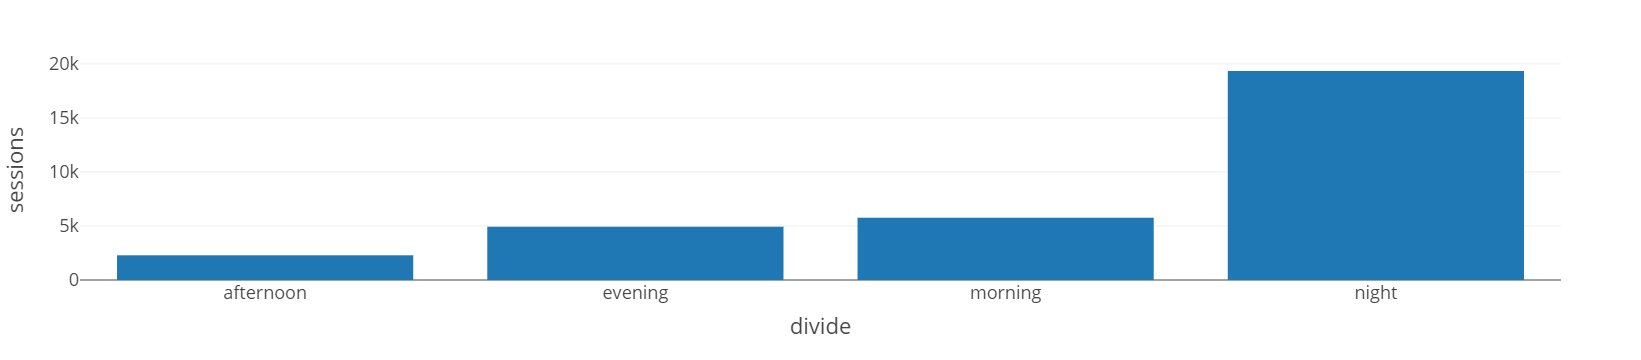
result

Notebook That goes with this.
How to Run SQL queries in Jupyter Lab was originally published in Level Up Coding on Medium, where people are continuing the conversation by highlighting and responding to this story.
This content originally appeared on Level Up Coding - Medium and was authored by Siddharth Kshirsagar
Siddharth Kshirsagar | Sciencx (2022-03-15T12:31:40+00:00) How to Run SQL queries in Jupyter Lab. Retrieved from https://www.scien.cx/2022/03/15/how-to-run-sql-queries-in-jupyter-lab/
Please log in to upload a file.
There are no updates yet.
Click the Upload button above to add an update.