This content originally appeared on DEV Community and was authored by Yash Indane
Alexa is Amazon’s cloud-based voice service available on more than 100 million devices from Amazon and third-party device manufacturers. With Alexa, you can build natural voice experiences that offer customers a more intuitive way to interact with the technology they use every day.
In this post I will guide you how to do it on a Raspberry Pi.
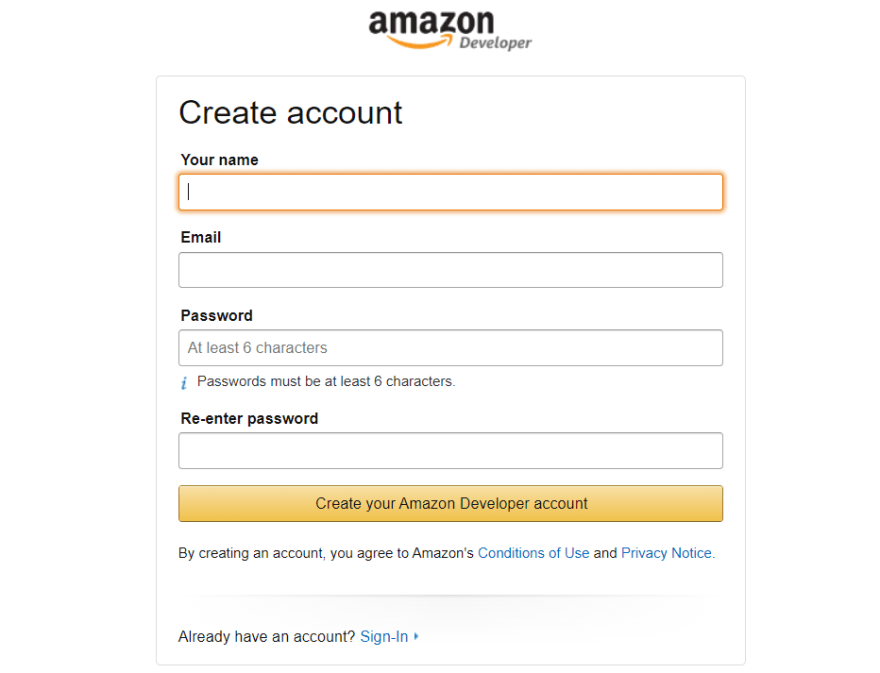
Step 1> Creating Amazon Developer Account
Open up a browser and go to https://developer.amazon.com/.
Just enter a username and password and create your account.
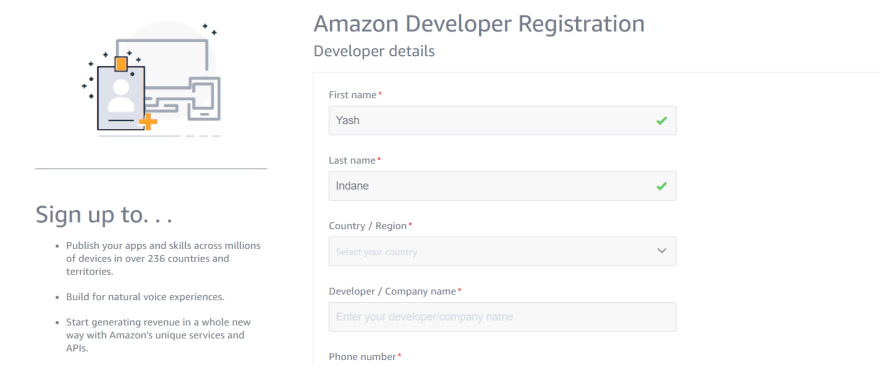
Step 2> Register Amazon Developer
Just enter all the relevant details
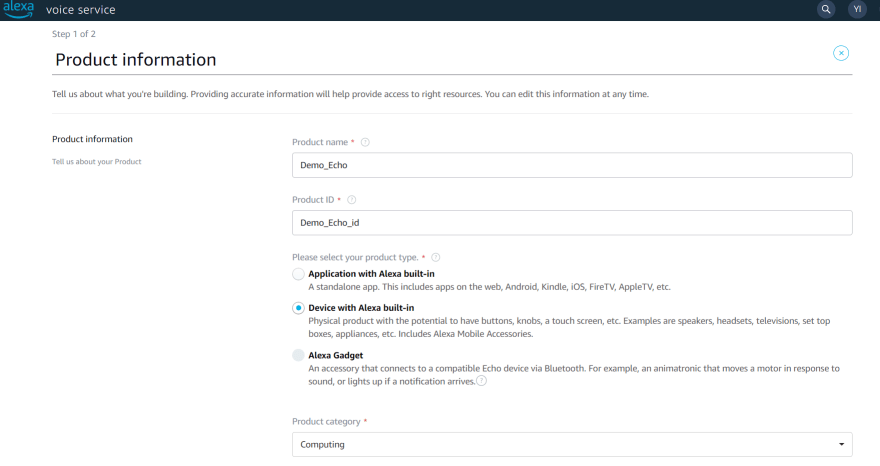
Step 3> Creating the Product
Go to https://developer.amazon.com/alexa/console/avs/products
Click on Add new product
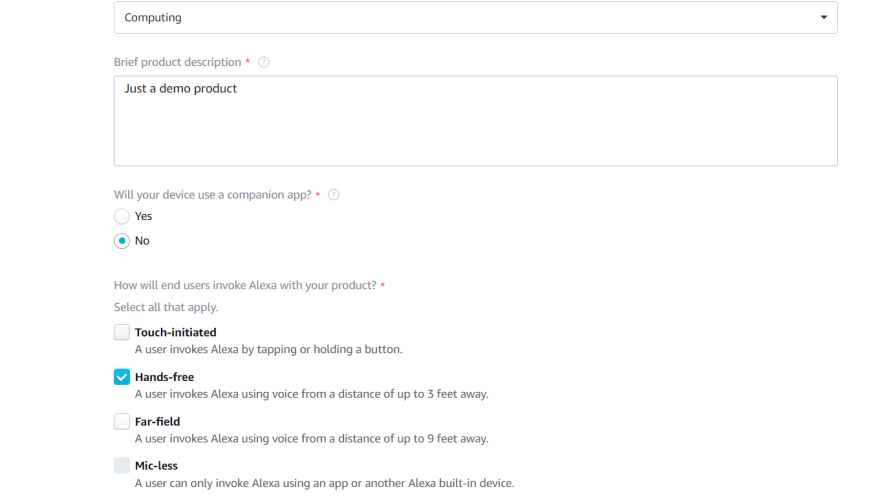
Now fill the required details
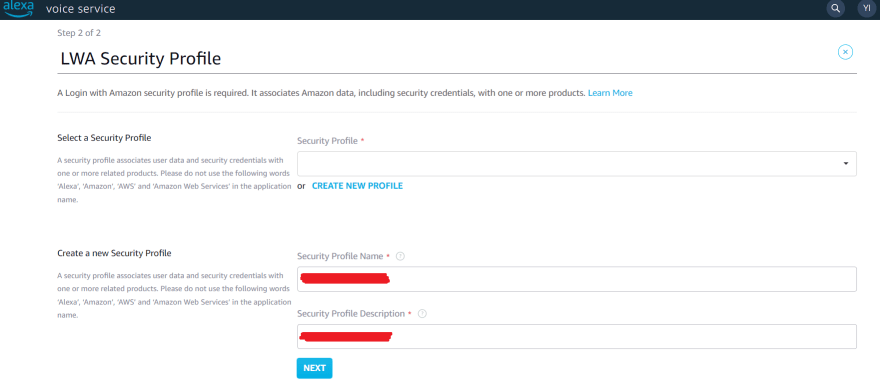
Step 4> Creating LWA Security Profile
Click on create new profile and fill the details
Note: You can put anything in security profile description
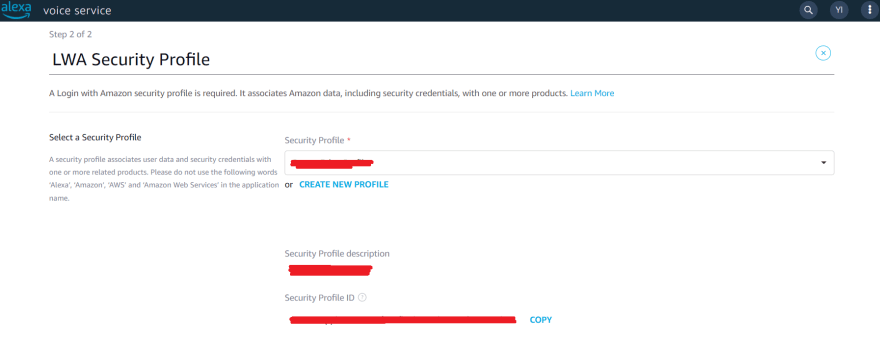
After filling details click on next.
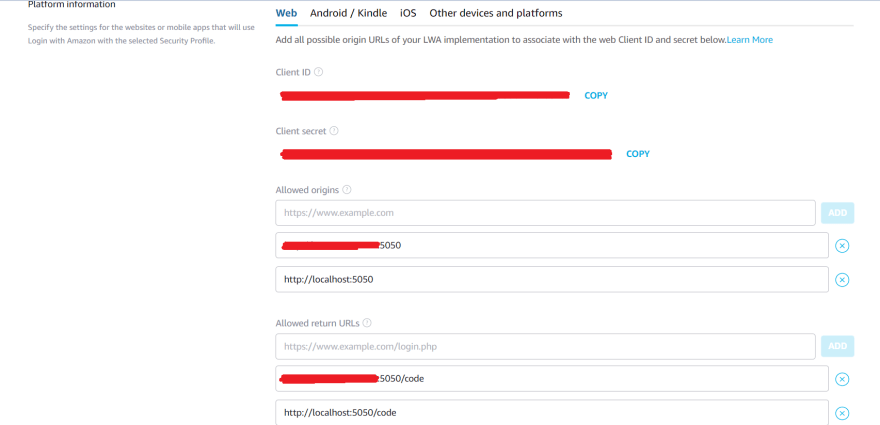
Copy all the details and note them, as they will be required in further steps.
IN allowed origins field put http://IP:5050 and http://localhost:5050.
IP is the IP of the Raspberry Pi where you want to Alexa service to run.
In allowed return URLs put http://IP:5050/code and http://localhost:5050/code
IP is the IP of the Raspberry Pi where you want to Alexa service to run.
Click on I agree and then continue/next.
You will get a message that Your product has been created successfully.
Step 5> Configuring the device
Open up a terminal, we will do some installations first.
Make sure everything is updated -
$ sudo apt-get update
Distribution upgrade -
$ sudo apt-get dist-upgrade
Install git -
$ sudo apt-get install git
Install CherryPy library -
$ sudo pip3 install CherryPy==17.4.0
Navigate to /opt folder -
cd /opt
Clone the AlexaPi repository -
$ sudo git clone https://github.com/alexa-pi/AlexaPi.git
Run the setup script -
$ sudo ./Alexa/src/scripts/setup.sh
Answer the prompts according to your device and OS. For Airplay support give n.
Once every detail is provided to the script, open up a browser and go to http://localhost:5050. If any error comes then check in security profile configuration that the URLs are added.
Sign in using your Amazon developer account credentials.
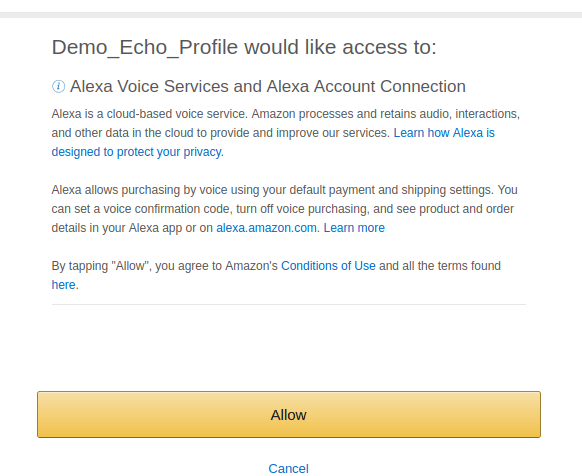
This page will come after signing in, click on Allow
You will get this message -
Now exit the browser and press Ctrl+C in the terminal.
Step Start the AlexaPi service
start by -
$ sudo systemctl start AlexaPi.service
stop by -
$ sudo systemctl stop AlexaPi.service
Connect a Speaker and Mic to your Raspberry Pi. Once the service is running start asking Alexa any questions.
Thanks
My GitHub Profile -> https://github.com/YashIndane
My Linkedin Profile -> https://www.linkedin.com/in/yash-indane-aa6534179/
This content originally appeared on DEV Community and was authored by Yash Indane
Yash Indane | Sciencx (2022-03-26T15:21:29+00:00) Configuring Amazon Alexa on Raspberry Pi!. Retrieved from https://www.scien.cx/2022/03/26/configuring-amazon-alexa-on-raspberry-pi/
Please log in to upload a file.
There are no updates yet.
Click the Upload button above to add an update.

