This content originally appeared on DEV Community and was authored by Pramit Marattha
Creating a search engine that are typo-tolerant, effective, and efficient are exceedingly tough. A typographical error could cause the search to fail even if the desired item is in the database. By removing the requirement to build a search engine from the ground up, Typesense might save a lot of time and effort. Users will also be able to use the app's search tool successfully, resulting in a positive user experience. Typesense is a free, open-source typo-tolerant search engine for programmers that aims to reduce the amount of time needed to execute effective and efficient searches. To learn more about typesense =>.What is Typesense, and why is it such a great tool?.
This tutorial will show you how to install Typesense, how to create a Typesense application from the ground up, how to preconfigure the Typesense client, and much more. This article also demonstrates how to establish a Typesense Collection. Finally, we'll start up our program, add a new item to our collection, and search our indexed data/collection.
Let's get started. The goal of this article is to create an instant search type application, also known as "search as you type," which means that whenever you type something, the results appear instantly, providing a pleasant user experience. So, in a previous article, we created a simple Typesense Booksearch javascript application, and in this article, we'll built an Anime search but by using Animes dataset and also by using react.js, with the goal of simply showing you how to do it using the most popular framework or UI library.So let's get started with our React js application with Javascript. To do so, simply follow the instructions below.
Configuring our React application
We'll begin by using create-react-app to set up our frontend. We'll build the user interface and its features from the ground up. Let's go to work on our application right away.
Setting up react application bootstarpped using CRA
Let's start with the react part and start building it. The first thing you need do is install Node.js if it isn't already installed on your PC. So, head over to the official Node.js website and download the latest version. Node js is required in order to use the node package manager, generally known as npm. Now open the folder in your preferred code editor. we'll be using VScode code editor for this article tutorial . Next, open the integrated terminal and type npx create-react-app . This command will create a react application in the current directory.
It normally only takes a few minutes to set up. Normally, we would use npm to get packages into a project, but in this case, we'll use npx, the package runner, which will download and configure everything for us so that we can get started with an excellent template right away. It's time to start our development server, so run npm start and the browser will open react-app instantly.
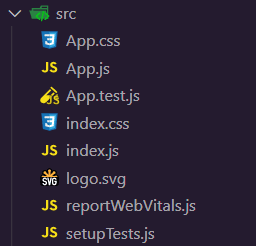
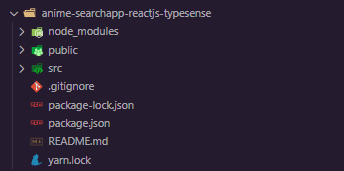
So, this is how the boilerplate template appears right away. Now it's time to investigate the file and folder structure provided by create-react-app. There is a folder called node module that contains all of our node dependencies. Then there's a public folder, where the only thing that matters is the index.html file. So this appears to be a standard HTML file, complete with head, body, and meta tags. You'll notice a div with the id root inside our body tag, followed by the fallback noscript tag, which will be visible only if the user's browser has javascript disabled.
<!--index.html-->

<!DOCTYPE html>
<html lang="en">
  <head>
    <meta charset="utf-8" />
    <link rel="icon" href="%PUBLIC_URL%/favicon.ico" />
    <meta name="viewport" content="width=device-width, initial-scale=1" />
    <meta name="theme-color" content="#000000" />
    <meta
      name="description"
      content="Web site created using create-react-app"
    />
    <link rel="apple-touch-icon" href="%PUBLIC_URL%/logo192.png" />
    <link rel="manifest" href="%PUBLIC_URL%/manifest.json" />
    <title>React practice</title>
  </head>
  <body>
    <noscript>You need to enable JavaScript to run this app.</noscript>
    <div id="root"></div>
  </body>
</html>
So you're probably wondering where the content comes from. Remember that, All of our source code is contained within our source or src folder, and react will inject it into the root div element. Let's take a look at our src folder, which contains some stylesheets, javascript files, and SVG files.
Now, head over to our App.js file
// App.js

import logo from "./logo.svg";
import "./App.css";

function App() {
  return (
    <div className="App">
      <header className="App-header">
        <img src={logo} className="App-logo" alt="logo" />
        <p>
          Edit <code>src/App.js</code> and save to reload.
        </p>
        <a
          className="App-link"
          href="https://reactjs.org"
          target="_blank"
          rel="noopener noreferrer"
        >
          Learn React
        </a>
      </header>
    </div>
  );
}
export default App;
In this case, we're simply importing react from react and logo from our logo using standard javascript. Following that, we have a normal javascript function called APP, and this function in react is known as a functional component, and this function is returning a react-element that looks like HTML but is actually an jsx as you can see there is a div tag with a className of APP, and we can't say class by itself because the class is a reserved word in javascript, so in jsx we have to use className. Following that, we have the header and then the image, and notice on the image source that we have our logo, which is actually a javascript variable that we imported at the top, so in order to use the javascript within JSX, we must surround it with curly brackets, and then we have a paragraph, an anchor tag, and that is all for this component.
NOTE: Because of the export, we are able to extract the component and place it on the webpage. Export appears at the bottom of the app.js file, indicating that we are exporting the App function.
So, Now let's look at the index.js file.
// index.js

import React from "react";
import ReactDOM from "react-dom";
import "./index.css";
import App from "./App";
import reportWebVitals from "./reportWebVitals";

ReactDOM.render(
  <React.StrictMode>
    <App />
  </React.StrictMode>,
  document.getElementById("root")
);
reportWebVitals();
So, in this case, we're importing react from react again, and this time we're also importing react-dom, and then we're importing the CSS stylesheet file, and finally, we're importing App from App.js, which is the file we just discussed, and there's service worker, which is used to make your application work completely offline. Then we invoke ReactDom.render, which accepts two parameters. The first parameter is the jsx object, and within jsx we can include our user-defined components, so react strict mode is a react defined component, whereas App is a user-defined component, and the second parameter is document.getElementById('root'), which targets the root div in our index.html file and is how we access the content in our webpage.
Note: ReactDom renders our content into our root div located at our index.html file.
React boilerplate files cleanup
We must first tidy up our projects by eliminating some of the files provided by create-react-app before we can begin creating them. After you've cleaned up your files and folder , they should look like this.
Adding and Installing some packages
We will need to install a few third-party packages for this project. so copy and paste the following command into your terminal
Installing typesense
This is going to be our primary typesense package.
npm install typesense
Installing typesense-instantsearch-adapter
This package will allow us to use the instantsearch UI, and this adapter will basically plug it into typesense because instantsearch.js is created by algolia, but typesense created this adapter to port its functionality and features into the typesense package itself.
npm install typesense-instantsearch-adapter
Installing styled-components
This package will lets you write actual CSS inside your JavaScript project.
npm install styled-components
Installing instantsearch.css
Instead of creating everything from scratch, this package will give pre-made styles such as the search box and numerous UI styles.
npm install instantsearch.css
Installing react-instantsearch-dom
This package is the React version of Algolia's instantsearch.js library which will provides us the components that we need render it onto our projects.
This package wil
npm install react-instantsearch-dom
Finally, your package.json file should look like this once you've installed all of your project's dependencies.
{
  "name": "anime-searchapp-reactjs-typesense",
  "version": "0.1.0",
  "private": true,
  "dependencies": {
    "@testing-library/jest-dom": "^5.14.1",
    "@testing-library/react": "^12.0.0",
    "@testing-library/user-event": "^13.2.1",
    "instantsearch.css": "^7.4.5",
    "react": "^17.0.2",
    "react-dom": "^17.0.2",
    "react-instantsearch-dom": "^6.22.0",
    "react-scripts": "5.0.0",
    "styled-components": "^5.3.3",
    "typesense": "^1.1.3",
    "typesense-instantsearch-adapter": "^2.3.0",
    "web-vitals": "^2.1.0"
  },
  "scripts": {
    "start": "react-scripts start",
    "build": "react-scripts build",
    "test": "react-scripts test",
    "eject": "react-scripts eject"
  },
  "eslintConfig": {
    "extends": ["react-app", "react-app/jest"]
  },
  "browserslist": {
    "production": [">0.2%", "not dead", "not op_mini all"],
    "development": [
      "last 1 chrome version",
      "last 1 firefox version",
      "last 1 safari version"
    ]
  }
}
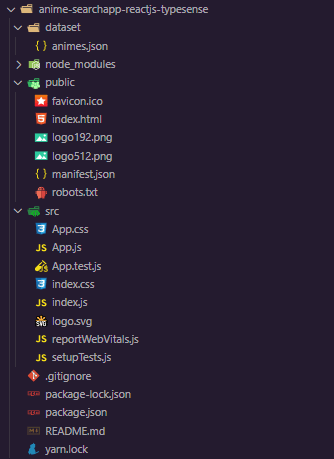
Now that our project and dependencies have been set up, we can get started.Firstly, we need to import our animes data, so create a dataset folder and inside it, create your own anime list json file, filling it with all of the necessary product information, or download the anime dataset from here. Finally, your folder structure and dataset should look something like this.
So, in order to populate our Typesense index, we must first start our Typesense server, and there are several ways to do so. There is the old programmatic way, which requires you to install everything, start it up, and provide the configuration using code, or there is this one awesome method, which is the preferred method, which is very steady and known to work, and which is used in the docker image and run the docker container that will basically bind and give it a volume that will connect to where you'll be storing the data, and that's all there is to it.So that's essentially what we'll be using in this article.
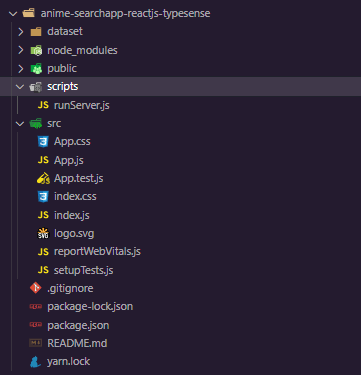
Let's start by creating a new script and a folder called scripts, because we'll have a handful of scripts loaded in here that will allow us to either index the data or start the typesense server or the docker container, so you can basically put it inside the script run tag inside the package.json.So that, every time you wish to start the server, you can just open up the command prompt and fire up the npm command
Inside the scripts folder, create a new file called runServer.js. So, this script will essentially run the docker command, but before we do so, we must first configure it. Folder structure should resemble something like this.
The very First step is to execute command from the child process of node.js.
// runServer.js
const { exec } = require("child_process");
Next, let's set up the command. We'll use docker -run and detach to run the docker in the background, then assign the port. The most important section of this command is the volume section. What we're doing here is binding the volume, which is essentially a way to store the data of the typesense, which by default is inside the container itself.So, typesense will store the data inside the container's data folder named /data, and it will expose and link this /data folder into the folder we designate on our system, which in this case will be the tmp directory. This approach will assist to keep the data consistent and ensure that it is resilient, and we will always preserve the data so that if the docker container is deleted, stopped, or something similar happens, we will simply keep our data in a secure place. By specifying a -v volume, we are just indicating where we want the data to be stored . After that, we need to specify which image is required to run inside our docker container, so we'll use typesense/typesense:0.22.2 for now, but you can use your own image, and then specify the data directory and the api key, which you can put anything you want and pass the listen port, and finally enable CORS so we don't have any CORS related issues. This is what your code should look like.
// runServer.js
const { exec } = require("child_process");

const command = `docker run -d -p 8108:8108 -v/tmp/typesense-server-data/:/data \ typesense/typesense:0.22.2 --data-dir /data --api-key=animesearch --listen-port 8108 --enable-cors`;
Finally, we must run the command and simply construct an error handler in the event that an error happens while running the commands. As a result, your final "runServer" code should look like this.
// runServer.js
const { exec } = require("child_process");

const command = `docker run -d -p 8108:8108 -v/tmp/typesense-server-data/:/data \ typesense/typesense:0.22.2 --data-dir /data --api-key=animesearch --listen-port 8108 --enable-cors`;

exec(command, (err) => {
  if (!err) console.log("Typesense Server is up and running...✰✨");

  if (err) {
    console.log("Error running server: ", err);
  }
});
So now that we have our runServer.js script ready to go, we can simply update the script tag in our package.json file.Finally, your package.json file should look like this once you've updated the script.
// package.json
{
  "name": "anime-searchapp-reactjs-typesense",
  "version": "0.1.0",
  "private": true,
  "dependencies": {
    "@testing-library/jest-dom": "^5.14.1",
    "@testing-library/react": "^12.0.0",
    "@testing-library/user-event": "^13.2.1",
    "instantsearch.css": "^7.4.5",
    "react": "^17.0.2",
    "react-dom": "^17.0.2",
    "react-instantsearch-dom": "^6.22.0",
    "react-scripts": "5.0.0",
    "styled-components": "^5.3.3",
    "typesense": "^1.1.3",
    "typesense-instantsearch-adapter": "^2.3.0",
    "web-vitals": "^2.1.0"
  },
  "scripts": {
    "start": "react-scripts start",
    "build": "react-scripts build",
    "test": "react-scripts test",
    "eject": "react-scripts eject",
    "start-server": "node scripts/runServer.js"
  },
  "eslintConfig": {
    "extends": ["react-app", "react-app/jest"]
  },
  "browserslist": {
    "production": [">0.2%", "not dead", "not op_mini all"],
    "development": [
      "last 1 chrome version",
      "last 1 firefox version",
      "last 1 safari version"
    ]
  }
}
Finally, start the server by typing npm run start-server, and your docker will start running, then you can proceed to the next step of indexing the data/collection.
The next step is to actually populate or index the data inside the typesense server, so now that we have the server up and running and a bunch of anime data, this is the datset that we want to populate inside the typesense server so that later on in our UI we can basically query that typesense server and do an instant search that will be legit incredibly fast.So to do that let's get started writing the data-importing scripts. We'll start by creating a file called loadData.js inside the scripts folder which we previously created in which we'll initialize the typesense client.
Indexing data on typesense: a step-by-step guide
First step: We need to import the Typesense library to our project.
// loadData.js
const Typesense = require("typesense");
Seecond step: Let's go ahead and make a self-executing function that will run whenever we run the script and make it asynchronous so we can use the async await functionality. Simply create'module.export' and export the self-executing function inside it and make it asynchronous so we can make a script that reads the data and does the collection, manages the typesense server, and indexes the data. So the first thing we need to do is set up the typesense client so that we can connect to the server and begin managing, indexing, and retrieving data.
So first create a typesense config variable and pass the nodes properties first. So what it does is it allows you to have multiple nodes for a single server, for example, a client can connect to multiple nodes, and nodes are basically just servers, so this specific nodes is actually an array that holds the actual configuration for each server that you actually want to connect into and that you want the client to access, so currently we only have one server running so we are going to usitlize only one nodes.Next, inside the nodes array, supply the host, typesense port, and protocol it uses, as well as the api key.
// loadData.js
const Typesense = require("typesense");

module.exports = (async () => {
  const TYPESENSE_CONFIG = {
    nodes: [
      {
        host: "localhost",
        port: "8108",
        protocol: "http",
      },
    ],
    apiKey: "animesearch",
  };
})();
Third step: Let's utilize the typesense configuration to make a Typesense client.
// loadData.js
const Typesense = require("typesense");

module.exports = (async () => {
  const TYPESENSE_CONFIG = {
    nodes: [
      {
        host: "localhost",
        port: "8108",
        protocol: "http",
      },
    ],
    apiKey: "animesearch",
  };

  console.log("Config: ", TYPESENSE_CONFIG);

  const typesense = new Typesense.Client(TYPESENSE_CONFIG);
})();
Fourth step: This is a crucial stage because it is here that we provide the schema that will have our data indexed into the actual typesense database, therefore schema is quite critical. It's fairly basic syntax and super simple to work with. Schema is basically where you describe how your data is going to be saved. For our schema, we have title, synopsis, genre, aired, popularity, ranking, score, img url, and links. So in schema you only want to put the fields you wish to index.If you're familiar with nosql databases, especially mongodb, it's heavily inspired by this approach. If you're familiar with the mongoose ORM(Object Relational Model) for example: how it works and how you can retrieve data and collections, it basically works the same way and and typesense has this particular exact feature. So it's basically like a nosql database . It's a little more sophisticated than that, but you may think of it like this to get a general impression of it and understand how the data flows, and how it's all organized together.Begin by giving the schema a name and making sure the number of documents is set to zero. Next, add the fields, which will be an array of objects containing every single field that we want to index and store in our database, so provide the name, type, and facet. So, if you're wondering what facet is, it's a feature that allows you to define categories based on a subset of attributes so that users may narrow down their search results.This is how your schema should look like.
// loadData.js
const Typesense = require("typesense");

module.exports = (async () => {
  const TYPESENSE_CONFIG = {
    nodes: [
      {
        host: "localhost",
        port: "8108",
        protocol: "http",
      },
    ],
    apiKey: "animesearch",
  };

  console.log("Config: ", TYPESENSE_CONFIG);

  const typesense = new Typesense.Client(TYPESENSE_CONFIG);

  const schema = {
    name: "animes",
    num_documents: 0,
    fields: [
      {
        name: "title",
        type: "string",
        facet: false,
      },
      {
        name: "synopsis",
        type: "string",
        facet: false,
      },
      {
        name: "genre",
        type: "auto",
        facet: true,
      },
      {
        name: "genre.lvl0",
        type: "auto",
        facet: true,
        optional: true,
      },
      {
        name: "genre.lvl1",
        type: "auto",
        facet: true,
        optional: true,
      },
      {
        name: "genre.lvl2",
        type: "auto",
        facet: true,
        optional: true,
      },
      {
        name: "genre.lvl3",
        type: "auto",
        facet: true,
        optional: true,
      },
      {
        name: "genre.lvl4",
        type: "auto",
        facet: true,
        optional: true,
      },
      {
        name: "genre.lvl5",
        type: "auto",
        facet: true,
        optional: true,
      },
      {
        name: "aired",
        type: "string",
        facet: true,
      },
      {
        name: "popularity",
        type: "float",
        facet: true,
      },
      {
        name: "ranked",
        type: "float",
        facet: true,
      },
      {
        name: "score",
        type: "string",
        facet: true,
      },
      {
        name: "img_url",
        type: "string",
        facet: true,
      },
      {
        name: "link",
        type: "string",
        facet: true,
      },
    ],
    default_sorting_field: "popularity",
  };
})();
So, if you want to index all of the data in the array of genres, for example, you'll need to store store each level of the array on threir specific/own field.
Let's proceed to our dataset and look at the genres section. As you can see in the figure below, there are four items in that array, so we will make each field level for each of them items.
Fifth step: Let's start by reading the movies from the json files and then importing the dataset. Now is the time to call the Typesense client and establish a connection with a schema within it.
// loadData.js
const Typesense = require("typesense");

module.exports = (async () => {
  const TYPESENSE_CONFIG = {
    nodes: [
      {
        host: "localhost",
        port: "8108",
        protocol: "http",
      },
    ],
    apiKey: "animesearch",
  };

  console.log("Config: ", TYPESENSE_CONFIG);

  const typesense = new Typesense.Client(TYPESENSE_CONFIG);

  const schema = {
    name: "animes",
    num_documents: 0,
    fields: [
      {
        name: "title",
        type: "string",
        facet: false,
      },
      {
        name: "synopsis",
        type: "string",
        facet: false,
      },
      {
        name: "genre",
        type: "auto",
        facet: true,
      },
      {
        name: "genre.lvl0",
        type: "auto",
        facet: true,
        optional: true,
      },
      {
        name: "genre.lvl1",
        type: "auto",
        facet: true,
        optional: true,
      },
      {
        name: "genre.lvl2",
        type: "auto",
        facet: true,
        optional: true,
      },
      {
        name: "genre.lvl3",
        type: "auto",
        facet: true,
        optional: true,
      },
      {
        name: "genre.lvl4",
        type: "auto",
        facet: true,
        optional: true,
      },
      {
        name: "genre.lvl5",
        type: "auto",
        facet: true,
        optional: true,
      },
      {
        name: "aired",
        type: "string",
        facet: true,
      },
      {
        name: "popularity",
        type: "float",
        facet: true,
      },
      {
        name: "ranked",
        type: "float",
        facet: true,
      },
      {
        name: "score",
        type: "string",
        facet: true,
      },
      {
        name: "img_url",
        type: "string",
        facet: true,
      },
      {
        name: "link",
        type: "string",
        facet: true,
      },
    ],
    default_sorting_field: "popularity",
  };

  const animes = require("../dataset/animes.json");

  try {
    const collection = await typesense.collections("animes").retrieve();
    console.log("Found existing collection of animes");
    console.log(JSON.stringify(collection, null, 2));
  } catch (err) {
    console.error(err);
  }
})();
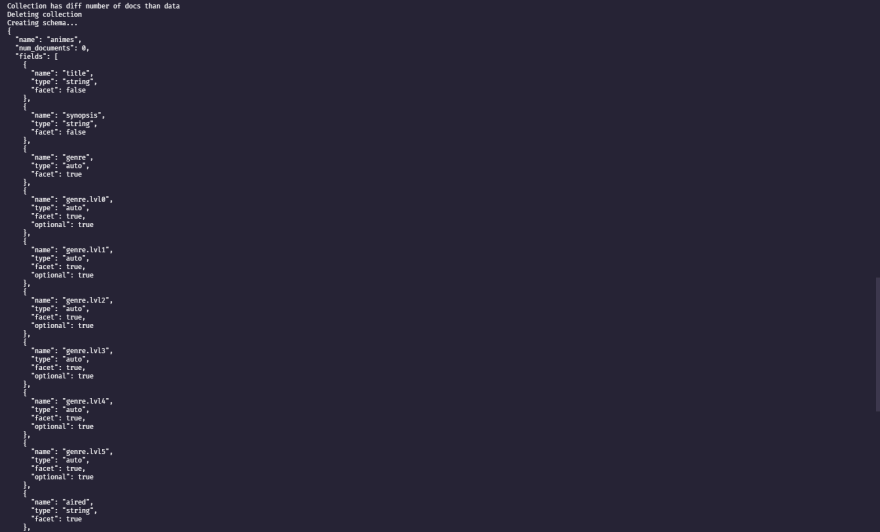
Sixth step: If an error occurs while loading the data(data duplication error), simply add the following snippet of code to the loadData.js file before creating schema becasue it will simply remove the existing data and populates it with the new ones.
if (collection.num_documents !== animes.length) {
  console.log("Collection has diff number of docs than data");
  console.log("Deleting collection");
  await typesense.collections("animes").delete();
}
Seventh step: Creating a collection named animes . In Typesense a Collection is a set of related Documents that functions similarly to a table in a relational database. We give a collection a name and describe the fields that will be indexed when a document is added to the collection when we create it.
Your final code inside loadData.js file should look like this.
// loadData.js
const Typesense = require("typesense");

module.exports = (async () => {
  const TYPESENSE_CONFIG = {
    nodes: [
      {
        host: "localhost",
        port: "8108",
        protocol: "http",
      },
    ],
    apiKey: "animesearch",
  };

  console.log("Config: ", TYPESENSE_CONFIG);

  const typesense = new Typesense.Client(TYPESENSE_CONFIG);

  const schema = {
    name: "animes",
    num_documents: 0,
    fields: [
      {
        name: "title",
        type: "string",
        facet: false,
      },
      {
        name: "synopsis",
        type: "string",
        facet: false,
      },
      {
        name: "genre",
        type: "auto",
        facet: true,
      },
      {
        name: "genre.lvl0",
        type: "auto",
        facet: true,
        optional: true,
      },
      {
        name: "genre.lvl1",
        type: "auto",
        facet: true,
        optional: true,
      },
      {
        name: "genre.lvl2",
        type: "auto",
        facet: true,
        optional: true,
      },
      {
        name: "genre.lvl3",
        type: "auto",
        facet: true,
        optional: true,
      },
      {
        name: "genre.lvl4",
        type: "auto",
        facet: true,
        optional: true,
      },
      {
        name: "genre.lvl5",
        type: "auto",
        facet: true,
        optional: true,
      },
      {
        name: "aired",
        type: "string",
        facet: true,
      },
      {
        name: "popularity",
        type: "float",
        facet: true,
      },
      {
        name: "ranked",
        type: "float",
        facet: true,
      },
      {
        name: "score",
        type: "string",
        facet: true,
      },
      {
        name: "img_url",
        type: "string",
        facet: true,
      },
      {
        name: "link",
        type: "string",
        facet: true,
      },
    ],
    default_sorting_field: "popularity",
  };

  const animes = require("../dataset/animes.json");

  try {
    const collection = await typesense.collections("animes").retrieve();
    console.log("Found existing collection of animes");
    console.log(JSON.stringify(collection, null, 2));

    if (collection.num_documents !== animes.length) {
      console.log("Collection has diff number of docs than data");
      console.log("Deleting collection");
      await typesense.collections("animes").delete();
    }
  } catch (err) {
    console.error(err);
  }

  console.log("Creating schema...");
  console.log(JSON.stringify(schema, null, 2));

  await typesense.collections().create(schema);

  console.log("Populating collection data...");

  try {
    const returnData = await typesense
      .collections("animes")
      .documents()
      .import(animes);

    console.log("Return data: ", returnData);
  } catch (err) {
    console.error(err);
  }
})();
So now that we have our loadData.js script ready to go, we can simply update the script tag in our package.json file.Finally, your package.json file should look like this once you've updated the script.
// package.json
{
  "name": "anime-searchapp-reactjs-typesense",
  "version": "0.1.0",
  "private": true,
  "dependencies": {
    "@testing-library/jest-dom": "^5.14.1",
    "@testing-library/react": "^12.0.0",
    "@testing-library/user-event": "^13.2.1",
    "instantsearch.css": "^7.4.5",
    "react": "^17.0.2",
    "react-dom": "^17.0.2",
    "react-instantsearch-dom": "^6.22.0",
    "react-scripts": "5.0.0",
    "styled-components": "^5.3.3",
    "typesense": "^1.1.3",
    "typesense-instantsearch-adapter": "^2.3.0",
    "web-vitals": "^2.1.0"
  },
  "scripts": {
    "start": "react-scripts start",
    "build": "react-scripts build",
    "test": "react-scripts test",
    "eject": "react-scripts eject",
    "start-server": "node scripts/runServer.js",
    "indexer": "node scripts/loadData.js"
  },
  "eslintConfig": {
    "extends": ["react-app", "react-app/jest"]
  },
  "browserslist": {
    "production": [">0.2%", "not dead", "not op_mini all"],
    "development": [
      "last 1 chrome version",
      "last 1 firefox version",
      "last 1 safari version"
    ]
  }
}
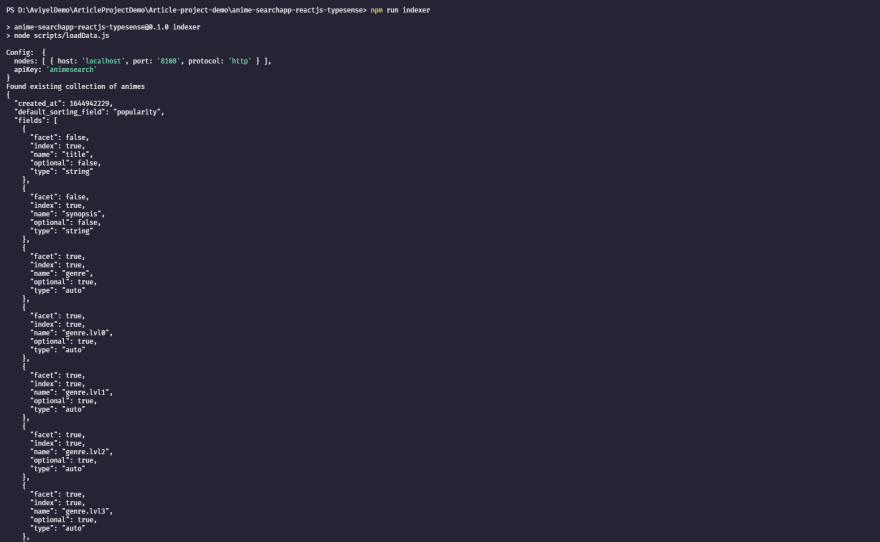
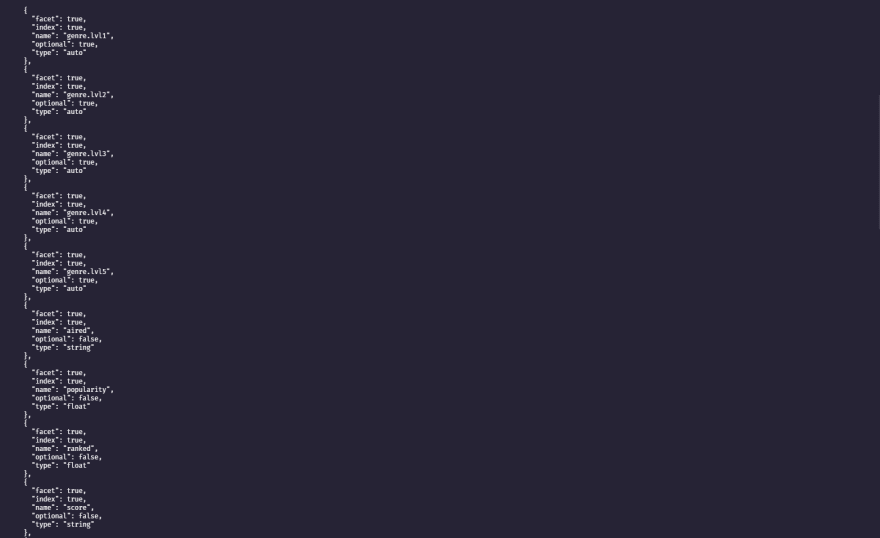
Finally, start indexing the data in typesense server by typing npm run indexer, and your data will start getting populated inside the typesense server.
Building a UI and retrieving the data
Let's get started by putting together the UI. Our frontend, or UI, will need to connect to the typesense server and do queries. A Typesense server is as standard and flexible as any other HTTP server. You can basically send the HTTP request, which we will be utilizing here as well, and the client will simply submit a normal HTTP request and it will do the search for you. That is basically how it will operate between a client and the actual typesense server.
So, before we perform any UI work or display or render any components, we must first connect to the server and supply the configuration that we accomplished previously.We can now finally adjust the project to use Typesense.We've got our typesense instance up and running in the background.To get React to use the Typesense adapter, open src/app.js file and create a connection first. Inside that, create a TypesenseInstantsearchAdapter object and add server as a key. Inside that, pass the apiKey and nodes, and inside the nodes, specify the host, port, and protocol. Finally, add the additional search parameter to it and pass the query and queryByWeight which you want to display the indexed document/data accordingly.(Remember that these parameters are passed directly to the Typesense search API endpoint. As a result, any parameters supported by the search endpoint can be passed through it).
The following is an example of what your code should look like.
import React, { useState } from "react";
import TypesenseInstantSearchAdapter from "typesense-instantsearch-adapter";

const typesenseInstantsearchAdapter = new TypesenseInstantSearchAdapter({
  server: {
    apiKey: "animesearch",
    nodes: [
      {
        host: "localhost",
        port: "8108",
        protocol: "http",
      },
    ],
  },
  additionalSearchParameters: {
    queryBy: "titles,synopsis,genre",
    queryByWeights: "4,2,1",
    numTypos: 3,
    typoTokensThreshold: 1,
  },
});

const App = () => {
  return (
    <>
      <div>App</div>
    </>
  );
};

export default App;
Now that we've completed the configuration, let's move on to creating an interface for our application. To do so, first import the InstantSearch component from the react-instantsearch-dom library, and pass indexName and searchClient as props to that component.
// app.js
import React, { useState } from "react";
import TypesenseInstantSearchAdapter from "typesense-instantsearch-adapter";
import { InstantSearch } from "react-instantsearch-dom";

const typesenseInstantsearchAdapter = new TypesenseInstantSearchAdapter({
  server: {
    apiKey: "animesearch",
    nodes: [
      {
        host: "localhost",
        port: "8108",
        protocol: "http",
      },
    ],
  },
  additionalSearchParameters: {
    queryBy: "titles,synopsis,genre",
    queryByWeights: "4,2,1",
    numTypos: 3,
    typoTokensThreshold: 1,
  },
});

const App = () => {
  return (
    <>
      <InstantSearch
        indexName="animes"
        searchClient={typesenseInstantsearchAdapter.searchClient}
      ></InstantSearch>
    </>
  );
};

export default App;
If you start your " react.js" application, it will appear empty.
Before we dive into integrating searchbox, let's style our application and segregate the search section, as well as add some style to our interface, so simply follow the code below and wrap it inside the InstantSearch component.
const App = () => {
  return (
    <>
      <InstantSearch
        indexName="animes"
        searchClient={typesenseInstantsearchAdapter.searchClient}
      >
        <div className="search-container">
          <aside className="results-section"></aside>
          <main>Search/result section</main>
        </div>
      </InstantSearch>
    </>
  );
};
Now let's add the SearchBox and Hits components from the react-instantsearch-dom library, so we can directly incorporate those components inside our application.
import TypesenseInstantSearchAdapter from "typesense-instantsearch-adapter";
import ResultTemplate from "./components/ResultTemplate";
import "./App.css";
import {
InstantSearch,
SearchBox,
Hits,
Configure,
Pagination,
SortBy,
Panel,
RefinementList,
} from "react-instantsearch-dom";
import "instantsearch.css/themes/satellite.css";
const typesenseInstantsearchAdapter = new TypesenseInstantSearchAdapter({
server: {
apiKey: "animesearch",
nodes: [
{
host: "localhost",
port: "8108",
protocol: "http",
},
],
},
additionalSearchParameters: {
queryBy: "title,synopsis,genre",
queryByWeights: "4,2,1",
numTypos: 3,
typoTokensThreshold: 1,
},
});
const App = () => {
return (
<>
<h1 className="super-title">
👊🏻👨🏻🦲Anime search application built using react👺🔪👿
</h1>
<InstantSearch
indexName="animes"
searchClient={typesenseInstantsearchAdapter.searchClient}
>
<Configure hitsPerPage={12} />
<div className="search-container">
<aside className="results-section"></aside>
<main>
<SearchBox />
<div className="searchbox-gap"></div>
<Hits />
</main>
</div>
</InstantSearch>
</>
);
};
export default App;
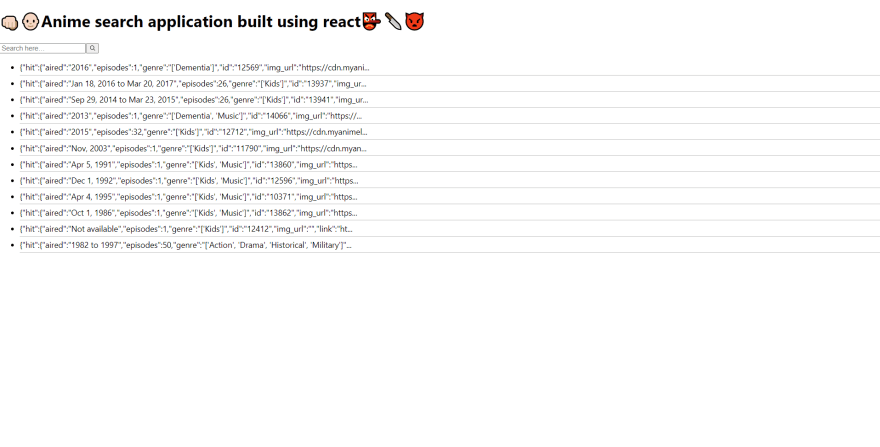
Simply re-run the application after you've fixed it, and your application should now look like this.
At the moment, our data is shown in json format, same like it is in our index. Let's present the data in a more appealing way, therefore let's make a new component folder and inside that folder create another new file called ResultTemplate.js and pass the the hit props. Finally, show the anime title by simply passing {hit.title} and wrapping it in a simple div tag.
// components/ResultTemplate
import React from "react";

const ResultTemplate = ({ hit }) => {
  return (
    <>
      <div>{hit.title}</div>
    </>
  );
};
export default ResultTemplate;
After you've finished creating a component, simply import it into the App.js file and feed it to the Hit component.
<Hits hitComponent={ResultTemplate} />
Simply re-run the application after you've fixed it, and it should now appear like this.
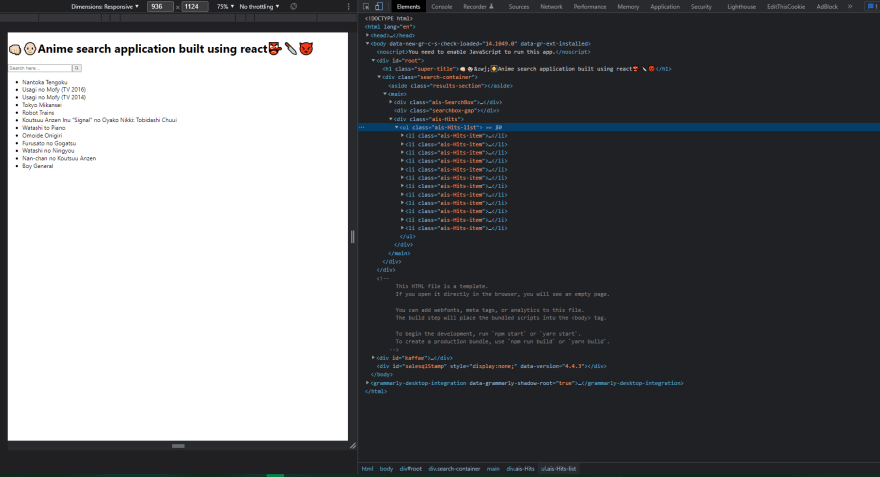
So, let's add some styling to our app to make the results display in a grid format, so head to the app's main page and inspect the element there.
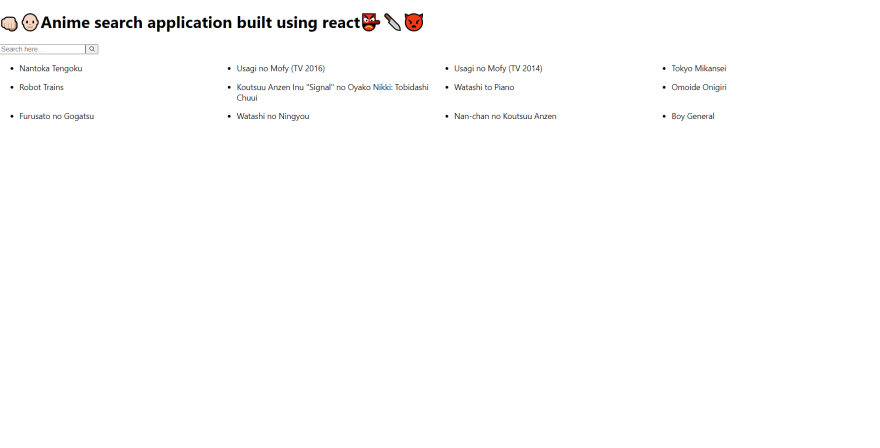
So the concept here with this reactInstanceSearch library is that those elements have predefined classes names, as you can see each element has an ais-Hits,ais-Hits-lists and then you have ais-Hits-items. so we just need to change the styles and because we're using vanilla css approach, we'll use the grid of four columns so let's save the application and simply re-run it.
/* App.css */
.ais-Hits-list {
  display: grid;
  grid-template-columns: repeat(4, minmax(0, 1fr));
  gap: 1rem;
}
Also, don't forget to make some changes to the styles ResultTemplate before re-running the application.
// components/ResultTemplate
import React from "react";

const ResultTemplate = ({ hit }) => {
  return (
    <>
      <div className="anime-container">
        <h3 className="anime-wrapper">{hit.name}</h3>
      </div>
    </>
  );
};
export default ResultTemplate;
.anime-container {
  display: flex;
  flex-direction: column;
  justify-content: center;
  align-items: center;
  margin-bottom: 2rem;
}

.anime-wrapper {
  border-radius: 1rem;
}
and the application should now look something like this.
It's time to display some images of our anime movies, so we'll use the "img" tag and simply pass{hit.image_url} as an image source, followed by the styles.
// components/ResultTemplate
import React from "react";

const ResultTemplate = ({ hit }) => {
  return (
    <>
      <div className="anime-container">
        <div className="anime-wrapper">
          <img className="anime-image" src={hit.img_url} alt="movie" />
        </div>
        <h3>{hit.name}</h3>
      </div>
    </>
  );
};
export default ResultTemplate;
Styles
/* App.css */
.anime-container {
  display: flex;
  flex-direction: column;
  justify-content: center;
  align-items: center;
  margin-bottom: 2rem;
}

.anime-wrapper {
  border-radius: 1rem;
}

.anime-image {
  width: 100%;
  height: 150px;
  object-fit: cover;
}

.ais-Hits-list {
  display: grid;
  grid-template-columns: repeat(4, minmax(0, 1fr));
  gap: 1rem;
}
It's time to set up the list of hits that will appear on your page, simply add the Configure component and specify the hitsPerPage option to configure the list of hits that you want to display in your page. Finally, use the Pagination widgets offered by the react-instantsearch-dom library to add pagination. Also, let's try adding facets. To do so, we'll add a widget, which in the react-instanctsearch-dom library is named RefinementList, and then define the attribute we want to take, which in our instance would be genre, and also for labeling add the Panel component as well so Finally, re-run the application. As a result, your completed code should look like this...
import TypesenseInstantSearchAdapter from "typesense-instantsearch-adapter";
import ResultTemplate from "./components/ResultTemplate";
import "./App.css";
import {
InstantSearch,
SearchBox,
Hits,
Configure,
Pagination,
Panel,
RefinementList,
} from "react-instantsearch-dom";
const typesenseInstantsearchAdapter = new TypesenseInstantSearchAdapter({
server: {
apiKey: "animesearch",
nodes: [
{
host: "localhost",
port: "8108",
protocol: "http",
},
],
},
additionalSearchParameters: {
queryBy: "title,synopsis,genre",
queryByWeights: "4,2,1",
numTypos: 3,
typoTokensThreshold: 1,
},
});
const App = () => {
return (
<>
<h1 className="super-title">
👊🏻👨🏻🦲Anime search application built using react👺🔪👿
</h1>
<InstantSearch
indexName="animes"
searchClient={typesenseInstantsearchAdapter.searchClient}
>
<Configure hitsPerPage={12} />
<div className="search-container">
<aside className="results-section">
<Panel header="Popularity"></Panel>
<Panel header="Genre">
<RefinementList
attribute="genre"
transformItems={(items) =>
items.map((item) => ({
...item,
label: item.label.slice(2, -2),
}))
}
searchable={true}
showMore={true}
limit={10}
showMoreText="Show more"
showLessText="Show less"
/>
</Panel>
<Panel header="Aired">
<RefinementList attribute="aired" />
</Panel>
</aside>
<main>
<SearchBox />
<div className="searchbox-gap"></div>
<Hits hitComponent={ResultTemplate} />
<Pagination />
</main>
</div>
</InstantSearch>
</>
);
};
export default App;
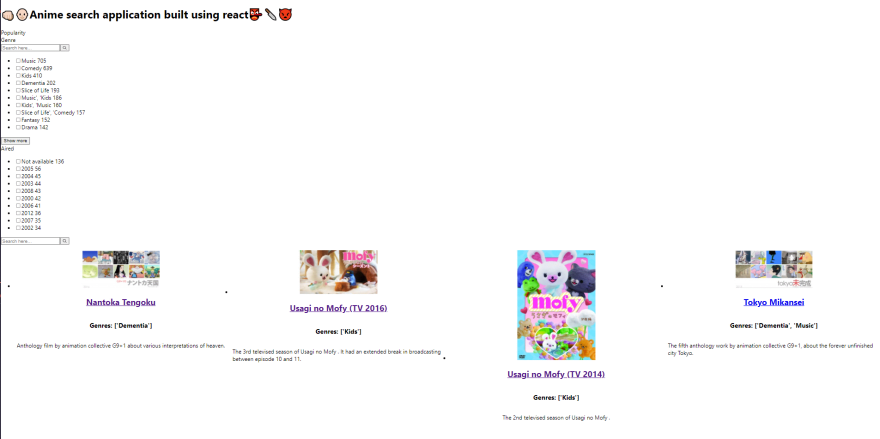
and the following is how your application should appear:
Finally, using the same procedures as before, we can add sorting capabilities to the application: Add the items with the label default with the value animes to the SortBy widget/component from react-instantsearch-dom, and then create another label called ranked (asc) with the value animes/sort/popularity:asc, and another label called ranked (desc) with the value animes/sort/popularity:desc.
<SortBy
  items={[
    { label: "Default", value: "animes" },
    {
      label: "ranked (asc)",
      value: "animes/sort/popularity:asc",
    },
    {
      label: "ranked (desc)",
      value: "animes/sort/popularity:desc",
    },
  ]}
  defaultRefinement="animes"
/>
Finally, let's update the template for the information we want to display in our app (for example, title,img_url and genres), so this is how your code should appear.
// components/ResultTemplate
import React from "react";

const ResultTemplate = ({ hit }) => {
  return (
    <>
      <div className="anime-container">
        <div className="anime-wrapper">
          <a href={hit.link} target="_blank">
            <img className="anime-image" src={hit.img_url} alt="movie" />
          </a>
        </div>
        <a href={hit.link} target="_blank">
          <h2 className="anime-title">{hit.title}</h2>
        </a>
        <h3 className="anime-genre">Genres: {hit.genre}</h3>
        <p>{hit.synopsis}</p>
      </div>
    </>
  );
};

export default ResultTemplate;
Add a few more styles to the project to make it appear even better, so the application's styles should look like this.
/* App.css */
@import url("https://fonts.googleapis.com/css2?family=Inter:wght@100;200;300;400;500;600&family=Poppins:ital,wght@0,100;0,200;0,300;1,100;1,200&display=swap");
* {
  font-family: "Poppins", sans-serif;
}
.super-title {
  display: flex;
  justify-content: center;
}

.search-container {
  display: flex;
  padding-right: 10px;
}

.results-section {
  height: 100vh;
  padding-left: 5rem;
  padding-right: 1rem;
  padding-top: 5rem;
}

.anime-container {
  display: flex;
  flex-direction: column;
  justify-content: center;
  align-items: center;
  margin-bottom: 2rem;
}

.anime-wrapper {
  border-radius: 1rem;
}

.anime-image {
  width: 100%;
  height: 150px;
  object-fit: cover;
}

.searchbox-gap {
  padding: 10px;
}

.ais-Hits-list {
  display: grid;
  grid-template-columns: repeat(4, minmax(0, 1fr));
  gap: 1rem;
}

a:link,
a:visited {
  text-align: center;
  text-decoration: none;
  display: inline-block;
}
Finally, use the react instantsearch library's instantsearch.css style and add it directly to the project. Hence, after you've integrated everything, your complete project's source code should look like this.
// App.js
import TypesenseInstantSearchAdapter from "typesense-instantsearch-adapter";
import ResultTemplate from "./components/ResultTemplate";
import "./App.css";
import {
InstantSearch,
SearchBox,
Hits,
Configure,
Pagination,
SortBy,
Panel,
RefinementList,
} from "react-instantsearch-dom";
import "instantsearch.css/themes/satellite.css";
const typesenseInstantsearchAdapter = new TypesenseInstantSearchAdapter({
server: {
apiKey: "animesearch",
nodes: [
{
host: "localhost",
port: "8108",
protocol: "http",
},
],
},
additionalSearchParameters: {
queryBy: "title,synopsis,genre",
queryByWeights: "4,2,1",
numTypos: 3,
typoTokensThreshold: 1,
},
});
const App = () => {
return (
<>
<h1 className="super-title">
👊🏻👨🏻🦲Anime search application built using react👺🔪👿
</h1>
<InstantSearch
indexName="animes"
searchClient={typesenseInstantsearchAdapter.searchClient}
>
<Configure hitsPerPage={12} />
<div className="search-container">
<aside className="results-section">
<Panel header="Popularity">
<SortBy
items={[
{ label: "Default", value: "animes" },
{
label: "ranked (asc)",
value: "animes/sort/popularity:asc",
},
{
label: "ranked (desc)",
value: "animes/sort/popularity:desc",
},
]}
defaultRefinement="animes"
/>
</Panel>
<Panel header="Genre">
<RefinementList
attribute="genre"
transformItems={(items) =>
items.map((item) => ({
...item,
label: item.label.slice(2, -2),
}))
}
searchable={true}
showMore={true}
limit={10}
showMoreText="Show more"
showLessText="Show less"
/>
</Panel>
<Panel header="Aired">
<RefinementList attribute="aired" />
</Panel>
</aside>
<main>
<SearchBox />
<div className="searchbox-gap"></div>
<Hits hitComponent={ResultTemplate} />
<Pagination />
</main>
</div>
</InstantSearch>
</>
);
};
export default App;
Let's take a look at the final version of our typesense-integrated Anime search application.
Entire source code of the application can be found here
Join Aviyel’s community to learn more about the open source project, get tips on how to contribute, and join active dev groups. Aviyel is a collaborative platform that assists open source project communities in monetizing and long-term sustainability. To know more visit Aviyel.com and find great blogs and events, just like this one! Sign up now for early access, and don’t forget to follow us on our socials!
Follow @aviyelHQ or sign-up on Aviyel for early access if you are a project maintainer, contributor, or just an Open Source enthusiast.
Join Aviyel's Discord => Aviyel's world
Twitter =>https://twitter.com/AviyelHq
This content originally appeared on DEV Community and was authored by Pramit Marattha
Pramit Marattha | Sciencx (2022-03-31T07:46:10+00:00) Anime search app built using Reactjs and Typesense. Retrieved from https://www.scien.cx/2022/03/31/anime-search-app-built-using-reactjs-and-typesense/
Please log in to upload a file.
There are no updates yet.
Click the Upload button above to add an update.


