This content originally appeared on DEV Community and was authored by Harun R Rayhan
Taking regular backup/snapshots of a production application is important. It is one of the main requirements of a disaster recovery(DR) plan. But snapshots are not only for DR, you can use them to move/clone instances to different regions or availability zone(AZ). Maybe move to a higher spec instance. Or maybe you want to move to Amazon EC2 altogether.
Prerequisites
You just need an existing Amazon Lightsail instance. Don't worry if you don't have one, follow how to Deploy WordPress App to Amazon Lightsail.
Take Snapshot (Backup)
Click on the instance name you want to take a snapshot. All of the instances are listed under the Instances tab of the home page.

-
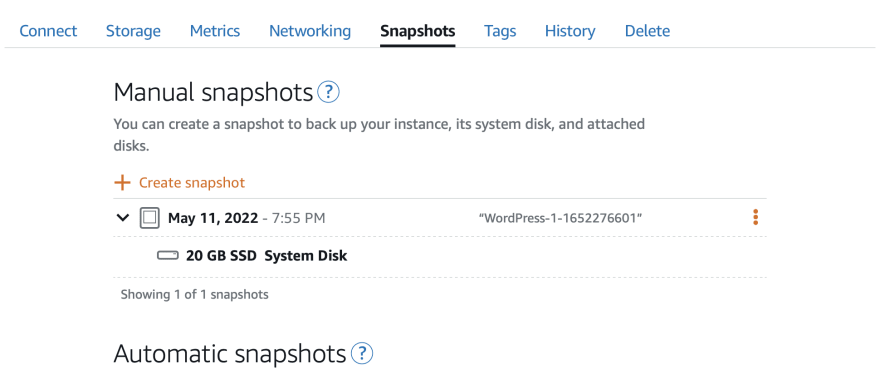
Go to the Snapshots tab of your instance page.

(B) We are going to create a manual snapshot. This one will take a snapshot instantly.
(C) Optionally, you can set up an automatic snapshot too. It will take daily snapshots.⚠️ **For production instance, always set up an automatic snapshot. **
Give it a name and click Create.

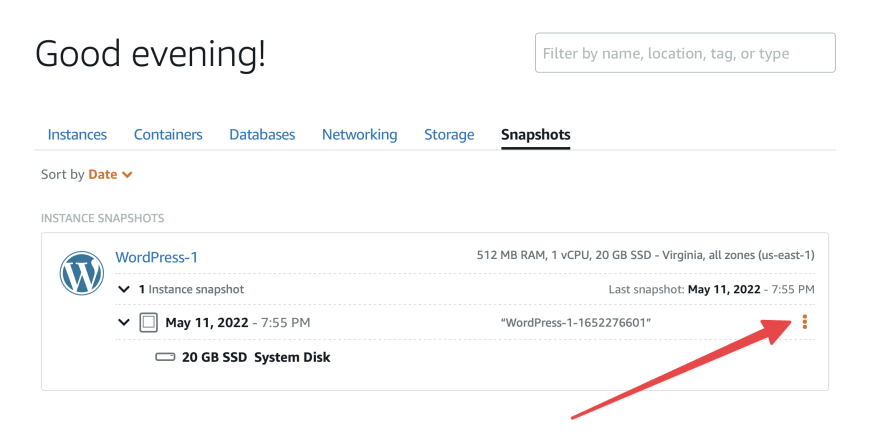
It will take some time if this is the first snapshot of the instance, size is another factor. Subsequent snapshots are faster, as it takes incremental backups, only changes from the last snapshot.You will find all of the snapshots in the Snapshots tab of the homepage. I have just one:

Restore to new Amazon Lightsail instance
-
Click on Create new instance from this menu:

ℹ️ You can click on the second item, Copy to another Region to literally copy to another region and restore to a new instance there. Snapshot stored in an S3 bucket in the same region where the instance launched. You can't access the S3 bucket as it's managed by AWS. To restore a snapshot to a new instance in another region, you have to copy it first.
The page looks familiar, right? It's the same create instance page.

(A) You can change the availability zone(AZ) if you want. It's great if you are using multiple instances for horizontal scaling, gives high availability(HA).
(B) Choose an instance the same size or larger than the source. Choose larger for vertical scaling. If you need a larger instance than you originally have, this is the way.
(C) Give it a name, and
(D) Click the Create instance button from the bottom of the page.
Wait a moment, maybe a few minutes. Congratulations 🎉 you just restored your instance.
...
Copy to another Region
Snapshot stored in an S3 bucket in the same region where the instance launched. You can't access the S3 bucket as it's managed by AWS. To restore a snapshot to a new instance in another region, you have to copy it first. Let's copy it to another region.
Go to the Snapshots tab of the homepage. Find your instance and snapshot. Click the three dots. And then click Copy to another Region:
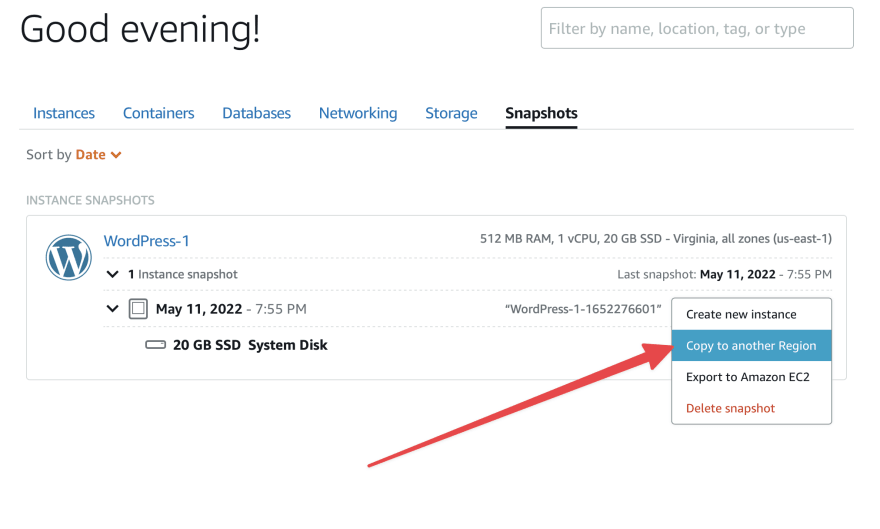
(A) Choose the region you want to copy the snapshot, (B) give it a name, and (C) click the Copy snapshot button from the bottom of the page.

It will take a few minutes to copy the snapshot.
...
Restore/Export to Amazon EC2 instance
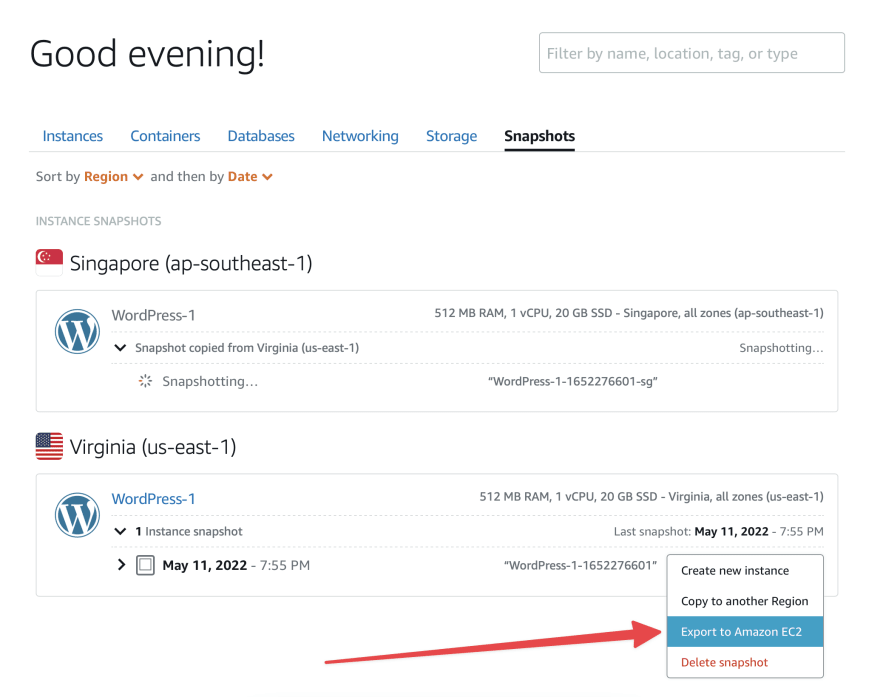
Click three dots from the snapshot menu you want to restore to EC2 and click the Export to Amazon EC2 menu item
-
Click the Yes, continue button in the popup. Click Acknowledge in the next popup.

⚠️ If you are not in the free-tier or cross the free-tier limit, you may get charged for this. If you are not sure, don't do it. Just follow my demo.
You will see a task running like this ↓. Wait for a while to finish. A small snapshot wouldn't take much time.

After the copy task is completed, go to Snapshots of EC2 Management Console. Choose the correct region. You should see your snapshot there.
Select the snapshot and click the Create image from snapshot from the Actions menu

Give the name of the image and click the Create image button from the bottom of the page
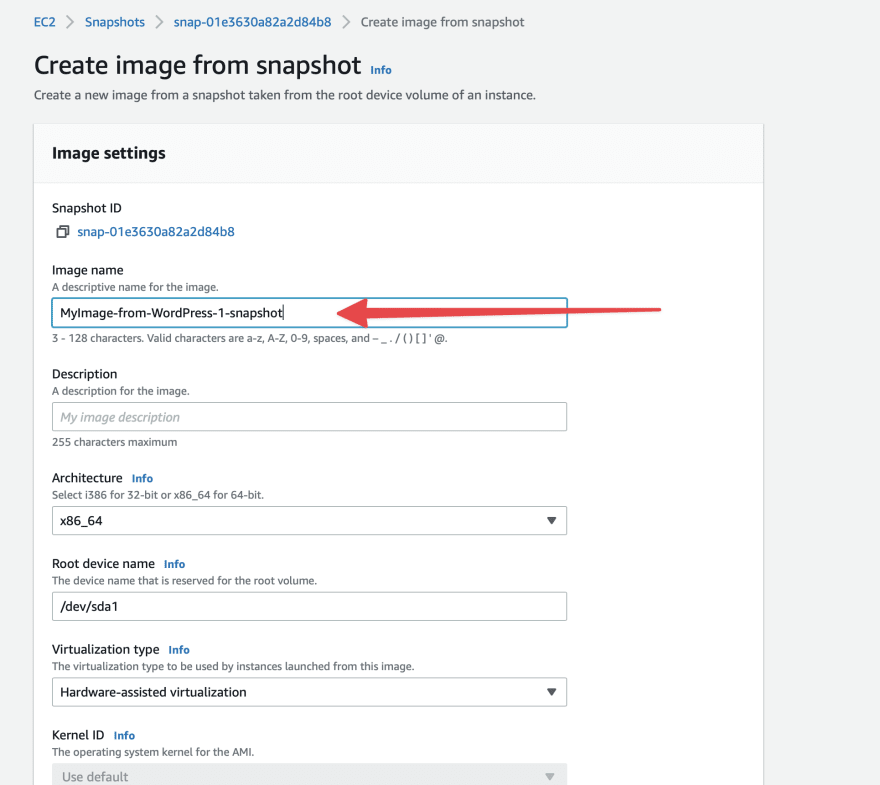
Now go to AMIs page of EC2 Management Console. Choose the correct region, N. Virginia (us-east-1) in my case. You should see all of your AMIs.
Select the AMIs you just created and click the Lunch Instance from AMI button in the top right corner.

You will see a traditional EC2 Lunch page:

(A) Give your instance a name. (B) Choose an instance type, for my case, it's free tier eligible t2.micro. (C) Choose existing key pair or create a new one. You need it to log in via SSH. (D) Check the ports you want to open, in my case I selected all of them.
Now, click the Lunch instance button from the right sidebar. Wait for a while to instance state to become Running and Status check 2/2 checks passed.
- You will see the EC2 Instances page like this:
 Select the instance. Copy the public IP address and try it in the browser. You should see the same page as Amazon Lightsail instance.
ℹ️ Manual snapshots will not be deleted even if you delete the instance. So, don't forget to delete unnecessary snapshots to save bills.
...
Conclusion
Hope you enjoyed this article. Ask your questions in the comment. Subscribe to my newsletter to get weekly updates.
This content originally appeared on DEV Community and was authored by Harun R Rayhan
Harun R Rayhan | Sciencx (2022-05-12T14:31:04+00:00) Snapshot and Restore of Lightsail Instance to Lightsail/EC2. Retrieved from https://www.scien.cx/2022/05/12/snapshot-and-restore-of-lightsail-instance-to-lightsail-ec2/
Please log in to upload a file.
There are no updates yet.
Click the Upload button above to add an update.

