This content originally appeared on DEV Community and was authored by Vedant Chainani
What are Smart Contracts?
Smart contracts are simply programs stored on a blockchain that run when predetermined conditions are met. They typically are used to automate the execution of an agreement so that all participants can be immediately certain of the outcome, without any intermediary’s involvement or time loss. They can also automate a workflow, triggering the next action when conditions are met.
Things you need to build and deploy your first Smart Contract
- Motivation
- You need to have your IDE (Integrated Development Environment). I would be using Remix (Online Ethereum IDE).
Step 1 - Solidity IDE - Remix
The fastest way to run a solidity smart contract is by using an online Solidity IDE like Remix (recommended).
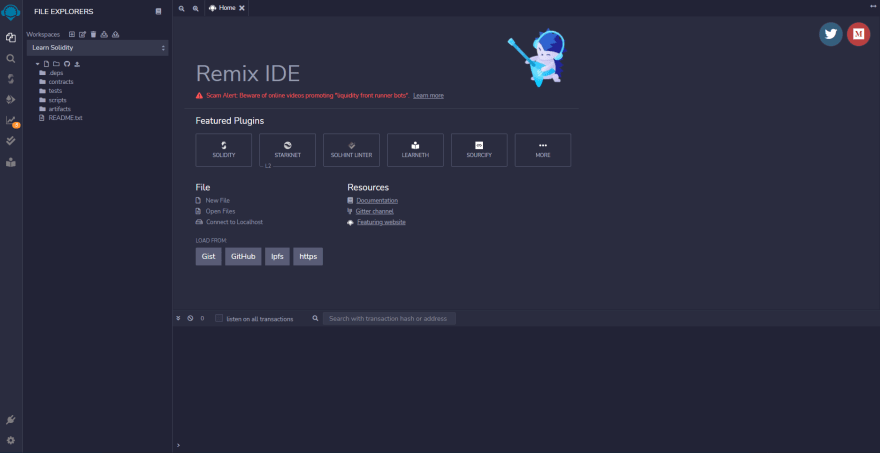
The Remix IDE is a powerful, open source Solidity IDE that allows us to quickly write, compile, and deploy smart contracts directly from the web browser.
Visit remix.ethereum.org to launch the Remix IDE on your browser.
Step 2 - Creating a Solidity Source File
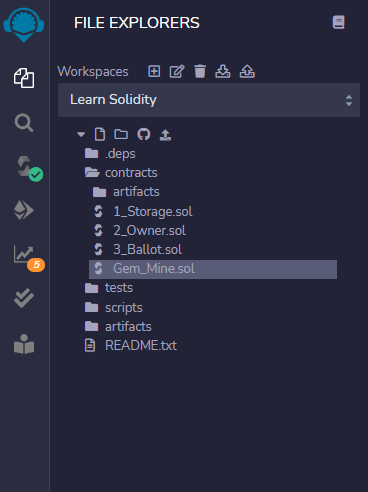
Next, locate the contracts folder under the "File Explorers" section and create a new Gem_Mine.sol file inside like this:
Step 3 - Writing the Smart Contract
In this step, we're going to write a Gem_Mine smart contract that will store location data for the Mines.
Copy and paste the code below inside of your Gem_Mine file:
// SPDX-License-Identifier: MIT

pragma solidity ^0.8.7;

contract GemMine {
    function checkStatus() public pure returns (string memory) {
        return "Mine is Working With 100% Accuracy";
    }

    mapping(uint256 => Mine) mines;
    uint256 public counter = 0;

    struct Mine {
        uint256 id;
        string location;
    }

    function addMine(string memory location) public {
        counter += 1;
        mines[counter] = Mine(counter, location);
    }

    function getLocation(uint256 id) public view returns (uint256 mineID, string memory location) {
        return (mines[id].id, mines[id].location);
    }
}
1. Solidity Smart Contract License
Every developer is encouraged to add a machine readable license at the top of their Solidity Source file, as shown below:
// SPDX-License-Identifier: MIT
The MIT license is similar to the license you'll find on GitHub. You can add the UNLICENSED value if you don't want to specify a license on your Solidity source file, but this should not be left blank.
You can check out the complete list of Solidity Licenses supported by SPDX here.
2. Solidity Pragma
pragma solidity ^0.8.7;
In Solidity the pragma keyword is used to configure compiler features and checks.
The first line is a pragma directive which tells that the source code is written for which Solidity version.
3. Solidity Contract
A contract is a collection of states and functions that is deployed on the blockchain at a specified address.
contract GemMine {
    ...
}
4. Solidity Function
In programming, a function is a block of code that performs a task. They’re code components that have been encapsulated into a single object.
function checkStatus() public pure returns (string memory) {
        return "Mine is Working With 100% Accuracy";
    }
Solidity function breakdown:
-
checkStatus()is the name of the function. -
publicis the visiblity of the function which indicates that the function is accessible by other contracts. -
pureis the function’s modifier which indicates that the function does not modify any state. -
returnsis the function’s return type which indicates the data types returned by the function. -
stringkeyword specifies the data type of the returned value. -
memorykeyword means that the variables of the function will be stored in a temporary place while the function is being called.
5. Mapping and Variables in Solidity
Mapping in Solidity acts like a hash table or dictionary in any other language. These are used to store the data in the form of key-value pairs, a key can be any of the built-in data types but reference types are not allowed while the value can be of any type.
mapping(uint256 => Mine) mines;
Syntax -
mapping(key => value) <access specifier> <name>;
uint256 public counter = 0;
Here we declare a unsigned 256 bit integer variable called counter and initialize it to 0.
more on Variables here
6. Solidity Struct
Solidity allows user to create their own data type in the form of structure. The struct contains a group of elements with a different data type. Generally, it is used to represent a record. To define a structure struct keyword is used, which creates a new data type.
struct Mine {
        uint256 id;
        string location;
    }
Here we create a struct called Mine which contains two fields, id and location.
id - is a unsigned 256 bit integer variable to store ID of the Mine.
location - is a string variable to store location of the Mine.
Step 4 - Compiling the Smart Contract
Remix IDE allows us to compile our Solidity smart contracts directly from our browser.
- Ensure to save your source file with CTRL + S.
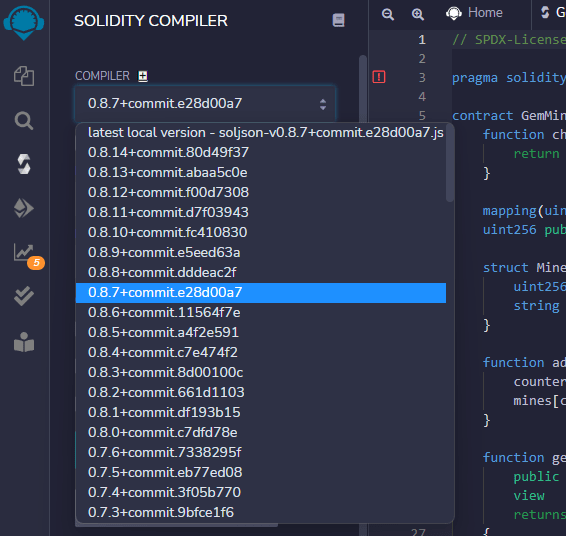
- If you notice a red flag on the pragma directive like this:
It means that the Remix IDE compiler is not set to the specified Solidity version in our source code.
To fix this, click on the Solidity compiler icon and select the Solidity version you're using for your smart contract:
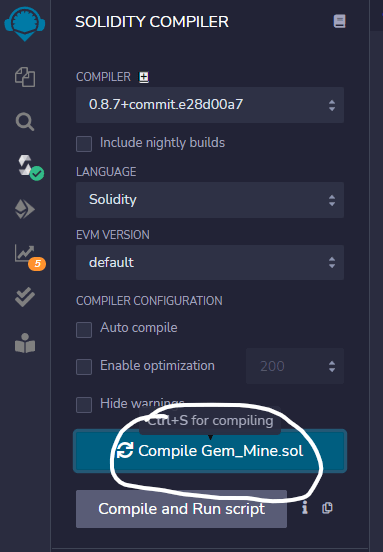
Finally, save your source file with CTRL + S and click on the compile button. Your Solidity compiler icon should change to green as shown below:
Step 5 - Deploying the Smart Contract
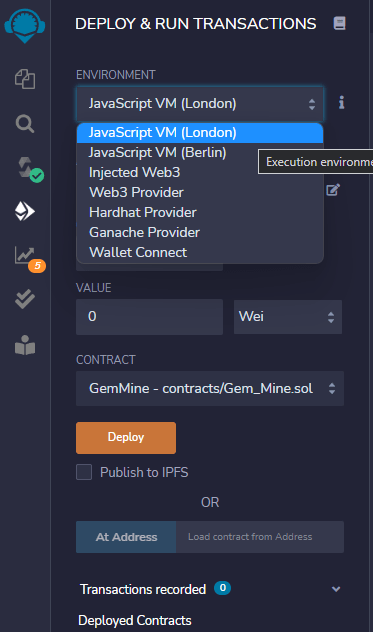
It's time to deploy our smart contract. Click on the "Deploy & Run Transaction" button from the sidebar.
First, select a JavaScript Virtual Machine Environment (we'll be using the JavaScript London VM for this Solidity tutorial).
You can read more about the Remix IDE Virtual Machine Environment here.
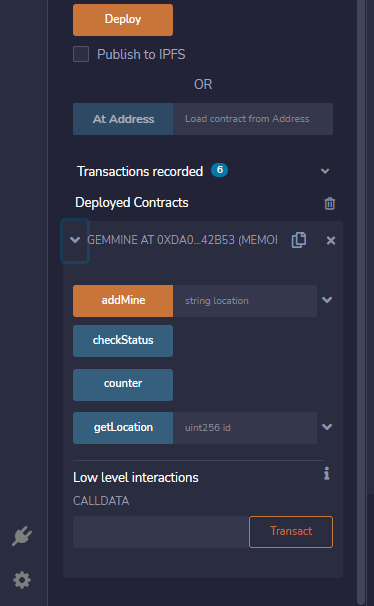
Next, leave the other default options as they are, and click on the "deploy" button
If the deploy was successful, you'll see our smart contract name under the Deployed Contracts section, which is located under the "deploy" button
The getter function is automatically generated for all state variables by the Remix IDE.
Step 6 - Interacting with the Smart Contract
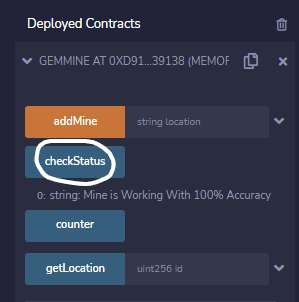
Our first interaction with the smart contract is to call the checkStatus function and see if it returns the expected value.
Click on the checkStatus button:
The Mine is Working With 100% Accuracy
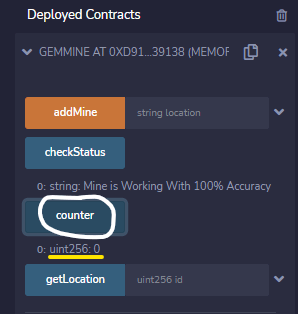
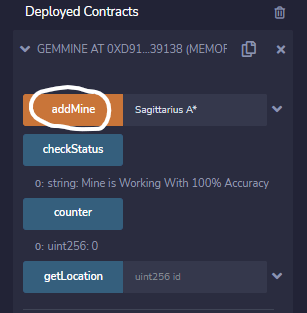
Now Click on the counter button which should return its default initial value of 0.
In this step we'll check our addMine function.
- Fill the
addMineinput box with location of the mine in this caseSagittarius A* - Next click on the
addMinebutton to run the function.
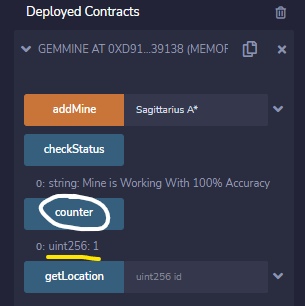
Now click on the counter button which should now return 1 as we have added one mine.
Now let's test the getLocation function.
- Fill the
getLocationinput box with the ID of the mine in this case1 - Click on the
getLocationbutton to run the function. - The function should return two outputs, the ID of the mine and the location of the mine.
It's Done 🥂
Congratulations on completing this Solidity tutorial! We've learned how to use the Remix IDE to write, deploy, and interact with our first smart contract.
This content originally appeared on DEV Community and was authored by Vedant Chainani
Vedant Chainani | Sciencx (2022-06-03T15:01:24+00:00) ♦️ Build Your First Smart Contract using Solidity. Retrieved from https://www.scien.cx/2022/06/03/%e2%99%a6%ef%b8%8f-build-your-first-smart-contract-using-solidity/
Please log in to upload a file.
There are no updates yet.
Click the Upload button above to add an update.


