This content originally appeared on Telerik Blogs and was authored by Peter Vogel
When you create a user profile to be used in load testing, you may want to tweak it. Test Studio provides two editors for you to enhance your load tests.
As part of creating a load test, you’re going to create one or more user profiles. After you create each user profile, you’ll be presented with two dialogs—Dynamic Targets and Edit User Profile—that you can use to tweak your load test.
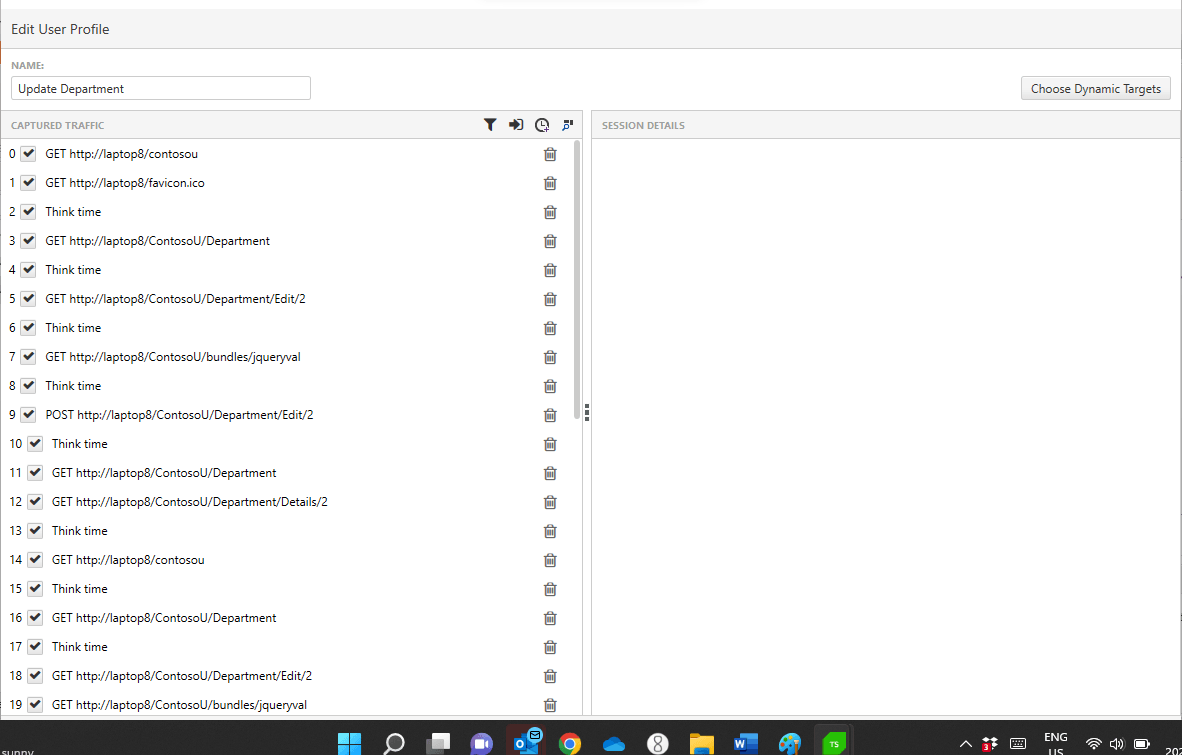
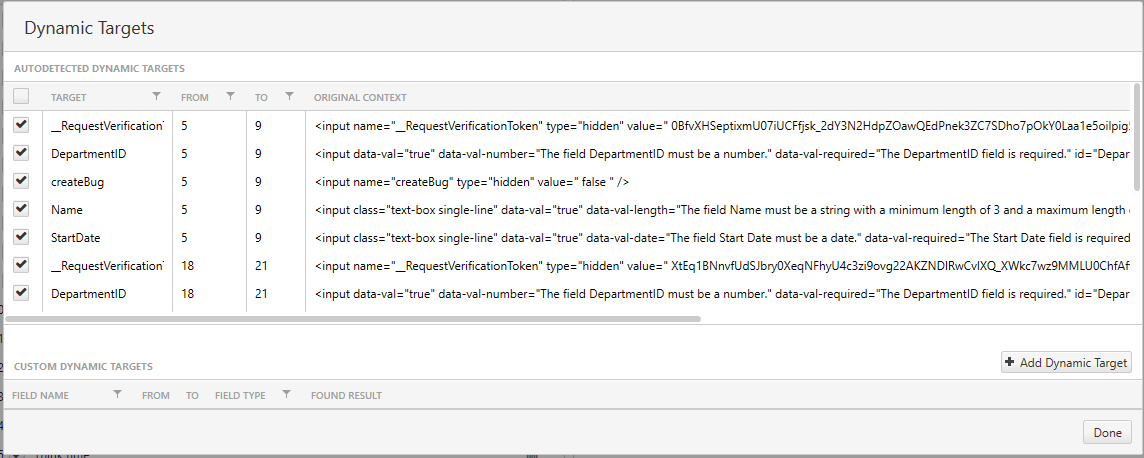
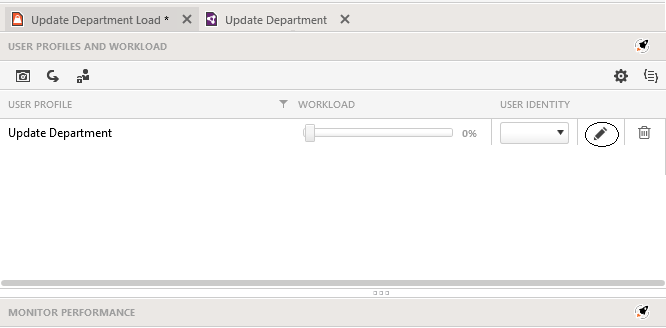
You can return to these dialogs from Test Studio’s User Profile pane by clicking the edit/pencil button for the profile you want to tweak.
There are several kinds changes you may want to make to your user profile using the Edit User Profile dialog.
Introducing ‘Think Time’
Test Studio includes “think time” steps in your user profiles that reflect the time that a user will take between interactions with your application.
If you created your user profile by having Test Studio record your interactions with your application, then the user profile will include “think time” steps that reflect the time you took between GETs and POSTs while recording your profile. On the other hand, if you used an existing test script to create your user profile, Test Studio will insert “think time” steps into your user profile where it seems appropriate. Finally, if you’ve imported a Fiddler trace, Test Studio will use the timestamps on the HTTP requests to set “think time” steps.

You should review those automatically generated “think time” steps to make sure there are enough, that they’re in the right place, and that their durations are appropriate (you’re probably much faster at using the application than a new user will be, for example, so think times from your recording may not match the actual load on your application).
Each “think time” step not only has a duration but a deviation time that will be used during testing to vary the length of these pauses. You should make sure that these deviations are also reasonable (i.e., do they reflect the variation between an experienced user who will race through the page and a new user who will take more time?).
You can add a new “think time” step by clicking on the clock icon at the top of the list of steps in the Edit User Profile dialog

Global Changes (Particularly Domains)
The Edit User Profile dialog also includes a find-and-replace option in the upper-right corner (the magnifying glass). Find-and-replace can obviously be used to handle a variety of changes. What makes this feature especially useful is that it lets you record your user profile against one version of your application (running on, for example, the development server) and then run your test against another version of your application (a new deployment or the production version of the application). You can use find-and-replace to update the URLs the profile uses.
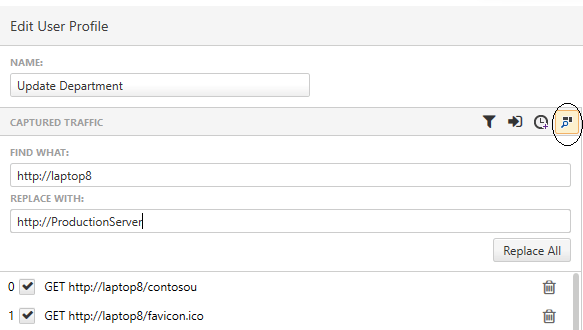
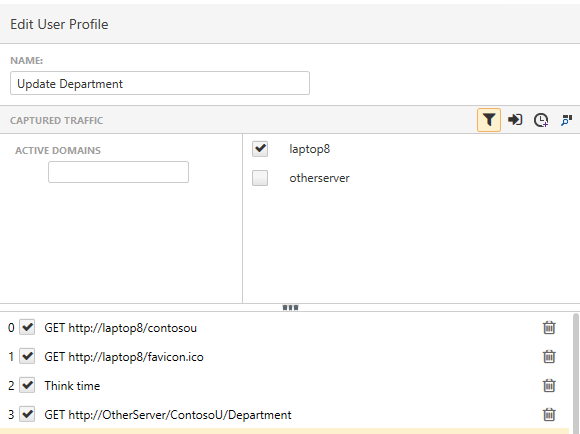
If you’ve imported a test script or a Fiddler trace that wasn’t initially created to support your load test, the resulting user profile may include steps that you don’t need. If those steps are targeting a different domain, a quick way to get rid of them is to use the filter icon to the left of the find-and-replace icon to get a list of all the domains in your user profile and uncheck those domains you don’t want accessed in the test.
Cookies, Headers, Content
Part of the interaction between your browser and your server will include material that’s invisible to the user, including sending headers and hidden fields to the server. As part of interacting with your application, Test Studio’s recorder will have captured that information and will resend them during your test.
However, that may not work out when your load test executes your tests multiple times while impersonating multiple users—all your interactions will look alike, which may not be realistic. If you need to modify your GETs and POSTs, click on any step in your user profile to display the request that is sent to the server in that step. You can modify any of the displayed fields in the request to meet the needs of your test.
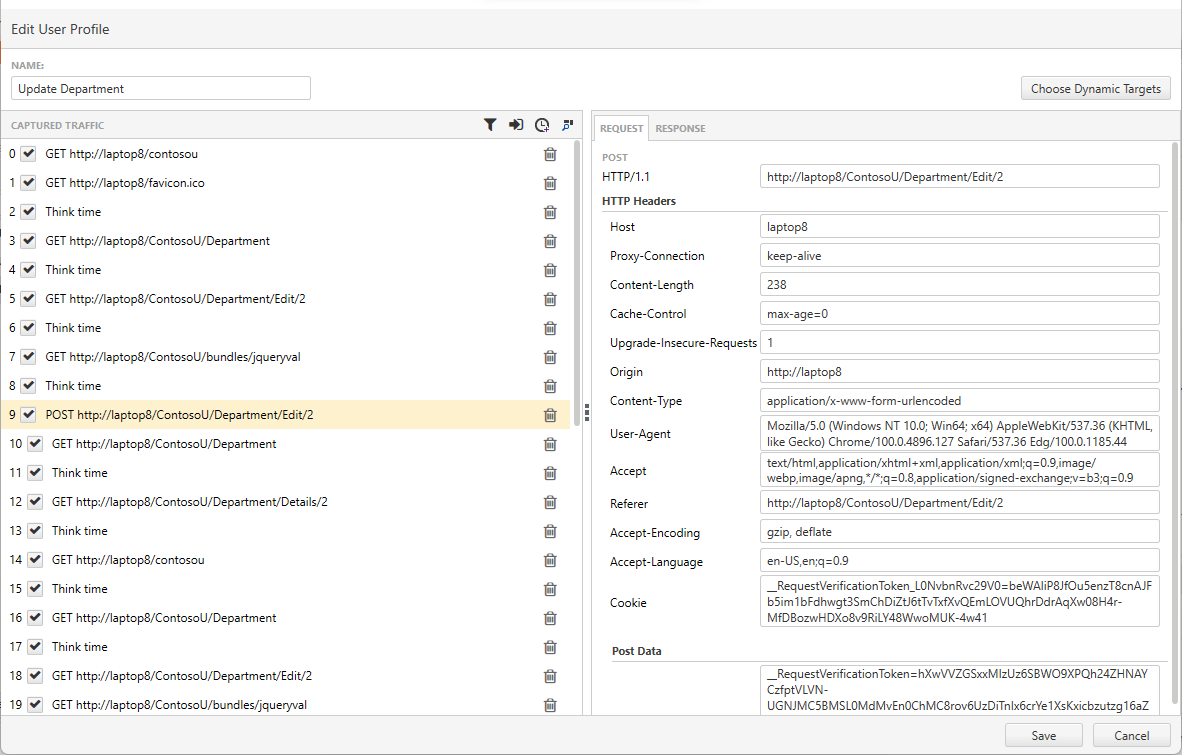
Cookies are another example where you might need to tweak your user profile. For example, in the real world, a returning user may have accepted some cookies from the site on an earlier visit. If you started your test from that a browser that doesn’t have those cookies, then those cookies won’t be part of your test. To successfully impersonate that returning user, you may need to add those cookies to your user profile.
To add a cookie, first click on the Add cookie button at the top of the Edit User profile dialog
That will add a new border down the left side of your user profile’s steps.
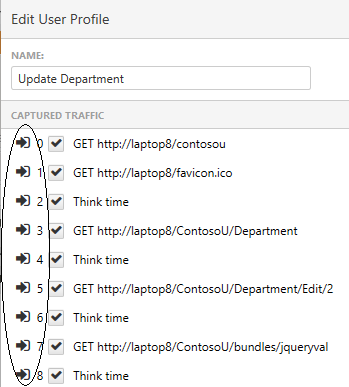
Pick the step where you want the cookie to be used and click on the button in the margin. That will add a new step above the step you selected where you can add the cookie your profile needs.

Dynamic Targets
It’s not unusual for an application to generate values on the server, send them to the browser, and then expect those values to be returned to the server in a subsequent step. As an example, ASP.NET generates a session identifier that it uses to distinguish between different users and to tie together the requests from a single user. Another example is hidden fields in HTML forms that contain values used by the server to identify specific transactions (for example, updates to a sales order whose unique ID is not displayed to the user will probably include a hidden field with the sales order ID).
These values are special because many of them are dynamic—they vary from one request to another. What’s essential with these values is that whatever value is sent by the server in one step must be returned to the server in a later step. Test Studio automatically detects these dynamic values wherever it finds them (e.g., in querystrings, headers, response payloads, etc.) and displays those values to you in the Dynamic Targets dialog (you can get to the Dynamic Targets dialog by clicking the Choose Dynamic Targets button in the upper right corner of the Edit User Profile dialog).
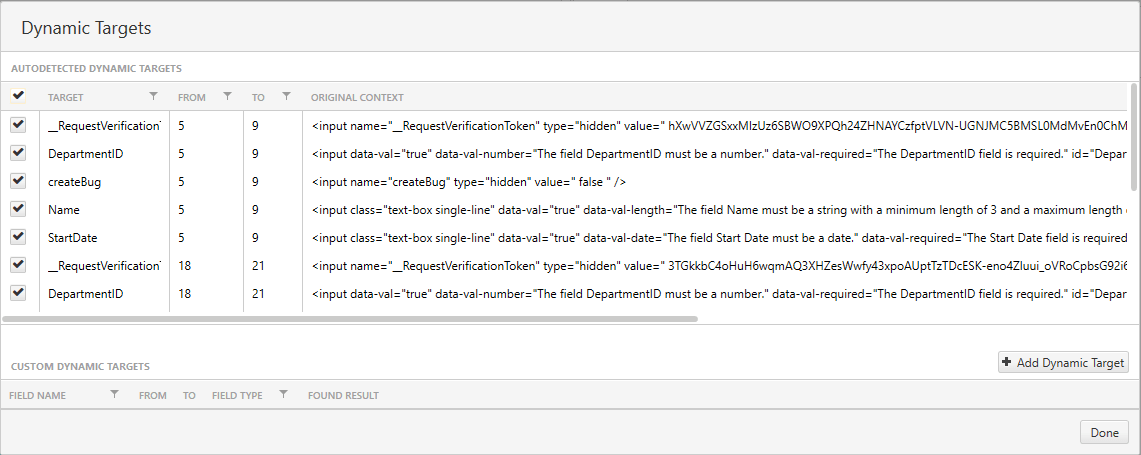
This list displays all the values, the number of the step where they’re received by the browser and the number of the step where they’re returned to the server. By default, none of the dynamic targets are checked which means, when the test runs, the values found when the user profile was recorded will be used.
However, you probably don’t want the values that you recorded used during your test: You want the values generated by the server while the test is executing. The best way to deal with these, then, is to enable them all by clicking the checkbox list at the top right of the dialog—that causes your test to use the values generated at test time. You should only unselect those targets where you want the test to always use the values found when the user profile was recorded.
If you know of some value that Test Studio didn’t find in its analysis, you can add it yourself. For example, you might look at the interaction between your browser and server as displayed in the User Profile (or as captured by Fiddler) and see a custom HTTP header that holds a transaction id sent by the server to your browser. Later in the list of interactions, you find that transaction id being returned to the server from your browser. Obviously, your script will need to capture that value when it’s sent to the browser and return it.
Clicking on the Choose Dynamic Targets button in the upper right of the Edit User Profile dialog will let you define and add a new Dynamic Target that will capture and return that transaction id (Dynamic Target’s Search facility can be helpful here). Here’s a walkthrough that shows how to add a custom Dynamic Target. And you’re not limited to values in headers—the Dynamic Targets dialog handles an enormous variety of potential targets.
When you need some additional support in getting the load test you want, these two dialogs should be your first stop.
This content originally appeared on Telerik Blogs and was authored by Peter Vogel
Peter Vogel | Sciencx (2022-06-08T08:04:01+00:00) Modifying Your Load Test User Profile. Retrieved from https://www.scien.cx/2022/06/08/modifying-your-load-test-user-profile/
Please log in to upload a file.
There are no updates yet.
Click the Upload button above to add an update.
