This content originally appeared on Telerik Blogs and was authored by Maria Hadzhieva
I have the honor of announcing the latest addition to the Telerik UI for WPF suite—the RadVirtualKeyboard control. Born with the R2 2022 release, it is designed to allow users to enter characters without a physical device and interact with it via the mouse or a touch device.
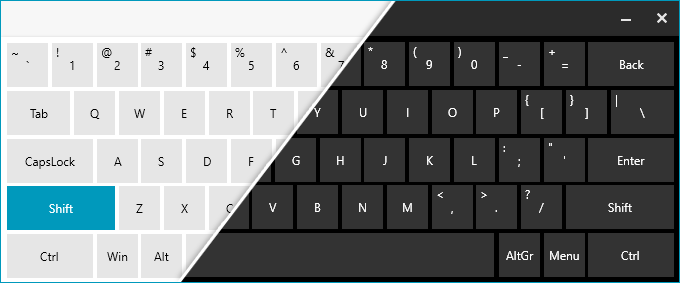
Sounds promising, doesn’t it? Let’s check it out together.
The Purpose of a Virtual Keyboard
Virtual keyboards come with numerous advantages. One of my personal favorites is that users can type directly in their language on foreign language keyboards. They are also extremely useful for disabled users as they can use the mouse to type. Don’t need to even mention that such keyboards can increase user security, right?
Getting Started
Equipping yourself with the RadVirtualKeyboard is an easy task once you have a WPF project set up. What you need is a RadVirtualKeyboard tag in XAML and references to the Telerik.Controls.dll, Telerik.Windows.Data.dll and Telerik.Controls.Navigation.dll. Check it out:
<telerik:RadVirtualKeyboard /> 
Key Features
Ready to learn all the marvelous features of the RadVirtualKeyboard control? Then go on with this section.
Layout
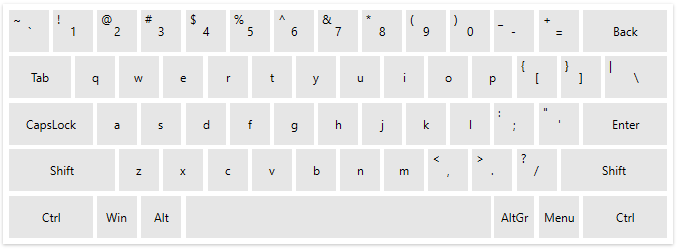
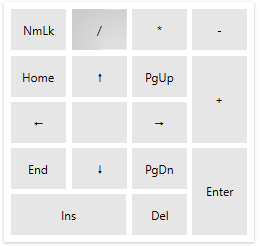
The control has three built-in layouts which can be controlled through the DefaultKeyboardLayout property:
- Extended – a standard keyboard, like a standard physical keyboard, with numpad and F1–F12 keys, etc.

- Compact – a keyboard without a numpad and other keys
- Numpad – shows only the numpad keys
Need a custom layout? Do not worry. You can create one with a special XML file and then load it using the LoadLayout method of the virtual keyboard. More info on that, guess where—in the Telerik UI for WPF documentation.
Language Culture Support
The default language of the letter buttons in the RadVirtualKeayboard is determined by the selected input language of the OS. Changing that language runtime will not affect the text in the letter buttons. The SynchronizeCultureWithSystem property comes to the rescue here. Just set it to True and the current input language tracking will be enabled—the text will update when the language changes at runtime.
The current language of the letters can also be changed manually by setting the Culture property of the control. Let me show you how easy it is to show our beautiful Bulgarian letters on these keys. ⌨️
virtualKeyboard.Culture = new System.Globalization.CultureInfo("bg-BG");
Using Sound
Guess what? This keyboard has a click sound on key press! If you don’t like it, simply set IsKeyPressSoundEnabled property to false. Or change it through the KeySoundPlayer. I will now show you how this works:
StreamResourceInfo info = Application.GetResourceStream(new Uri(@"/WpfApplication;component/myClickSoundFile.wav", UriKind.Relative));
virtualKeyboard.KeySoundPlayer = new DefaultKeySoundPlayer(info.Stream);
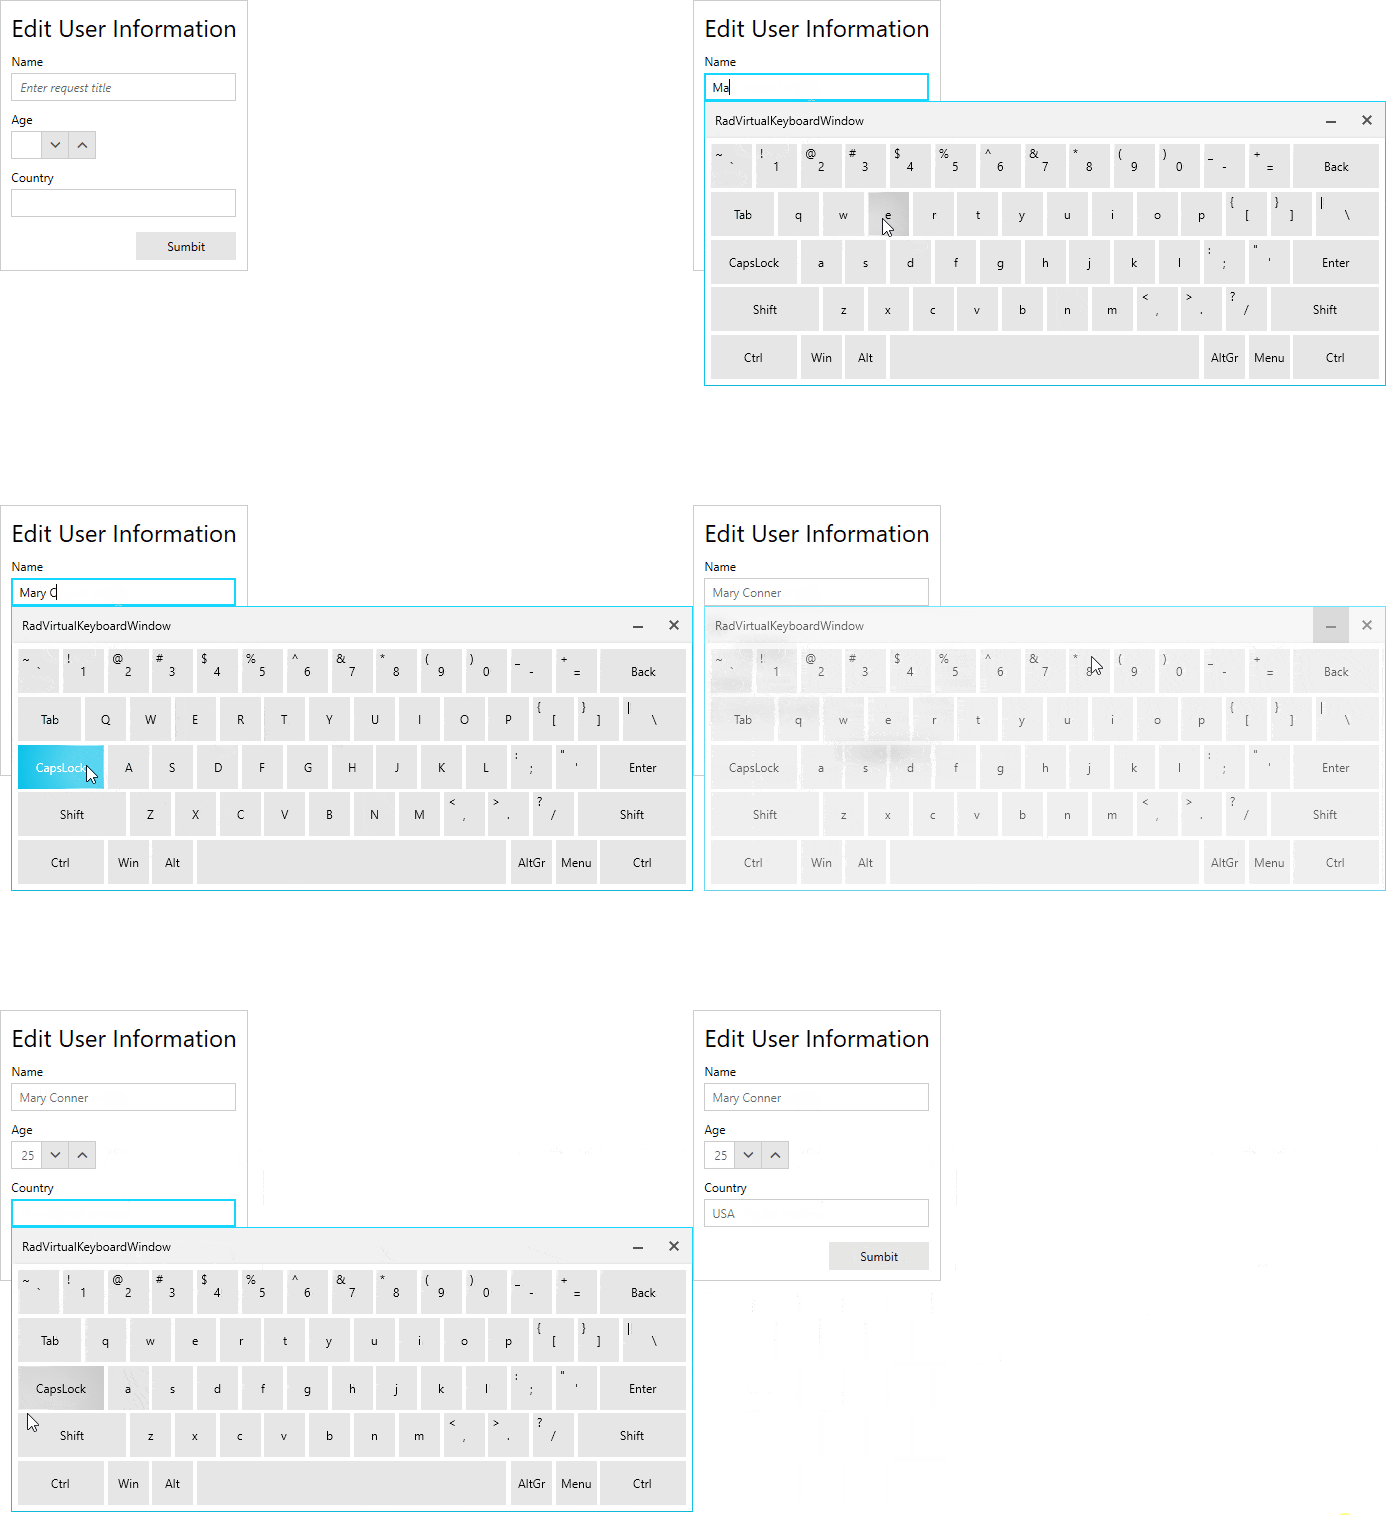
Keyboard Window
Another cool thing about the RadVirtualKeyboard is its special window which is styled according to the keyboard design:
var keyboardWindow = new RadVirtualKeyboardWindow(new RadVirtualKeyboard() { DefaultKeyboardLayout = DefaultKeyboardLayout.Compact});
keyboardWindow.Show(); 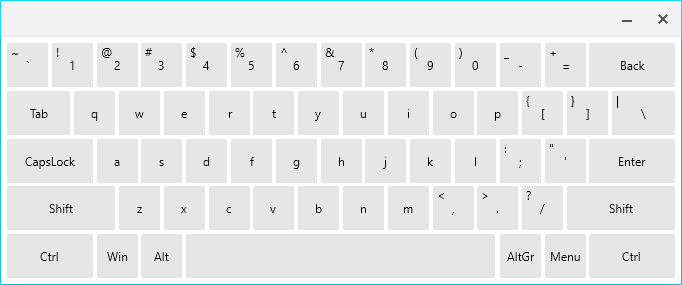
Customization
You think the default look of the component is too standard? Well, the keyboard buttons can be customized using the VirtualKeayboardTemplateSelector property of the control. Let us have some fun together and make that keyboard off-beat!
<ResourceDictionary>
<ResourceDictionary.MergedDictionaries>
<ResourceDictionary Source="/Telerik.Windows.Themes.Crystal;component/Themes/System.Windows.xaml"/>
<ResourceDictionary Source="/Telerik.Windows.Themes.Crystal;component/Themes/Telerik.Windows.Controls.xaml"/>
<ResourceDictionary Source="/Telerik.Windows.Themes.Crystal;component/Themes/Telerik.Windows.Controls.Input.xaml"/>
<ResourceDictionary Source="/Telerik.Windows.Themes.Crystal;component/Themes/Telerik.Windows.Controls.Navigation.xaml"/>
</ResourceDictionary.MergedDictionaries>

<Style x:Key="KeyButtonStyle" TargetType="telerik:RadButton" BasedOn="{StaticResource RadButtonStyle}">
<Setter Property="Padding" Value="4"/>
<Setter Property="FontSize" Value="11"/>
<Setter Property="Focusable" Value="False"/>
<Setter Property="Foreground" Value="#4b6159"/>
<Setter Property="CornerRadius" Value="20"/>
<Setter Property="MinWidth" Value="0"/>
</Style>

<DataTemplate x:Key="RegularKeyTemplate">
<telerik:RadButton Command="{Binding KeyCommand}" AutomationProperties.AutomationId="{Binding DisplayText}" Style="{StaticResource KeyButtonStyle}" VerticalContentAlignment="Stretch" HorizontalContentAlignment="Stretch">
<Grid>
<Grid.RowDefinitions>
<RowDefinition/>
<RowDefinition/>
</Grid.RowDefinitions>
<Grid.ColumnDefinitions>
<ColumnDefinition/>
<ColumnDefinition/>
</Grid.ColumnDefinitions>
<TextBlock Text="{Binding ShiftText}" Margin="3 0 0 0" Grid.Row="0"  Grid.Column="0" Visibility="{Binding ShowSecondaryText, Converter={StaticResource BooleanToVisibilityConverter}}"/>
<TextBlock Text="{Binding DisplayText}" Grid.RowSpan="2" Grid.ColumnSpan="2" HorizontalAlignment="Center" VerticalAlignment="Center"/>
</Grid>
</telerik:RadButton>
</DataTemplate>
<DataTemplate x:Key="SpecialKeyTemplate">
<telerik:RadButton Content="{Binding DisplayText}" Command="{Binding KeyCommand}" AutomationProperties.AutomationId="{Binding DisplayText}" Style="{StaticResource KeyButtonStyle}" Background="#ffdac1" MinWidth="40" />
</DataTemplate>
<DataTemplate x:Key="NumpadKeyTemplate">
<telerik:RadButton Content="{Binding DisplayText}" Command="{Binding KeyCommand}" AutomationProperties.AutomationId="{Binding DisplayText}" Style="{StaticResource KeyButtonStyle}"/>
</DataTemplate>
<DataTemplate x:Key="LockKeyTemplate">
<telerik:RadToggleButton Foreground="#4b6159" Content="{Binding DisplayText}" Command="{Binding KeyCommand}" IsChecked="{Binding IsChecked}" Background="#b5ead7"
 AutomationProperties.AutomationId="{Binding DisplayText}" Focusable="False" FontSize="{Binding FontSize, RelativeSource={RelativeSource AncestorType={x:Type telerikNavigation:RadVirtualKeyboard}}}"
 Padding="0" helpers:ThemeHelper.CornerRadius="30" helpers:ThemeHelper.FocusVisualMargin="0"/>
</DataTemplate>
<telerikNavigation:VirtualKeyboardTemplateSelector x:Key="VirtualKeyboardTemplateSelector"
RegularTemplate="{StaticResource RegularKeyTemplate}"
SpecialTemplate="{StaticResource SpecialKeyTemplate}"
NumpadTemplate="{StaticResource NumpadKeyTemplate}"
LockTemplate="{StaticResource LockKeyTemplate}" />
</ResourceDictionary>
<telerik:RadVirtualKeyboard VirtualKeyboardTemplateSelector="{StaticResource VirtualKeyboardTemplateSelector}"/>
Let’s check it out:

And that is not all. The customization of the control can be brought to the next level by extending the control’s view models and additional properties which can be used in the DataTemplates of the VirtualKeyboardTemplateSelector. I believe you can and will, just know that a custom keys factory class needs to be implemented to use the extended view models. Now I will demonstrate to you how to add properties for the background and foreground of the buttons.
We need to create a custom key view model to include background and foreground information:
public class CustomLockKeyViewModel : LockKeyViewModel
    {
        public CustomLockKeyViewModel(int virtualKey, double keyWidth, double keyHeight, string displayText)
            : base(virtualKey, keyWidth, keyHeight, displayText)
        {
        }
        public Brush Background { get; set; }
        public Brush Foreground { get; set; }
    }

    public class CustomModifierKeyViewModel : ModifierKeyViewModel
    {
        public CustomModifierKeyViewModel(int virtualKey, double keyWidth, double keyHeight, string displayText)
            : base(virtualKey, keyWidth, keyHeight, displayText)
        {
        }
        public Brush Background { get; set; }
        public Brush Foreground { get; set; }
    }

    public class CustomRegularKeyViewModel : RegularKeyViewModel
    {
        public CustomRegularKeyViewModel(int virtualKey, double keyWidth, double keyHeight, bool showSecondaryText, string displayText = null)
            : base(virtualKey, keyWidth, keyHeight, showSecondaryText, displayText)
        {
        }
        public Brush Background { get; set; }
        public Brush Foreground { get; set; }
    }
    public class CustomSpecialKeyViewModel : SpecialKeyViewModel
    {
        public CustomSpecialKeyViewModel(int virtualKey, double keyWidth, double keyHeight, string displayText)
            : base(virtualKey, keyWidth, keyHeight, displayText)
        {
        }
        public Brush Background { get; set; }
        public Brush Foreground { get; set; }
    }
The next step is creating a key factory:
public class CustomKeyFactory : DefaultKeyFactory
{
    private static readonly List<int> specialColorKeyCodes = new List<int>()
    {
        8, 20, /*CapsLock*/ 9,  /*tilde*/ 160,
        /*Backspace*/ 226, 162, /*Ctrl*/
        91, /*Win*/ 164, /*Alt*/ 165, /*AltGr*/ 93, /*Menu*/
        163,  /*Ctrl*/ 45, /*Backspace*/ 226, 192
    };
    public Brush DefaultBrush { get; set; }
    public Brush EnterBrush { get; set; }
    public Brush SpaceBrush { get; set; }
    public Brush SpecialBrush { get; set; }
    public Brush ShiftBrush { get; set; }
    public Brush DefaultForeground { get; set; }

    public CustomKeyFactory()
    {
        DefaultBrush = new SolidColorBrush((Color)ColorConverter.ConvertFromString("#FCFCFC"));
        EnterBrush = new SolidColorBrush((Color)ColorConverter.ConvertFromString("#F2E50B"));
        SpaceBrush = new SolidColorBrush((Color)ColorConverter.ConvertFromString("#FF7F50"));
        SpecialBrush = new SolidColorBrush((Color)ColorConverter.ConvertFromString("#21B20C"));
        ShiftBrush = new SolidColorBrush((Color)ColorConverter.ConvertFromString("#17DEEE"));
        DefaultForeground = new SolidColorBrush((Color)ColorConverter.ConvertFromString("#333333"));
    }
    public override BaseKeyViewModel CreateKey(int virtualKey, KeyType keyType = KeyType.Normal, string displayText = null, double width = 1, double height = 1, int alternateVirtualKey = -1, string alternateText = null, bool showSecondaryText = false)
    {
        var keyModel = CreateCustomKey(virtualKey, keyType, displayText, width, height, alternateVirtualKey, alternateText, showSecondaryText);

        if (virtualKey == 13) // Enter
        {
            SetCustomViewModelProperty(keyModel, "Background", EnterBrush);
            SetCustomViewModelProperty(keyModel, "Foreground", Brushes.Black);
        }
        if (virtualKey == 13) // Enter
        {
            SetCustomViewModelProperty(keyModel, "Background", EnterBrush);
            SetCustomViewModelProperty(keyModel, "Foreground", Brushes.Black);
        }
        else if (virtualKey == 32) // Space
        {
            SetCustomViewModelProperty(keyModel, "Background", SpaceBrush);
        }
        else if (virtualKey == 160 || virtualKey == 161) // Shift
        {
            SetCustomViewModelProperty(keyModel, "Background", ShiftBrush);
        }
        else if (specialColorKeyCodes.Contains(virtualKey))
        {
            SetCustomViewModelProperty(keyModel, "Background", SpecialBrush);
            SetCustomViewModelProperty(keyModel, "Foreground", Brushes.White);
        }
        return keyModel;
    }

    private BaseKeyViewModel CreateCustomKey(int virtualKey, KeyType keyType, string displayText, double width, double height, int alternateVirtualKey, string alternateText, bool showSecondaryText)
    {
        switch (keyType)
        {
            case KeyType.Normal:
                return new CustomRegularKeyViewModel(virtualKey, width, height, showSecondaryText, displayText) { Background = DefaultBrush, Foreground = DefaultForeground };
            case KeyType.Special:
                return new CustomSpecialKeyViewModel(virtualKey, width, height, displayText) { Background = DefaultBrush, Foreground = DefaultForeground };
            case KeyType.Modifier:
                return new CustomLockKeyViewModel(virtualKey, width, height, displayText) { Background = DefaultBrush, Foreground = DefaultForeground };
            case KeyType.Lock:
                return new CustomLockKeyViewModel(virtualKey, width, height, displayText) { Background = DefaultBrush, Foreground = DefaultForeground };
            case KeyType.Numpad:
                return new NumpadKeyViewModel(virtualKey, width, height, displayText, alternateVirtualKey, alternateText);
            default:
                throw new ArgumentException("Unknown key type");
        }
    }

    private static void SetCustomViewModelProperty(BaseKeyViewModel viewModel, string propertyName, object value)
    {
        var propertyInfo = viewModel.GetType().GetProperty(propertyName);
        if (propertyInfo != null)
        {
            propertyInfo.SetValue(viewModel, value);
        }
    }
}
Now we will define the key template selector:
And the last step is setting the custom key factory and the template selector:
<telerik:RadVirtualKeyboard VirtualKeyboardTemplateSelector="{StaticResource KeyTemplateSelector}" DefaultKeyboardLayout="Compact" Width="675" Height="240"> <telerik:RadVirtualKeyboard.KeyFactory> <local:CustomKeyFactory /> </telerik:RadVirtualKeyboard.KeyFactory> </telerik:RadVirtualKeyboard>
<telerik:VirtualKeyboardTemplateSelector x:Key="KeyTemplateSelector">
   <telerik:VirtualKeyboardTemplateSelector.RegularTemplate>
       <DataTemplate>
           <telerik:RadButton Command="{Binding KeyCommand}" VerticalContentAlignment="Stretch" HorizontalContentAlignment="Stretch" Padding="0" Background="{Binding Background}" Foreground="{Binding Foreground}">
               <Grid>
                   <Grid.RowDefinitions>
                       <RowDefinition/>
                       <RowDefinition/>
                   </Grid.RowDefinitions>
                   <Grid.ColumnDefinitions>
                       <ColumnDefinition/>
                       <ColumnDefinition/>
                   </Grid.ColumnDefinitions>
                   <TextBlock Text="{Binding ShiftText}" Margin="3 0 0 0" Visibility="{Binding ShowSecondaryText, Converter={StaticResource BooleanToVisibilityConverter}}"/>
                   <TextBlock Text="{Binding DisplayText}" Grid.RowSpan="2" Grid.ColumnSpan="2" HorizontalAlignment="Center" VerticalAlignment="Center"/>
               </Grid>
           </telerik:RadButton>
       </DataTemplate>
   </telerik:VirtualKeyboardTemplateSelector.RegularTemplate>
   <telerik:VirtualKeyboardTemplateSelector.SpecialTemplate>
       <DataTemplate>
           <telerik:RadButton Content="{Binding DisplayText}" Command="{Binding KeyCommand}" Padding="0" Background="{Binding Background}" Foreground="{Binding Foreground}"/>
       </DataTemplate>
   </telerik:VirtualKeyboardTemplateSelector.SpecialTemplate>
   <telerik:VirtualKeyboardTemplateSelector.LockTemplate>
       <DataTemplate>
           <telerik:RadToggleButton Content="{Binding DisplayText}" Command="{Binding KeyCommand}" IsChecked="{Binding IsChecked}" Background="{Binding Background}" Foreground="{Binding Foreground}"/>
       </DataTemplate>
   </telerik:VirtualKeyboardTemplateSelector.LockTemplate>
</telerik:VirtualKeyboardTemplateSelector>That’s it!
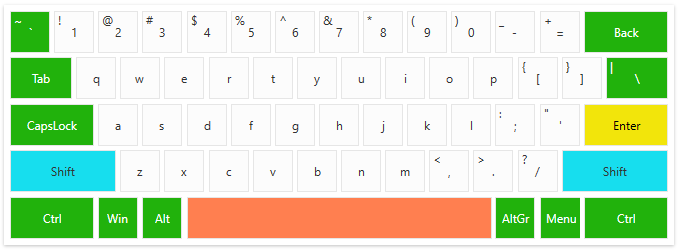
It looks great, right?
Try It and Share Your Feedback
I hope you enjoyed reading this blog. Do not forget to download and try the latest version of Telerik UI for WPF and explore the latest features. Existing users can get the R2 2022 bits from your Telerik account, and new users can download a trial of Telerik UI for WPF.
Once you do, please share your thoughts in the comments section below or the well-known Feedback Portal.
This content originally appeared on Telerik Blogs and was authored by Maria Hadzhieva
Maria Hadzhieva | Sciencx (2022-06-13T17:00:01+00:00) Get Ready for Our Brand-New Control: RadVirtualKeyboard!. Retrieved from https://www.scien.cx/2022/06/13/get-ready-for-our-brand-new-control-radvirtualkeyboard/
Please log in to upload a file.
There are no updates yet.
Click the Upload button above to add an update.
