This content originally appeared on Level Up Coding - Medium and was authored by David Bethune

Part 2 | Setting Up Lit & Vite
Lit, from Google, is a simple way to start working with web components. In Part 1 of this series, I explain how we got to web components and why I call Lit the anti-framework for web applications. In this post, we’ll get Lit installed with VSCode and the Vite development server, then create a test app and show how it works.
Quick Index
Part 1: Introducing Web Components
Part 2: Setting Up Lit and Vite
Part 3: Building a Single Page App
Prerequisites: NPM and VSCode
If this is your first time doing local web development in Typescript (or the first time on this machine), you’ll need to install NPM, the Node Package Manager. A package is simply a folder with files in it that your application needs. Another term for this is dependency. NPM installs packages from the web and keeps track of which ones you have. To use a package, we import it into our code.
If you don’t have NPM yet, run the installer for Mac, Windows, or Linux first.
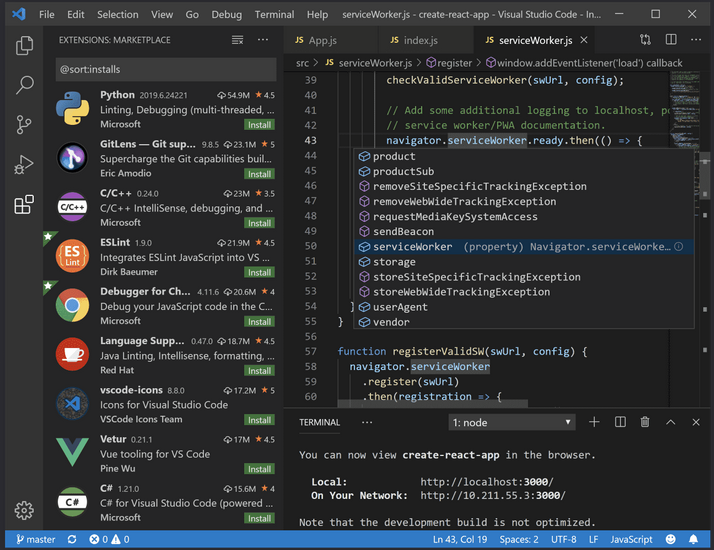
VSCode (or VS Code, or Visual Studio Code) is a modern IDE, an Integrated Development Environment — which is a fancy way of saying a text editor for code. We’ll use VSCode to organize our files and folders and write the files that make up the app.
If you don’t have VSCode yet, run the installer for Mac, Windows, or Linux first.
File & Folder Setup
Because it’s not a framework, Lit doesn’t come with any rules or recommendations on how to setup your files and folders. So I’ll make some for you! Best practices say that we need a root folder where your application will live. Its only contents will be the index.html file that’s served-up to the browser, along with a few configuration files. Everything else will live in separate folders, with each web component or Typescript module that we write in its own file.
Along the way, I’ll teach you a module loader trick I came up with to keep from having a huge list of imports and exports to manage as you share your components between files.
If you decide to work with GitHub, which I recommend as a way to backup and share your code online (here’s mine), you might want to have a single folder where you keep all your repos or GitHub repositories. Under that, you’d have a single folder for each app, and that is the root folder we’ll be working from here. This model makes it easy to keep track of which repos hold which apps and where you need to be to edit or update things.
Installing Vite with NPM
Vite (pronounced “veet” and French for quick) is a development and build server you can run locally. It’s perfect for writing and debugging Typescript apps because it updates the browser every time you make changes. And it’s perfect for deploying your finished app because Vite can easily build a static copy for publication to an inexpensive hosting website. You can keep a local copy at one stage of development and the production build at another, which is often what you need.
As a bonus, Vite comes with built-scaffolding for Lit apps built with Typescript, which is just what we have in mind.
Screenshots and commands here are from Windows Terminal, but the process is similar on Mac and Linux.
Using the Windows Terminal, navigate to your repos or parent folder where you want to keep all your apps. From there, run this NPM command.
npm create vite@latest
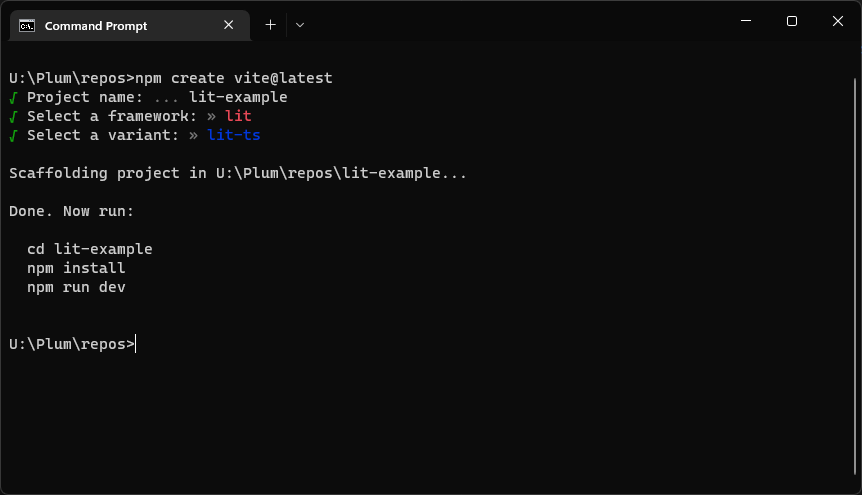
At the prompt, type a “project name” for your app. This will become the name of the root folder. I chose lit-example. When prompted for a framework, choose lit. When prompted for a variant, choose lit-ts. These settings tell Vite to automatically add the Node packages for Lit and Typescript to the app you’re building.
Updating to the Latest Lit
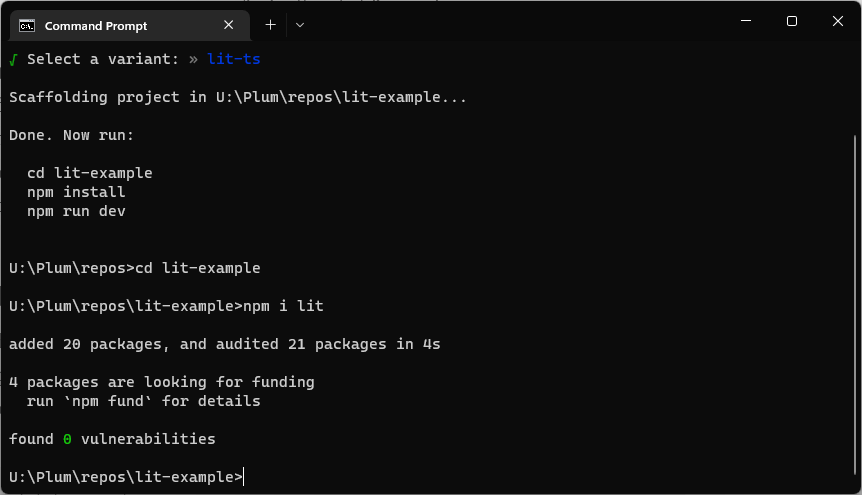
The template from Vite will work correctly, but while we’re here, let’s have Lit update itself to the latest version with this command. Before you run it, move to the root folder that was just created.
cd lit-example
npm i lit
Run the Development Server
The first time we run a Lit app, we must install the app itself with NPM, meaning install all of its dependencies. In the future when we run the dev server, we only need the second command here.
Still in the root folder, run:
npm install
npm run dev
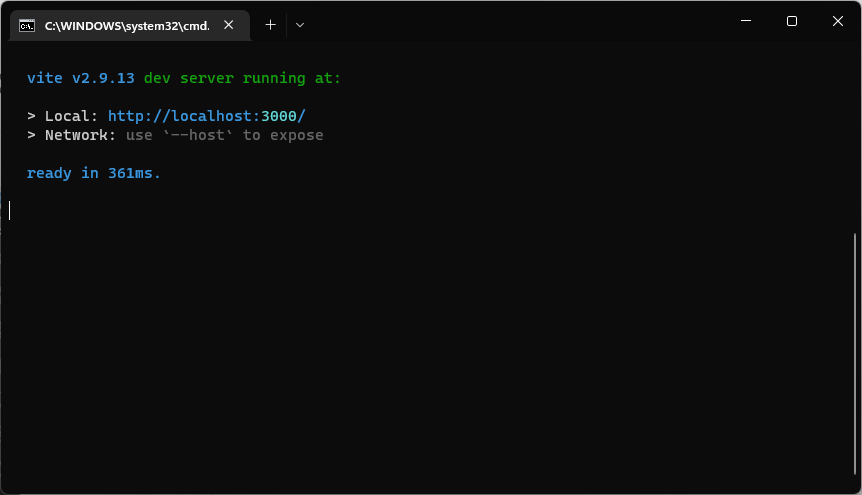
You can start the dev server later by navigating to the root folder and running npm run dev. Leave the window open to keep the server running.
Off to the Races with VSCode!
Launch VSCode and use File/Open Folder… to open the root folder.
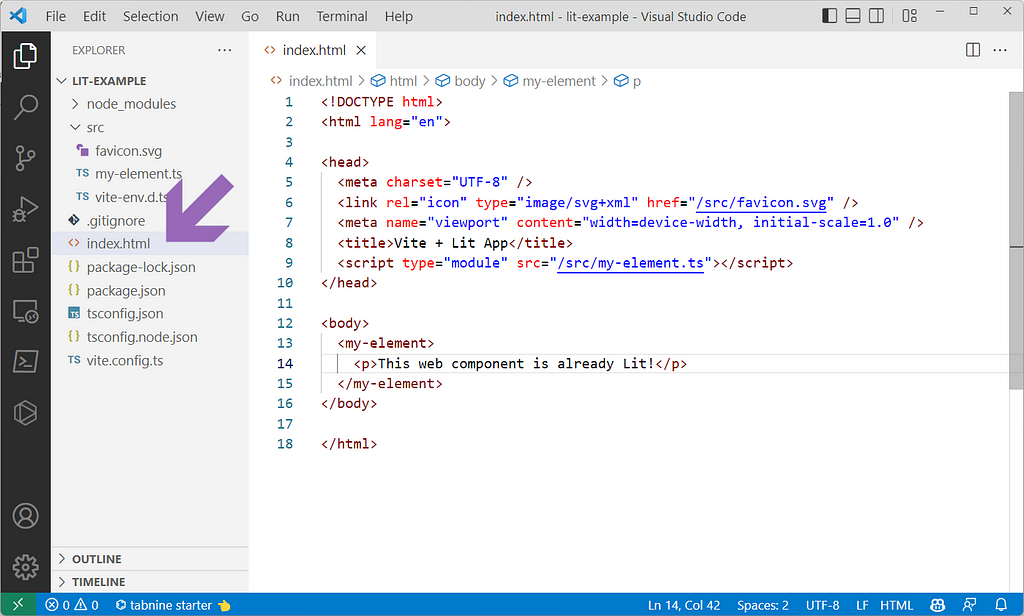
Vite created an index.html which you should open and edit by double-clicking it on the left. Notice that the page already has a web component in it! It’s <my-element>. When we visit the page in the browser, we’ll see the behavior from the Lit component definition behind-the-scenes.
Visiting the Page in the Browser
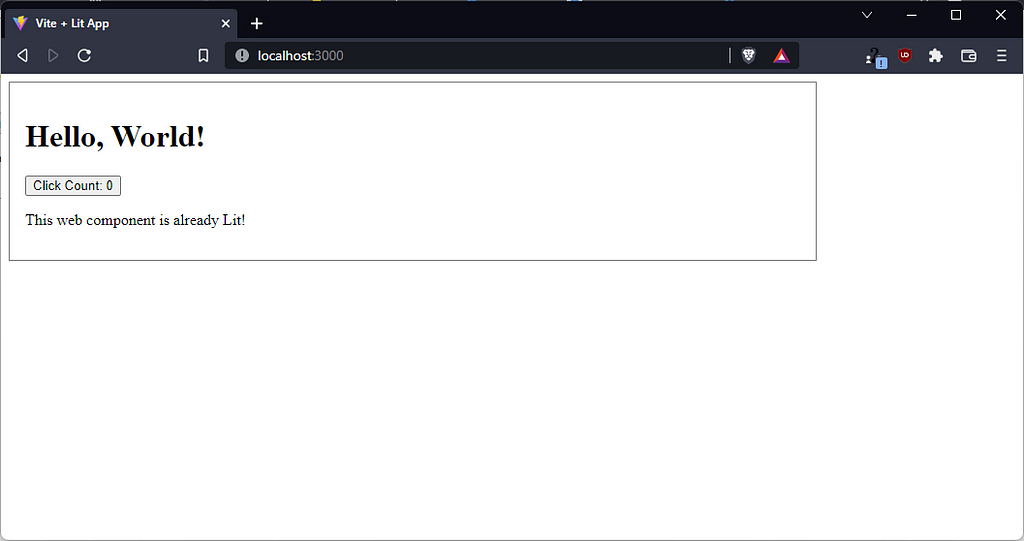
To see the new app, save your changes (Ctrl-S) and visit the website in your browser. You can either type the address that’s shown in the Terminal window, or Ctrl-Click to open it. Normally, this will be http://localhost:3000.
If you haven’t seen these kind of addresses before, localhost is just what it sounds like — your machine. The last part is a port number, which keeps your app separate from other servers you might be running.
Congratulations! You just built a single page app (SPA) with web components and Lit! It doesn’t do anything exciting yet… we’ll get to that. But if you’d like to see how it works, read-on briefly.
The Dirty Underbelly
Mark Twain once said that you don’t want to know how laws or sausages are made. The same is true of software. Before we wash away this entire sample app in a Great Flood (and build our own sample app to replace it), let’s look inside the factory and see how it came to be. It’s not terrible!
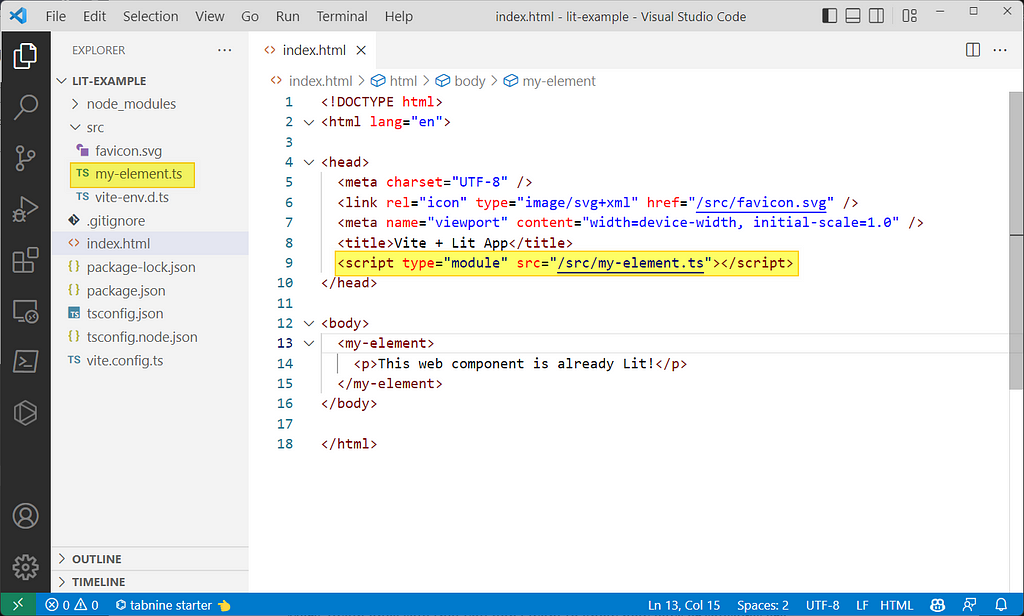
Our new web component not only appears on the screen like regular HTML, it also has custom functionality in the form of the click-to-count button. The component works because of the <script type=”module”> definition in the <head>. While this is a brute-force method that’s simple, it’s not what we’ll use going forward. However, it’s important to note that your component definitions must appear in ES6 module files and they must be imported (somewhere) with that module type. We’ll look at how to do that when we build our module loader in Part 3.
ES6 modules are critical to the reusability of your app — and I don’t mean for other people. Even if you are only writing components for yourself (which is usually the case), modules allow you to make those components… modular! In other words, you can borrow and reuse your own pieces and parts throughout your app. And you should! This practice, while it seems obvious, is not commonplace. Very few companies have their own custom set of web components and TS modules that they can freely interchange. Now, you are one of them.
This is owing in part to the fact that modules are new, and not the way we used to import code and dependencies. Many popular libraries, in fact, don’t even support ES6 because they were not coded that way from the beginning, meaning you must use them in kludgy <script> loads like this scaffolded example.
If there were only one component in the world, scripts would be great. But you’ll quickly find, even with your own apps, that you have many components which must work together in different scenarios. Some components will need to call functions from two or three of your custom Typescript modules, and others will need a different set. And this is when modules, as opposed to scripts, become your friend.
How The Click Counter Works
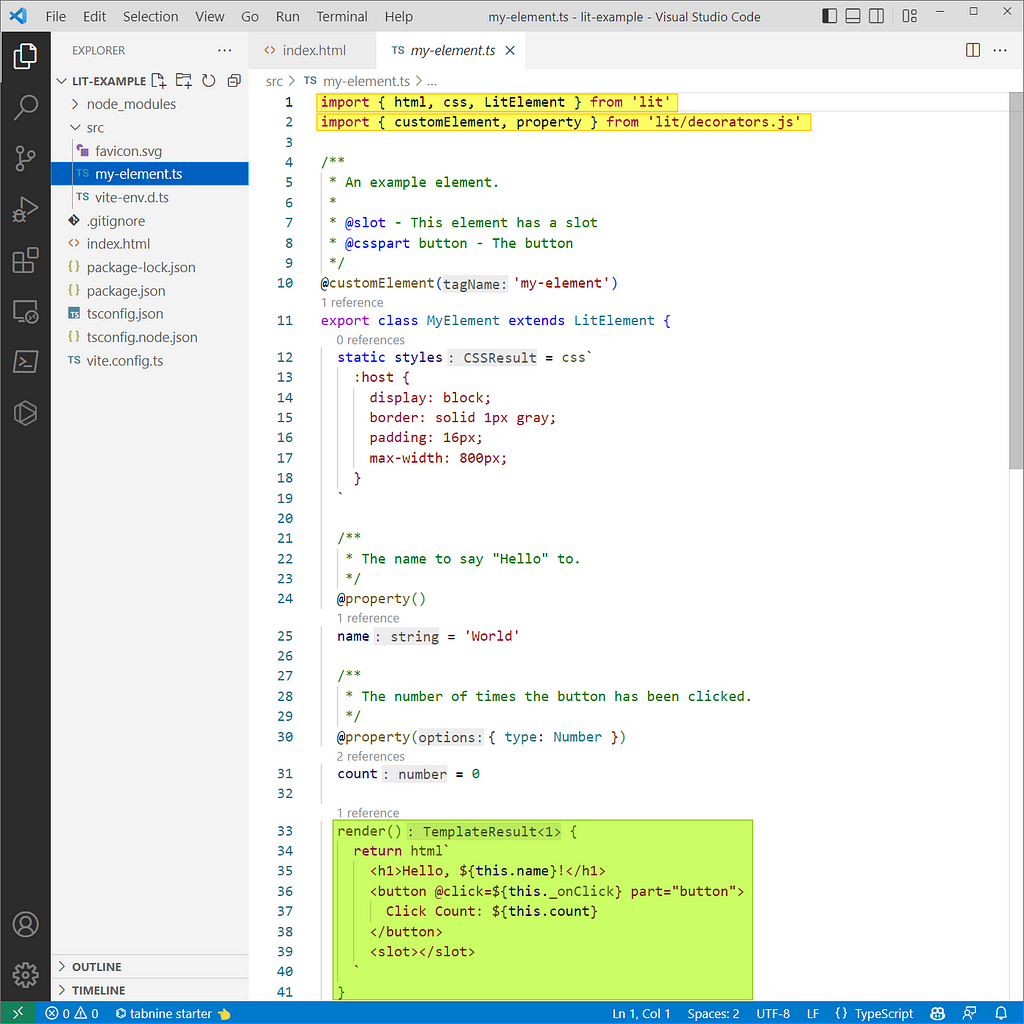
I won’t go deeply into the mechanics of the clickable button in this article, but if you open my-element.ts on the left, there are two key things to note. First is the requirement that your module import the Lit modules. And yes, this file is a module and we said so on its <script> loading tag back in index.html.
This pattern of my module imports yours is extremely common in Lit programming, even when both of the modules are yours. Soon you will come to think of your app as having two kinds of modules — those which result in web components, like this one, and those which just “do stuff” under the hood with Typescript and don’t directly drive the UI. As you’ll see when we develop our own custom app, we’ll divide everything we write into one of those buckets.
The second is that the module ends with a render() function. This is responsible for actually outputting HTML to the page. It can output regular HTML, CSS, SVG, and any other custom web elements you write. It can also output any other kind of framework, like Angular or Vue, which is how you can cross-grade or upgrade components to Lit, even one at a time. Regardless of what happens in the code “before” render() in the module, the render itself is what renders your component. Makes sense, right? By setting up the conditions before the render, we can ensure that it displays correctly every time.
Up Next: Part 3 | A Custom Web App with Lit
In Part 3, we’ll erase everything we’ve done here (well, just about), and build an app with a structure that you can really use in production — with proper organization, module loading, and an interface that does something cool.
If you enjoyed this story, look me up on Hacker News and add your comments to the thread. If there’s enough interest, I might add a Part 4 covering static hosting with Firebase to deploy your app to the web.
Thanks for reading! See you next time.
— D
Getting Started with Web Components & Lit | Part 2 was originally published in Level Up Coding on Medium, where people are continuing the conversation by highlighting and responding to this story.
This content originally appeared on Level Up Coding - Medium and was authored by David Bethune
David Bethune | Sciencx (2022-07-05T12:17:55+00:00) Getting Started with Web Components & Lit | Part 2. Retrieved from https://www.scien.cx/2022/07/05/getting-started-with-web-components-lit-part-2/
Please log in to upload a file.
There are no updates yet.
Click the Upload button above to add an update.
