This content originally appeared on DEV Community and was authored by Shubhendra Singh Chauhan
Employees and Requests
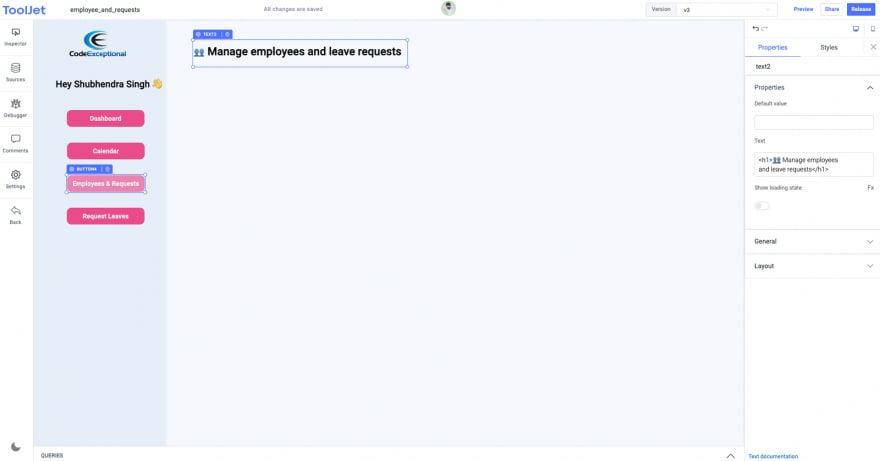
Clone the last app that we built and remove all the widgets from the main section and remove all the queries that are there. Don't forget to rename the application from Company Calendar to Employees and Requests from the top left of the app editor.
Assuming that you connected the MongoDB datasource, we can now start building the UI of the main section and then add the queries.
Build the user interface
- In the last two apps, we disabled the respective button on the sidebar, similarly, in this app, we will disable the
Employees and Requestsbutton.
- Drag a Tabs widget into the Canvas, and edit its properties. Set the Tabs field value to:
{{[{ title: 'Employees', id: '0' },{ title: 'Leave Requests', id: '1' }]}}
- Set the Default tab to
0 - We will be placing the widgets inside the Employees and Leave Requests tabs.
Employees Tab
- First, drag a modal widget somewhere below the tabs widget
- Place a button inside the Employees tab, edit the button's property and add an event handler to show a modal, and choose the modal that you added on the canvas (modal1)
- Click on the button to show the modal, now you can drag the widgets inside the modal to create a form-like UI. I have used text widgets for labels, text input widgets for the input fields, and then a button widget
Add. The button widget will have two event handlers: one for closing the modal1 and the other that will trigger the query for adding the employee details into the database.
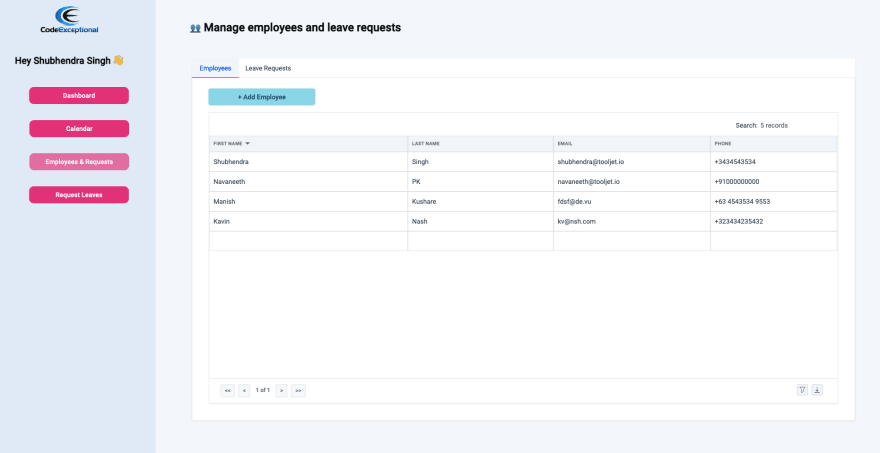
- Now, add a table widget inside the Employees tab. Set the Table data field value to
{{queries.allEmployees.data}}- we haven't created the queries yet. The table will be populated once we create the queries. - Go to the Add Columns, add 4 columns First Name, Last Name, Email, Phone, and set their keys as
first_name,last_name,email, andphonerespectively.
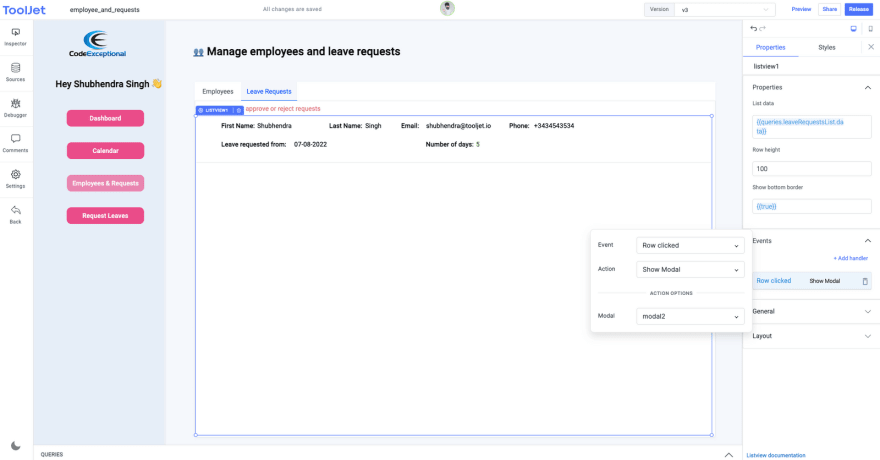
- Now, switch the tab to Leave requests. Place a second modal somewhere below the tabs widget, drag a listView widget inside the tab, and set the List data field value to
{{queries.leaveRequestsList.data}}. Add an event handler on the ListView widget - select Event as Row Clicked, Action as Show Modal, and choose the modal i.e. modal2
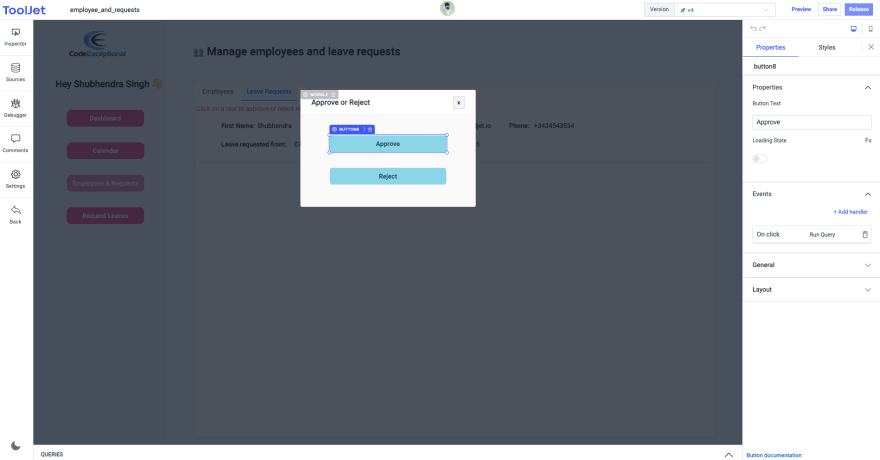
- Now, click on the row to show the modal. Inside the modal, add two buttons: Approve or Reject. These two buttons will be used to accept or reject the leave request raised by the employees.
- We will add the widgets inside the listview once we have created the queries.
Build the queries
addEmployee
This query will be used to insert a document into a collection. With this query, we will add an employee to the database.
- Create a new MongoDB query, select the
Insert Oneoperation, enter the Collection nameemployees - Enter the Document data as an object:
{ first_name: "{{components.textinput1.value}}", last_name: "{{components.textinput2.value}}", email: "{{components.textinput4.value}}", phone: "{{components.textinput3.value}}" }- here we are using JS to get the values from the widgets that we have added inside the modal1. - Hit the Save button, not the Save & Run because executing the query now will fail as there are currently no values in the form.
- Once the query is saved, you can click on the
Add Employeebutton to show up the form modal and then edit the Add button inside it. Add another event handler to run theaddEmployeequery on the On Click event.
allEmployees
This query will return all the employees in the database.
- Create a new MongoDB query, select
Find Manyoperation, and enter the Collection name asemployees - Go to the Advanced tab and enable the
Run query on page load - Click Save & Run button on the query manager and as soon as the query runs you'll see the table gets populated with the employees' data.
leaveRequestsList
This query will return the list of those documents that have leaves status set as requested and will display it on the listview widget.
- Create a MongoDB query, select
Find Manyoperation, enter the Collection name as employees - In the Filter field, set
{"leaves.status": "requested"} - Click on Save & Run the button to save and fire up the query.
- Now, that we have our data, we can add widgets to the list view widget. I have used the text widgets. For Labels use text widgets with HTML heading/bold tag for formatting. For displaying the query data use:
First Name: {{listItem.first_name}}
Last Name: {{listItem.last_name}}
Phone: {{listItem.phone}}
Email: {{listItem.email}}
Leave Requested from:
{{listItem.leaves.reduce((acc,leave) => {
if (leave.status === "requested"){
acc = moment(leave.start_date).format("DD-MM-YYYY");
}
return acc;
},"")}}
No. of Days:
{{litItem.leaves.reduce((acc,leave) => {
if (leave.status === "requested"){
acc = leave.leave_days
}
return acc;
},0)}}
You can now successfully release this version of the application by clicking the Release button on the top right of the app editor.
This content originally appeared on DEV Community and was authored by Shubhendra Singh Chauhan
Shubhendra Singh Chauhan | Sciencx (2022-07-11T11:33:55+00:00) Build HR Management System using MongoDB and ToolJet (Part 3: Employees and Requests). Retrieved from https://www.scien.cx/2022/07/11/build-hr-management-system-using-mongodb-and-tooljet-part-3-employees-and-requests/
Please log in to upload a file.
There are no updates yet.
Click the Upload button above to add an update.


