This content originally appeared on Level Up Coding - Medium and was authored by Emmanuel Tejeda
Creating the controller and our CRUD operations.

This guide is a continuation. If you haven’t, start from the beginning here or pt3 here.
In this guide, we will add the essential characteristic of a REST API, the controller. The Controller is responsible for managing our CRUD operations and processing APIs requests.
To start, create a new package under “com/example/demo”, and we will name this new package “controller”. In our new package will create a class named "StudentController". When you are finished, your file structure should look like this.
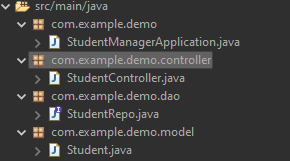
To make this class a REST API, we will add the “@RestController” annotation to the class. To read more about the RestController annotation, click here. But in short, the RestController allows us to create RESTful web services with less hassle.

Get Request
In this section, we are going to work in reverse. I will show you what a completed get request looks like and then break down what every line is responsible for doing.
Before making any request, we will first import our Repository to get access to all the valuable tools it provides.

The “@Autowired” annotation creates the object for us when we run our application. This is known as dependency injection. Learn more about dependency injection here.
Next is our get requests.
@GetMapping("students")
     public List<Student> getAllStudents(){
     return repo.findAll();
}
Starting from the top
- We have our “@GetMapping” annotation. This annotation tells Spring that this method is responsible for getting information from our database. The second part of this annotation is the name of the API. For example, the name of this request would be “localhost:8080/students”.
- Next, we have our method declaration with the name “getAllStudents” and a return type of list of students.
- Lastly, we have our call to the database. This “repo.findAll” returns a list of all the students.
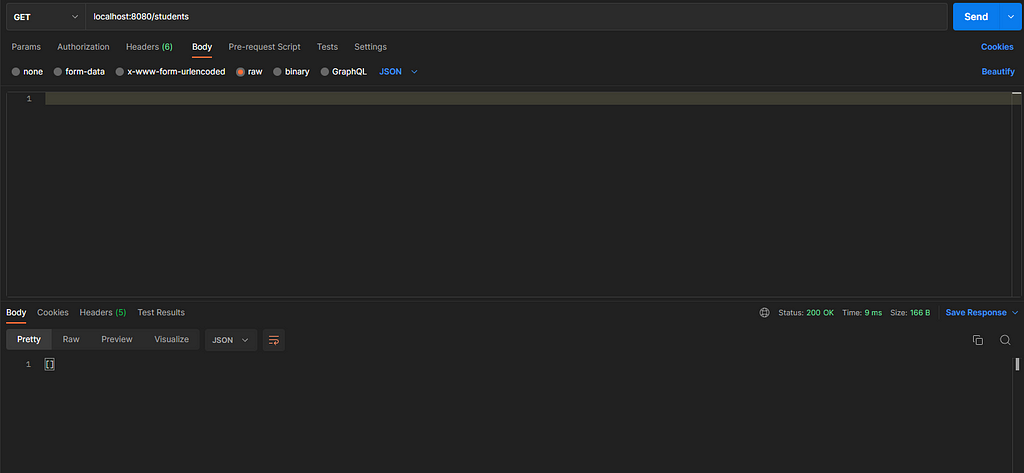
If we were to run this and make a GET request on Postman, we would get an empty list. To address this, let's go to creating the Post request.
Post Request
@PostMapping("student")
public Optional<Student> addStudent(@RequestBody Student newStudent{
     repo.save(newStudent);
     return repo.findById(newStudent.getStudentID());
}
The Post request differs slightly from the Get request, but we can see some similarities.
Starting from the top
- We have our PostMapping annotation, which annotates our method as a post request. We named our address “student” but you can change this to whatever you want.
- Next, we have our method, which we named “addStudent” and set the return type to Optional<Student>. We require this odd return type because when returning an object, we can either return the student object, which in this case is the student model. Or, if it does not find a student object, it returns an exception. This Optional return type allows us to handle both situations.
- Inside our parameters, we have the student we are trying to store “newStudent” to the database along with the “@RequestBody” annotation. We use this annotation because when sending information in a request, the data travels inside the body of the HTTP request, which then gets converted into a Java Object or a JSON. Read more about it here.
- Inside our method body, we have “repo. save” which saves our new student into the database, taking the student object as a parameter.
- Lastly, we want to return the student we just saved. We use the “repo.findById” to find our new students by their unique ID.
In the end, your controller should look like this.
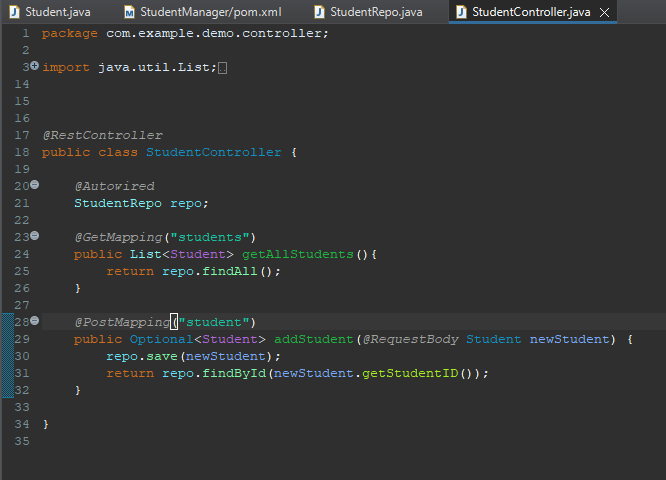
Now let's see our new features in action.
Let’s go to Postman. We set our request to post, and we write our new student in the body in a JSON format. After hitting send, this is what we get.
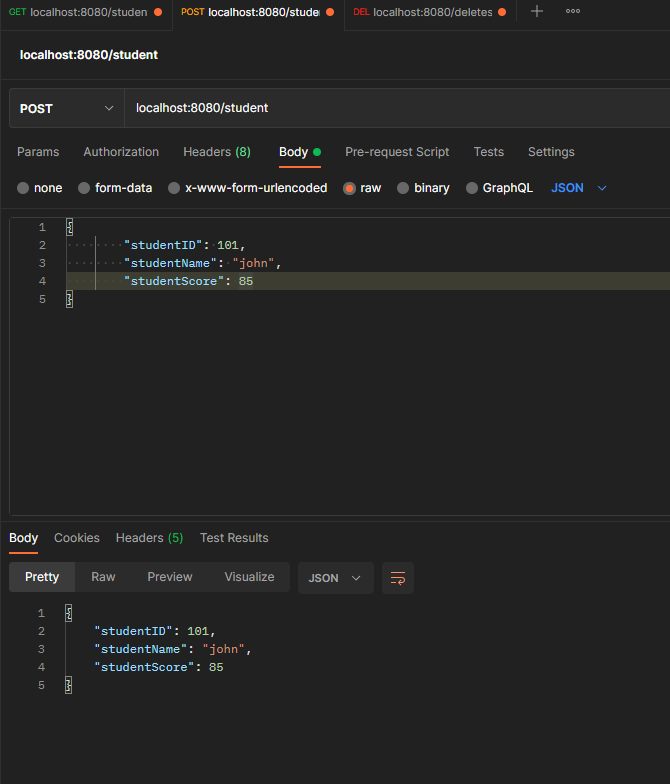
As you can see, we get the student we just entered back as a response. We can test that the student is in the database by making a get request.
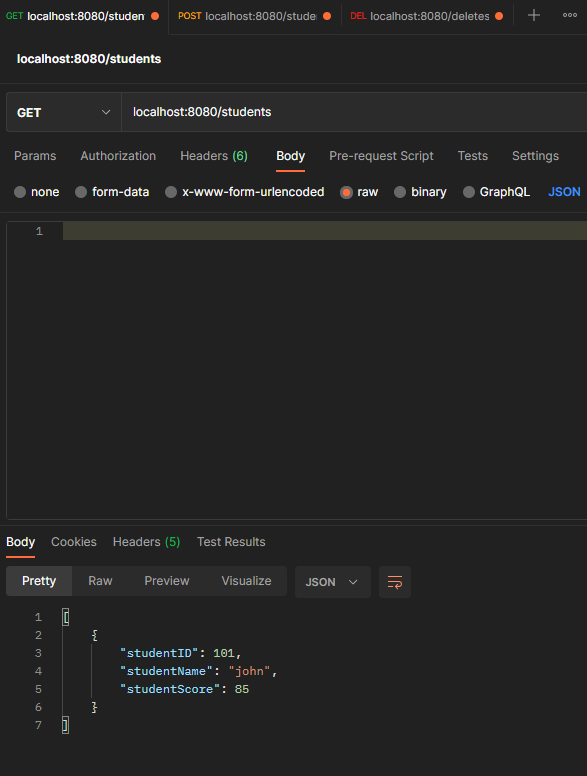
This is all for our REST API. There are so many things that are not mentioned in this guide that I implore you to research and explore. Learning how to create a REST API is one of the best skills you can learn and will help you across most, if not all, of your programming career. If you want some direction, look up how to implement a Delete and Put request in the controller.
I will leave a link to this code in the resources section of this guide; check it out and play around with it. If you have any questions, please comment, and I will get to it ASAP.
I hope you have a great day!
Resources
Link to the github repository for this code
Information on Rest Controllers
Spring dependency injection
Sping Request body annotation
Java Tutorial. Creating a Basic Rest Api Using SpringBoot. Pt4 was originally published in Level Up Coding on Medium, where people are continuing the conversation by highlighting and responding to this story.
This content originally appeared on Level Up Coding - Medium and was authored by Emmanuel Tejeda
Emmanuel Tejeda | Sciencx (2022-07-14T02:00:57+00:00) Java Tutorial. Creating a Basic Rest Api Using SpringBoot. Pt4. Retrieved from https://www.scien.cx/2022/07/14/java-tutorial-creating-a-basic-rest-api-using-springboot-pt4/
Please log in to upload a file.
There are no updates yet.
Click the Upload button above to add an update.
