
This content originally appeared on DEV Community and was authored by Elisa Levet
The JWT app type will be deprecated in June 2023 and we recommend and highly encourage that you start migrating from the JWT app to the newly introduced Server-to-Server OAuth App
**But, you might be wondering why we are deprecating the JWT app?**
And the main reason why we are doing this is to offer developers a more protected and secured way to retrieve data from our various endpoints.
By using JWT there is no way to scope the access to data and with the same token you can access every single endpoint available and it can be dangerous if you token or credentials lay in the wrong hands
Learn more about the Frequent Asked Question here:
https://marketplace.zoom.us/docs/guides/build/jwt-app/jwt-faq/
That being said, here is a quick and simple guide on how to use or new app with Postman
This new app type facilitates OAuth-authenticated requests between servers without end-user involvement. And this grant type enables your private server application to get your account owner access token without user interaction.
To start using this App, the Administrator for your Zoom account or the Owner of the account must enable the view and edit permissions for Server-to-Server OAuth app by going to User Management > Roles > Role Settings > Advanced features
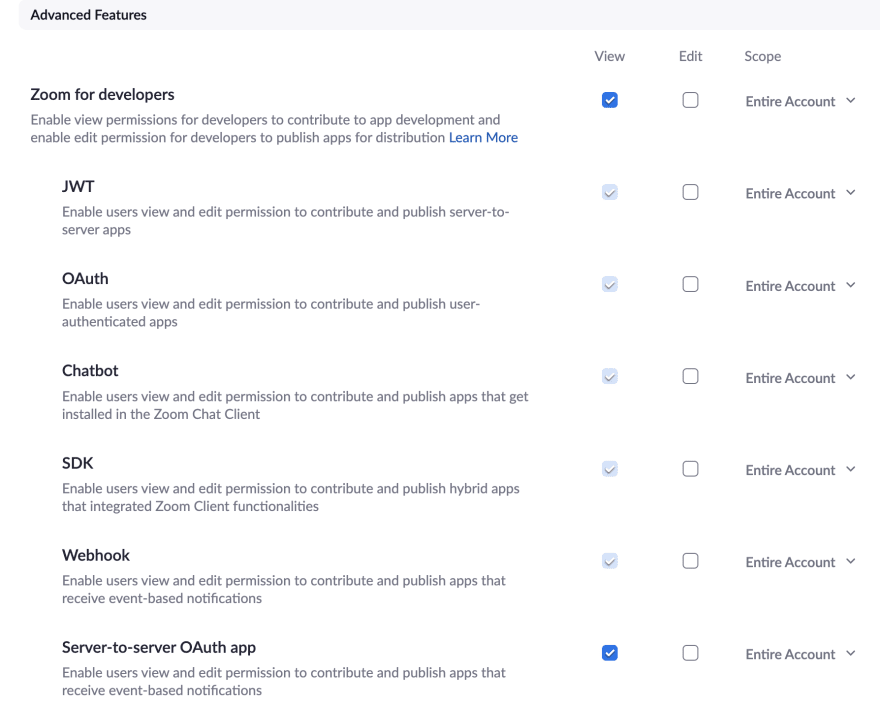
Once those permissions are enabled, you will be able to see the app in your Marketplace Dashboard.
Once the app is created and you have added the scopes that you want to include as well as Features (event subscriptions) that you want to add then you can go ahead and activate your app in your account.
Feel free to follow along on the Steps on How to Create a Server-to-Server OAuth app here:
Now, it is time to get started and use Postman with our newly created app.
Step 1
Create a new Post request to https://zoom.us/oauth/token
Step 2
Add the following Query Params
grant_type=account_credentials
account_id={account_id}
(Grab your account_id from the App credentials Tab in your newly created app)
So your Post request should look something like this

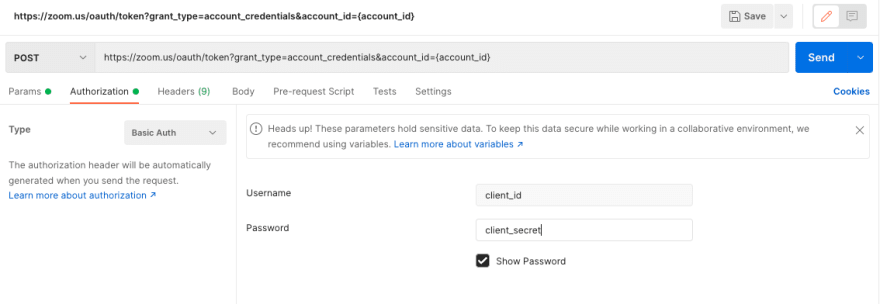
Step 3
Go to the Authorization Tab and select Basic Auth as the authorization type and user your Client ID as a Username and your Client SECRET as your password
(Grab those credentials from your newly created app as well)
Once that is all done, you should be able to send the POST request and you will get a response that will look something like this:
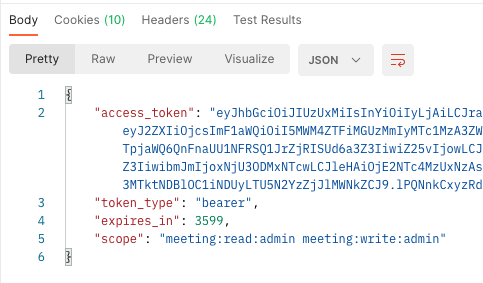
You should be able to use the access_token as a bearer token to make API calls to those endpoints that can be accessed with the scope/s set up in the Server-to-Server application.
Hope this helps to understand this new app type better and let me know if you have any questions or suggestions!
Happy coding!
Elisa :)
This content originally appeared on DEV Community and was authored by Elisa Levet
Elisa Levet | Sciencx (2022-07-15T16:01:41+00:00) Why use Server To Server OAuth?. Retrieved from https://www.scien.cx/2022/07/15/why-use-server-to-server-oauth/
Please log in to upload a file.
There are no updates yet.
Click the Upload button above to add an update.