This content originally appeared on Level Up Coding - Medium and was authored by David Bethune
Part 3: Working with JSON Objects
So far in this series, we’ve looked at data binding, storing data in objects, and mapping over it with arrays. In this episode, we’ll look at how to slice-and-dice the data in Typescript objects and how to write and call functions that work with objects internally.
Quick Index
Part 1: Properties, Values, & Data Binding
Part 2: Working with Arrays
Part 3: Working with JSON Objects
Inside of a Function, It’s Too Dark to Read
If you’ve been with us so far, you’ve heard me say before that everything is an object. We’ll revisit that idea momentarily, but for the bulk of this discussion, we’ll be talking about JSON objects — the ones that hold data values under a key.

In Part 2, we used an object to store colors for a universal palette. Then we recalled values from that object with a key that was, itself, variable. This part is important.


We’re going to use this technique a lot because, inside of a function, we are usually acting on a variable value. Something passed-in from the outside, a parameter, becomes the value of the variable. In our previous example, that was the color= property. Hold that thought…
Adding Objects to Objects
Earlier, we looked at how to walk through or iterate the keys in an array to get values from the corresponding object key. Let’s extend our model to add names for the colors. This will require re-thinking the architecture.
Each key in a JSON object can only have one value. But, that value can be an object with multiple values under its own keys! That gives us the ability to redefine each color as an object, rather than just a hex value.
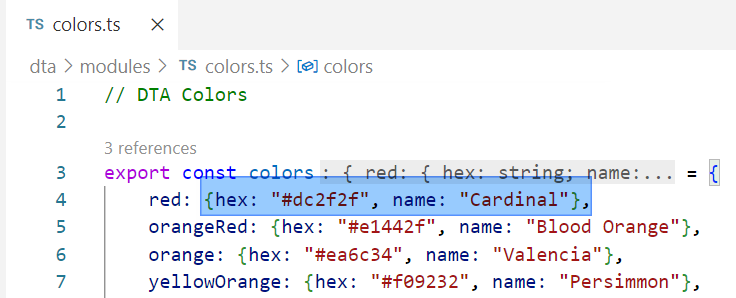
Here I changed each color to have two values, one under hex and one under name. Whenever we change the model, we also need to change the view, so let’s update dta-chip.ts:
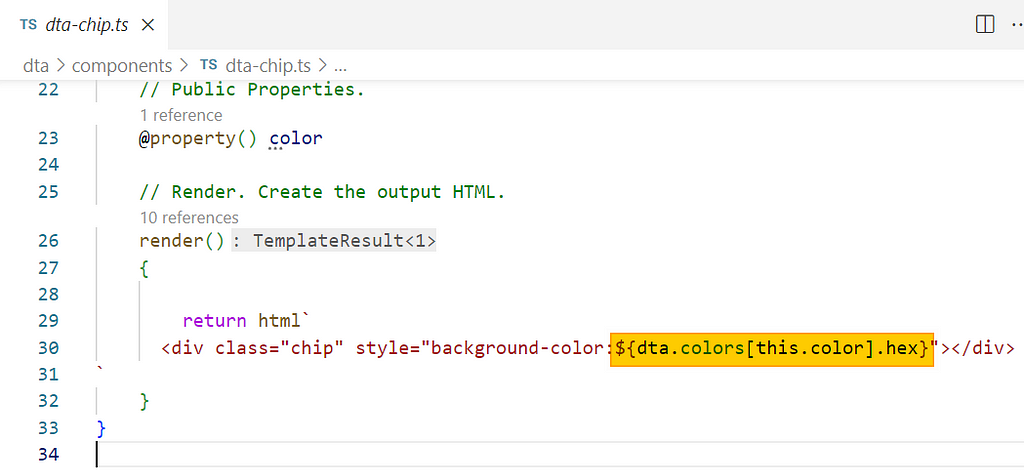
So to get “three layers deep” and find the actual hex value, we now have to write a long, yucky accessor. In pseudocode, we could say we:
- Take the object that is the value of this.color key from dta.colors.
- Return the value of the hex key from it.
This isn’t the worst accessor in history, but it is an example of code smell. That’s an early warning that this code could be problematic later. Here, the problem lies in the complexity of the steps. In effect, they constitute a “recipe,” and we can use that idea to refactor them into a function.
There’s More Than One Way…
In programming, there’s always more than one way to achieve the same thing. The best one to start with is the one that’s easiest for you to reason about. Then, you can refactor into something better. Let’s look at a couple of ways we could move the recipe for “getting a color’s hex value” into a function.
Using a Function Object
In Typescript, the other major type of object (aside from the JSON data we’ve been storing) is a function object. The difference between functions and every other object is that a function does something.
JSON data does not “do” anything. It sits around like a granary and waits for you to put wheat in and take it out. Functions are the do-ers and they follow our recipes. In Part 2, we looked at arrow functions that “do something” while we map() over an array.
In this case, we need a standalone function so that we can apply its recipe from any component. You may have noticed we’ve already written several function calls like map() that end with parenthesis. This is how you (and Typescript) differentiate between JSON data objects and function objects. Data doesn’t end with parens. Functions do.

Here we can see the difference in syntax between accessing data from the model (on line 44) and running or calling a function with a parameter in parenthesis (on line 45). In our particular model, these are two ways of getting at the same (fixed) piece of data.
How could we call a function to get a hex value from a variable key? In dta-chip.ts, Let’s replace the background color dta.colors[this.color].hex with a call to a new function dta.getColor(thisColor), which we haven’t defined yet.
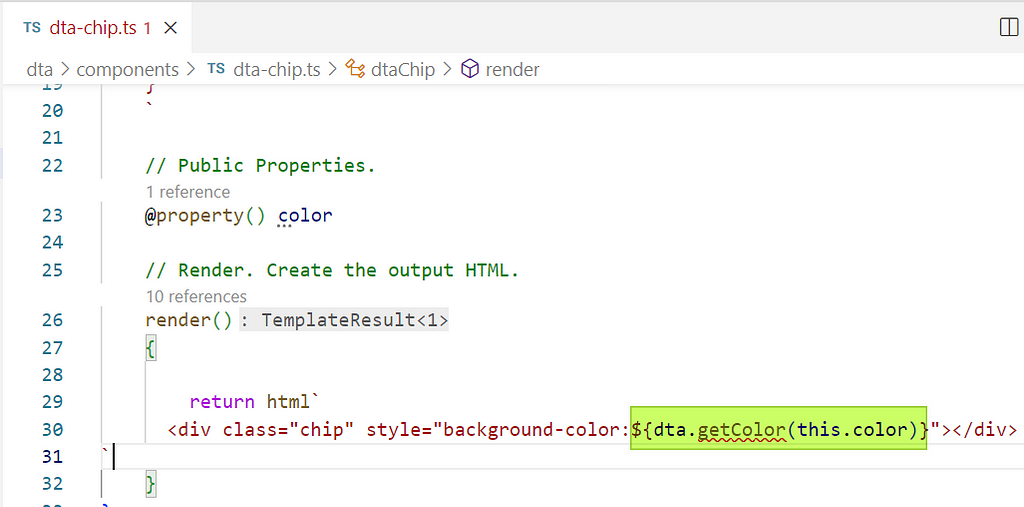
Defining and Exporting a Function
Let’s write the function definition. The ideal place is the colors.ts module that we already made and imported. If we export the function definition, it will be available we import it. Here is the recipe:
- Given a color (key)…
- Return its hex value from our existing colors object.
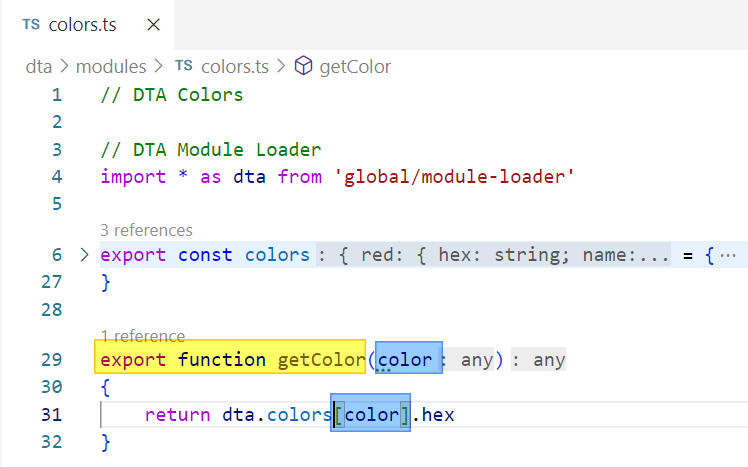
In order to access the dta.colors object from our model, we’ll need to import it (or the module loader) on line 4.
This screenshot also shows a VSCode trick… You can collapse a big section of code (like export const colors) with the > right angle symbol on line 6.
Defining and Using the Parameter Value
The first line of our recipe says we are “given a color key.” Anything we are given becomes a parameter. On line 29, we define the name of that parameter to use inside this function. This name is meaningless in any other context. It only applies inside this recipe. This code says the parameter is named color.
When we access the same color variable later in the recipe, on line 31, we get whatever value was passed-in on a particular function call. So if we call this function with getColor(“green”) we get back dta.colors[green].hex.
Returns of the Day
Typescript functions can return a value, although that’s not required. If a function has a return statement like the one on line 31, whatever is returned becomes the value that substitutes for the function call where it was used. Another way to say is that the return value replaces the function call in the same position in the code.

The net effect is that our new getColor function will take in a key and give back the hex color we need, thus plugging correctly into the background-color value we put on the chip. Here it is again for reference:

The browser “sees” the background-color property as though only the return value of the function is present. The function itself does not appear anywhere. If we look out our output, it should be unchanged!
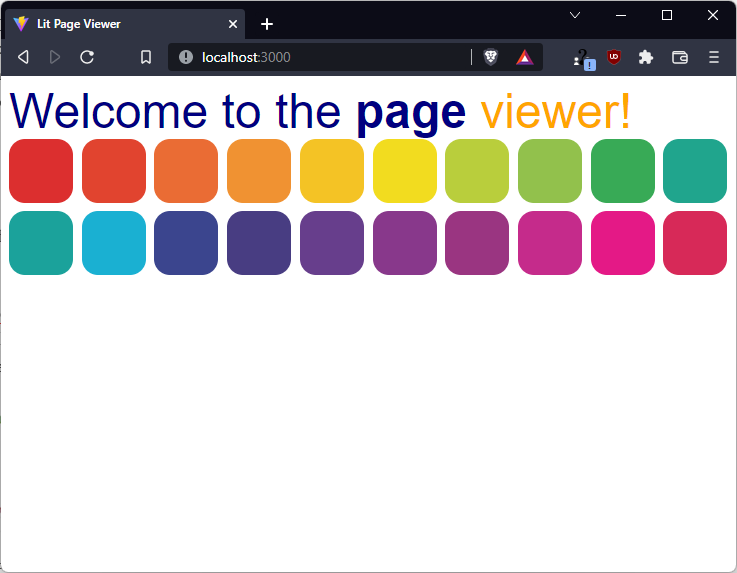
A successful refactoring or improvement of the existing code (as opposed to a new feature) should result in no changes to the existing output. In other words, this new way of getting the hex code should work exactly like the old way. Under-the-hood, we’ve added a new name for each color (a new feature), so let’s add that to the view.
Adding New Data from the Model
To get to the color name that’s now in our model, let’s write another function in colors.ts.
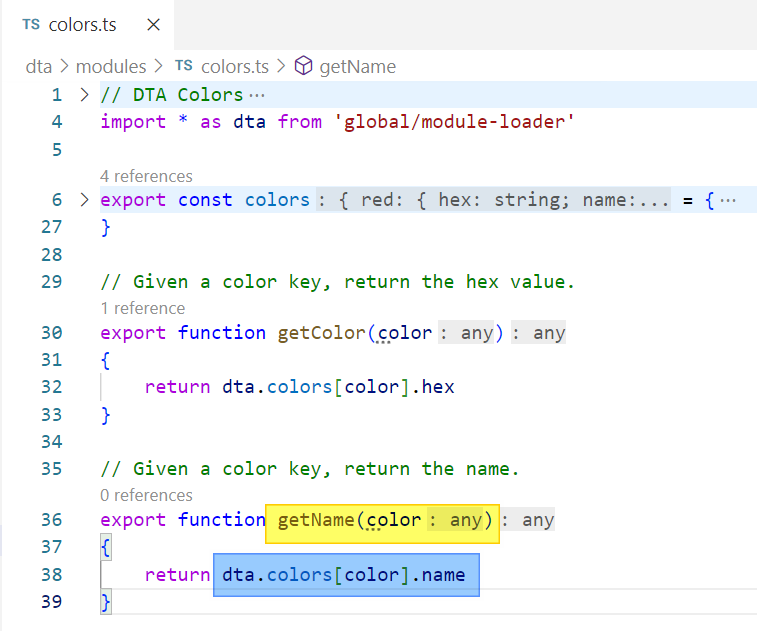
I can access the name in the component view by calling my new function. Here, I’ve put it inside a <div> inside the chip.

Lay it on the Line!
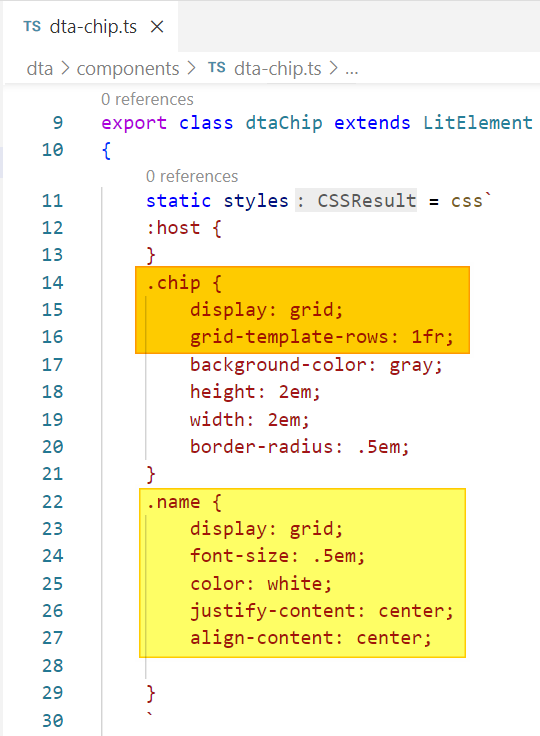
With some CSS on the chip component, I can display the color names inside the chips.
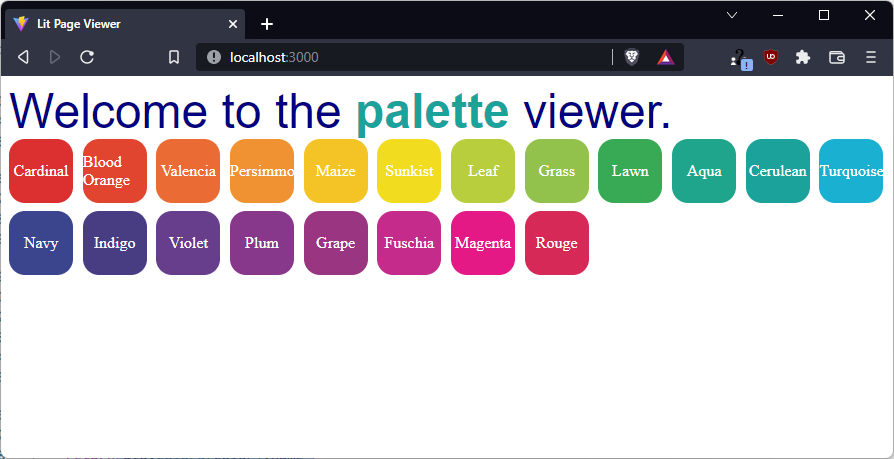
This example also demonstrates using the color elsewhere in your output, as with the word palette here to which I applied dta.getColor(“seaGreen”).
So Many Functions
It might seem as though we’re creating a lot of functions for simple things. After all, we already have two functions just to get two different things out of the same object. This brings up an important point in your architectural designs. Only you know how many functions are too many and only you can decide when you should refactor to a better way of accomplishing the same thing. Before I move on, let’s just think of a few ways this design could be changed:
- A single function could return the name or the hex value, depending on a parameter.
- A single function could return the color object at the key’d location and let us take the keys off of it that we need.
- We could access dta.colors directly when we need it, albeit with multiple layers of keys.
Does any of these appeal to you more than what we have now? Feel free to think about it or code it up as you work through your own designs.
If you decide to refactor your code, aim for no changes in output first to prove your refactoring works — before you add new features. The code we have so far could be refactored in any of these ways (and several others) without changing the output. Choose the design that’s easiest for you to understand.

Creating a Gradient Component
Let’s see if we can build something more advanced out of our palette. As an exercise in working with objects, lets build a gradient component that shows a range of colors between two color keys that we pass it. As usual, I’ll code how I want to use the component before I write its functionality.

In my new dta-gradient.ts file, I need to add the two properties that will receive data from these two attributes.
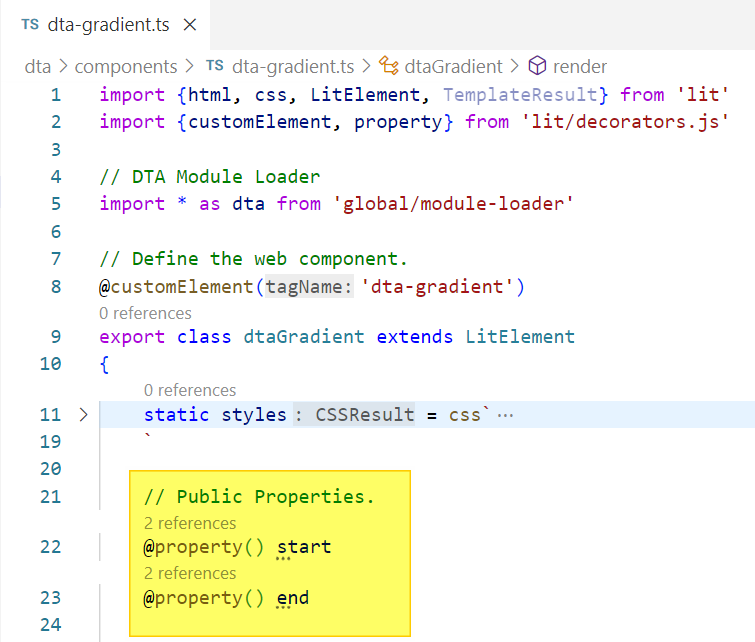
In my <dta-gradient> element, I want to pass just the color keys for start= and end=. But to draw the gradient, I’ll need to dig deeper and get the hex values. Let’s look at how we can “mine” an object to create variables out of its values.

Destructuring Objects

This code may look strange, but it demonstrates one of Typescript’s most powerful features: destructuring assignment. That’s a mouthful, like this code, but in practice it’s very simple and powerful.
Having passed in the start and end keys, I want the name and hex colors of each to go into separate variables. However, these are all on the same keys in each color object! In other words, both the start and end hex color are under the hex key.
In a destructuring assignment, I tell Typescript how to break it down. Line 30 says to grab the key called name and assign it to a new variable called startName, and to take the key hex and assign it to a new variable startHex. “The key called name off of what?, you might ask.” And the answer is on the other side of the assignment statement, after the = equal sign.
By assigning dta.colors[this.start] on the right side to a destructing argument on the left side, we are telling TS to take the object at dta.colors[this.start] and divide it up as we outlined. The end values are processed the same way on line 31.
Here’s what the same assignment statements look like without destructuring:

Both of these are recipes for Igor, but destructuring is a more compact form with less repeated text and fewer chances for errors. This raises an important principle in Typescript. Often, the shortest code is the best because every piece of code has potential errors — even simply typos or things in the wrong order that are hard to spot. Anytime we can conceive of a design with less code, that’s less code that might be in error. Ultimately, Typescript is for humans to read (the computer uses machine language), so write the code that is easiest for you to read and reason about.
If we don’t need to make up a new name for the variables, we can write an even shorter version of object destructuring:

If we just write the key name, we create a variable of that same name. You can take as few or as many keys from the object as you need. The :newName syntax (as on lines 30–31) is only needed if you want a different name for the new variable. Destructuring has many other powerful features which we’ll examine in another post.

Let CSS Do the Heavy Lifting
CSS has an amazing number of abilities under the hood. One of them is gradients, and MDN has a great intro.
Let’s have our new gradient component output two of the color chips — for the start and end colors. In between, we’ll draw the gradient box.
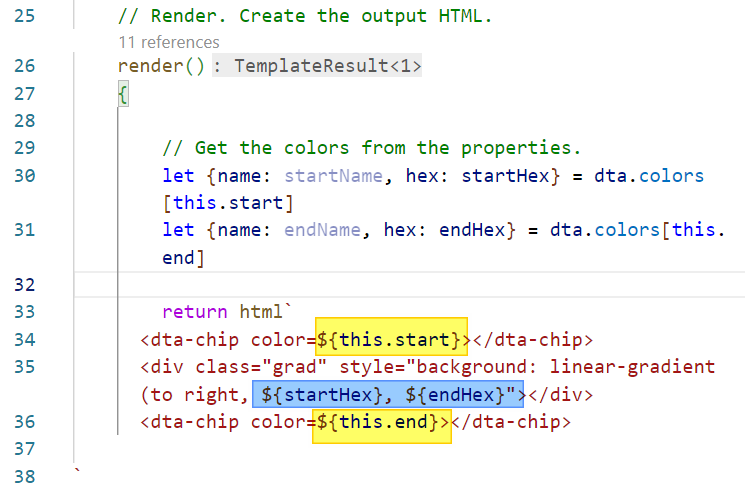
We need the start and end keys (for the chips) and the hex values (for the gradient). We can plug-in those variables, thanks to the destructuring assignment. The gradient itself is fairly easy to read, even if we don’t know the CSS.
This ease of reading is another benefit of destructuring (and good naming in general). We may not know the order of parameters in the CSS gradient on line 35, but we can read ${startHex} and know what it represents.
Half of this new component is our other component, reused. The purpose is obvious from the name: <dta-chip>. It’s easier for humans to read ${startHex} and <dta-chip> than it is to read the code they represent. As your programs become more complicated, this idea will become even more of a benefit.
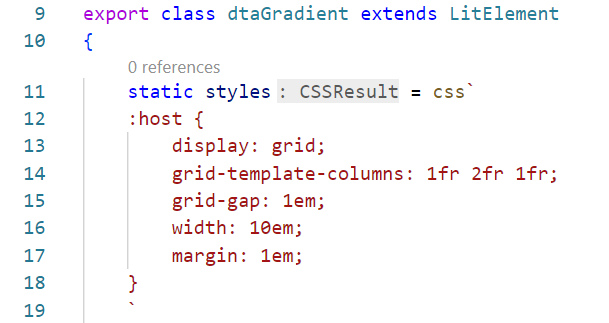
And It Works, Too!
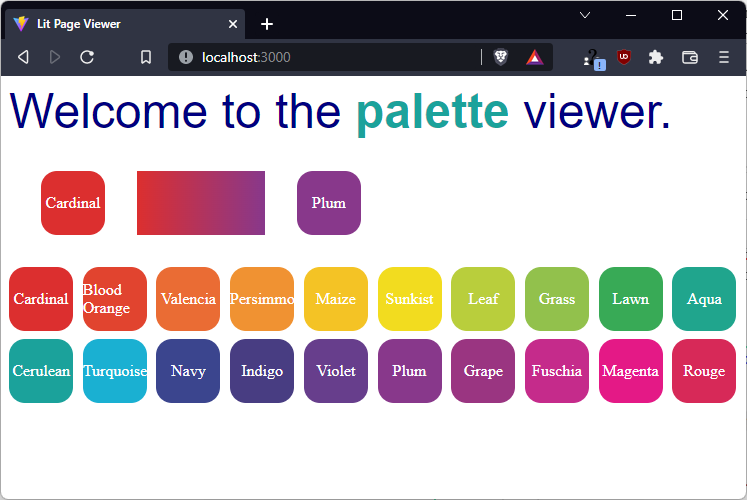
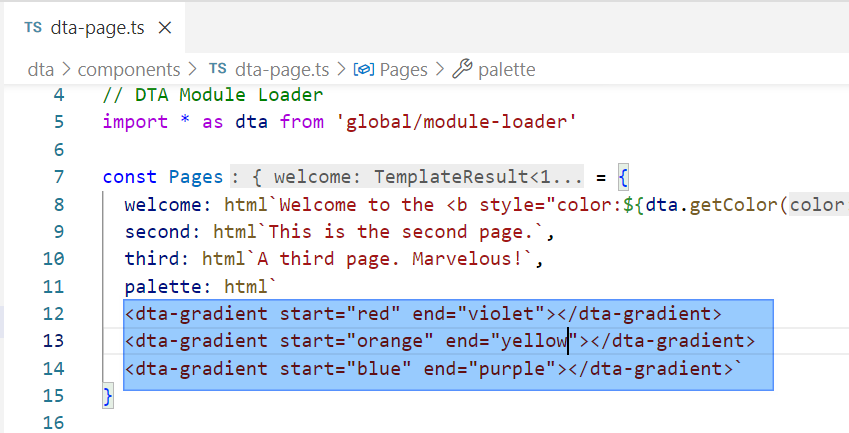
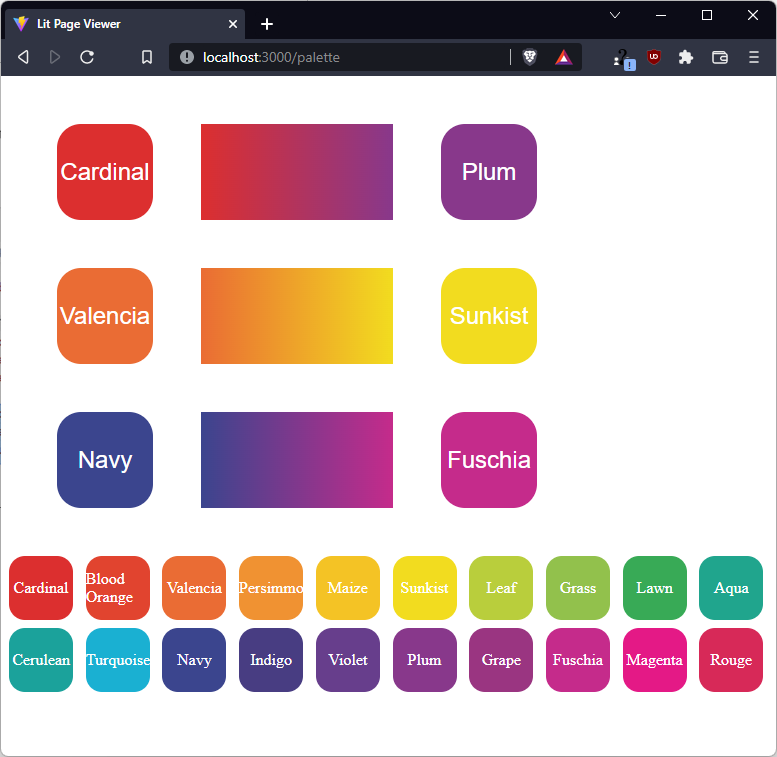
I can refactor the single gradient into a palette page by adding that key and some content in dta-page.ts. The content is just a few instances of my new gradient component! Then, I can visit that page separately in the browser.
That’s All Folks!
So what have we accomplished? In this series, we’ve seen several ways to approach learning Typescript with web components. All of them are built around the idea of designing a data model (a combination of JSON objects and arrays) first. Then, we pass around parts of our model with properties and attributes to get access to data from inside the component views. By combining special properties of arrays and objects in Typescript and Lit, we can create complex sets of UI elements with a minimum of repeated code. Finally, we can define custom functions both inside and outside of those components to make our code easier to read and debug.
Until next time, thanks for reading!
— D
Level Up Coding
Thanks for being a part of our community! More content in the Level Up Coding publication.
Follow: Twitter, LinkedIn, Newsletter
Level Up is transforming tech recruiting 👉 Join our talent collective
Learning Typescript with Web Components: Part 3 was originally published in Level Up Coding on Medium, where people are continuing the conversation by highlighting and responding to this story.
This content originally appeared on Level Up Coding - Medium and was authored by David Bethune
David Bethune | Sciencx (2022-07-18T00:33:42+00:00) Learning Typescript with Web Components: Part 3. Retrieved from https://www.scien.cx/2022/07/18/learning-typescript-with-web-components-part-3/
Please log in to upload a file.
There are no updates yet.
Click the Upload button above to add an update.
