
This content originally appeared on DEV Community 👩💻👨💻 and was authored by Mohamed Radwan
In this article, I am going to show you how to integrate keycloak with kubeapps on AWS EKS.
Steps:
Create EKS Cluster
Register a domain in route53 or create a subdomain, ex: example.com
Request a certificate from ACM
Install Keycloak
helm repo add bitnami https://charts.bitnami.com/bitnami
helm install my-release bitnami/keycloak --version 9.8.1
No needs to use the service Loadbalancer for keycloak as we will use the Nginx ingress controller.
Let's switch the service of keycloak to ClusterIP.
kubectl patch svc my-release-keycloak -p '{"spec": {"type": "ClusterIP"}}'
Note the admin password of keycloak
kubectl get secrets/my-release-keycloak -o jsonpath='{.data.admin-password}' | base64 --decode
- Install Nginx Ingress Controller Update the AWS ACM certificate on the below installation
helm repo add ingress-nginx https://kubernetes.github.io/ingress-nginx
helm repo update

helm install nginx ingress-nginx/ingress-nginx --set controller.service.type=LoadBalancer  --set controller.service.targetPorts.https=http --set controller.service.annotations."service\.beta\.kubernetes\.io/aws-load-balancer-ssl-cert"="arn:aws:acm:eu-west-1:XXXX:certificate/XXXX-XXX-XXX-XXXX-XXXXX"  --set controller.service.annotations."service\.beta\.kubernetes\.io/aws-load-balancer-backend-protocol"=http --set controller.service.annotations."service\.beta\.kubernetes\.io/aws-load-balancer-ssl-ports"=443   --set-string controller.config.use-forwarded-headers="true" --version 4.2.3
- Create ingress for keycloak
apiVersion: networking.k8s.io/v1
kind: Ingress
metadata:
  annotations:
    kubernetes.io/ingress.class: nginx
    nginx.ingress.kubernetes.io/rewrite-target: /
    nginx.ingress.kubernetes.io/ssl-redirect: "true"
  name: keycloak
  namespace: default
spec:
  rules:
  - host: auth.example.com
    http:
      paths:
      - backend:
          service:
            name: my-release-keycloak
            port:
              number: 80
        path: /
        pathType: ImplementationSpecific
Login to the keycloak console https://auth.example.com, with username: user and password in the keycloak installation step.
Create a new realm, name it kubeapps

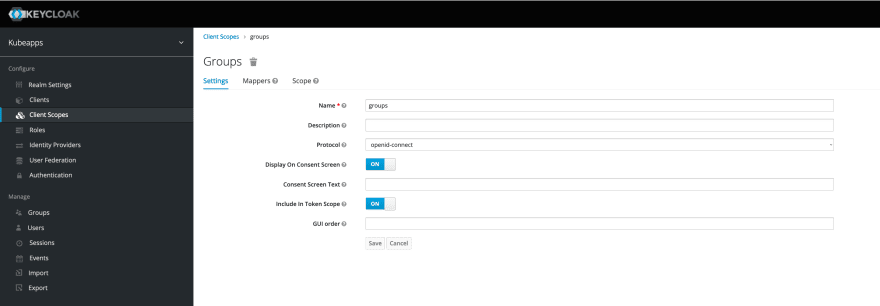
Groups Claim
By default, there is no "groups" scope/claim. We will create a global client scope for groups.
In the admin console:
- Click "Client Scopes" from the left navigator menu
- Click on "Create" from the table (top right corner)
- Provide a name, ensure the protocol is set to "openid-connect" and that the option "Include in Token Scope" is on.
Once the client scope is created, you should be redirected to a page with several tabs. Navigate to the "Mappers" tab as we need to create a mapper to populate the value of the associated claim:
- Click on the "Mappers" tab
- Click on "Create" from the table to create a new mapper
- Configure:
- Enter a name
- Select "Group Membership" as the claim type
- Enter "groups" as the token claim name
- Ensure the "Full group path" is OFF
- Keep the other knobs as ON
- Click ‘Save'

Kubeapps Client on Keycloak
- Click "Clients" from the left navigator
- Click "Create" from the table
Enter an "id" and Save (e.g. kubeapps)
Once created, configure the authentication as follows:Ensure the protocol is set to "openid-connect"
Configure the "Access Type" to be "confidential". This will add a new "Credentials" tab from which you can get the client secret
Ensure "Standard Flow Enabled" is enabled, this is required for the login screen.
"Direct Access Grants Enabled" can be disabled.
In the "Valid Redirect URIs" field, enter "https://kubeapps.example.com/*" as a placeholder.
Save

Note: take copy of the secret in Credentials
As for the cluster clients, we need to configure the client scopes:
- Click the "Client Scopes" tab
- Ensure the "email" scope is available either in the "Assigned Default Client Scopes" list or the "Assigned Optional Client Scopes" list
- The "groups" client scope should be available in the lists on the left.
- Add it either to the "Assigned Default Client Scopes" list or the "Assigned Optional Client Scopes" list.

Note the issuer URL from keycloak Realm
Realm Settings → Endpoints → OpenID Endpoint Configuration then copy the issuer URL
ex: https://auth.example.com/realms/kubeapps
On the EKS Cluster:
To the EKS cluster and then to Authentication

Add the identity provider like the following:
Issuer URL: https://auth.example.com/realms/kubeapps
Client ID: kubernetes

the process takes around 20 minutes.
Back to Keycloak
Create a new Client
- Click "Clients" from the left navigator
- Click "Create" from the table
- Enter an "id" kubernetes and Save
Once created, configure the authentication as follows:
- Ensure the protocol is set to "openid-connect"
- Configure the "Access Type" to be "confidential"
- turn on the "Standard Flow Enabled"
- Ensure "Direct Access Grants Enabled" is enabled, as this is how we can get the tokens via API
- Save


On Kubeapps client
Clients → Mappers → Create


Install Kubeapps
Update the following:
- clientSecret gets it from the above step Kubeapps Client on keycloak
- issuer-url and redirect-url for your domain.
helm repo add bitnami https://charts.bitnami.com/bitnami

helm install kubeapps bitnami/kubeapps \
  --set authProxy.enabled=true \
  --set authProxy.provider=oidc \
  --set authProxy.clientID=kubeapps \
  --set authProxy.clientSecret=<secret client credentials in the kubeapps client> \
  --set authProxy.cookieSecret=$(echo "not-good-secret" | base64) \
  --set authProxy.extraFlags="{--cookie-secure=false,--oidc-issuer-url=https://auth.example.com/realms/kubeapps,--redirect-url=https://kubeapps.example.com/oauth2/callback}" \
Create an ingress for kubeapps
apiVersion: networking.k8s.io/v1
kind: Ingress
metadata:
  annotations:
    nginx.ingress.kubernetes.io/proxy-buffer-size: 10k
  name: kubeapps
  namespace: default
spec:
  ingressClassName: nginx
  rules:
  - host: kubeapps.example.com
    http:
      paths:
      - backend:
          service:
            name: kubeapps
            port:
              number: 80
        pathType: ImplementationSpecific
Important to add proxy-buffer-size on the ingress controller otherwise you will get an error that says "upstream sent too big header while reading response header from upstream"
Create a new user on the keycloak, make sure you add email, and Email Verified is on.

Last step we need to add a role binding to access the Kubernetes cluster, update the user id in ClusterRoleBinding
apiVersion: rbac.authorization.k8s.io/v1
kind: ClusterRoleBinding
metadata:
  managedFields:
  - apiVersion: rbac.authorization.k8s.io/v1
  name: cluster-admin
roleRef:
  apiGroup: rbac.authorization.k8s.io
  kind: ClusterRole
  name: cluster-admin
subjects:
- apiGroup: rbac.authorization.k8s.io
  kind: User
  name: https://auth.example.com/realms/kubeapps#f5092396-d3b8-452c-9d1a-2b1dfbd58718
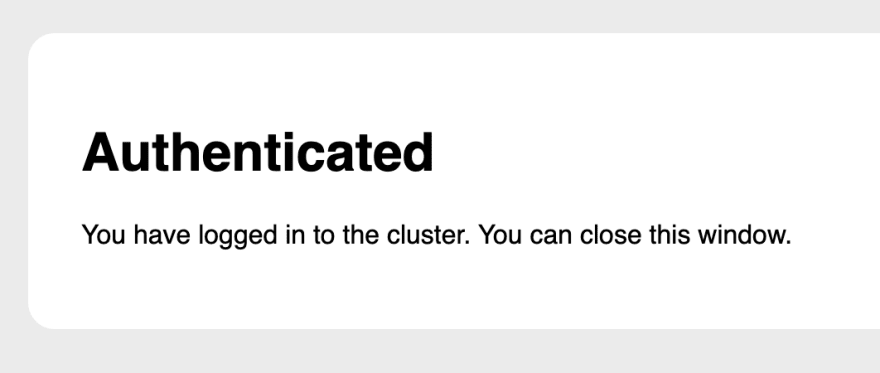
Finally, log in to Kubeapps at https://kubeapps.example.com

If you want to connect to EKS cluster by using OIDC
Install kubelogin:
- Go to keycloak and then go back to the Kubernetes client we created. You will see a tab called Credentials, grab the client secret.
- Run the below command in your terminal to verify authentication to keycloak:
kubectl oidc-login setup --oidc-issuer-url=https://auth.example.com/realms/kubeapps --oidc-client-id=kubernetes --oidc-client-secret=XXXXXXXXXXX
Bind a cluster role
kubectl create clusterrolebinding oidc-cluster-admin --clusterrole=cluster-admin --user='https://auth.example.com/realms/kubeapps#f5092396-d3b8-452c-9d1a-2b1dfbd58718'
Set up the kubeconfig
Use the same secret of Kubernetes client
kubectl config set-credentials oidc \
      --exec-api-version=client.authentication.k8s.io/v1beta1 \
      --exec-command=kubectl \
      --exec-arg=oidc-login \
      --exec-arg=get-token \
      --exec-arg=--oidc-issuer-url=https://auth.example.com/realms/kubeapps \
      --exec-arg=--oidc-client-id=kubernetes \
      --exec-arg=--oidc-client-secret=XXXXXXX
Verify cluster access
kubectl --user=oidc get nodes
Switch the default context to oidc
kubectl config set-context --current --user=oidc
Sources:
https://docs.aws.amazon.com/eks/latest/userguide/authenticate-oidc-identity-provider.html
https://github.com/vmware-tanzu/kubeapps/blob/main/site/content/docs/latest/howto/OIDC/OAuth2OIDC-keycloak.md
This content originally appeared on DEV Community 👩💻👨💻 and was authored by Mohamed Radwan
Mohamed Radwan | Sciencx (2022-09-25T09:47:15+00:00) Integrate Keycloak and Kubeapps on AWS EKS. Retrieved from https://www.scien.cx/2022/09/25/integrate-keycloak-and-kubeapps-on-aws-eks/
Please log in to upload a file.
There are no updates yet.
Click the Upload button above to add an update.