
This content originally appeared on Level Up Coding - Medium and was authored by tomerpacific

You are here because you have heard the news.
If you haven’t, brace yourselves.
In a statement made on August 25th, Herkou made a post on their blog stating that:
Starting October 26, 2022, we will begin deleting inactive accounts and associated storage for accounts that have been inactive for over a year. Starting November 28, 2022, we plan to stop offering free product plans and plan to start shutting down free dynos and data services. We will be sending out a series of email communications to affected users.
Yup, that sucks. 😢
If you are like me and had your share of free dynos hosted by Herkou, you need to start thinking about migrating them to somewhere else. You can obviously pay to keep your dynos, if you want. But, I have a sense that you are going to look for another free SaaS.
Lucky for you, I am in the same predicament and instead of waiting for November to come (way too soon), I have looked into Herkou alternatives.
This will be your one stop shop to choosing where to migrate your dynos to.
Heroku wasn’t first on the market with their solution and over time, more companies have popped up that can offer a similar set of tools. Most of my Heroku projects were Node.js applications, so I will be going over options that support that as well.
✋ I am assuming you already have a project you need to migrate so we won’t be discussing how to create a project here.
To make sure we are comparing (as much as we can) apples to apples, I am going to compare each service to Heroku based on the following characteristics:
- Setup (and how long/complicated it is)
- Free tier plan limitations
- Deployment
What I liked about Heroku is that with it’s free plan, you got 5 dynos (servers) and it was pretty straightforward to deploy your code to any of them. Sure, the dynos were kept alive for 15 minutes before going down (if no request came in), but for my use case, that was good enough.
So Many Options
First up, Google Cloud App Engine. It’s no surprise Google is in this market as well and the service they offer is similar in character and options to many other services they have.
As opposed to Heroku, where you could just choose a free tier plan and get going with the setup, at Google there is a pre-setup to the setup. You must first set up your billing account. This is not a lengthy process, but it does require you to link a credit card to your account.
⚠️ You will not be able to set up your project until you set up your billing account. Since this article’s main focus is on the setup of your application, we won’t be discussing how to do this. You can see a video explaining how to do this here.
Once you have your billing account set up, we can actually get to setting up our project.
- Create a project in Google Cloud
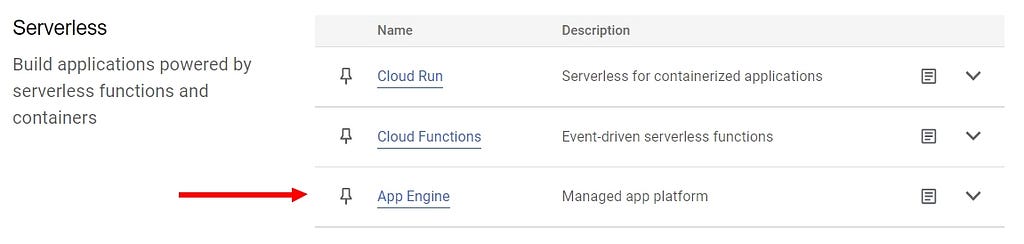
- Click on View all products in the left hand window
- Scroll down to Serverless and choose App Engine
4. Install the SDK
5. Install the CLI
6. Create a .yaml file
7. Run the command
gcloud app deploy
Simple enough, right?
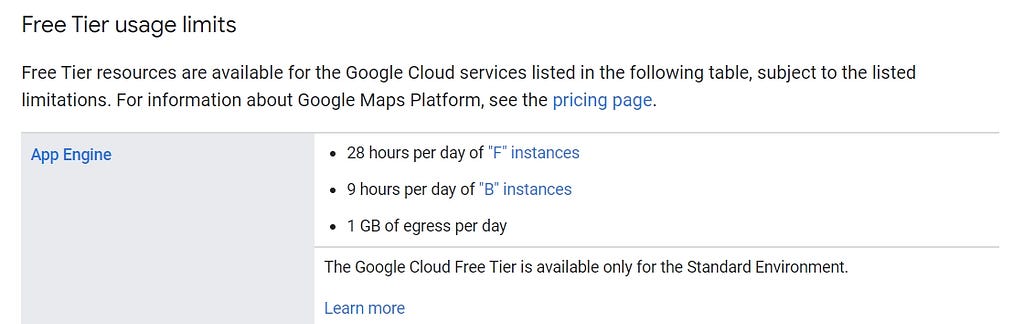
We do have to talk about the free tier plan. In essence, it might sound similar to what Heroku offered, but that is far from reality. Google Cloud’s free tier provides limited access to many Google Cloud products, including App Engine. Within this free tier, there are usage limitations:
And to be in the free tier you must fall under the following criteria:
- You do not have a negotiated pricing contract or a custom rate card with Google
2. You are actively in the Free Trial period or you have upgraded your Cloud Billing account to a paid account
3. Your Cloud Billing account is active and in good standing
Make sure to follow all these rules. After doing all of the setup for my project, with very very limited use, I was already being billed. Although it was in pennies, you can visualize where the trend is going.

Second, Render.
Render is a relatively new player in the market as it was started at 2019. It evens positions itself as a direct competitor to Heroku by stating that:
“We’ve built Render to help developers and businesses avoid the cost and inflexibility traps of legacy Platform-as-a-Service solutions like Heroku. Our customers often tell us Render is what Heroku could have been.”
Not surprising is the fact that they even have a Migrate From Heroku documentation.
With all this in mind, it was worth to see if Render was everything that it said it could be.
After creating an account, it is quite simple to get your Node.js application hosted.
- Press the New ➕ button
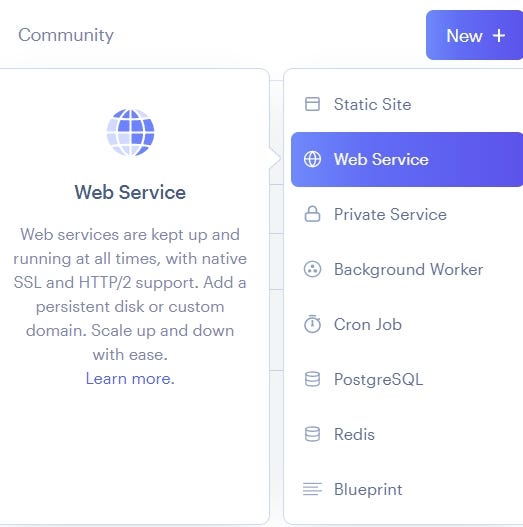
- Choose Web Service
- You can either connect your Github/GitLab account or your public repository
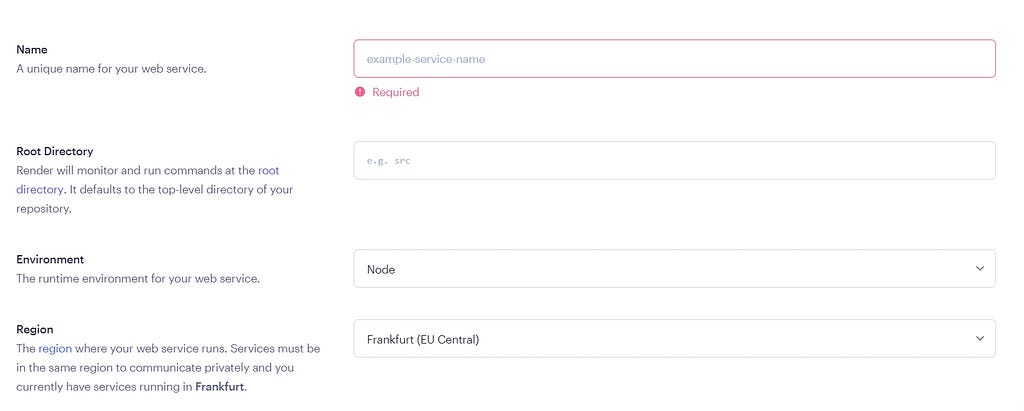
- Define the following settings for your application:
- Name of your web service
- Region where the web service runs
- Start command
- Choose the Free plan
4. Click on Create Web Service
5. Watch your deployment go
Easy-peasy!
Render has a free plan and it has its limits. Render states that:
With Render’s free plans you can spin up web services and PostgreSQL databases at no charge. Free plans have usage limits and are designed to help you to explore new tech, build personal projects, and get a preview of the Render developer experience. Free web services can use up to 400 free build hours per month, shared with static sites.
A full explanation on these limits can be found here and an explanation on build limits can be found here.
Pay attention that in the free plan, builds times will take longer and be slower.

Third, AWS Elastic Beanstalk.
I don’t think there is anything to elaborate about AWS here. You are probably aware of all the services they offer and having an option to host web applications is just one of them. The process here is very much similar to what you have to undergo at Google, albeit it is with less pizazz.
Before we can do anything here, we need to sign up. This process doesn’t take long but it requires you to do the following:
- Use your email and a password of your choice
- Enter in your address and phone number
- Input a credit card for various billing that may happen
- Verify your phone number by sending a verification code
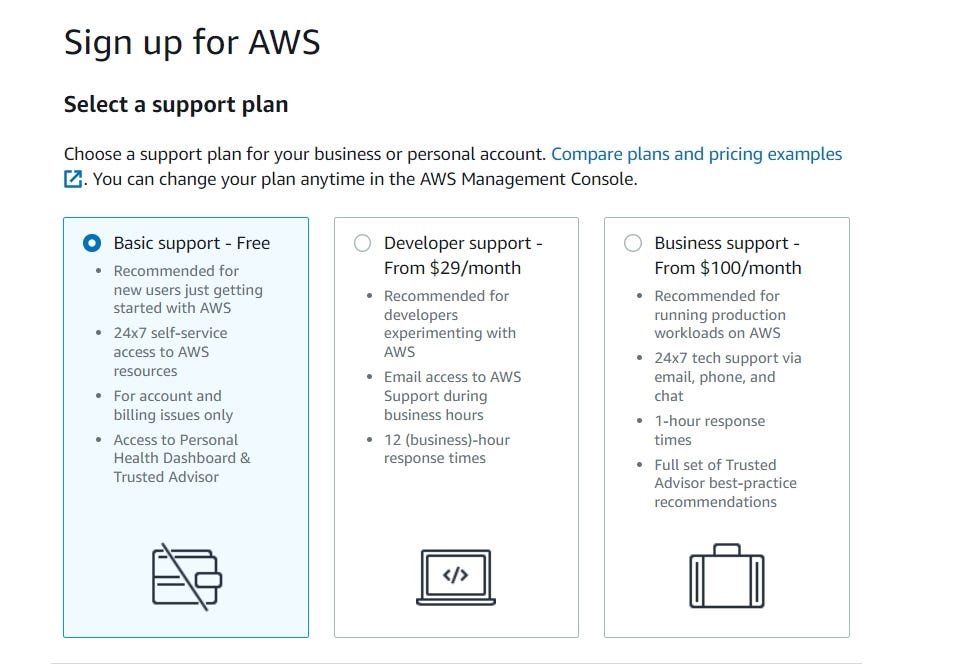
- Choose a support plan
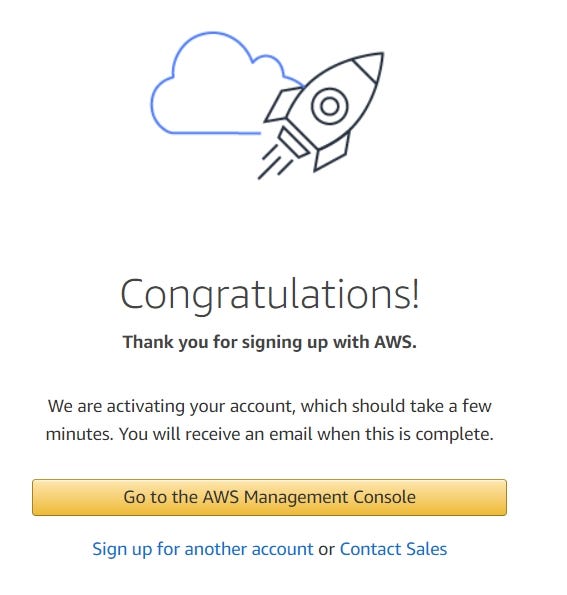
Once you are done, you will see the following screen:
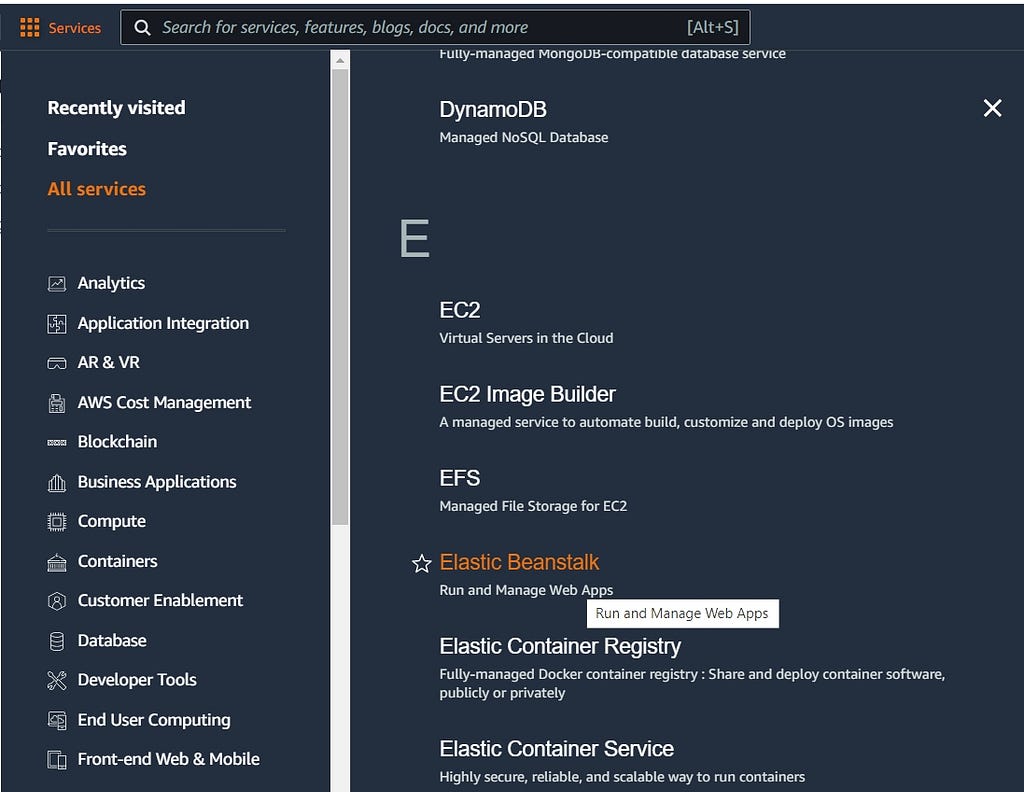
Now it is time to create our Node.js application. Head over to Services and search for Elastic Beanstalk.
Once there click on the Create Application button. From here you need to fill in the details:
- Application name
- The platform
- Choose Upload your code under Application Code
- Choose Local file under Source code origin and upload your source code
- Click on Create application
- Watch your deployment go
Here as well, there are limits in the free tier and you would be well advised to go over them.
Free tier limits
Since Amazon has a plethora of services, after you create your account, it offers up to a year of free usage in many of its services. There is obviously more than meets the eye here, in ways of monitoring your web applications and managing it.
I have only covered three options here. Two of them being major players in the internet ecosystem. There are many more options out there (big or small) and I did not want you to get lost in all the options. The choice is yours. Each service provider has its advantages and disadvantages, so it is crucial to understand what is most important to you. Do you prefer something that will be easier to setup? Does your web application require other components to be used? All of these will factor into which option best suits you.
For me, I chose Render since it gave me everything that I needed (for the time being) and the setup was a breeze.
You can check out other articles I have written below:
The End Of Free Dynos At Heroku was originally published in Level Up Coding on Medium, where people are continuing the conversation by highlighting and responding to this story.
This content originally appeared on Level Up Coding - Medium and was authored by tomerpacific
tomerpacific | Sciencx (2022-09-27T11:26:27+00:00) The End Of Free Dynos At Heroku. Retrieved from https://www.scien.cx/2022/09/27/the-end-of-free-dynos-at-heroku/
Please log in to upload a file.
There are no updates yet.
Click the Upload button above to add an update.